Don’t throw out a perfectly good rolling office chair just because the fabric is worn or out of style. We’re nearing the finish line for the One Room Challenge and for week 5 I’ll show you how you can do an Office Chair Makeover for only the cost of fabric to reupholster your chair.

I’m going to bring our ugly but perfectly good rolling chair back to life. And since I work from home and do a lot of sitting time for my job and blog a comfy and pretty chair is a must.
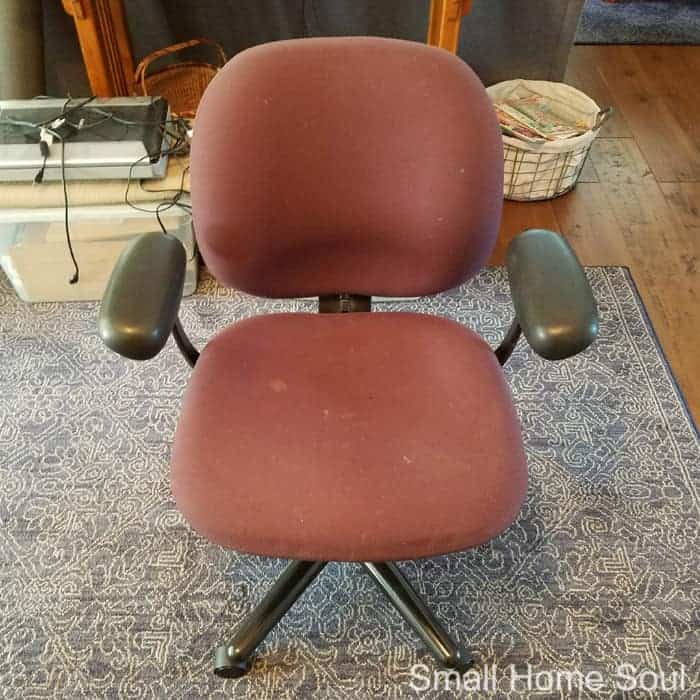
Let’s start by showing you how bad our old chair looked. It’s a bit more dusty from being in the garage during the makeover than when I bought it for $8 from a Facebook buy/sell group.
It looked pretty much like you see it; tired and with some stains. I gave it a good wash after bringing it home but some tough spots remained.
It’s a heavy chair and very well made with a comfy seat that I’ve been meaning to reupholster for the more than few years we’ve owned it. Again, why do I wait so long to make things pretty? Don’t answer that 🙂 #procrastinator
This mauve chair must have been from the 90’s. Can you imagine what the rest of the office looked like?
This post contains links to products, if you purchase something after clicking on my link I may earn a small commission (at no extra cost to you).
Supplies for your Office Chair Makeover
- Fabric – 1-2 yards depending on the size of your chair and if the fabric has a repeating pattern
- Cotton or Polyester batting (just enough to cover the actual seat and back)
- Fabric Scissors
- Tack Puller and Flat Head Screwdriver
- Needle-nose Pliers
- Electric Staple Gun (I have this model)
- Hammer
- Cordless Drill
- New Wheels (optional but I recommend this brand)
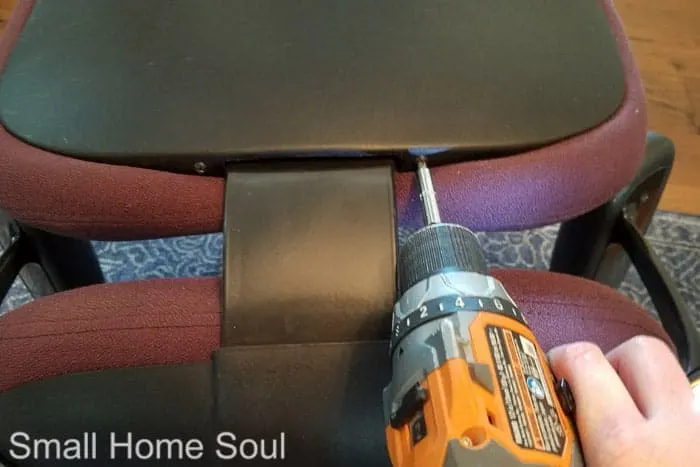
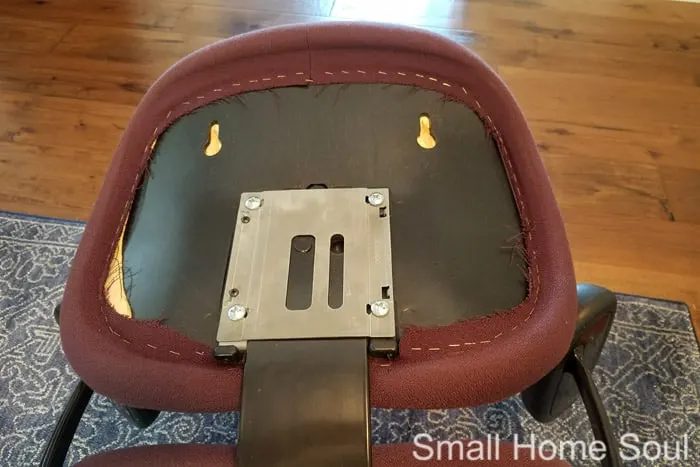
Disassemble your Chair
Make sure you take time to investigate your office chair before you start trying to pry it apart. I nearly busted the plastic back cover until I saw the tiny screws at the very bottom back.
- Use a screwdriver or a cordless drill (recommended because it’s going to get tough) to remove the screws from the backing. Your chair may have a different type of backing.
- Set aside all parts and keep them together.

- Continue removing the parts and setting them aside with the screws in a safe place. I recommend taking pictures of each step so you know what goes where when you’re ready to put it back together.
I’m so glad I did my chair makeover for the blog or I might not have taken pictures and then I’d be wondering where all this stuff went.

Until I started taking this chair apart I had no idea the back actually lifted up and down. Really? Like I said we’ve owned the chair for several years…. total dumb dumb moment 😀


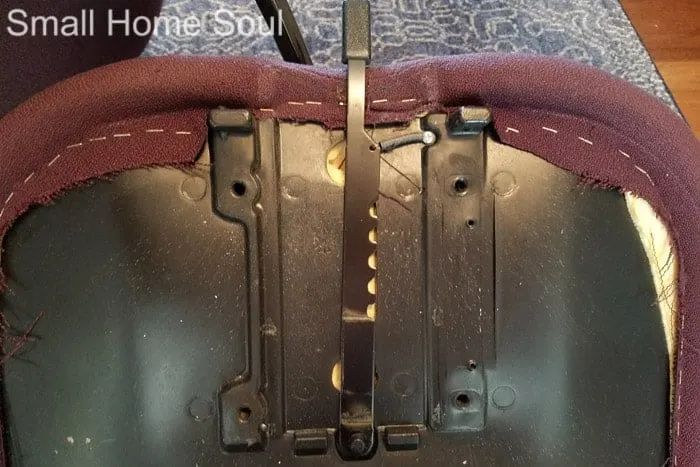
Now that the top is all apart move to the bottom and follow the same steps and process to prepare for your office chair makeover.
- Remove the arms (if you have them) and the wheel base. That cordless drill will be your friend with the big bolts that hold the office chair together.

- Keep paying attention to what goes where and how it comes apart. This chair was built very sturdy.

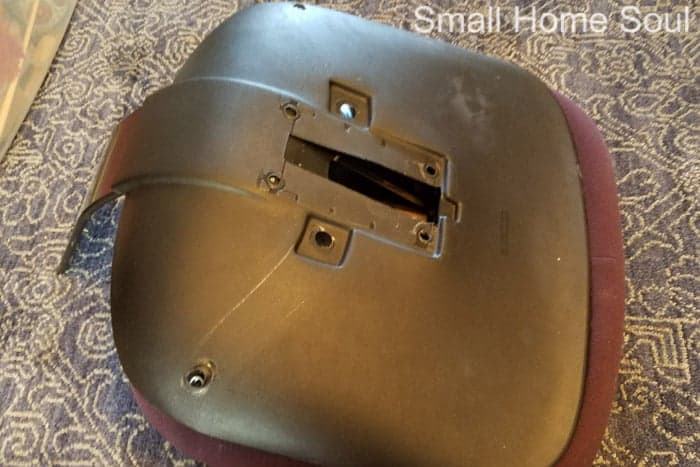
When all the desk chair parts are fully disassembled you’re ready to start reupholstering your office chair for the makeover.
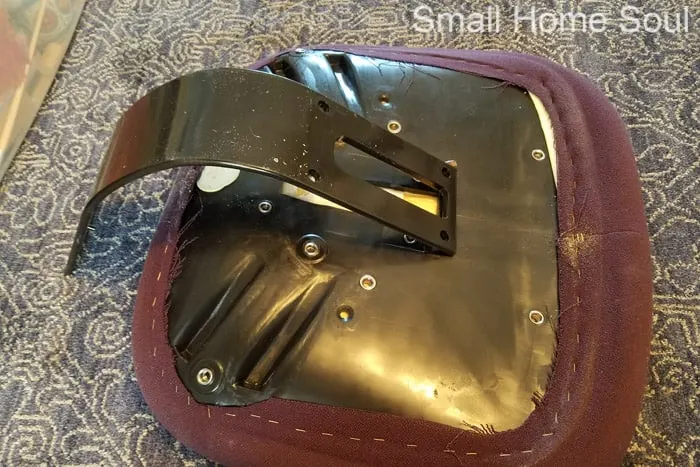
- Use tack pullers or a flat head screwdriver (or both) to lift the staples out of the plastic. You might want to wear gloves because I nearly gave myself a blister in the palm of my hand.
- Remove the staples the rest of the way with needle-nose pliers.
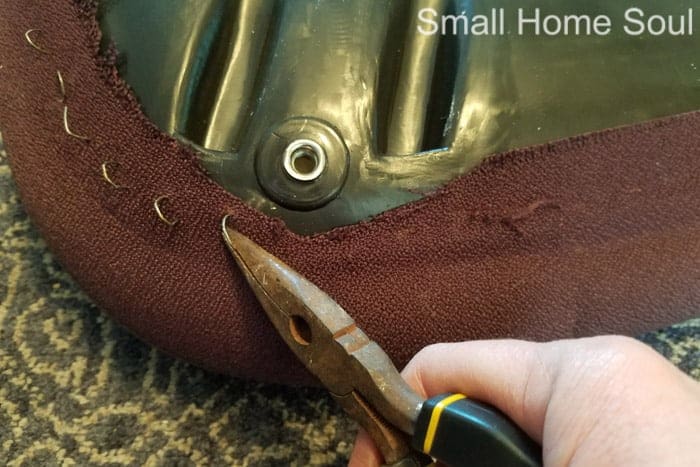

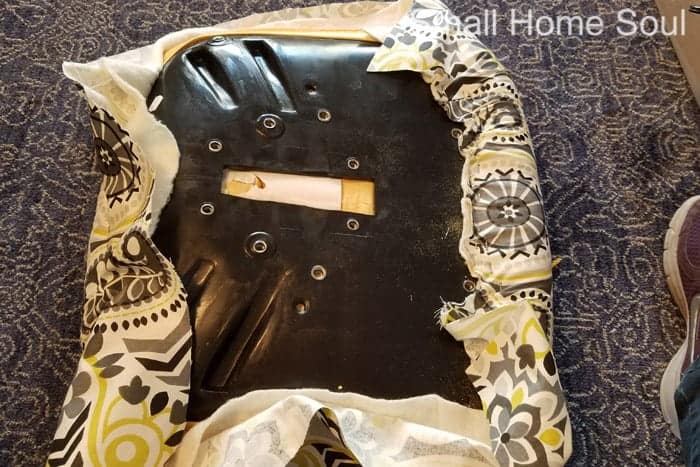
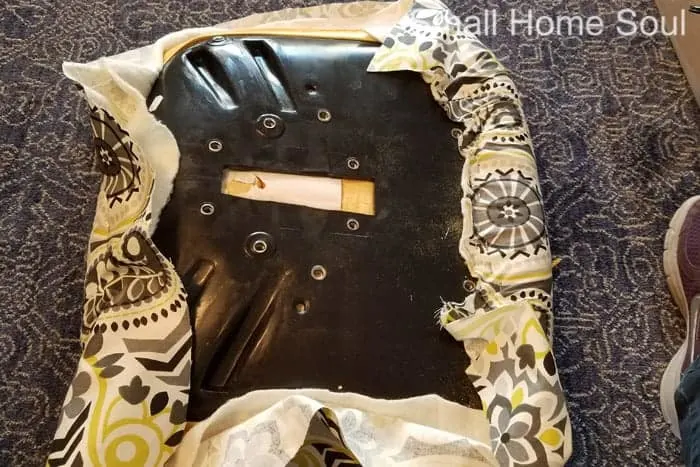
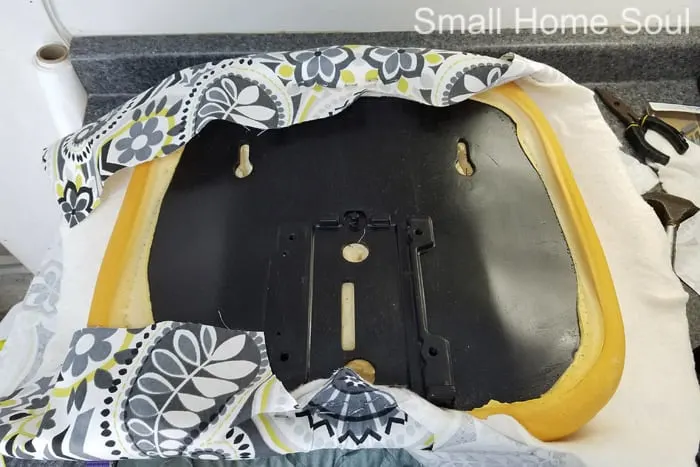
The fabric on our office chair had super strength, and it was glued to the foam rubber. I was gentle removing it but some bits did come off.

The fabric on our chair actually had a seam around the edges (see above picture). That was going to make it impossible for me to get a pattern to follow for size. I’ll show you how to work with that in a second.
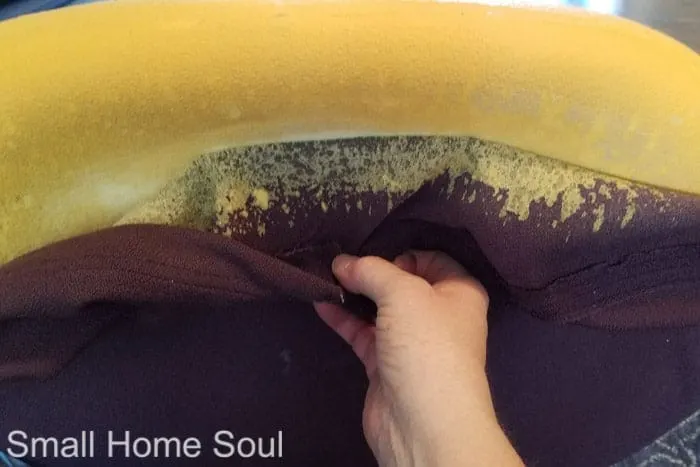
The very front of the foam seat was a bit mealy from years of use so I brushed it off until it stopped shedding. Then I covered it with some cotton batting.
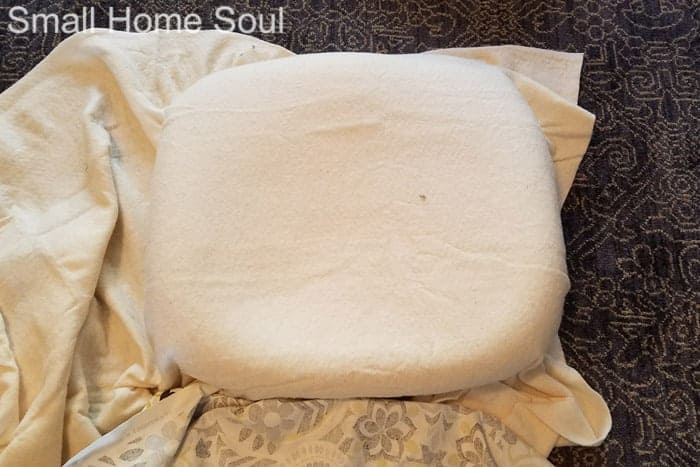
- Lay the cotton batting over your chair seat to determine how much you need and trim level with the bottom edge.

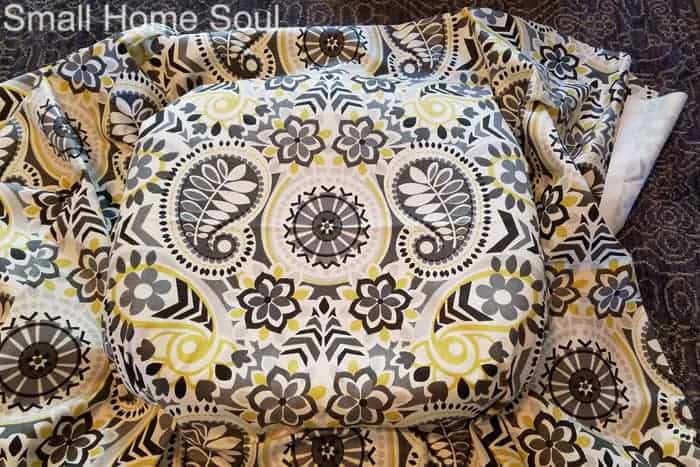
- To determine how much fabric you’ll need lay your fabric wrong side up on a flat surface along with the cotton batting and place the seat upside down near the corner of the fabric.
- Wrap the edges of the fabric up and onto the seat bottom until you have a few inches of fabric past the original staple holes.
- Trim the excess fabric with your fabric scissors and repeat the above step on each side.
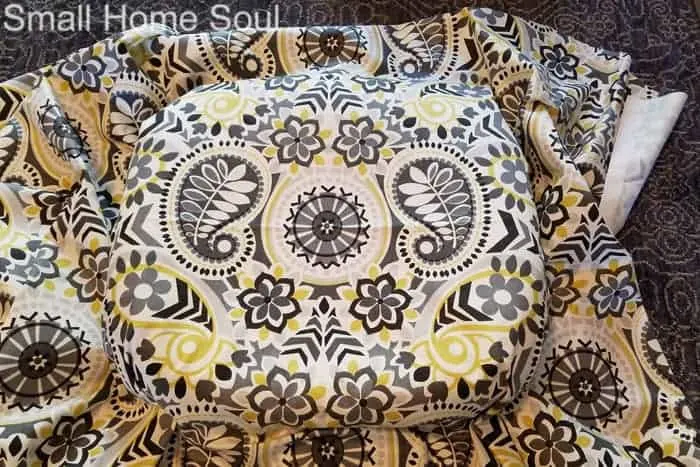
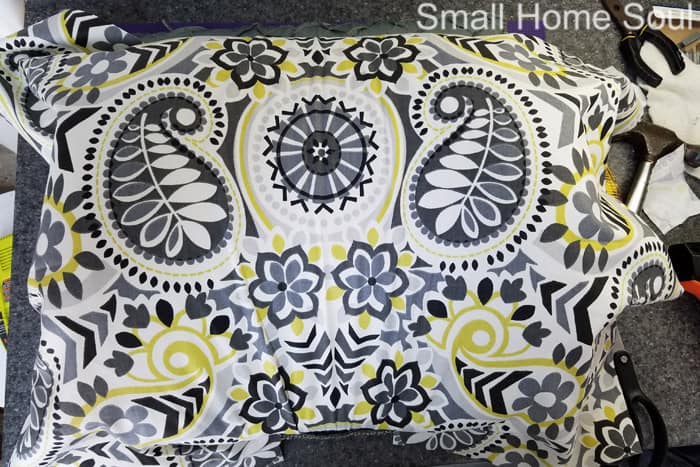
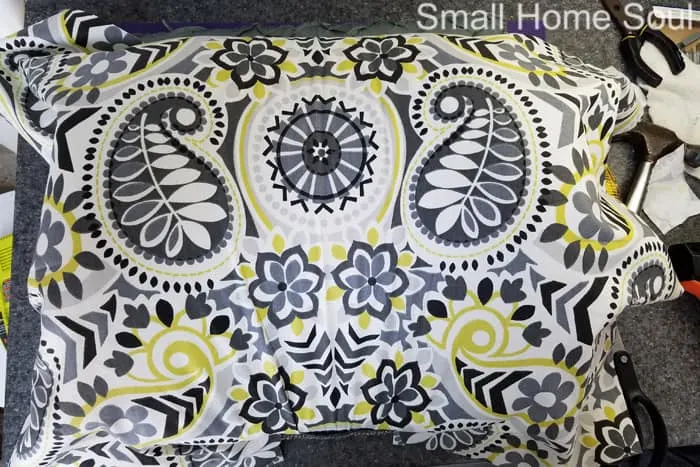
If you have a large repeating pattern you’ll need to take a few different steps. I knew the approximate size of my chair seat when I selected my fabric so I unrolled the fabric on the cutting counter to look for the repeating pattern.
I wanted that pattern to show on both the seat and the seat back. Here’s how you can cut the fabric so you have a an easier size to work with.
- Lay your seat on a flat surface foam side up, and move your fabric around until you get your pattern where you like it.
- Hold the fabric tightly on both sides and flip the seat over.
- Follow the steps above to trim the fabric.
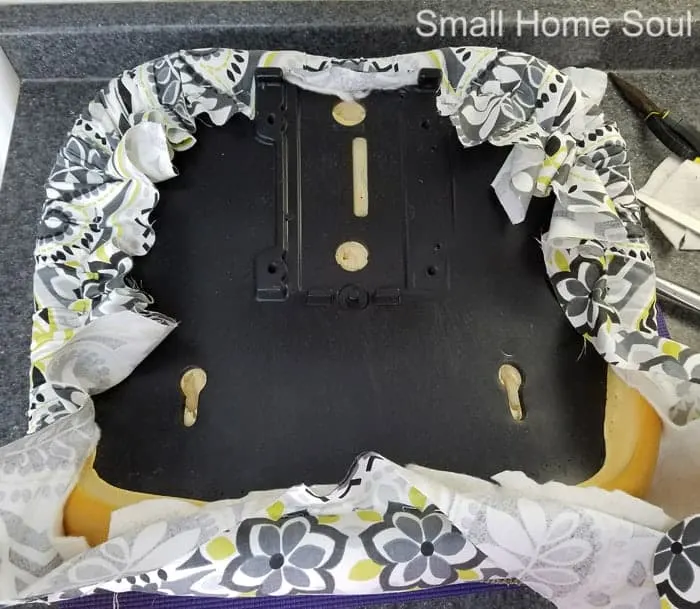
After you cut your fabric for the the seat turn it back over and make sure your pattern is where you want it. The carefully turn it all back over and get ready to party staple.
- Start on one side of the seat and staple about a 6″ section.
- Spin the seat around and pulling the fabric taught staple the same on the opposite side.
- Keep stapling the two sides until you’re a few inches from corner. We’ll do those last.
- After the first two opposite sides are stapled follow the same steps for the two remaining sides.

This office chair might have plastic parts but this stuff is no joke. The staples were hard to get out and even harder to get in. I used my electric stapler which is pretty powerful but I think the thickness of the heavy duty staples kept it from penetrating all the way.
That’s OK, because the hammer got them where they were needed (and I added extra staples for support).
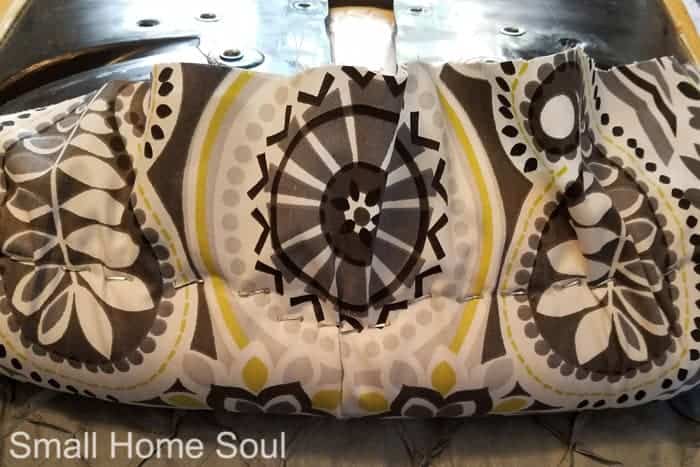
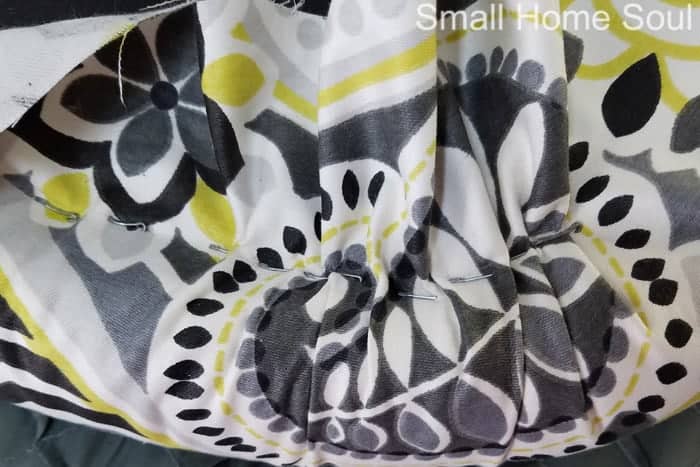
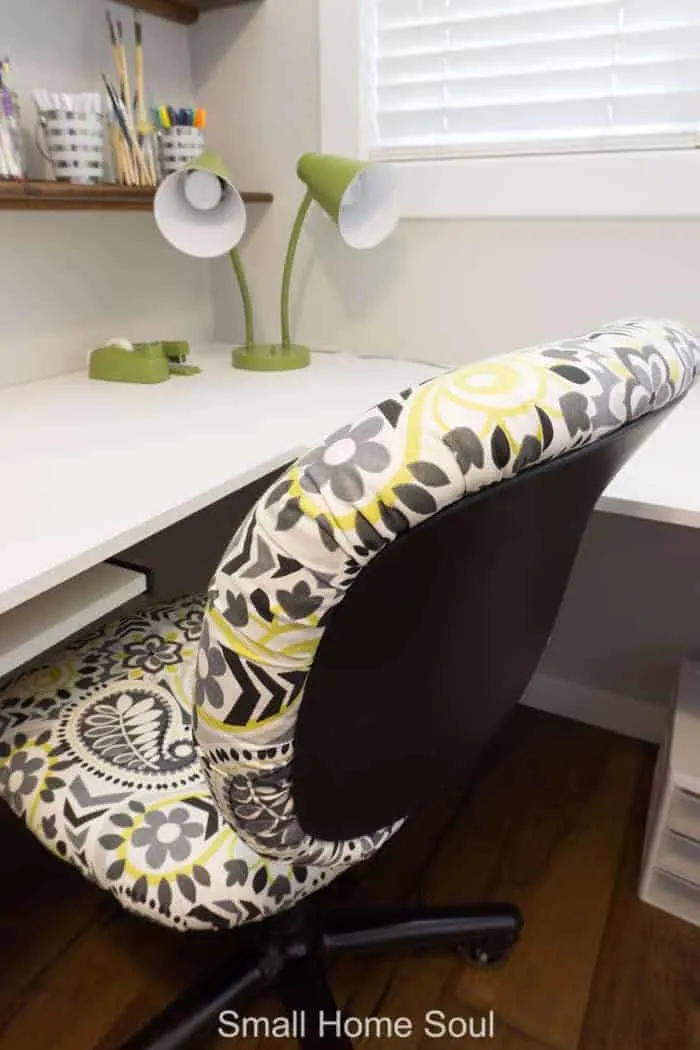
To staple the corners we’re going to do some ruching. If you watch Say Yes to the Dress you know what this is. If not, it’s like soft pleats. This is the same technique I used when I reupholstered our Dining Room Chairs.
- Start in the center of the corner and pull the fabric up and staple.
- Take a small section of fabric to the right and pull it and slightly toward the corner staple.
- Keep doing that until you have the entire corner stapled.

I was really worried all the sudden about how I was going to upholster the back. I was afraid I’d have to abandon my office chair makeover mid makeover because the back has a big indent at the lumbar area.
Figuring I don’t have anything to lose I thought about my plan of attack for a few minutes and got started. Here’s how to make it work.
- Start on the bottom edge of the seat back and staple a section about 4″ wide very securely.
- Spin the seat top around and pulling very very taught staple the top edge. You want the fabric in that section as tight as possible so when you staple the sides it doesn’t pull the fabric out of the indent.

You can see in the picture below how tight the fabric is at the bottom of the seat back. There is some slight pleating now but that will mostly resolve as you continue to staple the entire chair.
- Now continue stapling the seat back like you did the seat bottom.

After all the stapling is done just reassemble your chair in the reverse order of how you pulled it apart. And your office chair makeover is complete!
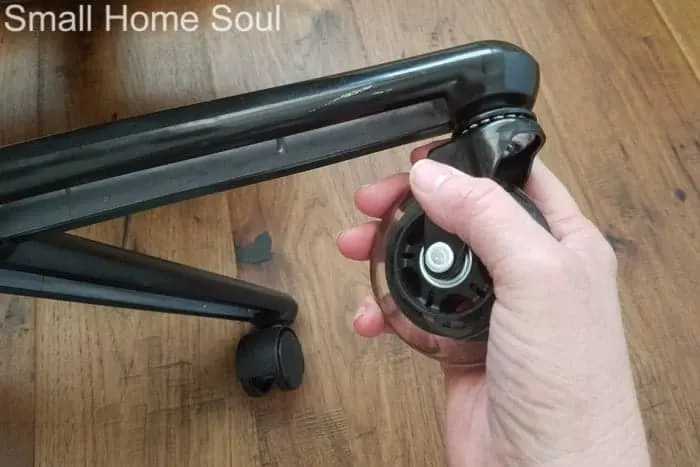
There is one addition step that you can take if you wish. I haven’t yet found a rug for the office but I need to protect the floors. Luckily my brother who has been in the hardwood floor business for over 30 years suggested some new wheels to me.
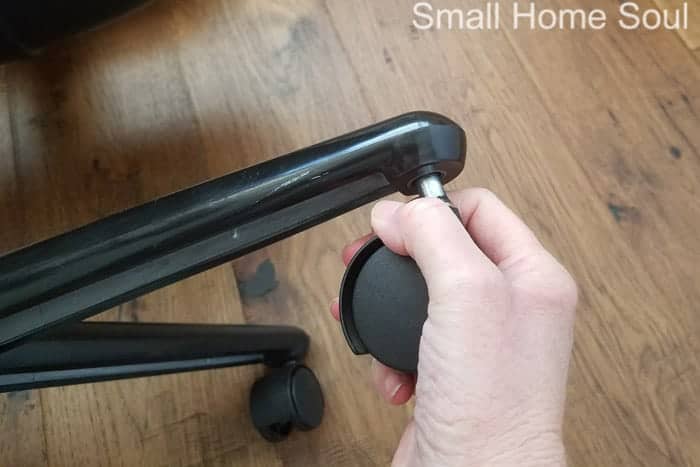
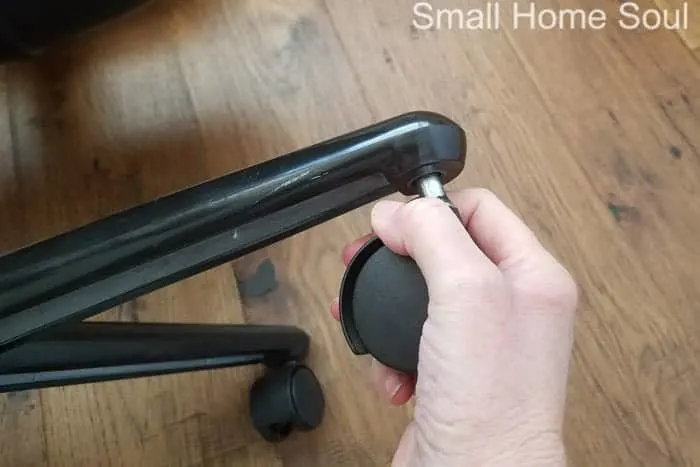
A quick search and I found and ordered these new office chair casters. Oh man, I can’t tell you what a huge improvement these made immediately. The chair moves so much more smoothly, and they are even awesome on carpet.

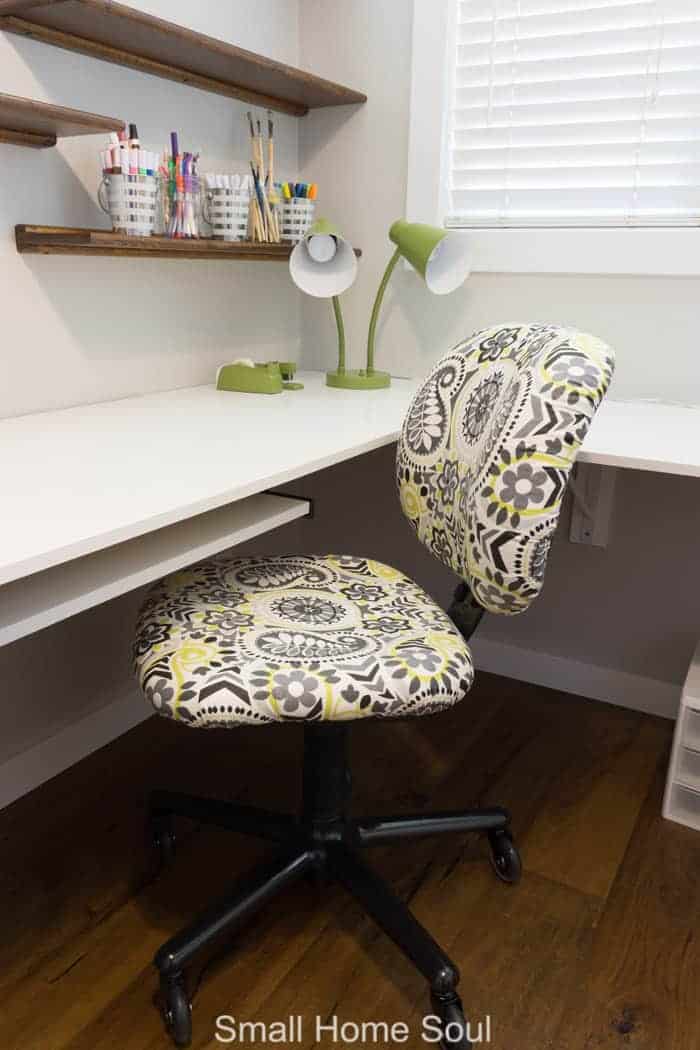
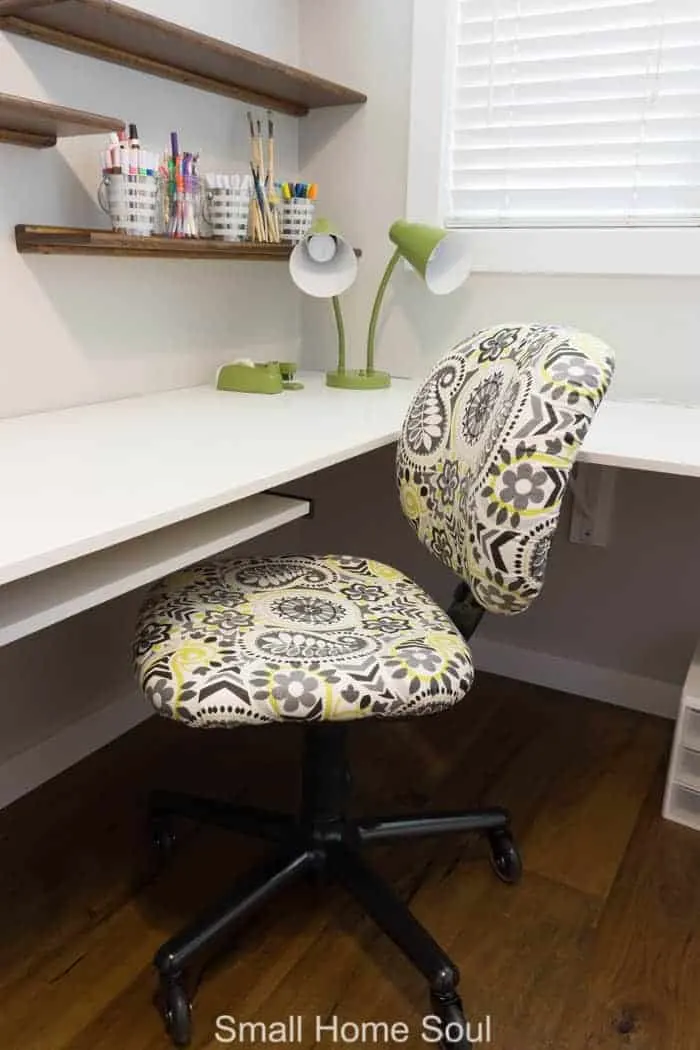
It was money well spent to really finish off my office chair makeover. I am beyond thrilled with how our office chair turned out. It took some muscle but reupholstering an office chair is a simple way to get a beautiful new chair for almost nothing.
I think this makeover cost a total of $50, including the new wheels. Yours could be cheaper depending on the amount of fabric you need and whether you replace your wheels or not. Still, that’s so much cheaper than buying a new quality office chair.
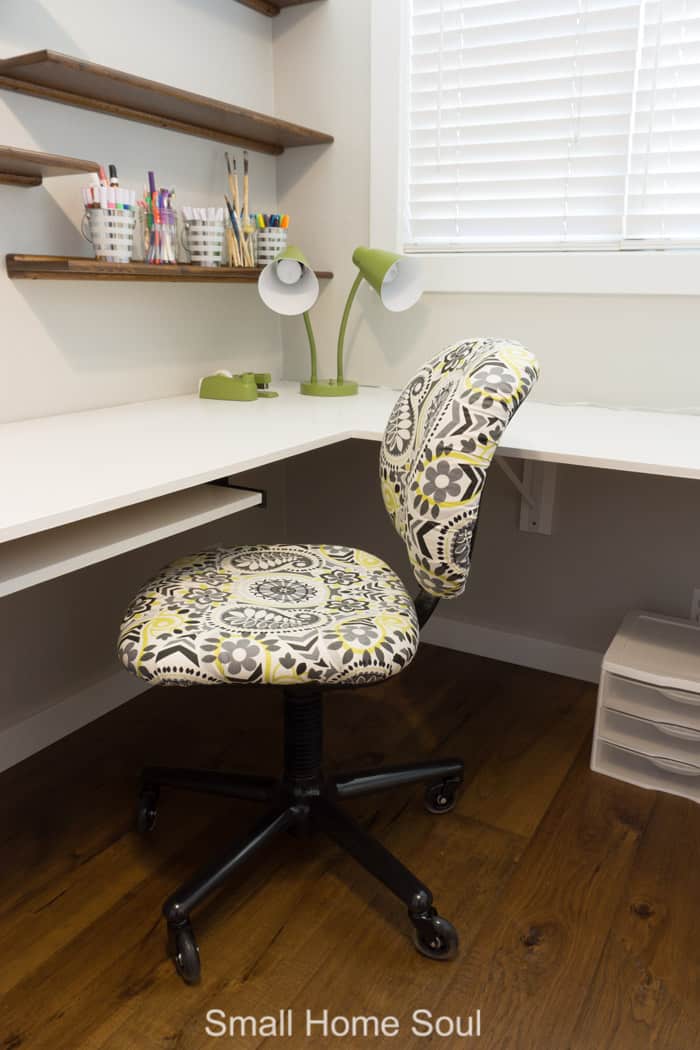

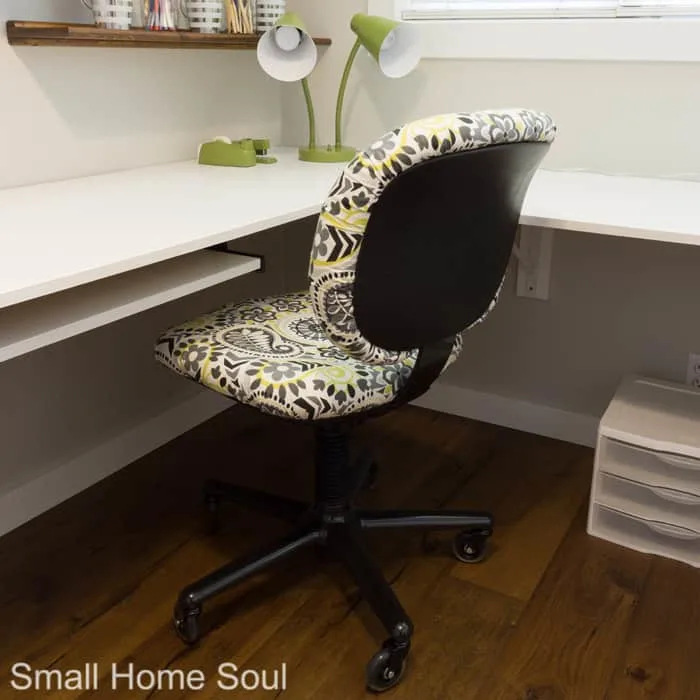
Check out that beautiful ruching around the back of my “new” office chair. But where are her arms you ask? I’ve decided to leave them off for now.
They were always a bit too high and I pulled up my shoulders while typing, which isn’t good for your body. We’ll see if I can live without them.

LOVE THE CHAIR!! PIN IT!!
I’d love to say I’m completely finished as I write this post but I have a few projects left to complete in the next few days and put the entire room together how I want it. I’ll be glad to get the computer off the dining room table.
I’ll be sharing extra projects in posts for the few weeks following next week’s reveal. Here’s my updated list of To Dos for this room makeover.
Give the room a fresh coat of paint.Build an L-shaped corner desk.Recover my existing desk chair.Take down the unused TV.Updating the lighting.- Create organization with peg board or some other fun product.
Replace the existing area rug.I’m loving the room without a rug right now but I’ll keep shopping to see if I can find the perfect one.Install shelves over the desk.
Come back next Thursday…. it’s the FINAL REVEAL of this office makeover. And you don’t want to miss the before and after shots in one post. So many good after shots to swoon over 😀 And be sure to visit the ORC participants’ projects for Week 5 through the link below:
WEEK 1 | WEEK 2 | WEEK 3 | WEEK 4 | WEEK 5 | WEEK 6

Almost there, almost there, almost there 🙂
Toni
Julie
Tuesday 26th of June 2018
Oh, THIS is so cute!!! Love the colors, and the tutorial! Great job! Pinned!
Merry Smith
Wednesday 30th of May 2018
OMG! What a great DIY project, the chair looks so gorgeous.
Toni | Small Home Soul
Monday 11th of June 2018
Thank you Merry, I can't believe I waited so long to take it from hideous to pretty.
Tonya C Redmond
Thursday 10th of May 2018
Toni, I'm so impressed! You rocked this project! Your chair went from sad to happy for sure! I love it!
Lidia
Monday 7th of May 2018
Now that looks like a HomeGoods chair that I would definitely buy!!! I love it!!!
Michelle James
Friday 4th of May 2018
That fabric is fabulous and looks so nice in the room. I am anxiously awaiting the big reveal you have done so much already and it looks so good.