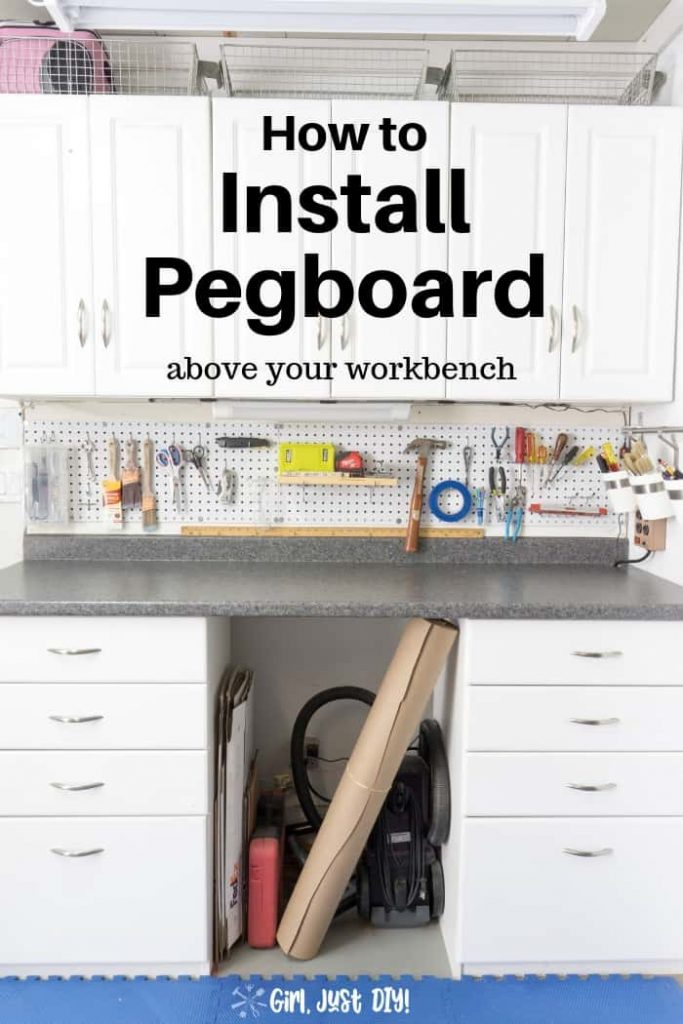
Are you constantly looking in this drawer and that for your tools, tape measures, safety glasses, etc? That’s been me for a very long time but I finally got it together and I’m going to show you How to Install PegBoard to store all your tools in one spot.

I’m back again this month with another At Home DIY project where 30+ bloggers share ideas with our readers based on a theme. You’ll find a link at the bottom where you can explore everyone else’s projects.
This month our theme was Home Improvement. I’m not ready to start any bigger home improvement projects right now so I thought I’d share a Garage Improvement project that is well overdue.
My husband has a work bench in the garage where the majority of the tools are stored, and I have an area on the opposite side that we put together for crafting and other projects. Until I got serious about doing some wood working the area was really a catch all because it’s right next to the door leading into the house. All my own tools were shoved into this drawer or that and not easily accessible.
So now was the right time to install peg board on the short wall between the counter and cabinet.
This page contains links to products, if you purchase something after clicking on my link I may earn a small commission (at no extra cost to you). You can read about affiliate links here.
Pegboard Installation Supply List
- Pegboard Panels
- 1×2 or similar wood to build frame
- Spray paint
- Cardboard or Contractor’s Paper
- Bar Clamps
- Stud Finder
- Jigsaw
- Miter Saw
- Table Saw
- Cordless Drill
- 2-1/2″ Wood Screws
- 3/4″ Wood Screws
- Pegboard Hangers Starter Kit
I forgot to take a before picture but you can see in the pictures that follow that it was just a blank wall above the workbench.
I’m sharing this installation using a wood frame because I wanted my pegboard wall to be solid. You may choose to use pegboard mounting spacers. I wanted mine on a frame so I could choose where it was screwed down.
Preparing to Install Pegboard with proper planning.
I’ll be honest and tell you that I made a lot of mistakes with this project. It turned out great and works just how I want and need it to. But I rushed things and didn’t think them through fully before I started. My struggle is your reward.
Let my mistakes be your lesson to do it differently than I did. Below I share how I did it and also how I should have done it.
Step 1: Preparation
Before you head off to the hardware store to pick up your pegboard you’ll want to measure the area to be covered. And write it down. I didn’t do this so do as I say, not as I did 🙂
- Measure the area to be covered with pegboard.
- Determine the varying sizes available of pegboard in your area or available online.
- Do the math and determine how many sheets of pegboard you need to purchase.
- It’s a good idea to find the studs in the wall where you’ll hang your pegboard because this could affect how you join two sections of pegboard, if needed.
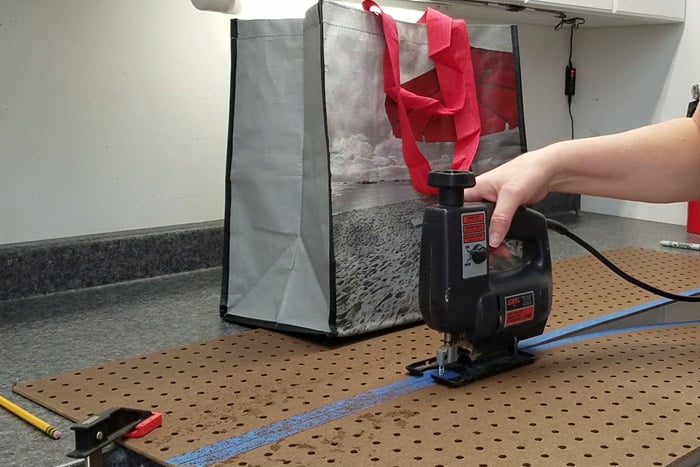
Step 2: Cutting the Pegboard to size
So I was being lazy and didn’t want to get out the table saw (big mistake) because that would have been so much faster and my cut would have been perfectly straight.
I started out using the Jigsaw to cut my pegboard in half lengthwise. I got smarter later when I needed it anyway and used it to trim up a section to the right width.
- Mark the cutting line on the pegboard or on a piece of painters tape.
- Clamp the pegboard in place on either end.
- Cut with jigsaw or circular saw. Alternately cut it on a table saw.

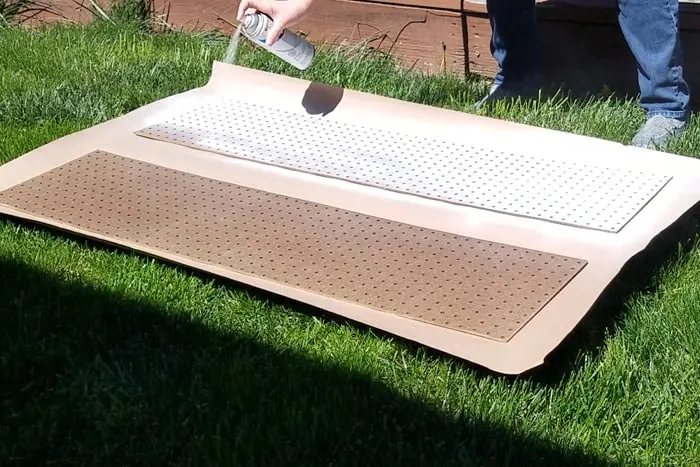
Step 3: Painting your Pegboard
If the pegboard you purchase doesn’t come in white the best way to paint it is to use spray paint. You could roll it on or brush it on but then you risk the holes getting plugged up. The added bonus of spray paint is that it has a more durable finish so it’s less likely to get scratched up with use. And it dries really fast.
- Lay out cardboard or a drop cloth. I recently bought a roll of Heavy Duty Contractors Paper so I could finally recycle all the old boxes I’d been saving for spray paint projects.
- Start spraying your pegboard and make sure you go slightly off each side so as to not get a puddle in one spot.
- You’ll need more than just a few passes because the pegboard will soak in a bit.
- Let it dry fully in the sun.

Framing and Support
Step 4: Framing the Wall
You already know I didn’t prep well for this project, and I only bought one 2’x4′ piece of pegboard. I figured I could put it together with some pieces I got at a garage sale. It’s older and much thicker so I decided to make the 1 sheet I bought work instead of heading back to the hardware store for another sheet.
The distance between my work bench and the cabinet was 15″ and the height of the pegboard cut in two was 12″. This means my frame needs to be thicker so I chose to put that at the top but probably should have reversed it. Oh well, done is done just keeping it real so you know that bloggers make mistakes too.
Determine the best framing material. This might be 1″x 2″ boards or even doubled up pieces of Lattice trim. That’s what I used on the Chevron Storage Cabinet I built recently.
Just make sure there’s enough room between the pegboard and wall so you can insert the hangers properly. I decided to use some shelves I’d saved from our old cabinets when we did our Kitchen Renovation.
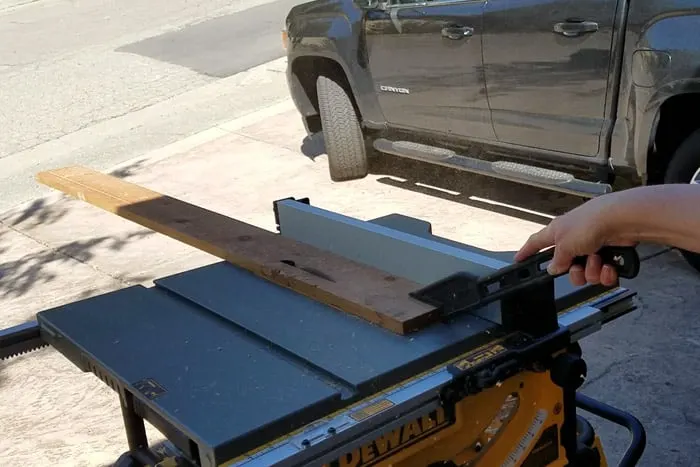
They had to be ripped to size, so I had to get the table saw out after all.
- Use a stud finder (or the old knocking method) to locate the studs.
- Mark the studs on the wall with pencil or a piece of painter’s tape.
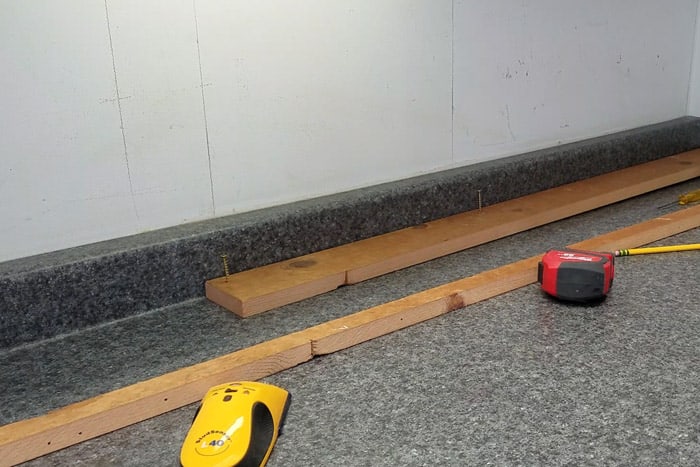
- Rip trim to the proper width if necessary with a table saw. Make sure you use a push stick to save your fingers.
- Cut the trim wood to the proper lengths with Miter Saw.

- Attach the wood framing to the wall using wood screws.
- The screws should be long enough to get through the wood, drywall, and into the stud. For my installation I used 2-1/2″ wood screws.
- If you have to butt two pieces of pegboard together make sure they meet over a section of wood frame.
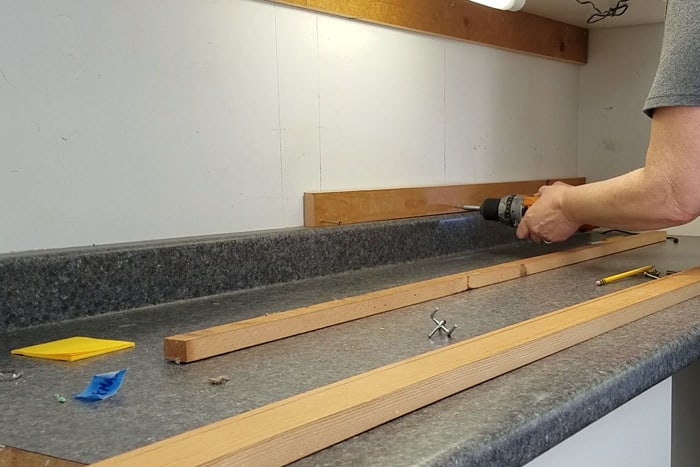

I chose to do a quick coat or two of white craft paint on the wood framing to make it sort of disappear behind the pegboard. You could skip this step if you want.
Final Installation steps
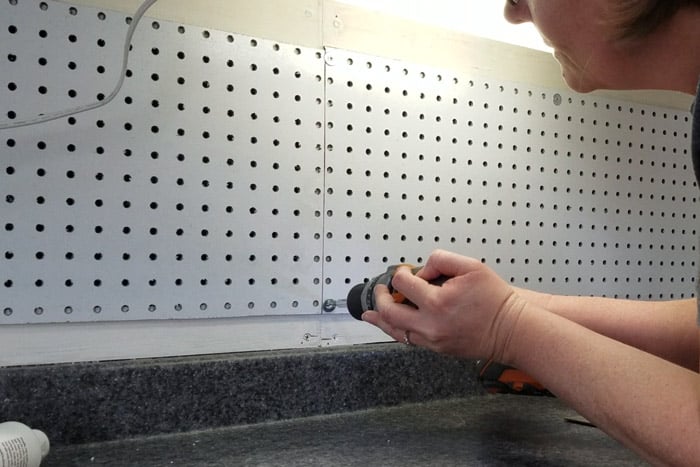
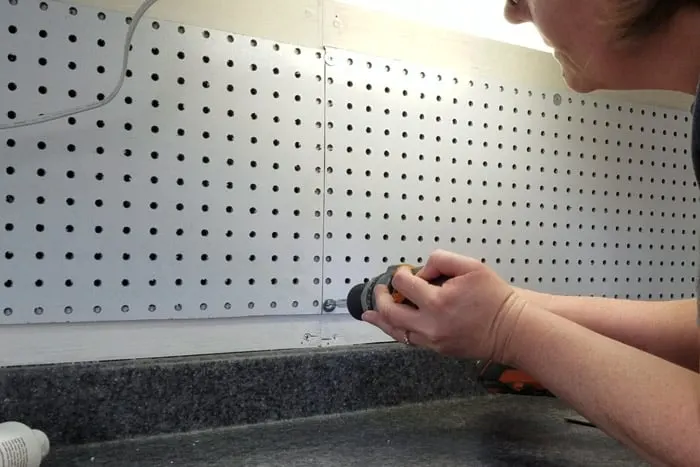
Step 5: Time to Install the Pegboard
Like I admitted, I didn’t go into this project with a full plan so I didn’t know the exact widths each section of pegboard should be based on the studs. Once my framing was up then I could make the final cut to size.
- Using the table saw, or skillsaw, measure, mark and cut pegboard pieces to fit.
- Install the Pegboard to the framing using 3/4″ wood screws, washers and a cordless drill.
- For my installation I used 20 screws. That’s probably overkill but better too many than not enough.
Other Woodworking Projects
Chevron Storage Cabinet – Craft Vinyl Storage Rack
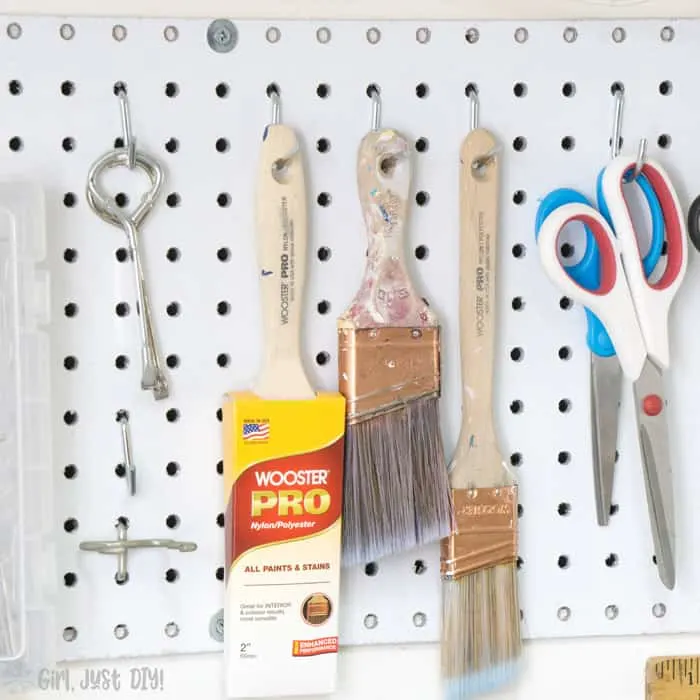
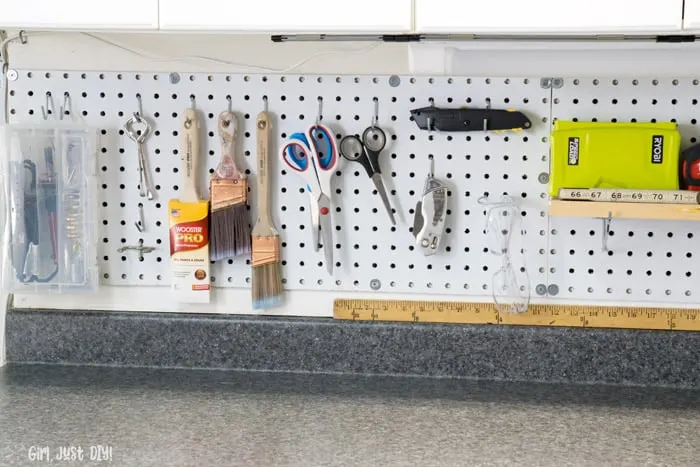
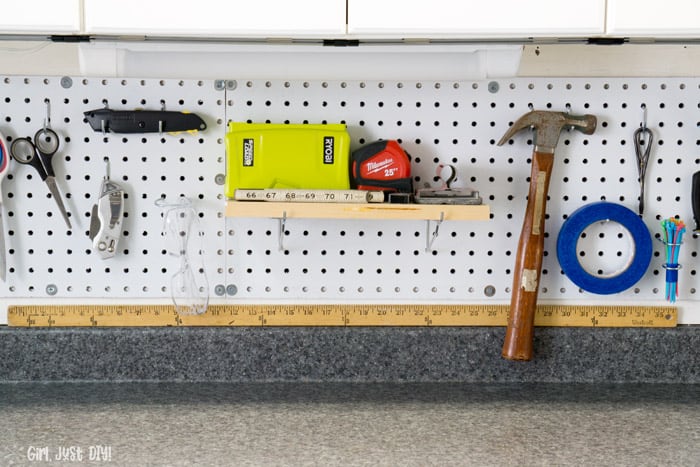
Step 6: Load up your tools
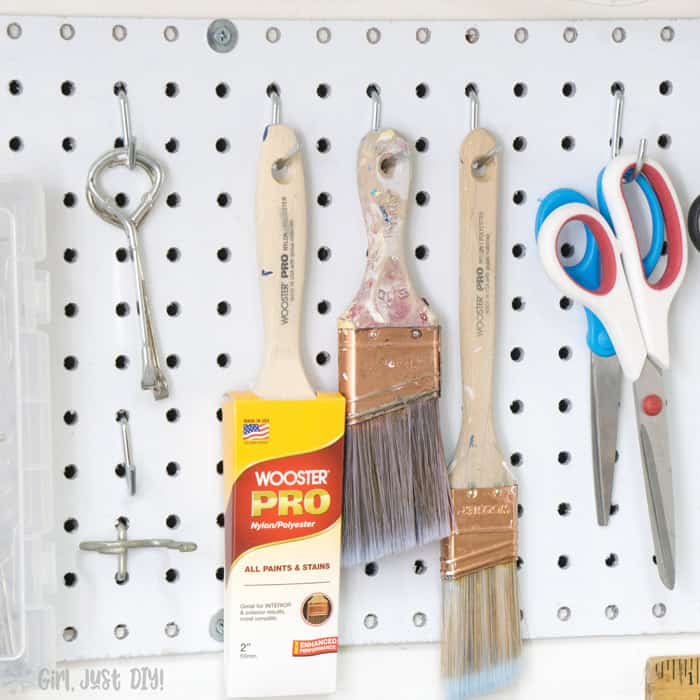
Finally the fun part. Think about where you want your tools and use a starter kit of Pegboard hangers and hooks to hang your tools in the best order for you.
You’ll probably move them around a bit until you get them just right. I’m sure I’ll still relocate a few things as I work with it. Eventually I’ll add the little hook locks so the pegboard hooks don’t pull out when I grab a tool.
My first time installing pegboard turned out great overall. It’s going to function just how I need it too even though it could be a little prettier. But it’s a garage after all so I’m not sweating any little imperfections.
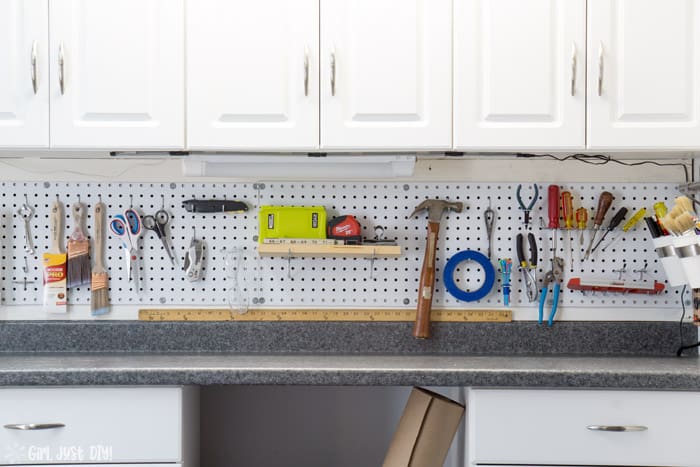
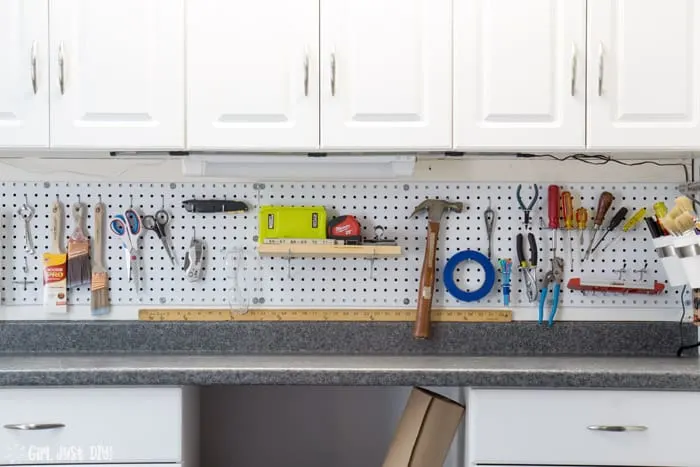
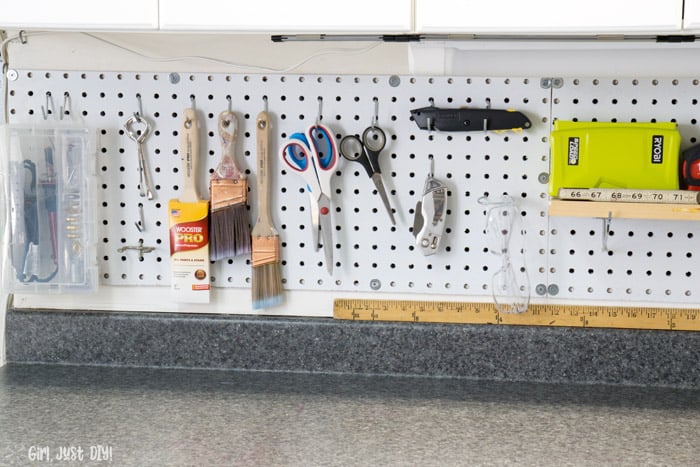


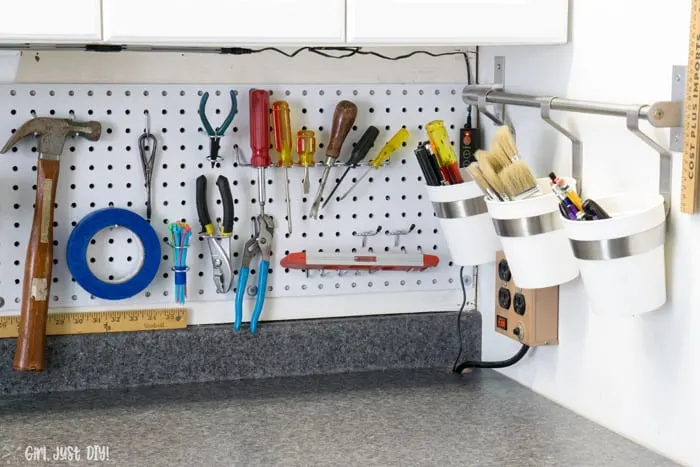
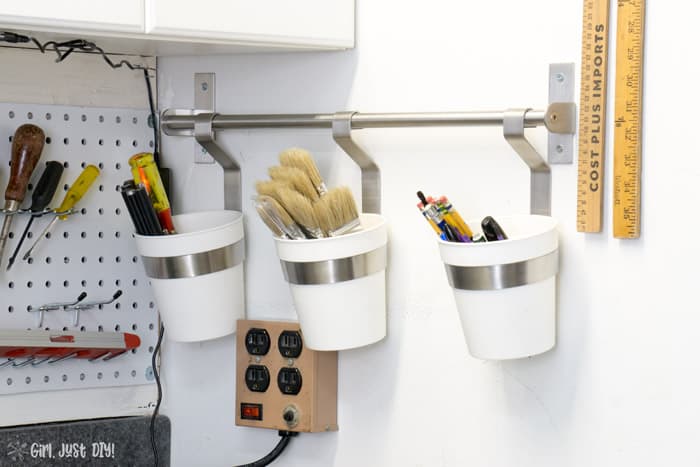
You need a place to store pens and such and since I didn’t have any hoseclamps to make my own cup hanger I decided to finally use these Ikea Rail and Flatware Cups my sister gave me a few years ago.

Now that I’ve installed pegboard once I know what thing’s I will do the next time.
The proper order looks like this:
- Measure fully.
- Buy all the materials you need before you get started.
- Cut and install framing.
- Cut pegboard to size.
- Paint Pegboard & frame (if desired).
- Install Pegboard.
- Hang tools.
- Build something fabulous!
Don’t forget to head over and check out eveyrone else’s projects by clicking the image below.


Amy
Thursday 2nd of May 2019
I love the pegboard for storage!
Eileen
Monday 22nd of April 2019
Looks great, Toni! I love pegboard organization <3
Dionne
Monday 22nd of April 2019
Love the tip of placing a bag of heavy items to hold down your pegboard while you cut it to size. I was wondering why you had a shopping bag so close to your project until I read more. Great tutorial!
Meegan
Saturday 20th of April 2019
Pegboard is so versatile. You did an awesome job with utilizing your space. Framing the pegboard is genius! It always fun to see what you are up to.
Julie
Thursday 18th of April 2019
Awesome, Toni! Love the tutorial, and the end result! So smart and so organized!