Do you have an old tin of grandma’s buttons? Even though I didn’t use grandma’s buttons for this project, I could still feel her in my heart as I picked through and created these cute Button Christmas Ornaments.


I remember playing with Grandma’s buttons as a kid, sorting them into the various shapes, sizes, and colors. Some were metallic but mostly they were brown, black, blue, and white.
I still love digging through those buttons and how close they make me feel, still, to a very sweet woman who I loved very much.
I can’t wait to show you how easy and fun these are to make. But first I’d like to thank Remodelaholic for inviting me, once again, to participate in her Creative Christmas Challenge. Last year I joined and made this Christmas Pompom Pillow.
You can see all 22 beautiful projects from this year linked at the bottom.
This post contains links to products, if you purchase something after clicking on my link I may earn a small commission (at no extra cost to you).
I’ve been very busy this year creating fun new Christmas projects and I’m really having fun playing with glitter when I made a new wreath of sorts.
Supplies to make Button Christmas Ornaments
- Pink Craft Buttons
- Green Craft Buttons
- Pink & Green Embroidery Floss (I bought this pack)
- White Buttons
- Doll Needle or other craft needle
- Lighted Needle Threader (I have this one)
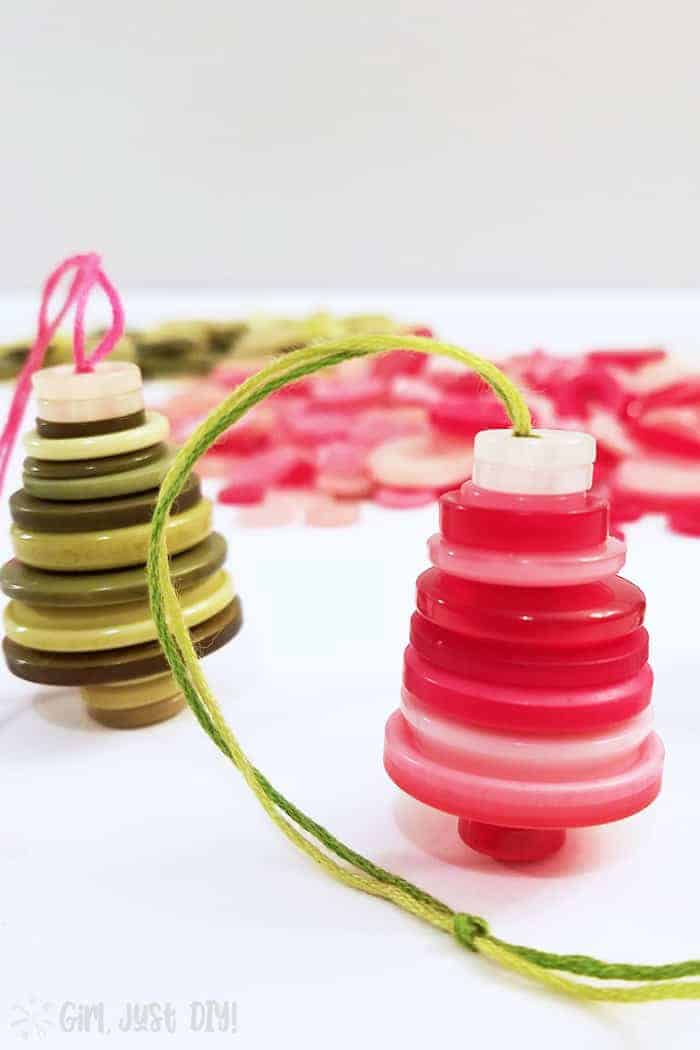
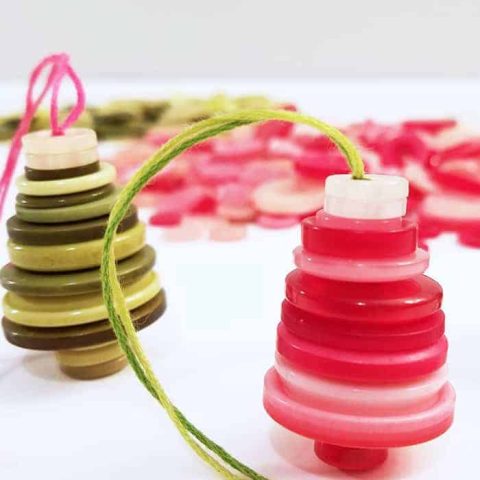
Pick your Button Ornament Color Scheme
I sorted through grandma’s buttons but as I mentioned the colors were mostly dark so I decided instead to use some buttons that I’d picked up a while back. I had a few colors to choose from but decided on Pink Buttons and Green Buttons for my button ornaments.


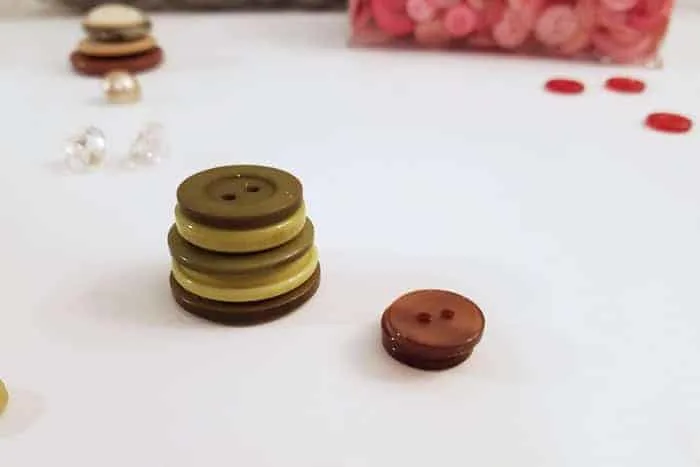
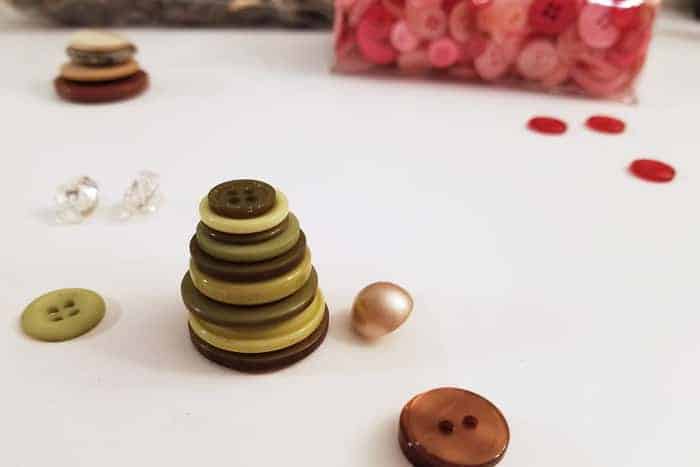
Step 1: Find a pleasing pattern
Originally I tried alternating the colors but it wasn’t a WOW, so I decided to keep them separate.
- Started stacking the buttons by descending size
- Mix up the shades within that color for each layer.
- I thought some Grandma’s dark buttons were going to come in handy as the “trunk” of the tree but I changed my mind.

Get creative and play around until you have the perfect little button Christmas ornaments for your tree. That’s all I did when I made some very cute and easy Button Magnets.

Step 2: Putting the Button Tree Together
When you’re happy with your “tree” it’s time to turn it into a hanging ornament.
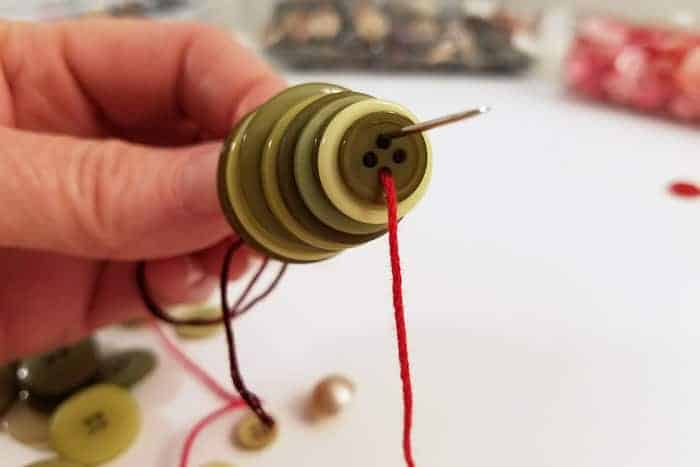
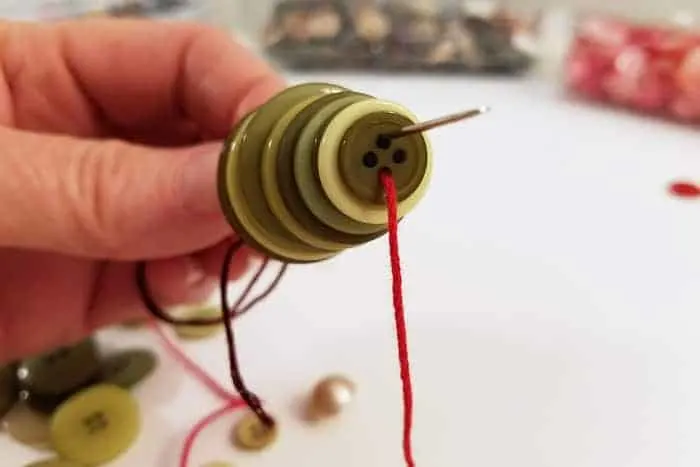
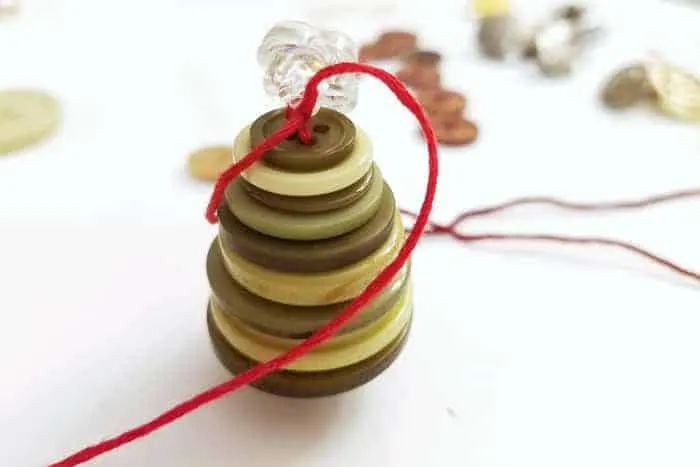
- Thread at least 18″ of embroidery floss onto a long craft needle that will fit through all the holes of the buttons. This is where the lighted needle threader comes in so so handy.
- Start at the top and wiggle the needle down through the stack of buttons until you get to the bottom.
- Pick them up and slide on the smaller buttons for the trunk.

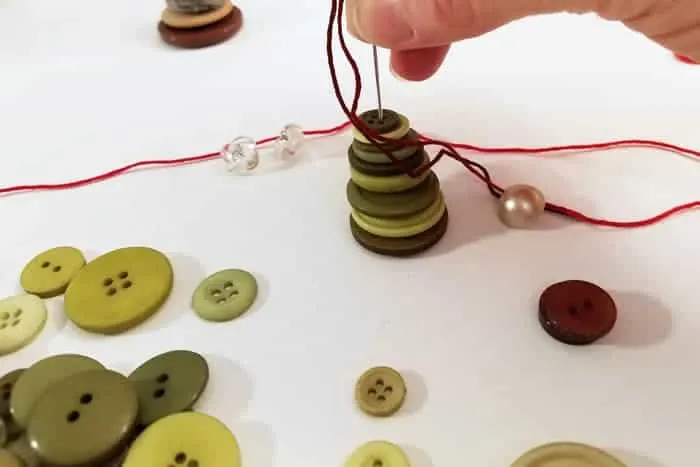
- Now it’s time to go the other direction.

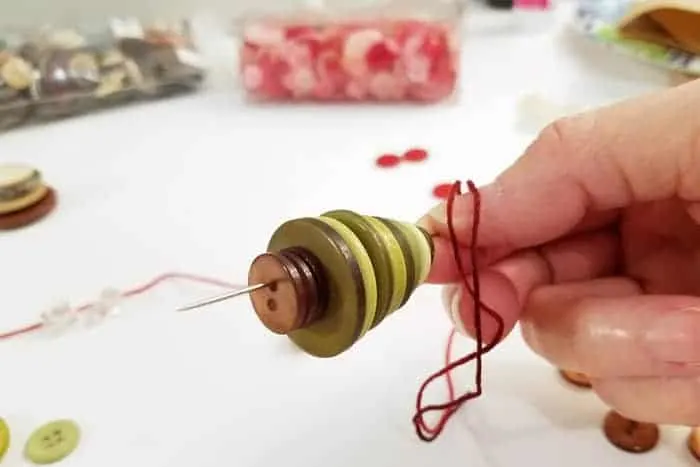
- As you’re threading the needle back up through to the top make sure you’re threading in the hole opposite of the first one. Otherwise your buttons in your little tree will be wonky.
Initially I used red embroidery floss with green buttons but didn’t like it and switched it out as you can see in the final pictures.
Don’t be afraid to take them apart and start over if you’re not happy. This craft goes pretty quickly so I started over a few times until I was happy with the end result.
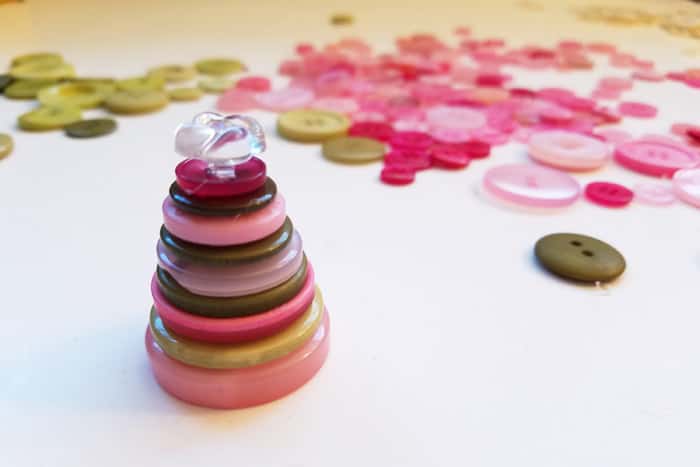
Finishing Touches and a Button Tree Topper
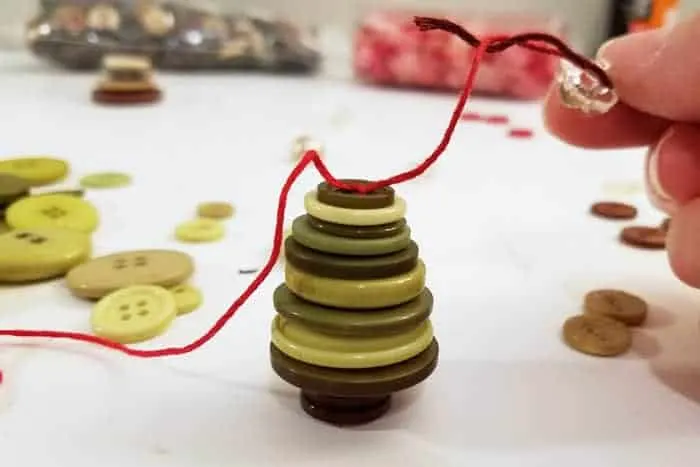
When you have your button ornament how you like it tie off the top.
- Leave at least 8″ of thread above the button tree.
- Tie a tight double knot.
- Thread on a fancy button as a tree topper and tie again.

I really wanted to use some cute little flower buttons on the top of mine but I couldn’t get it to sit the way I wanted so I went another route.
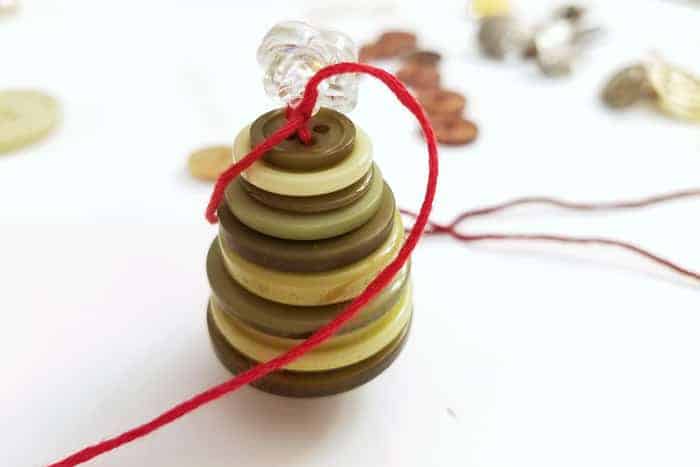
Instead of Grandma’s brown buttons for the trunk I used the same color as the tree ornament. For the topper I went with some of Grandma’s white buttons stacked sort of like a little star.

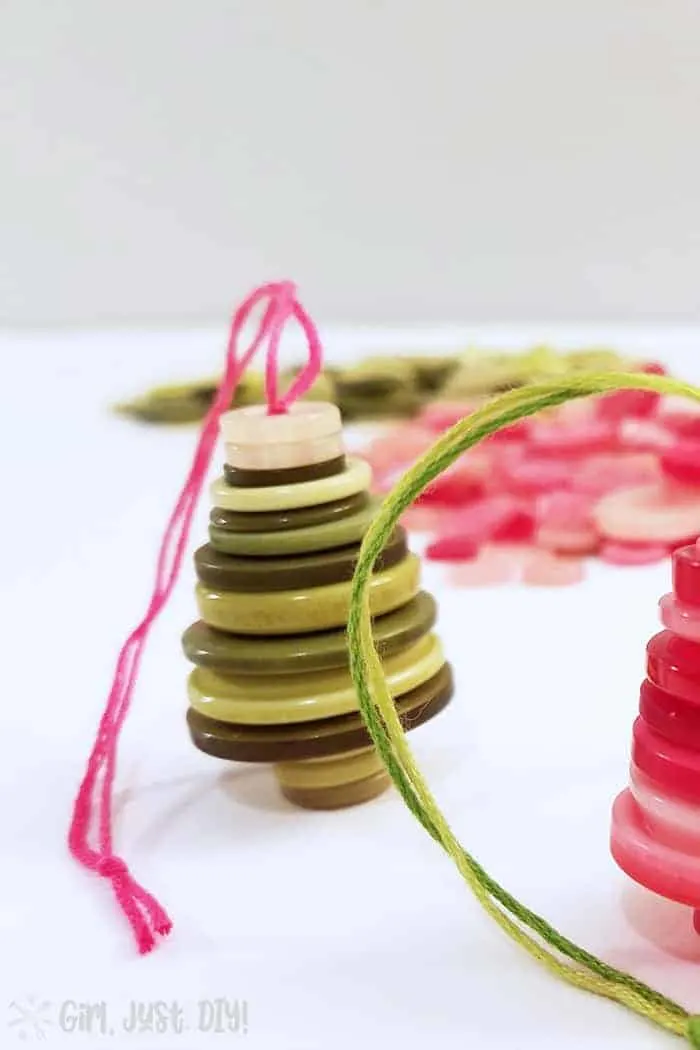
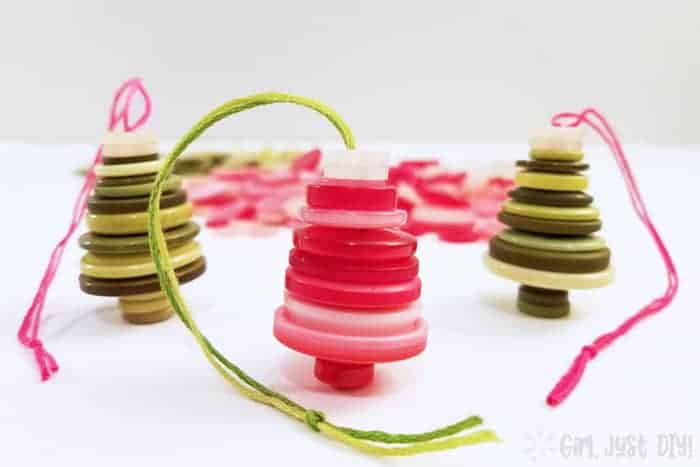
As I mentioned above I didn’t like red embroidery floss with the green button ornaments so I started over. I ended up with pink floss on the green button ornaments and green on the pink button ornaments.
I think Grandma would love these, except for the pink one, crazy woman didn’t like pink 🙂
I used one of the cute pink buttons on a recent Christmas Tree craft and when I made some Button Magnets.

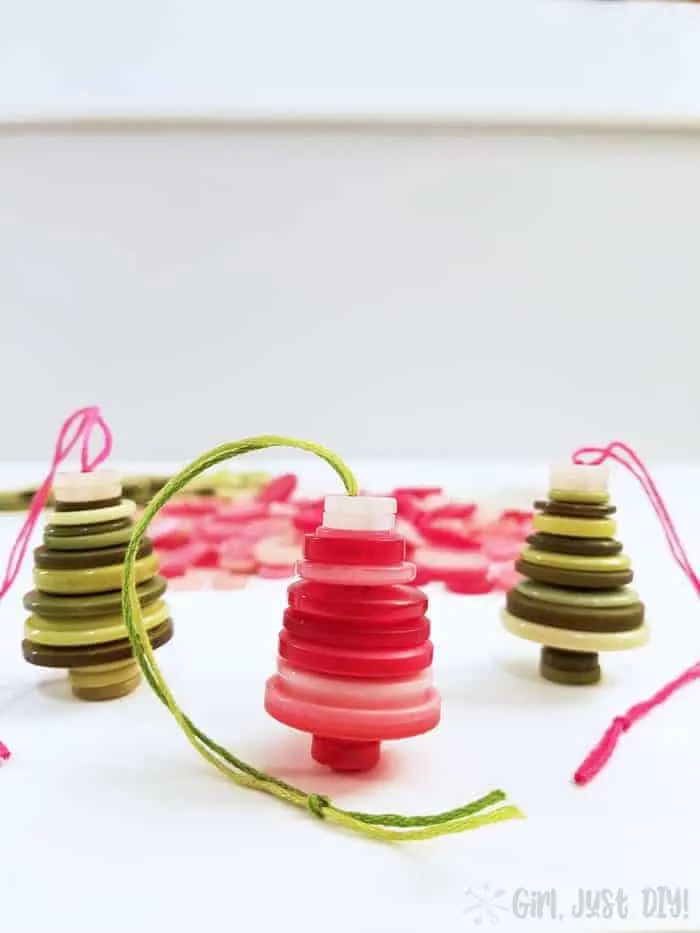
I think they turned out perfectly, and I can’t wait to hang them on our tree or arrange them on the sofa table with this adorable Button Christmas Tree.
Normally I do a mostly red and silver decorations like these Red Tassel Ornaments, but I’m ready to add more fun colors to Christmas decorating.

Pin it for later!!
And now, don’t forget to check out all these beautiful Christmas projects by some very talented and creative bloggers. All the links are below.

Nutcracker Christmas Tree Decorating | Remodelaholic
Copper Christmas Ornaments | From House to Home
DIY Rustic Carved Wood Ornaments | Ugly Duckling House
Snowman Globe Ornaments | Kailyn Williamson
Dollar Store Snow Globe Ornaments | Our Crafty Mom
Wood Disc Ornaments | Everyday Party Magazine
Button Christmas Ornaments | Girl Just DIY
Handlettered Ornaments 3 Ways | Lemon Thistle
Wood Slice Snowman Ornament | Creative Ramblings
Mini Wreath Ornaments | Love Create Celebrate
Buffalo Plaid Ornaments | Leap of Faith Crafting
Easy DIY Geometric Ornaments | Practical and Pretty
7 Cheap and Easy Christmas Ornaments | Toolbox Divas
Macrame Ornaments | Frazzled JOY
AND EVEN MORE….

Grapevine Christmas Wreaths | Grace in My Space
DIY Apple Candle Village | Life on Summerhill
Festive DIY Christmas Card Holder | Red Cottage Chronicles
Lettered Tree Sign | Smiling Colors
Modern Christmas Wreath | Sister’s What!
Reversible Holiday Easel | Queen Bee of Honey Dos
Pretty Decorative Clothespins | Sustain My Craft Habit
DIY Wooden Triangle Christmas Tree | Adventures of a DIY Mom

Button Christmas Ornaments
Materials
Instructions
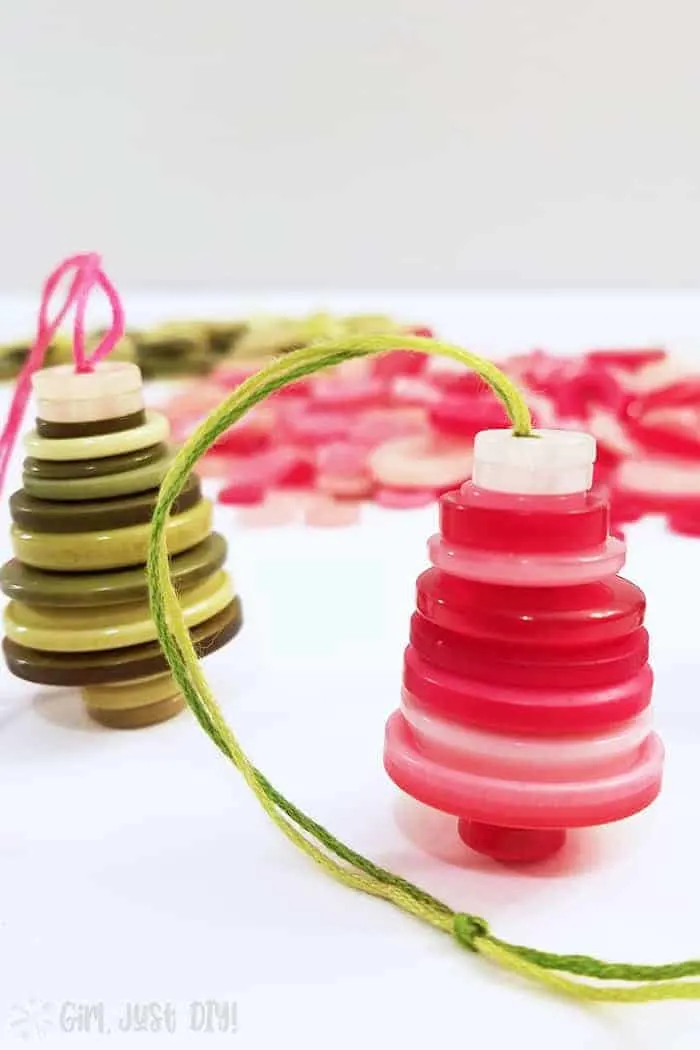
Step 1: Play around a bit and find a pleasing pattern.
- Start stacking the buttons by descending size
- Mix up the shades within that color for each layer.
- Decide if you want a small trunk at the base of your button christmas tree.
Or something colorful like this one below.
Step 2: Putting the Button Tree Together
- Thread at least 18″ of embroidery floss (I used all 6 strands) onto a long craft needle that will fit through all the holes of the buttons. This is where the lighted needle threader comes in so so handy.
- Start at the top and wiggle the needle down through the stack of buttons until you get to the bottom.
- Gently pick up the stack but keep them on the needle.
- Slide on the smaller buttons for the trunk (if using).
- Now it’s time to go the other direction.
- Pull your buttons off the needle and onto the floss and stack the tree upside down with the bigger buttons on the top.
- As you’re threading the needle back up through to the top make sure you’re threading in the hole opposite of the first one. Otherwise your buttons in your little tree will be wonky.
Step 3: Finishing Touches and a Button Tree Topper
When you have your button ornament how you like it tie off the top.
- Leave at least 8″ of thread above the button tree.
- Tie a tight double knot.
- Thread on a fancy button as a tree topper and tie again.
- Make a knot in the flossas long as you wish for hanging on the tree.
Tammy Cuoghi
Monday 9th of October 2023
How many buttons do you stack JUST FOR THE TREE?
Tammy Cuoghi
Thursday 21st of September 2023
Is there a way you could email me a copy of instructions for this craft that could be printed to share with my Womans Group at church.
Toni
Wednesday 27th of September 2023
Hi Tammy, I'm so happy this has inspired to share it with your ladies group! I updated the post and added a DIY card at the very bottom of the post which can be printed. If you want to email it you can click on the Print button and then change the destination to Save as PDF. Then you can email that to your church group. Pictures aren't included in the print out so you might just want to send them all a link to the post so they can review it and print it themselves before you gather to craft together... https://www.girljustdiy.com/button-christmas-ornaments-easy-and-fun/
Henry Walker
Thursday 10th of January 2019
This is a beautiful post, I love it Thanks for sharing..!
Bri Adams
Sunday 18th of November 2018
I love how abstract these are! This is something my kids would love!
Toni | Girl Just DIY
Wednesday 21st of November 2018
Yes, they'll have so much fun stringing them together.
Lisa // Cucicucicoo: Eco Sewing & Crafting
Saturday 17th of November 2018
So simple and cute! Saving and pinning! :) Lisa
Toni | Girl Just DIY
Wednesday 21st of November 2018
Thanks Lisa, you will have fun making some for yourself.