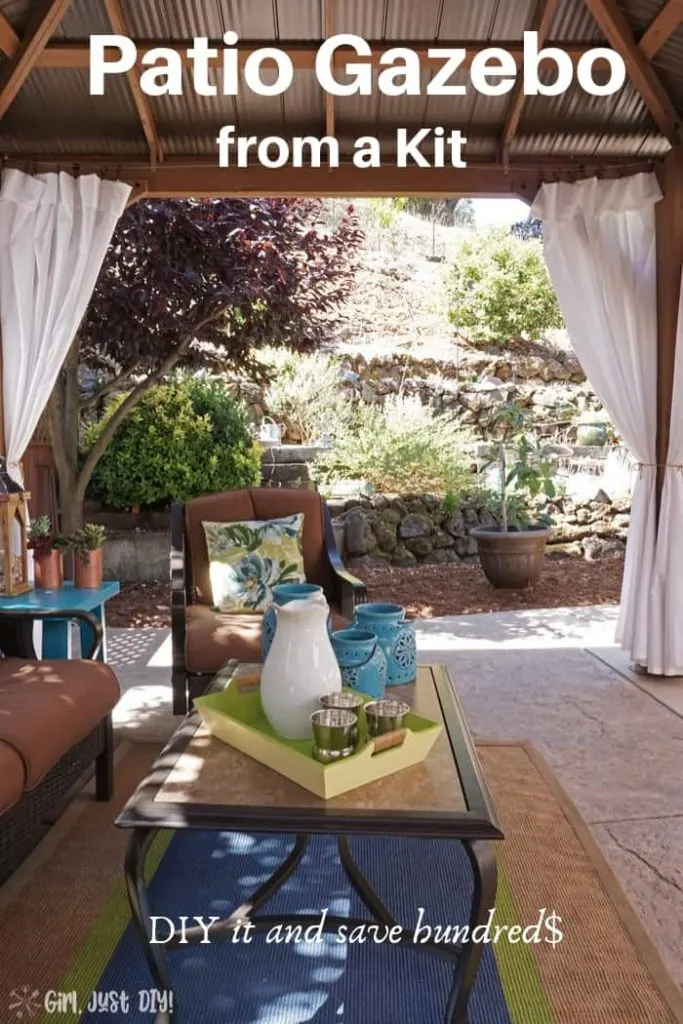
Putting together a DIY Patio Gazebo from a kit takes some time and work. But the effort was worth the outcome and you save a bunch of money in the process.

More Outdoor Projects
Painted Seagrass Rug – Drop Cloth Curtains
At least 14 years ago we bought a metal gazebo for our patio from a local hardware store. We paid around $300 but it was worth it because the only shade we had on our patio came from randomly placed umbrellas.
It was an improvement for sure. Having that consistent shade from the sun was wonderful.
What our old inexpensive gazebo really cost us
What we didn’t anticipate was having to replace the canvas top every few years. Between the beating summer sun, and then no sun in the winter to dry it out, they disintegrated after a few seasons.
Each replacement top cost us around $100 each. Over the years we probably spent an additional $500 on tops. That really adds up and our $300 patio gazebo cost us closer to $1,000, not a great investment after all.
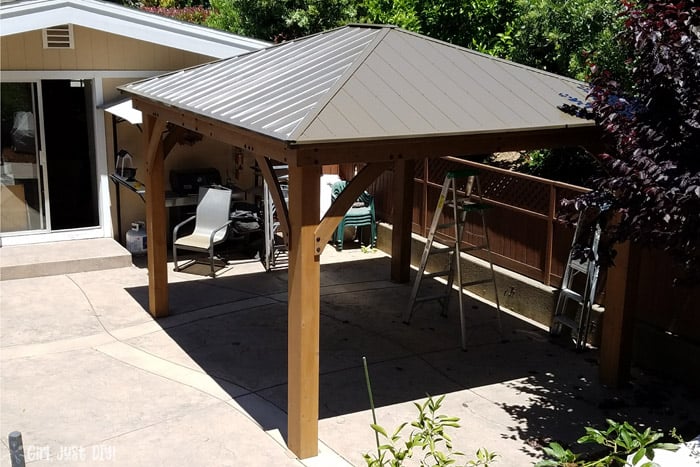
So last Spring on a trip to Costco we were thrilled to see a 12’x14′ cedar patio gazebo kit on display. With an aluminum top. Yay. No more replacing sun and water destroyed tops.
How our new Gazebo will save us money
This diy patio gazebo kit cost us $1399. That might seem like a lot but we’ll never have to do anything more than give it a little stain every few years.
Had we kept the old gazebo and kept buying new tops over the following few years it would ultimately cost us as much if not more than the new gazebo kit we bought.
This kit is not light. The three boxes weighed 600 lbs. But it has everything in it you need for assembly, other than the tools.
Tools & Supplies to Assemble a DIY Patio Gazebo
- Yardistry Cedar Patio Gazebo Kit
- Cordless Drill
- Crescent Wrenches
- Pliers
- Work Gloves
- Sawhorses
- 4’x8′ Sheet of plywood
- Hammer
- Bar Clamps
- Rachet Screwdriver with Universal Joint
- Multiple Ziplock Bags (to keep the screws and bolts organized)
- Helper/Partner
- Patience 🙂
Gazebo Parts and Assembly
This isn’t a full and detailed tutorial because that would take way too many photos and hours to read. I decided to give you an overview so you get the idea of what it will be like, and the tools you’ll need to build your own patio gazebo from this kit.
Yardistry, the manufacturer of this kit, provides an excellent instruction book and they also have a series of step-by-step videos you can watch.

We watched the videos several times before we started. And when we had questions about something, we’d replay just that part of the video.
Before we put ours together my husband decided to give it an extra coat of stain. It comes stained but we wanted it to look a bit richer, and give it the best start. After all the pieces were dry we stacked them in the garage until we were ready to assemble the gazebo.
That’s a lot of parts, but don’t stress, keep reading.

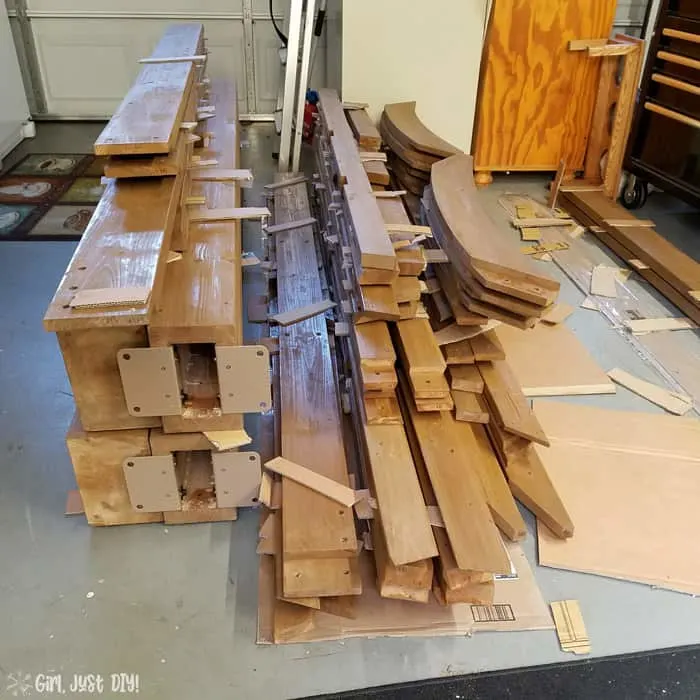
The ends of each board is labeled so you know which parts you need for which section. It looks intimidating but when you follow the directions step-by-step it really goes pretty smoothly.
We’d already removed some of the pieces when I took this picture.
I’m sorry I didn’t get a picture of the hardware. There is a lot of it. I mean a lot a lot so be prepared with those plastic bags and a sharpie to keep them organized.
Assembling the patio gazebo frame
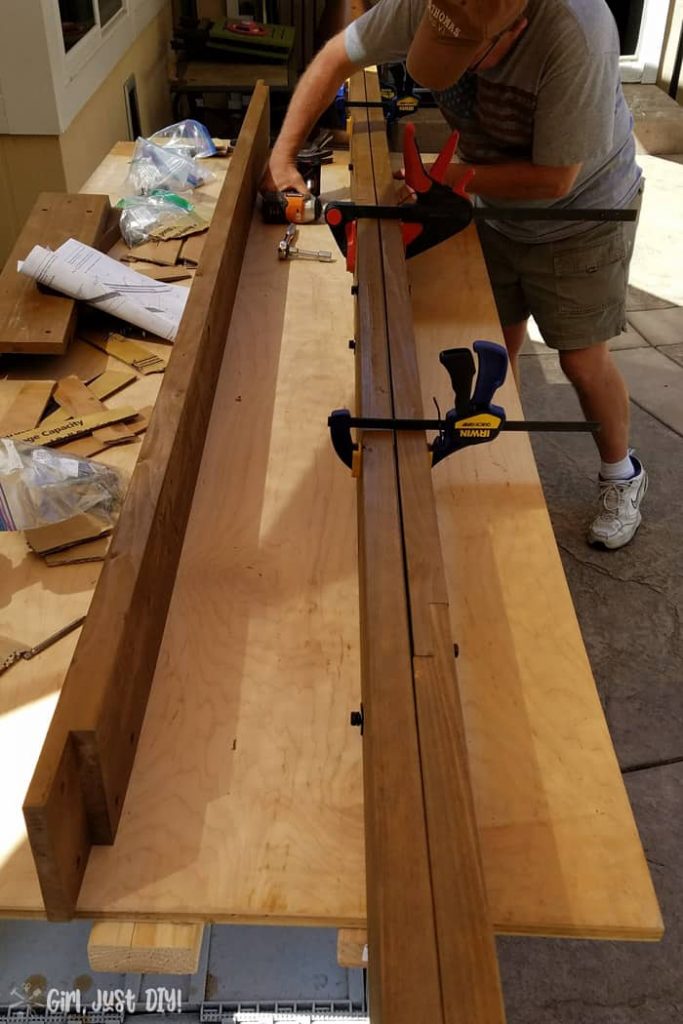
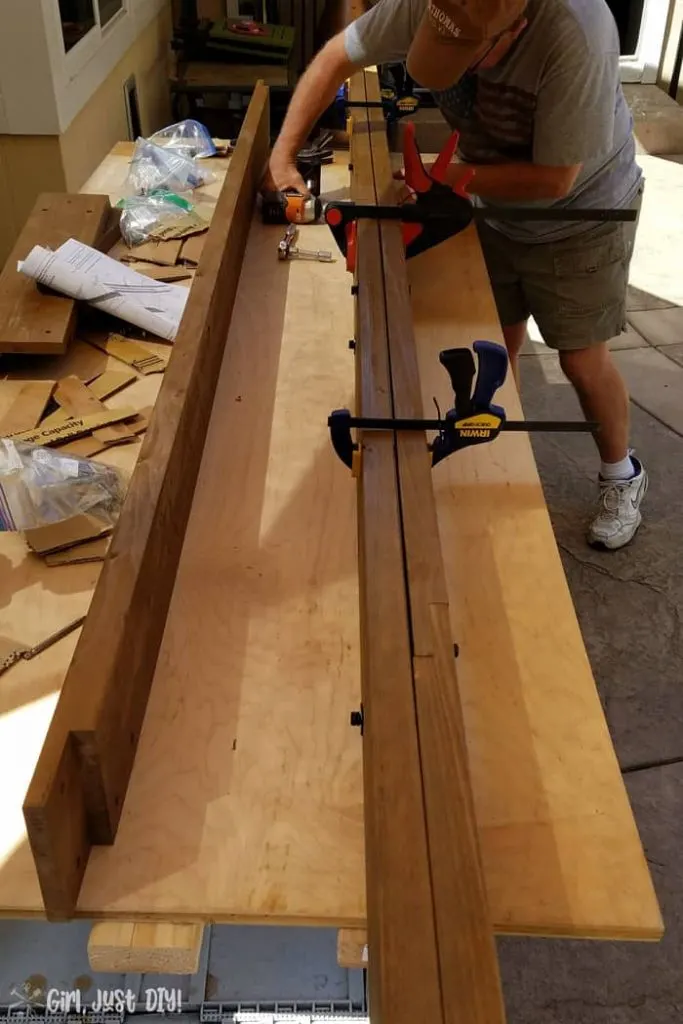
The first thing we did was set up the sawhorses and top it with a sheet of plywood to use as our workbench. We needed a large surface to assemble the four fascia boards that connect the posts.
This is where you’ll first need the bar clamps. The patio gazebo kit comes with all the holes pre-drilled and I am happy to say that they all lined up perfectly. Plus the connectors are two sided so they suck together creating a really tight fit.
Once all the fascia boards were assembled it was time to put of the frame. They recommend four people for this project but we did most of the work with just the two of us. More on that in a bit.
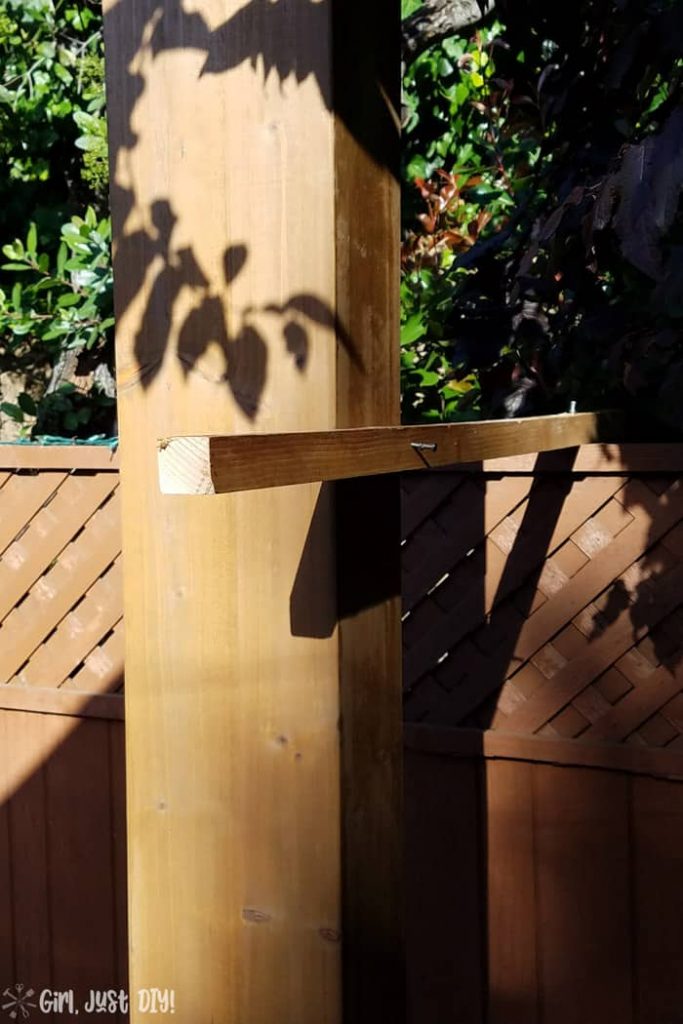
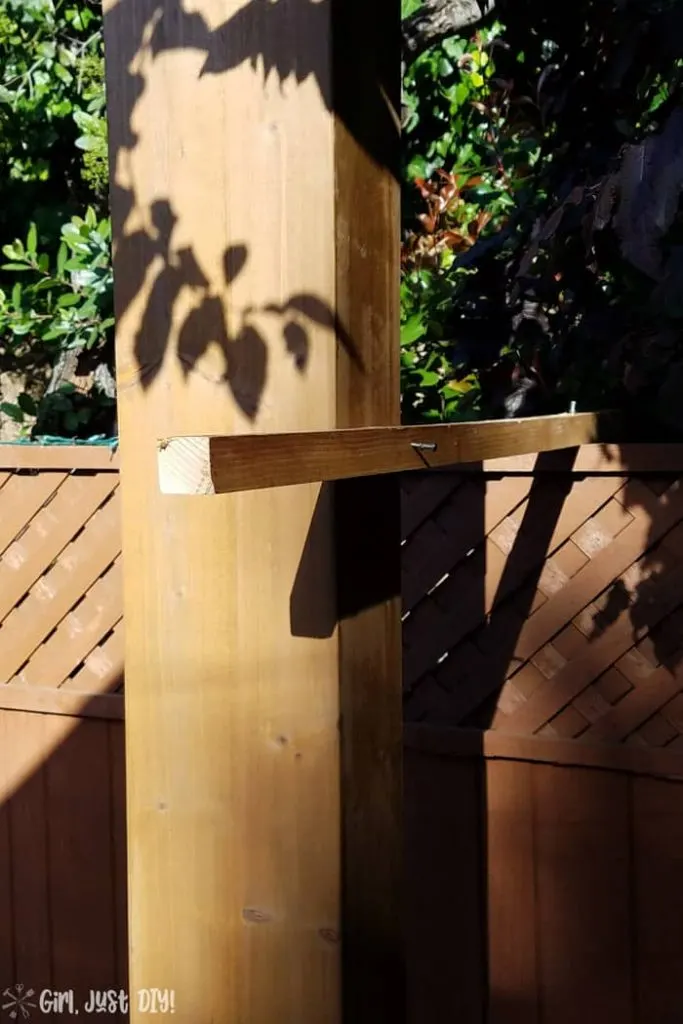
We assembled the back side of the gazebo first while it lay on the patio. After standing it up we used used a little construction trick to hold it up while we worked on the third pole.
It’s amazing how well one small board nailed to two surfaces acts as a third worker 🙂
We got the third and fourth posts in place and attached the fascia provided bolts and your crescent wrenches. Don’t tighten completely until make sure everything is level and square before the final tightening. See their video series for the proper way to ensure square.
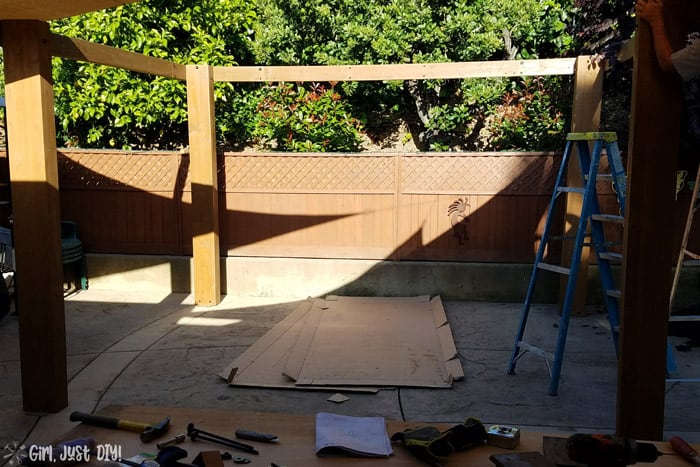

Since we were working with just two of us we spent way more time getting everything squared up properly. It can be done, we did it, but it would have been easier with more bodies.
Plus when you aren’t working on a perfectly level surface to begin with, expect that there will be challenges.
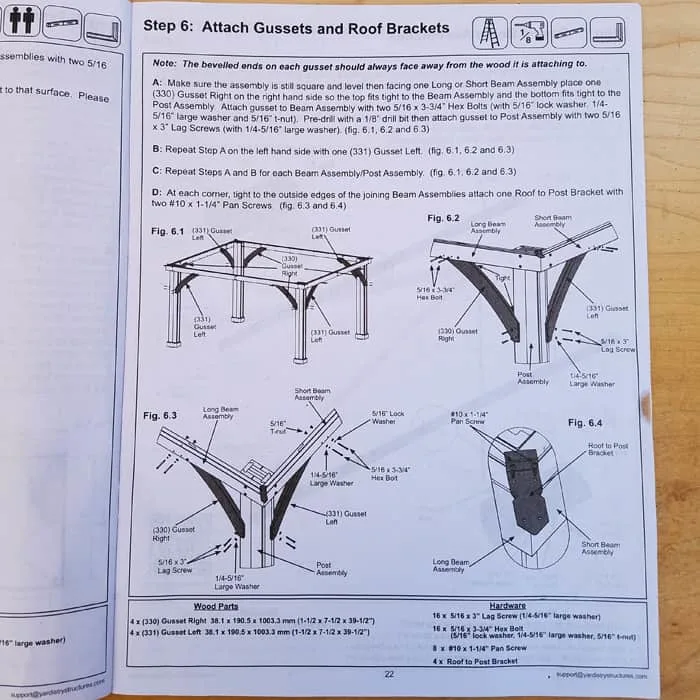
With the posts square, level, plum, and all those other builder terms, we were finally able to install the gussets on the corners of the patio gazebo.
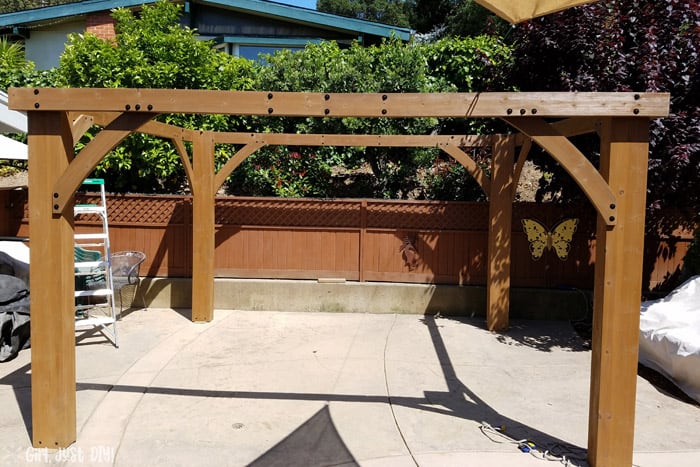

These also help with structural support and add a little style.


Assembling roof panels
With that step behind us it was time to turn our attention to the roof panels. These things are big when you’re assembling them without a huge workshop. But we made do with our sawhorses and large sheet of plywood.
Sure we could have assembled them on the ground, but my knees are too old and injured for that silliness.
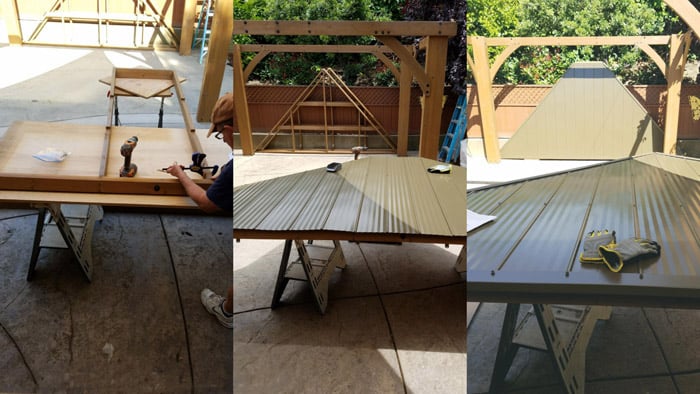

- Following the directions we built the frame in the exact steps, even if logically you think it’s wrong.
- We made sure to wear protective work gloves when we added the aluminum panels which are like one big knife. Secured it with sheet metal screws in only the holes designated.
- Lastly we added the aluminum flashing around the outside edge and screwed in the rest of the sheet metal screws.
- TIP-do not use a cordless drill on this part. You might start them with the drill, but finish them with the ratcheted screwdriver and hex head. You don’t want to dent and bend the aluminum roof and ruin all your hard work.
- Add the roof support brackets (included in the kit) to the designated panels.
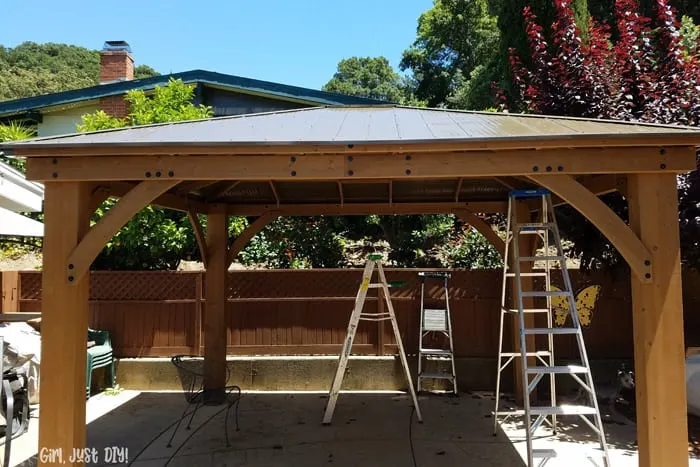
Once all the roof panels are assembled the only thing left is to install the roof.
Installing the Roof – you need four bodies for this part
We were so thankful to have our daughter and my brother help on a Saturday morning. Unfortunately I was not able to get pictures of this part. I couldn’t say, “hang on, hold that heavy roof panel up there over your heads while I run to get the camera. And say cheese, after you wipe the sweat from your brow” 😀
HaHa, free helpers are the best so I didn’t want to impose any more than we were already.
Seriously, it all went together well and following the instructions and watching the video we got it all up and secured in about 90 minutes.

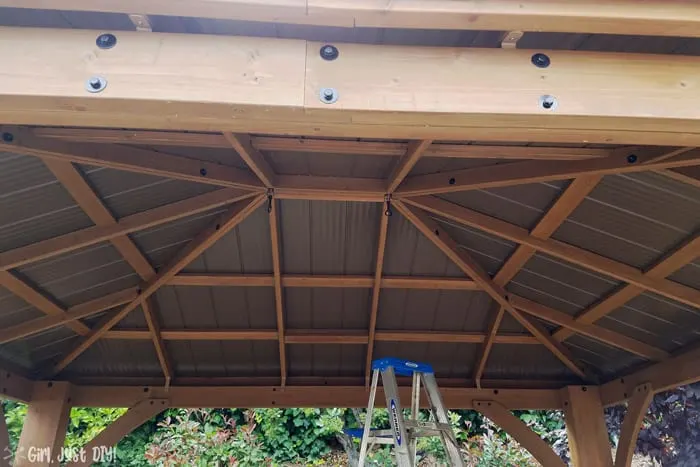
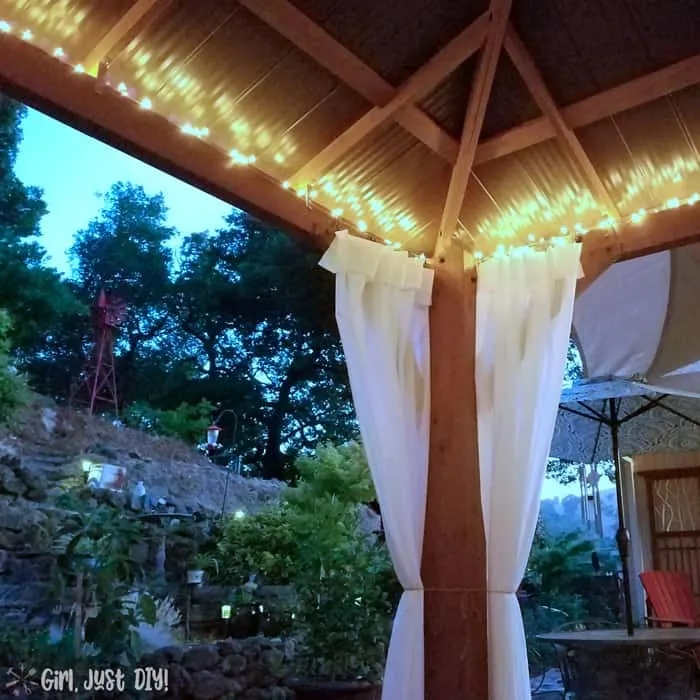
Here’s what the underside looks like with all four panels assembled. They even include a few hooks to hang lighting from the roof.

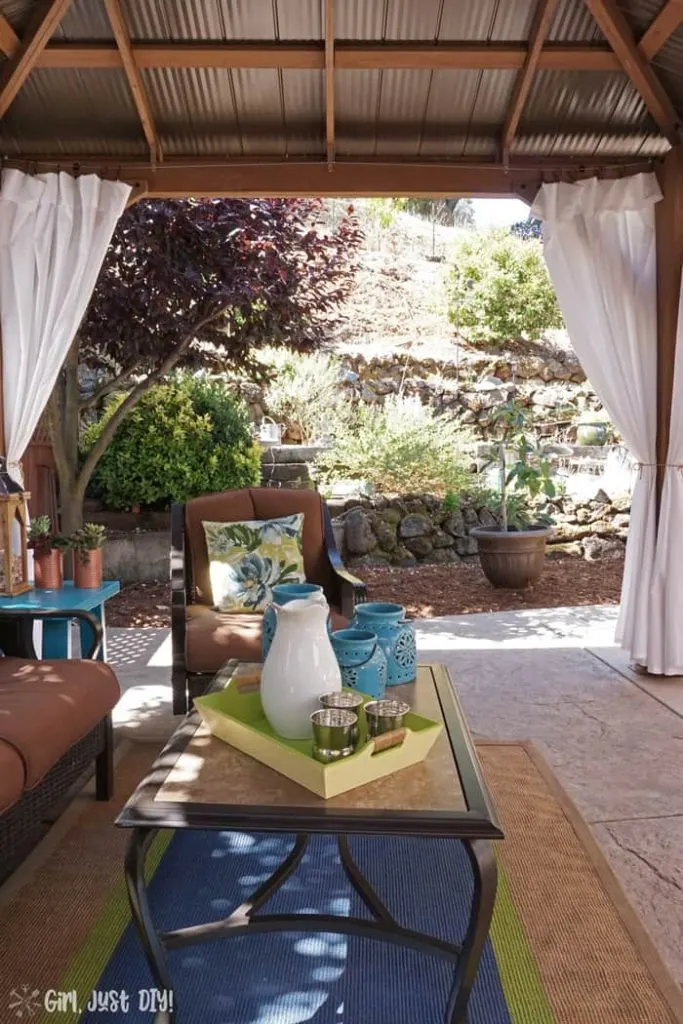
It’s amazing how much bigger this gazebo seems than our last patio gazebo. We did gain a little square footage but it’s also taller than our old one. And I am excited that we never have to buy another top again.
Here’s a view of it from the hill in our backyard.

I couldn’t wait to get all the furniture moved back in and hand the curtains.
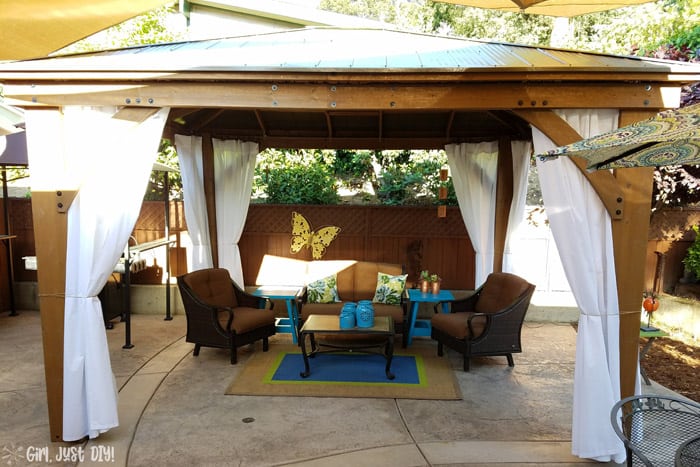
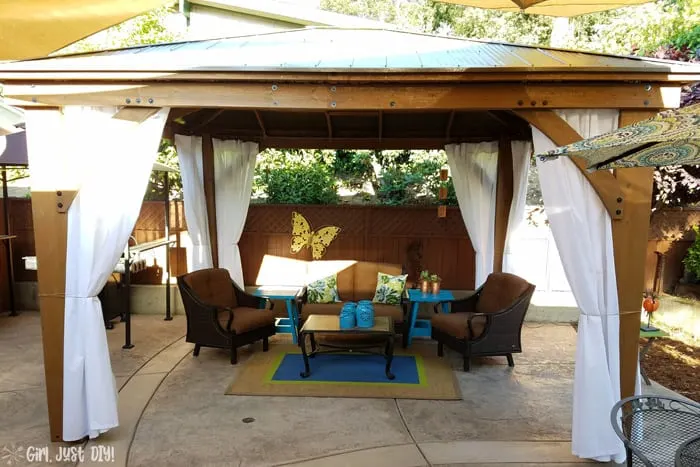
This is the best investment we’ve made in our outside living space since we had the new concrete poured in 2009. You can read about our New Backyard Retreat and how I built the 2×4 Side Tables.
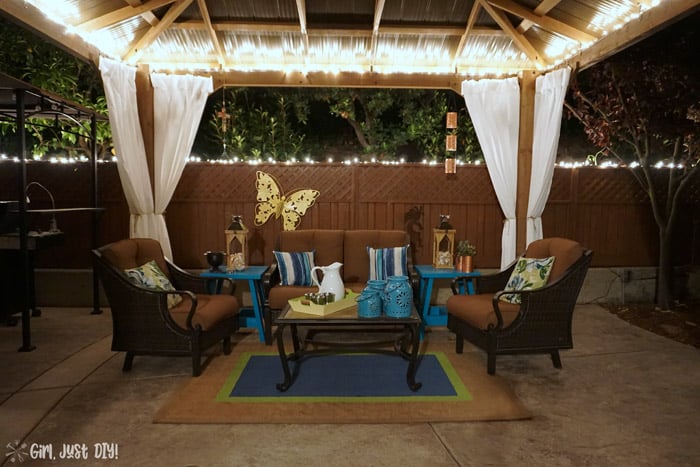
We sit out there often enjoying the weather and our hillside. It looks especially beautiful with the lights we added.


To build a DIY patio gazebo kit like this it will take some time. With the two of us working at it, and then four putting on the roof, it took about 50 man hours. Some of that was a learning curve.
Trying to do a four-person job with just two people made some things go slower. If you don’t think you want to tackle building one yourself, check around locally and I bet you can find some experienced people to put it together for you.
At our Costco they gave us the name of the guy who delivered it, and he offered to assemble it for a additional fee. One of our friends used him and was very happy so it’s worth checking out.

We love doing stuff ourselves so this DIY Patio Gazebo was right in our wheelhouse. It was cheaper than paying a contractor to build something that attached to our house (we know, we got bids).
Would you take on building your own patio gazebo? Would you use a kit, build from scratch, or hire a contractor? Drop a comment below and let me know how you’d add much needed shade to your backyard.
Mike
Wednesday 29th of March 2023
Did you fasten it to your concrete patio?
Toni
Wednesday 26th of July 2023
We did not fasten it to our patio, but we may at some point. We don't get strong winds, nor do we have tornadoes or hurricanes where we live.
Donna
Monday 14th of March 2022
We are putting the same gazebo up this weekend. 12x14 My question to you is about the curtains. Are they weather proof or just regular curtains? Where did you purchase them? How did you attach them to the inside. Looks like a cord of some sort but I can’t see it that well. I didn’t want to hang curtain rods and also have come up with different ideas but can’t seem to visualize it. So this is where I need help.
By the way, you guys did a great job on the gazebo and the decorating of it. I’m totally in awe.
Toni
Sunday 20th of March 2022
Hi Betty, you are going to love the gazebo, it was a game-changer for us in how we use our patio. For the curtains I never wrote a post about it because the in-process pictures I took were blurry LOL One of these days I'll take better pictures so I can actually document it and help others.
Basically we used vinyl-overed wire run through eye hooks and clamped them using wire clamps. We pulled the wire as tight as we could before attaching the wire clamps. We used 3 eyehooks for each of the 4 sides, two on either end (on top of the post so it's less visible) and one in the middle up high for support. Don't forget to thread on your curtain hooks before you do the clamps.
The actual "curtains" I hung up were simply white twin flat sheets that I got for a great deal at a Habitat for Humanity Restore. It's always breezy at my house so I might try some painter's drop cloths and see how that works, or add some drapery weights to keep them from flying up when I want to use them as shade in late afternoon. I hope this is helpful and thank you for your kinds words. It affirms that what I'm doing and sharing is helpful to others!
Marcus
Thursday 21st of January 2021
I am wondering how it has held up with the weather? I saw some bad reviews on other models like sunjoy stating it started leaking and wood discoloration after a year.
Toni
Thursday 21st of January 2021
Hi Marcus, we've had our Gazebo up for almost 4 years (we built ours May 2017) and it's holding up really well. We stained all the pieces before we assembled (it came pre-stained but we wanted extra initial protection and a slightly different color). After 4 summers summers of intense sun we decided to give it another coat on the outsides where it takes the most beating sun. We noticed in the Fall we have one screw on the roof that's got a tiny leak so we'll take care of that in the spring after the rain with a dab of clear silicon over the screw. The sun has beat on the roof an faded it a bit but that doesn't bother us. If it gets really bad we'll consider painting it but at this time it's not a worry. It's holding up better than all the soft top covers we had for our old metal gazebo. There really is no comparison and overall we're very happy with it.
I hope this has been helpful and thanks for reaching out and asking.
Leanna
Friday 26th of April 2019
Hi Toni. Our neighbour installed one of these last summer, Hubs is jealous I think. It looks fantastic lady, and you must be putting in some long days getting all this stuff done. Awesome job.
Susie | Chelsea Project
Wednesday 24th of April 2019
What a beauty....And great job with the construction. I'd LOVE to have one. Are you for hire??? :-)
Toni | Girl, Just DIY!
Monday 29th of April 2019
Friend, I would come help you build yours, or at least stand around and "supervise" :)