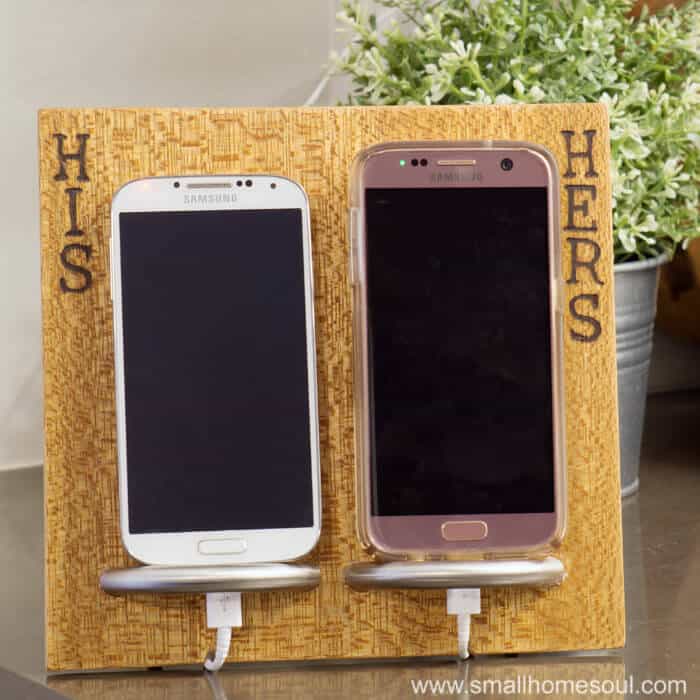
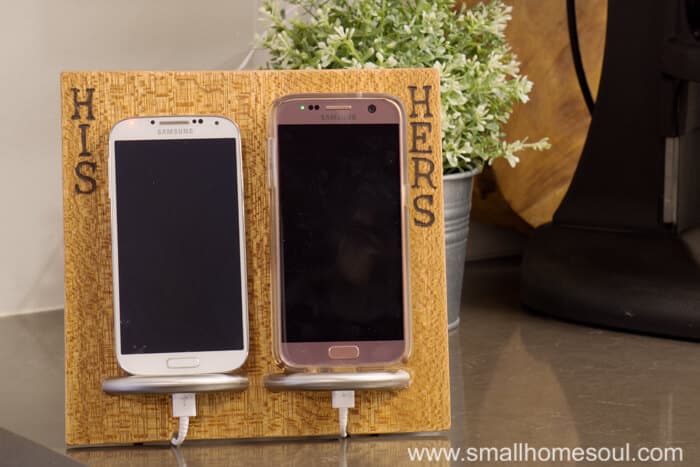
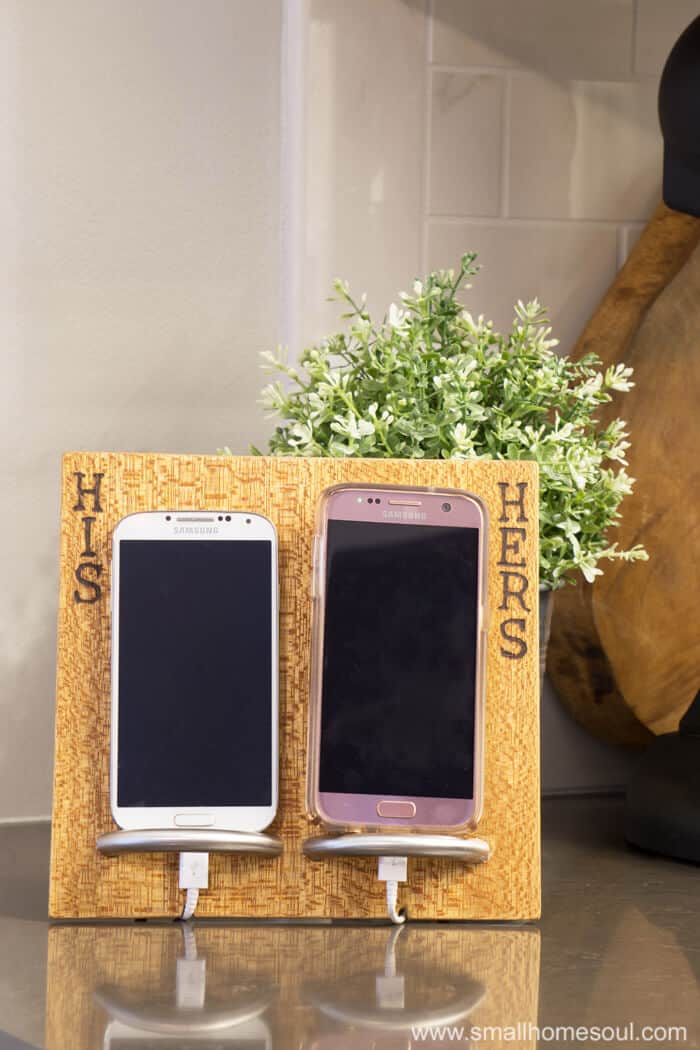
Where do you charge your phone? Chances are it’s a tangle of cords on the kitchen counter like mine is/was. No more messy cords, not since I made this easy Cell Phone Charging Stand. You can make one too, I’ll show you how. It’s the perfect give for everyone on your gift list this Christmas.
I’m happy to join the Handmade Holidays 2017 blog hop. It’s a 3-day event with different themes each day. Today’s theme is Handmade Gifts. This is the 7th year for the Hop hosted each year by Smart Fun DIY and along with some generous brands they sponsor a Giveaway with an awesome prize pack. Be sure to look for the giveaway at the bottom of the post.
This is my first time joining and I can’t wait to see the other creative Handmade Gifts everyone created. (pssst, here’s where you can find my Day 2 project.)

Now to my project. There are many variations of cell phone charging stands online but I’ve put my own spin on the design and used materials I had on hand to make mine unique. One of my favorite variations of a charging stand is one my friend Anika made last year as a gift for her husband. I love the spot for kiddo pictures 🙂
This post contains links to products, if you purchase something after clicking on my link I may earn
a small commission (at no extra cost to you).
Phone Charging Stand Supply List
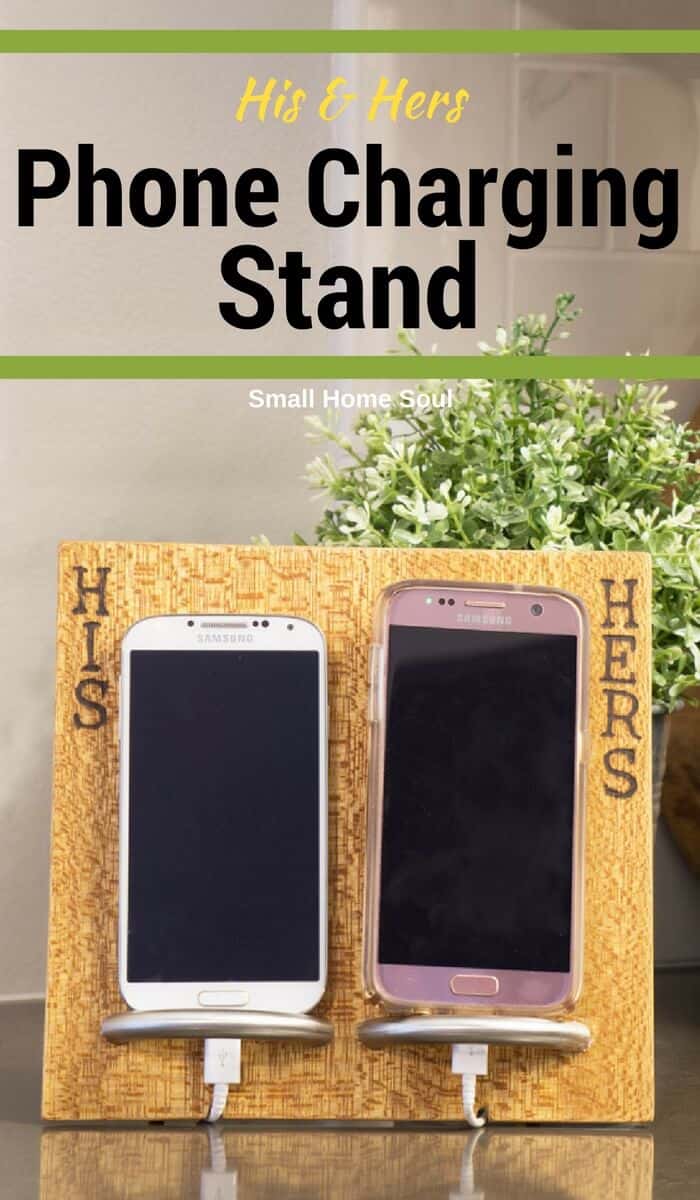
- 8″x 12″ piece of 1/4″ plywood
- 2″ Painters Tape
- Walnut Hollow Wood Burning Kit
- Walnut Hollow Hot Stamp Letter Set
- Two 3″ drawer pulls
- Hamp Oil
- Industrial Strength Adhesive (I like this one)
- Glue Gun
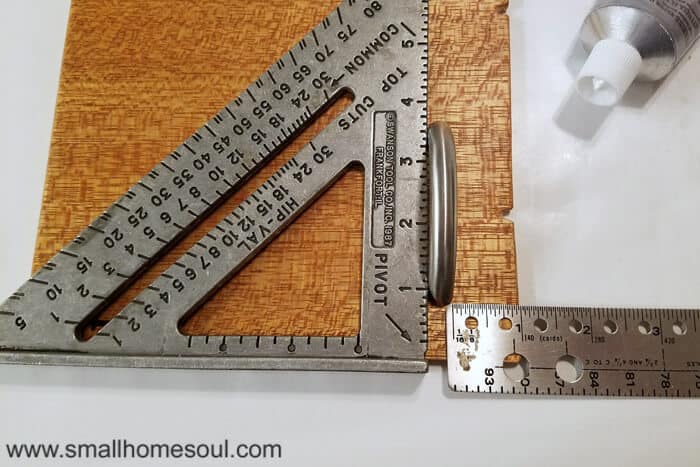
- Speed Square
- Chop Saw or Skill Saw
- Medium Binder Clip
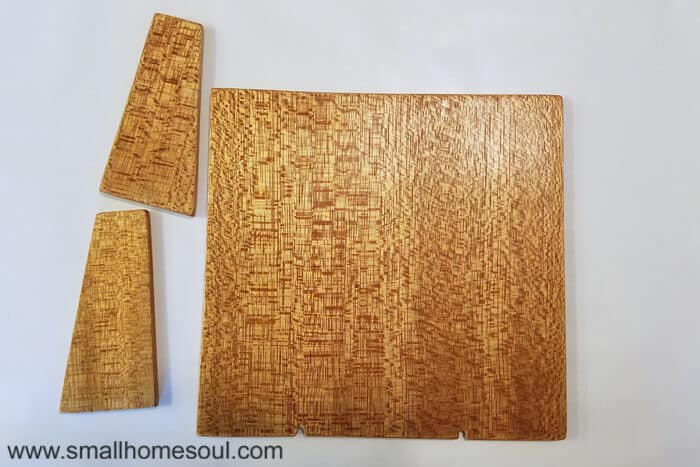
I had some old drawers laying around that I had taken apart. I lucked out that one of the drawer bottoms was the perfect width for my charging stand. The perfect height for my stand is 8″ which accommodates our two phones nicely. The board had some beautiful details that I wanted to use so I had to make two cuts on my board. The drawer pulls were from a stash I’d picked up at Habitat for Humanity ReStore over the summer.
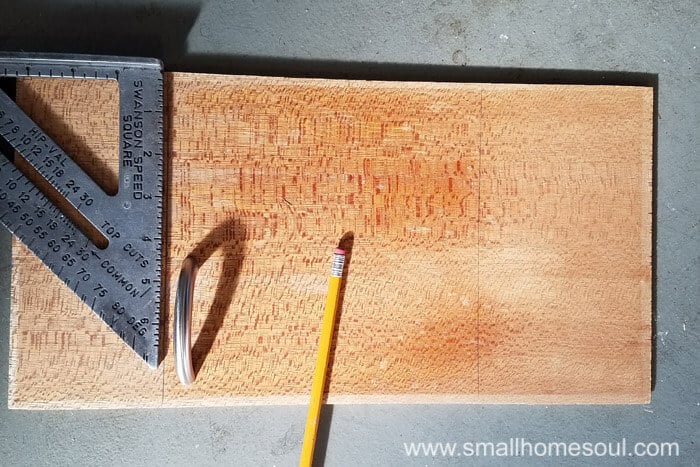
If you don’t have a speed square in your toolbox you really need one. You never realize how much you’ll use a tool until it’s one of the first things you reach for to get a perfectly straight line, every time.
WARNING – Use care, common sense, and safety glasses when working with power tools, and especially electric saws.
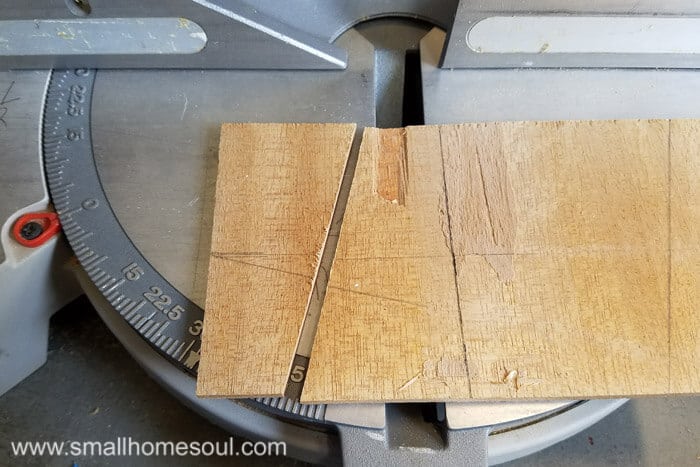
I didn’t want to get out the skill saw to make the cut so I used our Chop Saw. Mark your lines on your board and place the painter’s tape on the backside to keep the wood from splintering. Make your first cut and when the saw stops completely turn the board around. Carefully (without pulling the trigger) pull the blade down and adjust your board until the saw blade fits into the open cut as shown below.
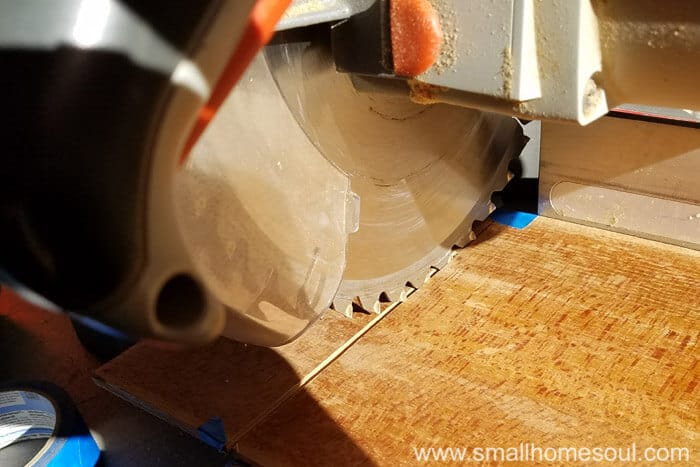
Once you have the board lined up, hold the board tight and lift the blade. Start the saw and slowly bring the blade toward the board and cut the remaining few inches.
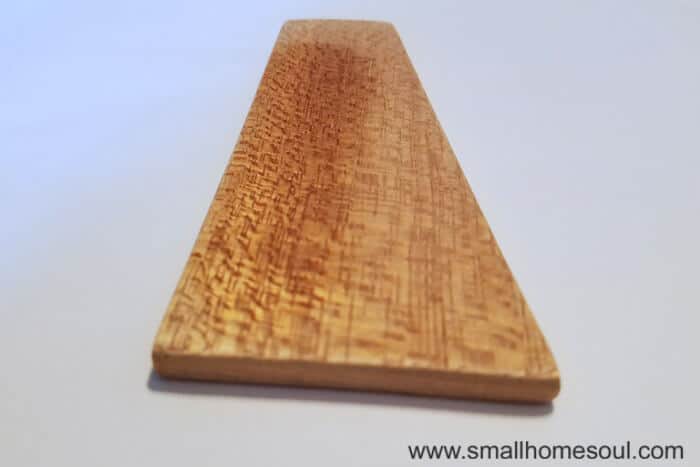
To make the legs I held up one of the scrap pieces I’d just cut and leaned the 8″x8″ board until I had a good angle. I had them lined up like when you build a house of cards. Then I drew a line on the scrap to transfer the ange. I’m sorry I couldn’t get a picture of this since I only had two hands and they were both busy 🙂
I turned the saw blade until it was even with my line (to about 15 degrees) and made one angle cut. Then I turned the saw blade back to square and cut the second leg from the scrap. UPDATE: See my post production notes below this picture.
UPDATE for Post Production Tips: After using the holder for a week I realized the original angle on the legs was too steep. The weight of the drawer pulls plus the phones made it a bit tippy. So I moved my legs up to get a steeper angle on my phone holder. When I make another phone charging stand I’ll cut the legs at 30 degrees for more backward lean.
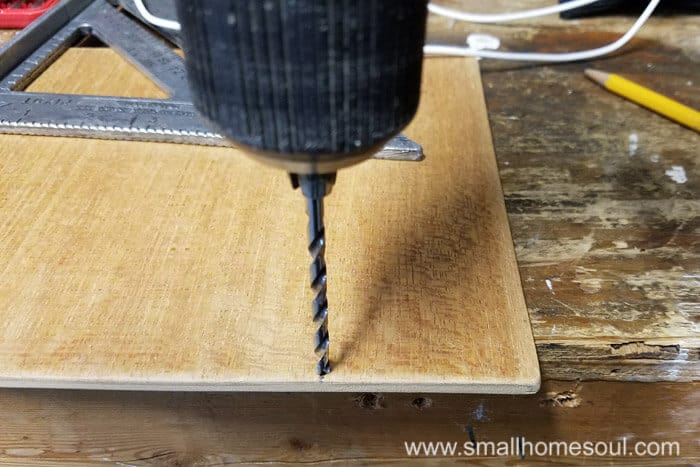
To accommodate the charging cord two small holes were drilled at the bottom edge centered below the drawer pulls. The idea is to drill close enough to the edge to make an opening for the cord to slip under the bottom edge.
The pieces all got a good sanding to remove any finish and smooth the edges. I had planned to use a whitewash but it didn’t look good over the wood scrap. Instead I chose to seal it with Hemp Oil. I learned that tip from my friend Lisa at The Purple Hydrangea. She has a painted furniture business and she knows here stuff when it comes to paint. When hemp oil dries and cures it’s great protection for wood.
You can instantly see the difference with just a little hemp oil, and it takes such a small amount to look beautiful.
Customize It
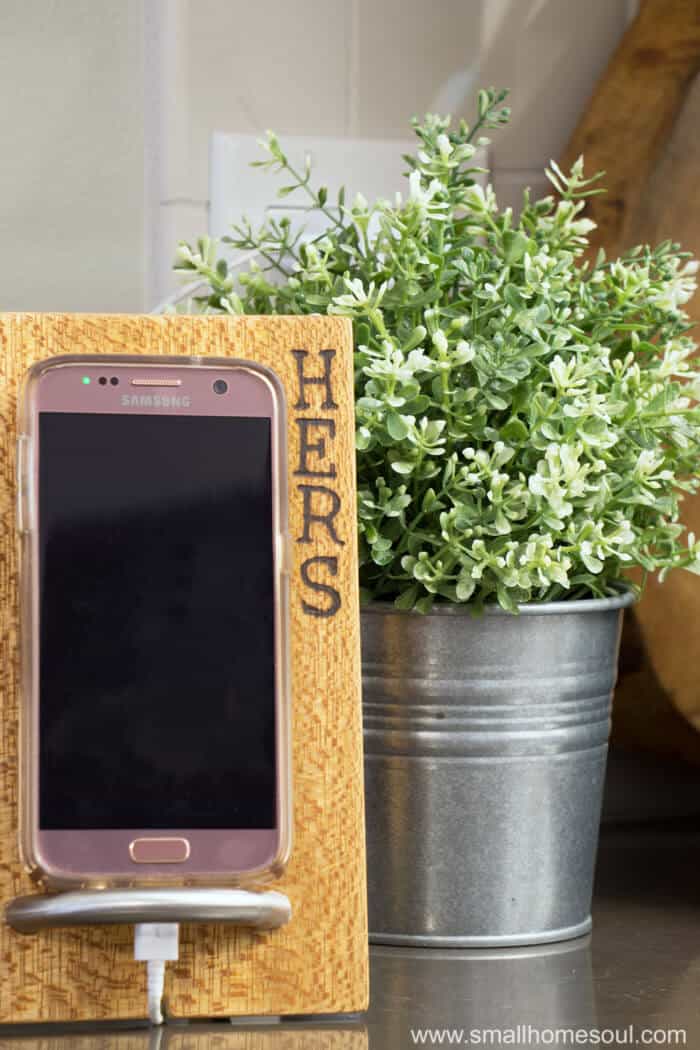
I am not a pro at wood burning but it’s fun and I want to find all the projects to use it on now 🙂 I bought some letter tools that made it pretty much fool proof. It’s best to practice a bit first so use a scrap piece of wood and get comfy with burning a few (a lot) things until you feel ready to make your first mark on your project.
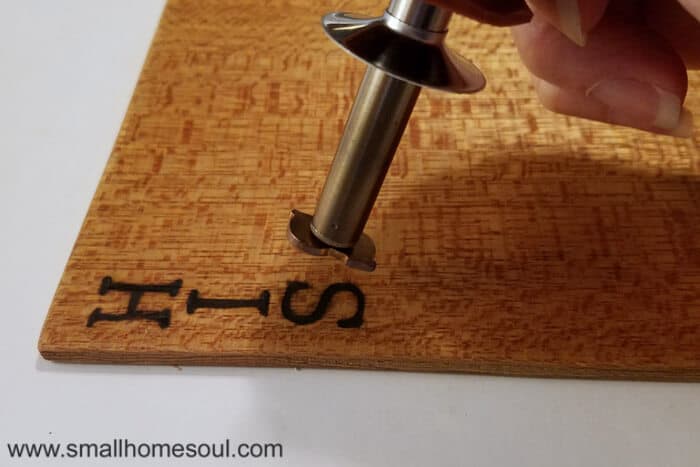
I recommend counting while you’re playing so you know how long to leave it on the wood. I rocked them a bit which worked well for me to get consistent coverage. Eyeballing the placement of my letters worked out well since they were short words but you could use a piece of painters tape or something similar as a guide if you want perfectly lined up letters.
Assemble your Charging Stand
When the oil was dry I attached the drawer pulls to support the phones while they charge. Using the speed square I used the industrial glue to attach the drawer pulls 1″ from the bottom and 3/4″ from either side. Let those dry for at least 24 hours before the last step. If you decide to use thicker wood you could use the screw that came with your pulls.
After the drawer pulls are cured turn the board over gently and using a glue gun attach the legs and the binder clip to the back side. Evenly space the legs near the outer edges for support.

That’s it, all done and your new Phone Charging Stand is ready for use, or to be wrapped up as a Handmade Gift for one lucky person. Who will you make one for?
Love it! Pin it!
Be sure to check out all the Gift Ideas and projects created by my very talented blogger friends. You’ll be inspired, just click on the links to check out their projects.
Thanks again to our Host Smart Fun DIY. Don’t forget to check out my Day 1 Handmade Gift Project.
Linda
Tuesday 30th of October 2018
this looks like a fun project to have. I’ve been looking for a phone stand for a good while until this post. Definitely will make one for myself!
elia johnes
Thursday 23rd of November 2017
Wonderful project! I love it - not only it is beautiful but it's also practical and would make a great gift too!
Toni Harvey
Friday 24th of November 2017
Thanks Elia, I made this one for my house but I'm seriously considering making some to give as gifts this year.
Nicole
Wednesday 15th of November 2017
I could use a little stand like this to hold my phone while it charges. Great DIY project idea. Thank you for linking up with us at the #HomeMattersParty this week.
Toni Harvey
Friday 24th of November 2017
I'm so glad you like it Nicole, you will love having one.
Kathleen
Wednesday 15th of November 2017
Wow, what a great and thoughtful gift! You are so talented -- I have not graduated to power tools yet:) And yes, mine sits willy nilly on the kitchen counter to charge, and my husbands as well, just on a different counter. We should get our charging acts together! Thanks for sharing at Vintage Charm -- hope to see you there at tomorrow's party as well:) xo Kathleen |Our Hopeful Home P.S. Pinned!
Toni Harvey
Friday 24th of November 2017
Hi Kathleen, I'm so glad you like it. You too can do power tools :) I love that the chop saw has a blade shield. The more you use them the more comfortable you become.
Melissa
Friday 10th of November 2017
This is perfect!! We need this so bad in my house. There are far too many cords and phones laying on my counters!! Great project and I definitely need to get those letter stamps for the wood burning tool! Love it!
Toni Harvey
Saturday 11th of November 2017
Thanks Melissa, it was exactly what we needed. And that tool is so fun to play with, you need one!