• Skip to primary navigation
  • Skip to main content
  • Skip to primary sidebar
  • Skip to footer

Girl, Just DIY!

Creative DIY for your life and home.

  • Blog
  • Crafts
    • Holiday
      • Christmas
      • Easter
      • Halloween
      • July 4th
      • Thanksgiving/Fall
    • Sewing
  • DIY
    • Bathroom
    • Bedroom
    • Cleaning & Organizing
    • Decor
    • Furniture Makeover
    • Kitchen
    • Lighting
    • Living Room
    • Yard & Garden
  • Woodworking
  • Recipes
  • Show Search
Hide Search
You are here: Home / Yard & Garden / Wicker Table Repair – My Patio Refresh Part 2

Wicker Table Repair – My Patio Refresh Part 2

By Toni | Girl, Just DIY!

Sharing is caring!

  • Pin1
  • Share0
  • Tweet
  • LinkedIn

Hi friends, welcome back to Part 2 of my Patio Refresh series.  Today I’m going to show you how I fixed this old wicker table and gave it a much needed face lift.  As I mentioned in Part 1 of my series all the brown tones have been killing me.  I need color, or at the very least some contrast.  This table was part of a set I got from my sister’s friend several years ago.  The couch and coffee table eventually made their way to my brother’s house a few years back but we kept this table because we had no end tables for drinks and such.


Check out Part 2 of my Patio Refresh Series which includes repairing a wicker table and giving a face lift to some inexpensive plastic side tables. www.smallhomesoul.com

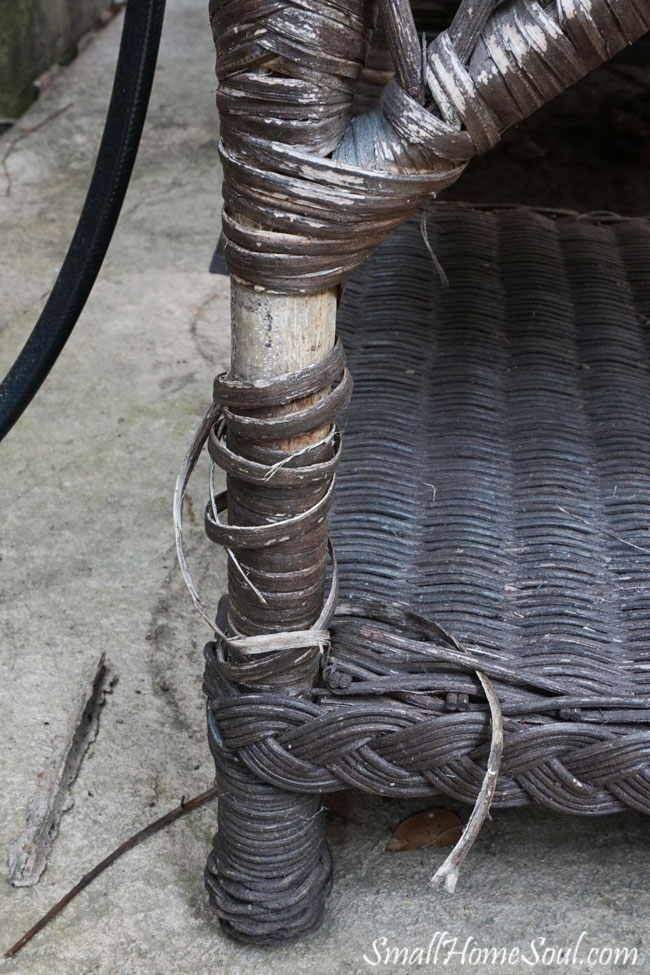
Yes, it’s super dusty, sorry I guess I could have given it a quick wipe down. It’s pretty dusty in our back yard because of the open space behind us so that’s a constant battle. This wicker table has been sitting out in the weather for a very long time, even before we got it.  It had been stored in a garage where some critters got to it (no, I don’t want to think about that, yuck) and we received it with some damage to the leg but otherwise good condition.

This post contains some affiliate links for your convenience.  You can read my full disclosure here.

Wicker Table Repair Supply List

    • Broken Table (obviously 🙂 )
    • Glue Gun and glue
    • Wicker Cane (if needed, size will vary by project)
    • 2 Cans White Spray Paint

After a good scrubbing it’s been perfectly fine, except for that leg. You’d think I would have repaired it before now.  Nooo….I just turned it around so you couldn’t see the bad side (out of sight out of mind, right?).

Check out Part 2 of my Patio Refresh Series which includes repairing a wicker table and giving a face lift to some inexpensive plastic side tables. www.smallhomesoul.com

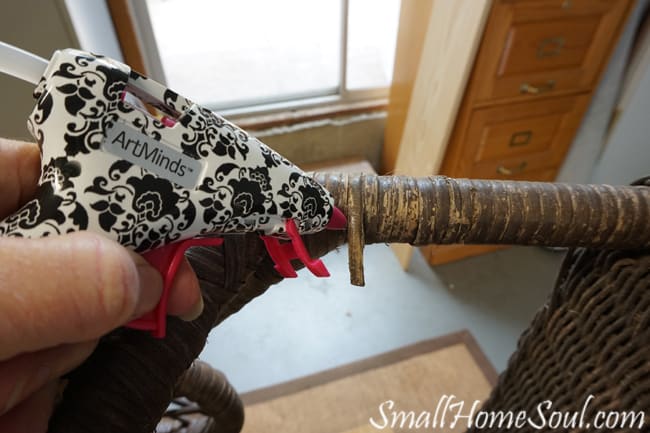
It’s sort of embarrassing because with my handy little glue gun I had it fixed good as new in a few minutes.  Thankfully my caning was just unwound and I had enough to re-wind the unraveled section so that it looked good as new.  I glued it in a few places as I wound it, simple as that.

Check out Part 2 of my Patio Refresh Series which includes repairing a wicker table and giving a face lift to some inexpensive plastic side tables. www.smallhomesoul.com


Next came the painting fun.  Well, it’s always breezy at my house so sometimes it’s frustrating too as I pause and wait for a lull in the wind.  One of these days I’m going to buy one of these painting tents so I don’t waste so much paint and risk the wind pushing it onto my car.

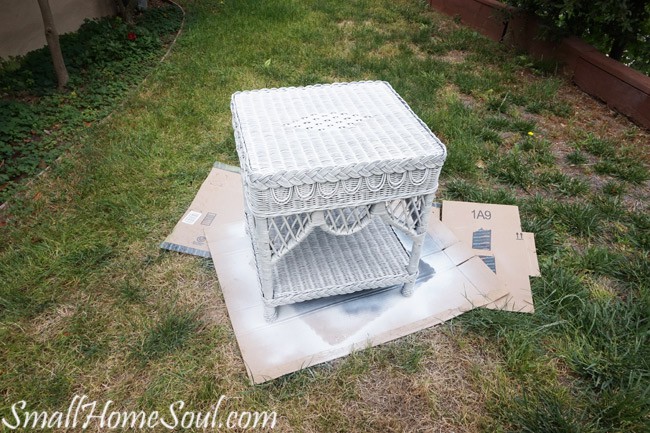
This tired old wicker table was so dry from all the years of weather that it took almost two full cans of white spray paint to get her covered.  I used gloss paint to make clean up easier and this picture was taken after the first coat.  Of course it’s hard to get it into all the nooks and crannies without globbing on too much.  It sits outside so if I didn’t get good coverage in a few hard to reach spots I won’t lose sleep over it.

Check out Part 2 of my Patio Refresh Series which includes repairing a wicker table and giving a face lift to some inexpensive plastic side tables. www.smallhomesoul.com

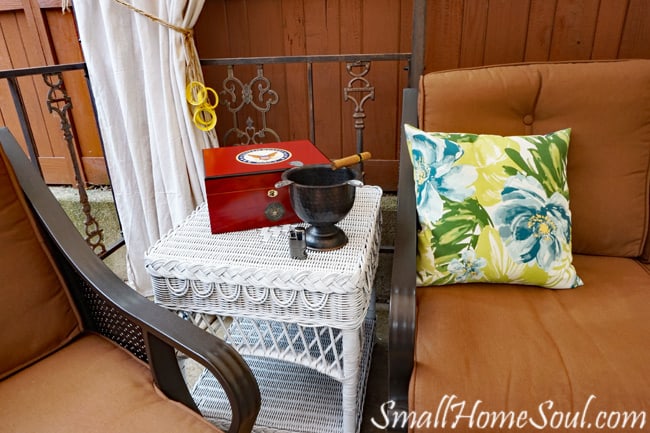
I gave a sneak peak of the wicker table in Part 1 of the series but here are a few more pics of her all fresh and ready for the next round of relaxation on the patio.  Maybe a good book and an ice cold drink…..

Check out Part 2 of my Patio Refresh Series which includes repairing a wicker table and giving a face lift to some inexpensive plastic side tables. www.smallhomesoul.com

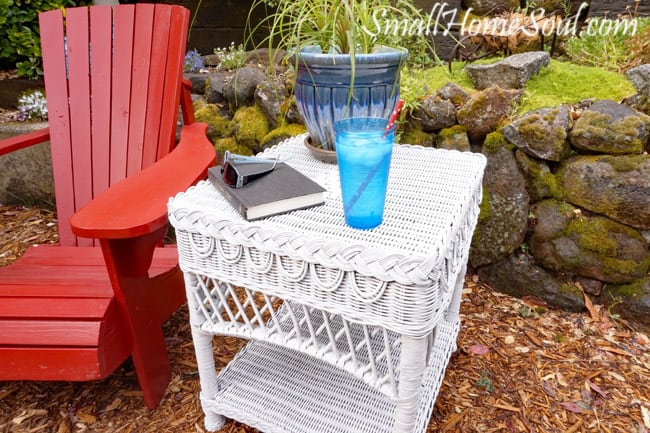
…..or a cigar and some good music.  My husband likes to enjoy an occasional cigar while he sits on the patio listing to music or comedy on his phone.  She looks so good now I can’t believe I waited so long to give her some attention!

Check out Part 2 of my Patio Refresh Series which includes repairing a wicker table and giving a face lift to some inexpensive plastic side tables. www.smallhomesoul.com

Next on the list for Part 2 of the Patio Refresh series are two plastic folding side tables that I bought at a drug store chain about 5 years ago for around $10 each.  They’ve been good tables but the tops were looking rough, even after a good scrub you could tell the sun had etched them.

Check out Part 2 of my Patio Refresh Series which includes repairing a wicker table and giving a face lift to some inexpensive plastic side tables. www.smallhomesoul.com

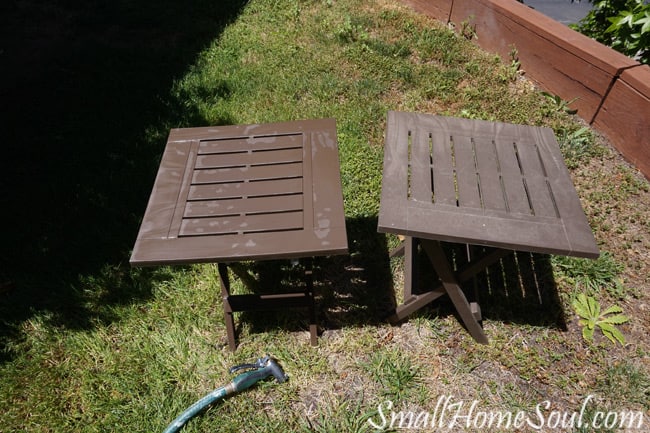
I thought I’d pop off the tops and start there before I tackled the legs.

Check out Part 2 of my Patio Refresh Series which includes repairing a wicker table and giving a face lift to some inexpensive plastic side tables. www.smallhomesoul.com

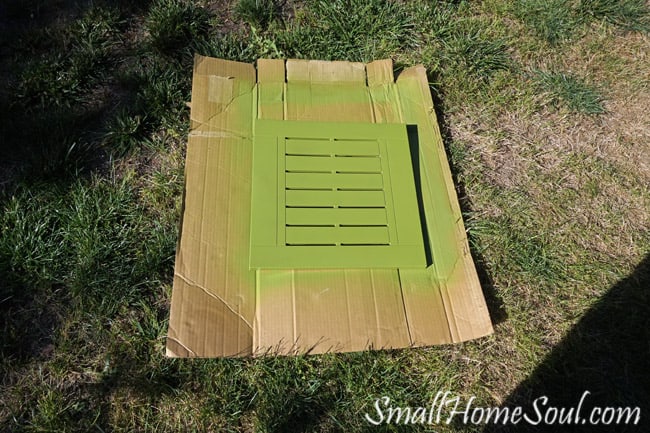
I decided to leave the legs brown for a little interest.  I’m glad because I think all green would have been too much.  I love color (just ask my husband) but that would have been too much even for me.  The matching table is sitting in the the other corner making comfortable seating for 6 with plenty of table top access for snacks and drinks.

Check out Part 2 of my Patio Refresh Series which includes repairing a wicker table and giving a face lift to some inexpensive plastic side tables. www.smallhomesoul.com

Thank you for checking out Part 2 of my Patio Refresh series.  I am so happy with how it’s all shaping up.

Don’t want to miss a post in the Patio Refresh series?  Sign up for my newsletter, there’s a sign-up box in the sidebar over there at the right 🙂


Sharing is caring!

  • Pin1
  • Share0
  • Tweet
  • LinkedIn

Related Posts:

  • DIY Industrial End Table Makeover - How to Restyle a Mission TableDIY Industrial End…
  • Build a DIY Patio Gazebo from a Kit - and save big moneyBuild a DIY Patio…
  • DIY Modern End TableDIY Modern End Table
  • Fun Easter Table Decorations - by a Complete NoviceFun Easter Table…

Filed Under: Furniture Makeover, Yard & Garden Tagged With: Decor, Furniture Repair, Painting

Previous Post: « Painted Seagrass Rug – My Patio Refresh Part 1
Next Post: Drop Cloth Curtains – My Patio Refresh Part 3 »

Reader Interactions


NOTICE! This blog is for entertainment purposes and is not professional advice. Reader assumes all responsibility for personal safety, injury or damages when attempting to re-create a project(s) by Girl, Just DIY! or other Guest Authors. Care should be given to follow all tool/product safety warnings.
Read my full Terms of Use and Disclosures Here.

—————

No One Likes SPAM

So I made the hard decision to turn off comments on my posts after a few weeks. If you have a question that isn’t answered in the post above please reach out via Email, Instagram or Facebook page and send me a DM. Thanks for visiting!

Comments

  1. Susie from The Chelsea Project says

    August 18, 2016 at 8:46 am

    Hi Toni,
    Love this little table so much. Great job on the refresh. It totally looks brand new. Thanks so much for linking to Friday’s Furniture Fix. We are so thrilled to have you share with us. I will be sharing out on social media in the next few days. XOXO

  2. Maria @ Pastels & Macarons says

    June 13, 2016 at 6:44 am

    Well done Toni, great job 🙂

    • Toni Harvey says

      June 13, 2016 at 7:54 pm

      Thanks Maria, I wish I’d updated this table a few years ago but I’m glad it’s looking so good now!

  3. Lisa Taylor says

    June 11, 2016 at 11:14 am

    You would never guess the wicker table was previously brown. It’s gorgeous!!!!!!!

    I love the green also.

    • Toni Harvey says

      June 13, 2016 at 7:57 pm

      It looks like a totally different table doesn’t it? Those little side tables have given me their money’s worth for sure. I’m glad they fit right in.

  4. Susie from The Chelsea Project says

    June 9, 2016 at 7:51 am

    Bueatiful job on both tables. Love the colors and the lift they give to the design. Kudos on a great project… Looking for to seing more… Susie

    • Toni Harvey says

      June 9, 2016 at 3:12 pm

      You are a dear, thanks so much for checking out my project!

    • Susie from The Chelsea Project says

      August 18, 2016 at 8:44 am

      OK… just let me say…. boo. Bad Sue. Typos are bad. Sorry, my dear!!!

      • Toni Harvey says

        August 18, 2016 at 2:45 pm

        You are so not a Bad Sue 🙂 I see no typos.

        • Toni Harvey says

          August 18, 2016 at 2:47 pm

          See, I was so busy worrying about your typo that I forgot to say thank you for sharing my little table. So thank you, thank you!

  5. Sarah says

    June 9, 2016 at 4:55 am

    This turned out SO well Toni!!! And your patio is gorgeous….wish I could pop right over and have some coffee with you!! ?? Nicely done,!!

    • Toni Harvey says

      June 9, 2016 at 3:13 pm

      Oh, coffee with you would be so wonderful. I wish there weren’t so many states between us 🙂

      • Toni Harvey says

        June 9, 2016 at 3:13 pm

        Oh, and thank you for the lovely compliment!

  6. [email protected] Bits says

    June 8, 2016 at 11:15 pm

    An awesome re purpose project Toni! So glad that you were able to give them all a new lease on life and use them once again! They look brand new!! I’m sure you will be spending lots of time out there in your new space! 🙂

    • Toni Harvey says

      June 9, 2016 at 3:15 pm

      Thanks Sam, I’ve purchased a few inexpensive things things along with paint so I’m going to do a tally of what it actually cost me when I’m all done.

  7. Lois says

    June 8, 2016 at 10:45 pm

    I like how the green table top brings out the green in your carpet.

    • Toni Harvey says

      June 9, 2016 at 3:15 pm

      Thanks friend, and thanks for stopping by. We’ll have to have a girl party this summer and hang out there together. xoxo

  8. Leanne says

    June 8, 2016 at 9:23 pm

    Toni I love that you are taking what you already have and giving it new life! Repurpose, upcycle, reuse! Love it!

    • Toni Harvey says

      June 9, 2016 at 3:18 pm

      Thanks Leanne, I would have loved to go out and buy a bunch of new stuff but it wasn’t really necessary. And I’d rather save that money for something else 🙂

Primary Sidebar

Welcome!

Author

Welcome, I'm Toni and I truly hope to inspire you to dive into this crazy fun world of DIY. Read More...

Let’s Connect

  • Email
  • Facebook
  • Instagram
  • Pinterest
  • Twitter
  • YouTube

More Categories

Footer

Copyright © 2019 · GIRL, JUST DIY! · Daily Dish Pro On Genesis Framework · WordPress

About Me – Disclosures and Privacy Policy

  • 1
  • 0