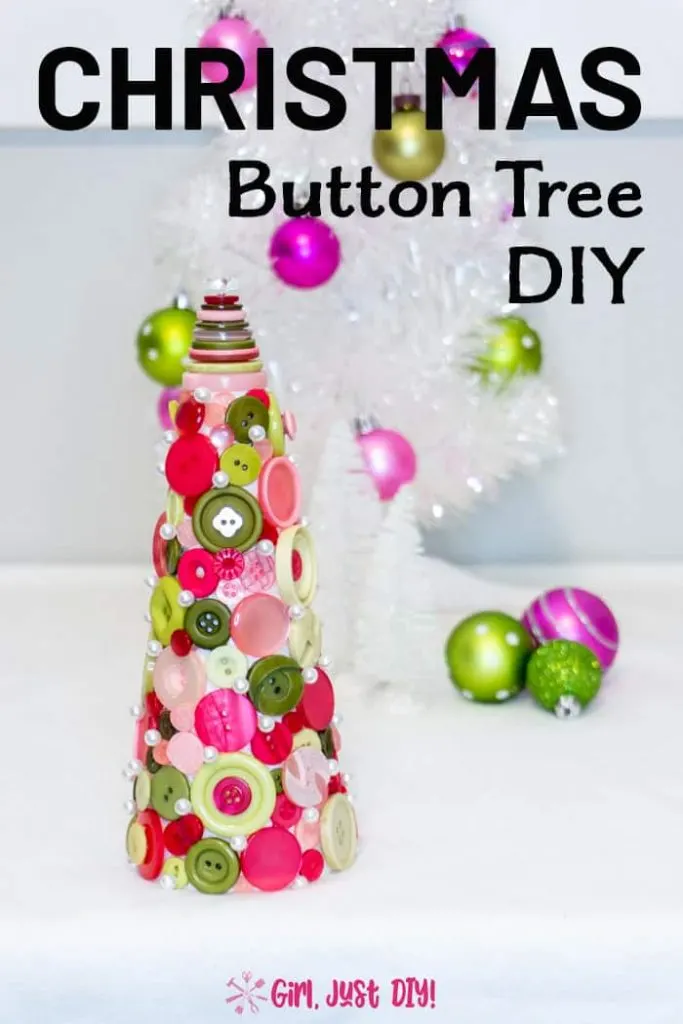
Hi Friends, this year has been such a challenge. I want it to be Christmas so badly and I know I’m not alone! To help you get in the Christmas spirit I’m going to show you how to make this easy Button Christmas Tree.

You can put this on a shelf or create a few different sizes of button Christmas Trees and put them on a table top or grouped as part of a centerpiece.
Button Christmas decorations are fun and easy projects. You can even make and gather them together with these cute little Button Christmas Ornaments I made as well. Just cut the string a little shorter if you don’t use them on your Tree.
This page contains links to products, if you purchase something after clicking on a link I may earn a small commission (at no cost to you). If you do make a purchase, thank you!
You can read about affiliate links here.
Button Christmas Tree Supplies
How to Make a Button Christmas Tree
This will be a cute and easy project. The best part is you can make them as big or as small as you want. The size will depend on the form you use. You’ll need a form of some sort if you want them to stand.
I used Styrofoam for mine but you can make or purchase a paper mache cone too.
How many Buttons do I need to make a button Christmas Tree?
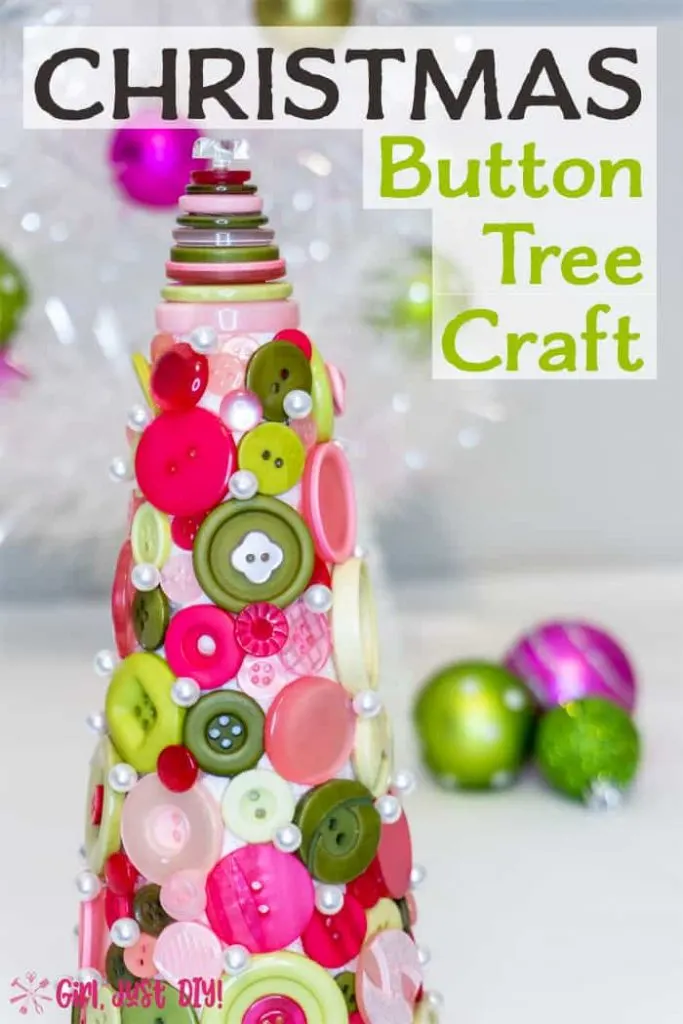
That depends on how tall and how many Button Christmas Trees you want to make. For this project I used one 8″ tall Styrofoam cone and that took around 120 buttons in various sizes. I used light and dark Pink, light and dark Green, and White buttons for my tree but you could use any favorite Christmas color combo.
The largest buttons were 1.25″ and the smallest about 3/8″ with some of them layered for interest. The smaller ones work great for filling in spaces or layer on bigger buttons.
Button Christmas Tree Decorations
There are so many ways to use buttons. I love to layer them and changing up the look. The fun part is there are so many color combinations you can choose that aren’t traditional. That’s why I chose pink and green for mine.
For the best result use buttons in varying shades of each color. OK, Let’s get started on this easy and fun DIY craft.
I’ve mostly been a traditional Christmas colors decorator. Then a few years ago I made this adorable Paint Stick Christmas Tree and it really helped move me out of my red and silver decor scheme.
Step 1: Separate and inventory your buttons.
I took a few minutes to separate the buttons by color and size. Doing this I was able to see what some of the styles were and if I wanted to use them in a specific way

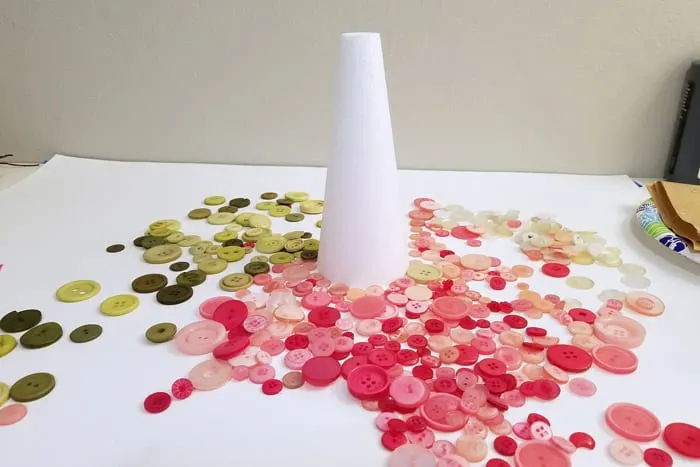
Step 2: Prep the Styrofoam cone.
If you use darker buttons you may want to give your Styrofoam a coat of dark paint, or something that compliments your buttons. I wasn’t worried about any of the white showing through since my colors were brighter.
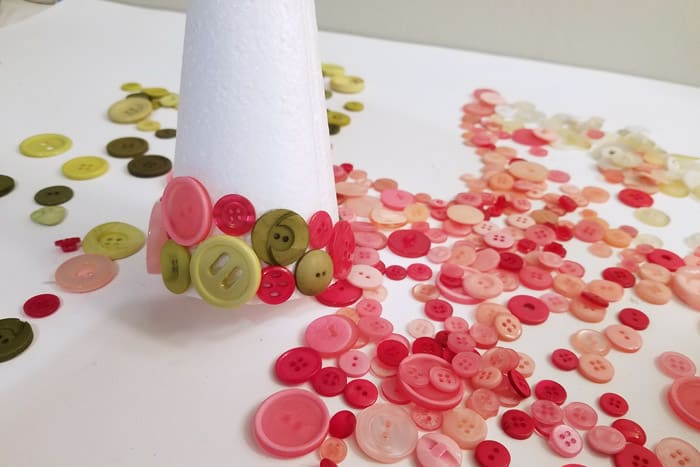
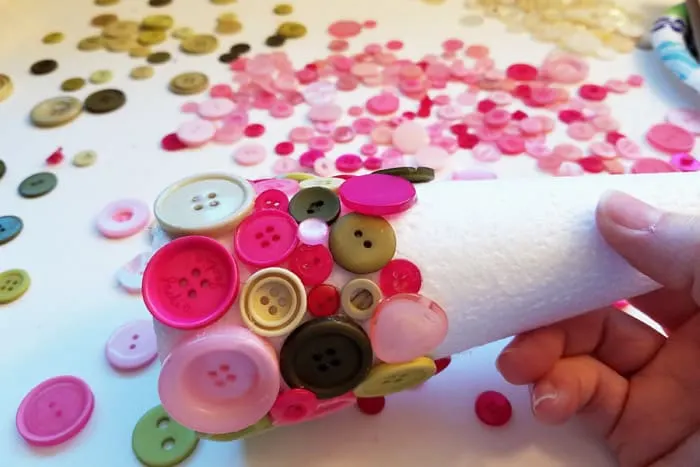
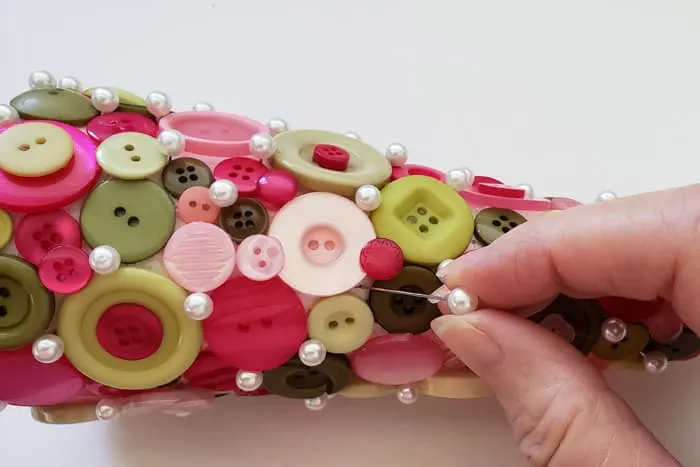
Step 3: Start gluing on the buttons
- With the cone on a flat surface grab your glue gun and start gluing buttons on at the bottom.
- After the bottom row is on you can turn it on its side if that is easier for you.
- Work in various sizes of buttons and use smaller buttons to fill in some of the spaces left between larger buttons.
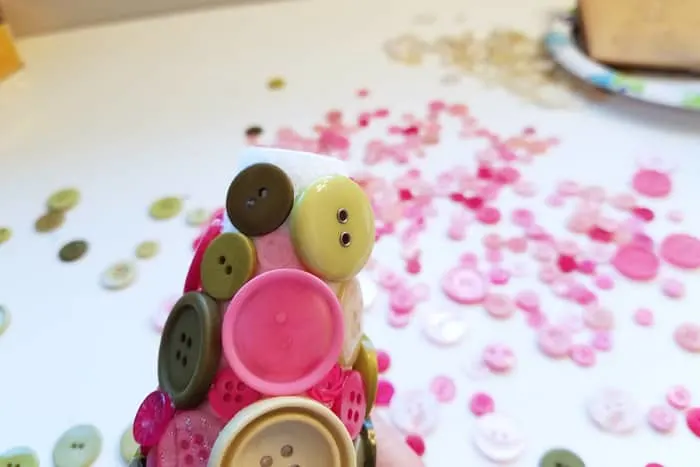
- Pay attention as you get close to the top and try not to go above the rim with the buttons.

Fill in big gaps at the top with those tiny and cute buttons. If you look at finished tree you’ll see I tucked some tiny buttons behind the other buttons.

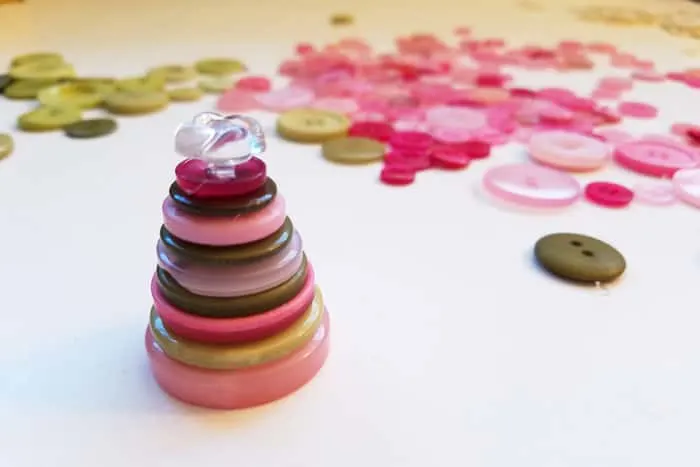
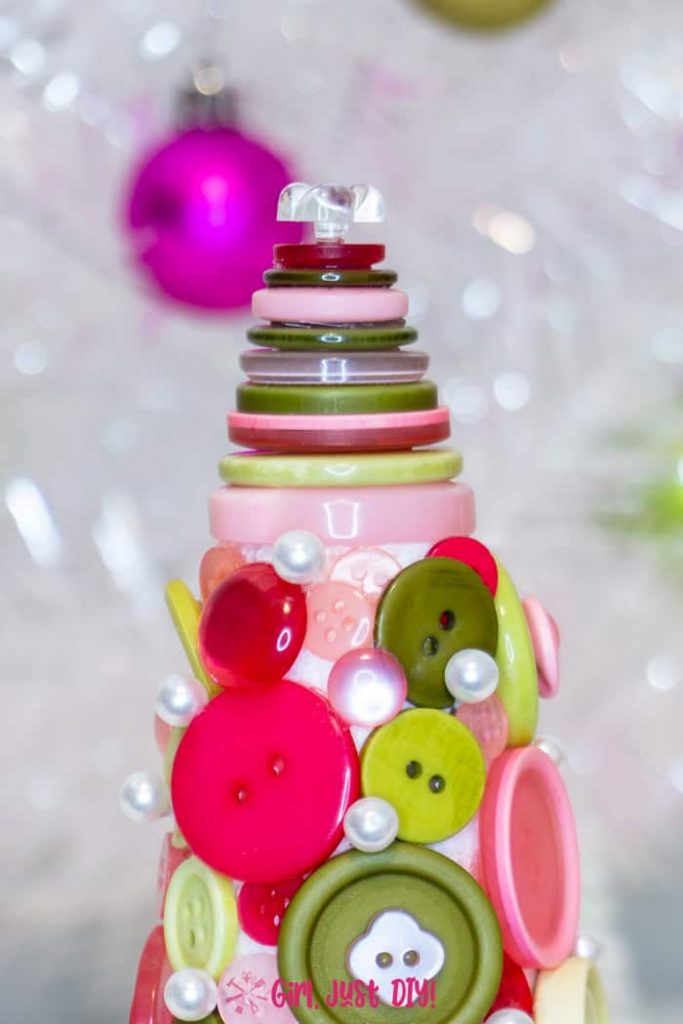
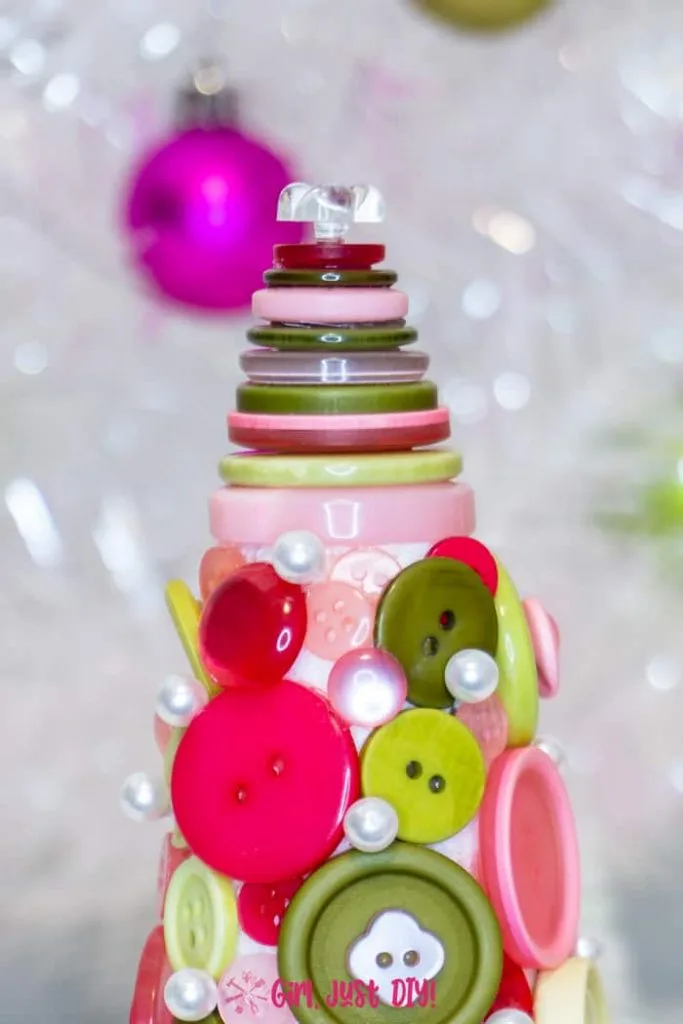
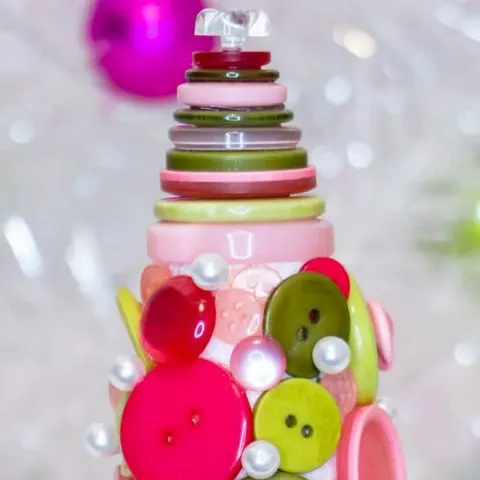
Step 4: How to Create a Button Christmas Tree Topper
Because my cone was flat on the top I needed to create a topper for it. If you’re using a paper mache cone then your Christmas tree cone will be pointed.
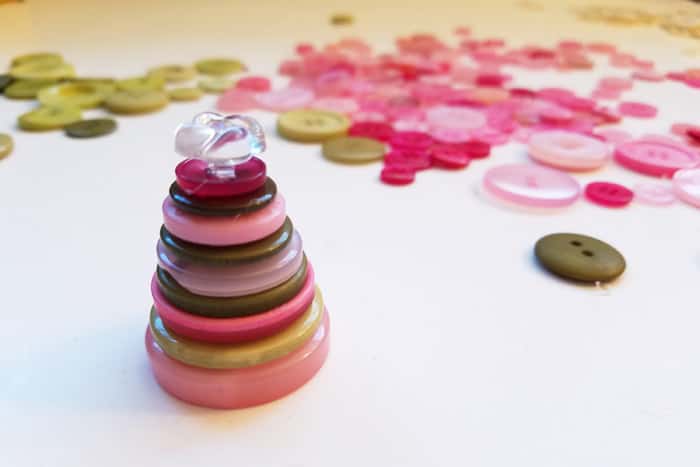
- Grab a button about the size of the top area of the button tree. This will be the bottom.
- You want it to be as big as the top of the cone. Slightly bigger is ok, just don’t let it protrude over the buttons on the cone.
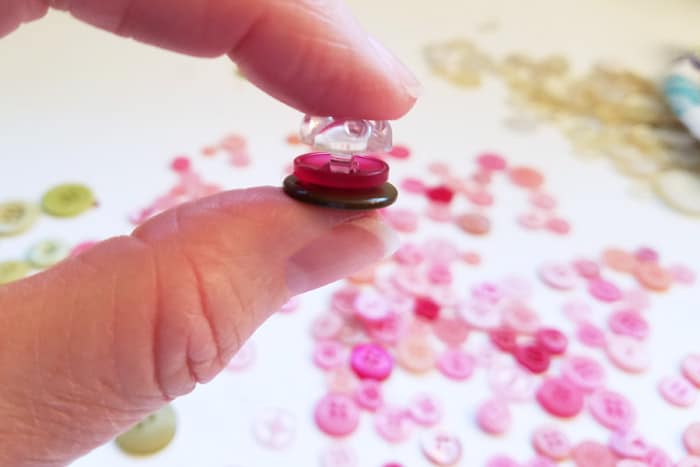
- Find your smallest button, or a fancy one where the eyes are hidden (see my clear one below). This will be the top.
- Start stacking buttons in alternating colors in graduating sizes until you get a nice cone shape between the top and bottom button.
- After you have the stack you want start at the bottom gluing them together until you glue on the very top button for the tree.
- Now glue that cute little stack of buttons to the top of your button Christmas Tree to finish it off.

You may have to come up with a special way to top your tree. A metal star for jewelry glued on the very top would look amazing.


Step 5: Adding “Ornaments” to your Button Christmas Tree
The last part is fun, it adds a little extra punch to your button tree. Push in some pearl floral pins randomly into some of the spaces between the buttons.
They look like ornaments, or even sort of like little a string of lights shining on the tree.

And Done!! Now you can make a few more for a beautiful table scape.
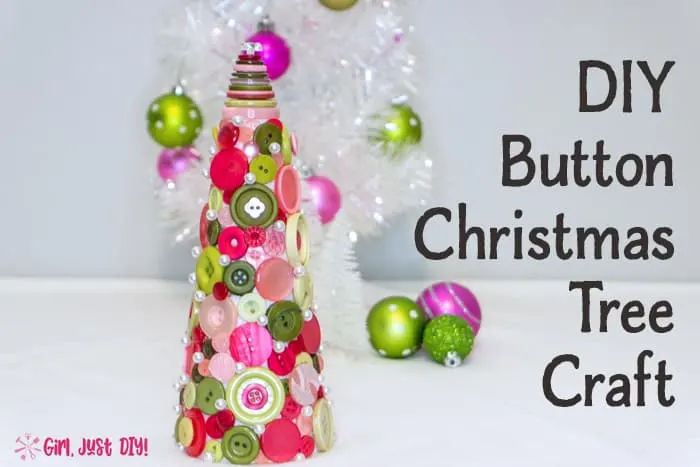
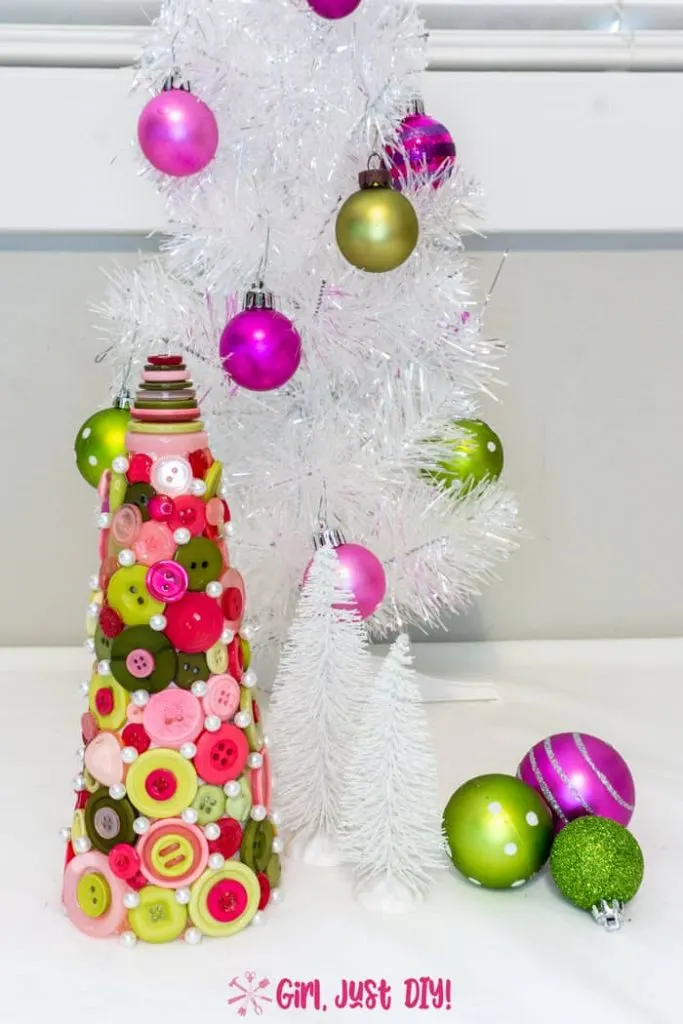
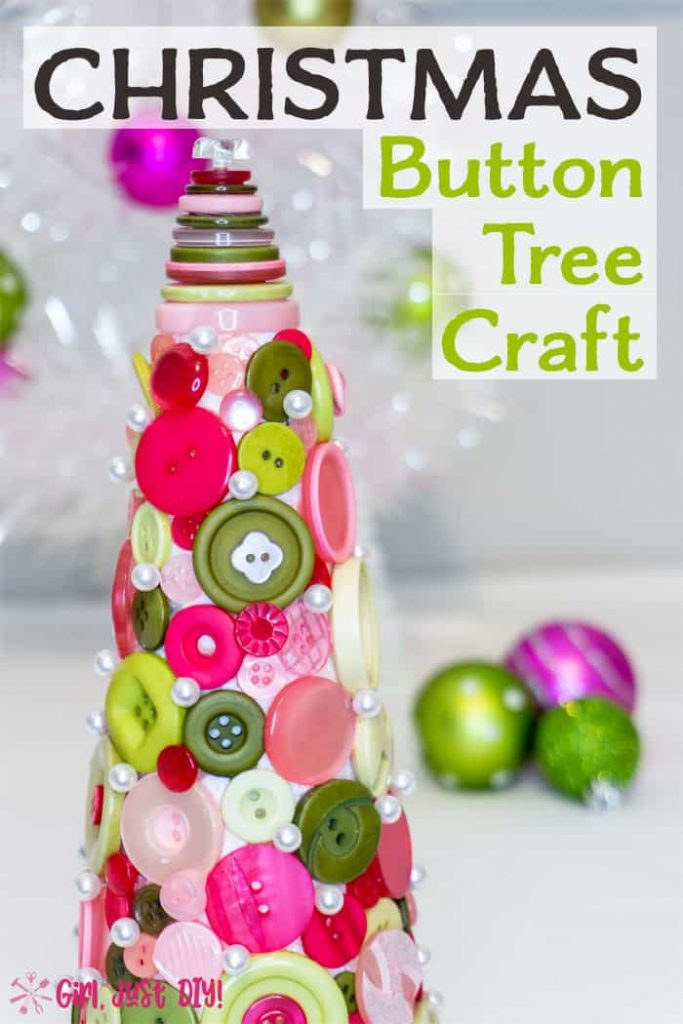
This isn’t the best picture but here is my cute DIY Button Christmas Tree along with the Button Christmas Ornaments I made at the same time.


This picture is much better of the cute little tree. It look great with that White Tinsel Christmas Tree and coordinating ornaments. It will look great with your Christmas Decor too.
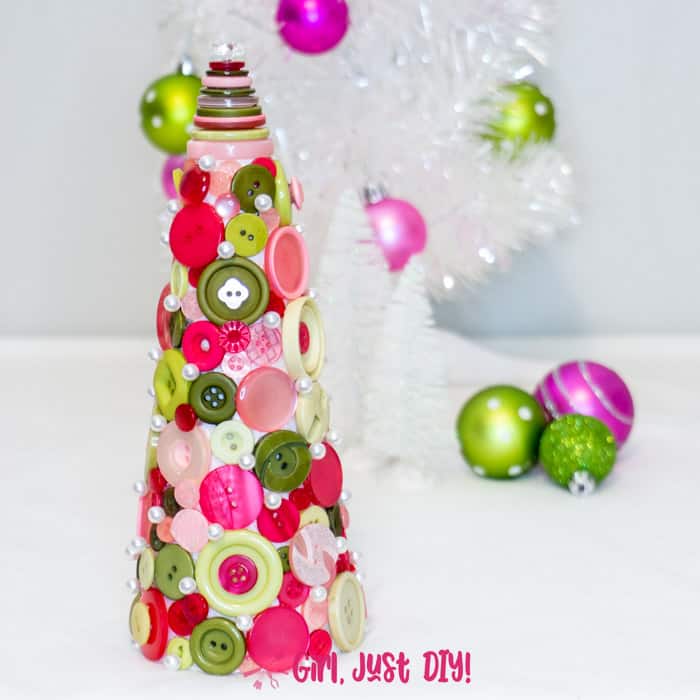

I love that cute little button at the top. I’m pretty sure that one came out of my Grandma’s old button tin.


LOVE IT!! PIN IT!!

Button Christmas Tree
Materials
Instructions
- Separate and inventory your buttons by color so you know what you're working with.
- Prep the Styrofoam cone if necessary. If using darker buttons paint the cone dark or a nice coordinating paint color to your buttons.
- Start gluing on the buttons working from the bottom up. Start the first course with the cone flat on the table. After the first course you can turn it on the side if you wish.
- Keeping hot gluing on the buttons mixing large and small together. Fill in bigger gaps with tiny buttons.
- Create a Button Christmas Tree Topper by fashioning a small cone out of different size buttons. Alternate the colors for added interest. Glue them together and then finally to the top of the button tree.
- To give some ornamentation to your button Christmas tree poke pearlized floral pins in the spaces created between the buttons.
Create more button trees in varying sizes and gather them together for a beautiful centerpiece.
Rebecca Payne
Friday 22nd of October 2021
I love this idea. I just found your blog.
Toni
Monday 1st of November 2021
Thanks and welcome, glad to have you here!
Susanne
Monday 26th of October 2020
This is adorable!! I love the colors and I have a bunch of pink and green buttons in my stash. Now to get a form!
Toni
Monday 26th of October 2020
Thank you Susanne, yes go get those buttons and a cone and make one of these fun trees!!
Linda
Saturday 24th of October 2020
Toni, The button Christmas tree is precious!
Toni
Tuesday 27th of October 2020
Thank you Linda, I'm so glad you love it! I was thrilled with how it came together.