What’s your favorite backyard game? My new favorite is super popular right now, and for good reason. It’s fun, it’s competitive, and you get a little exercise. Come see the DIY Cornhole Boards we built and how to build your own just in time for summer.

Do you remember when I helped my dear friend build a DIY Giant Jenga Game for her husband’s birthday party? Well, we also built Cornhole Boards that extremely hot weekend.
I know, I’m sorry, it’s taken me way too long to get this project posted. You might already know I work kind of slow, but it’s finally here just in time for summer fun. Yay!!
This page contains links to products, if you purchase something after clicking on a link I may earn a small commission (at no cost to you). If you do make a purchase, thank you!
You can read about affiliate links here.
Supplies for Cornhole Boards
- 2×4 Lumber for the frame and legs cut Per the Plans
- 3/4″ Plywood cut Per the Plans
- Miter Saw or Circular Saw
- Table Saw or Circular Saw
- Jigsaw or 6″ Hole Saw
- Cordless Drill
- Drill Bits
- Tape Measure
- Clamps (optional)
- Pocket Hole Jig
- Right-angle clamp
- Pocket Hole Screws
- Brad Nailer or Finish Nails & Hammer
- Woodglue
- Paint
- Carriage Bolts, Washers, and Wing nuts
- Cornhole Skin (optional)
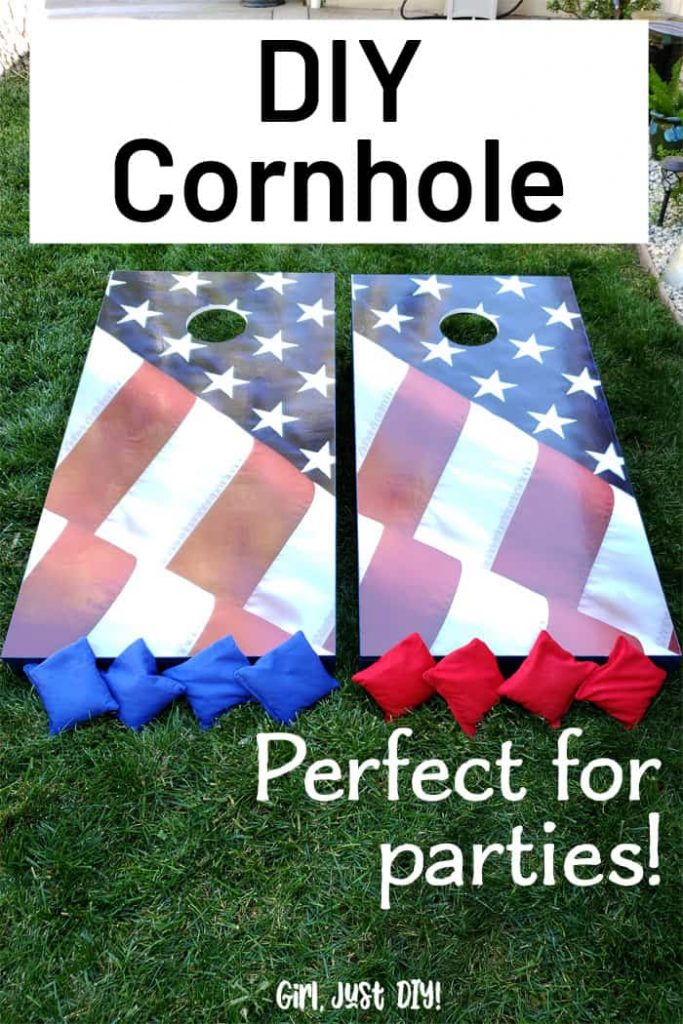
- Cornhole Bags

How to Build Cornhole Boards
This is a pretty simple build and you should be able to make these in an afternoon. I’ve got a few pointers to make building your cornhole game boards a bit easier so keep reading.
I helped my friend make a set for her husband and then later my husband and I made a set for ourselves. So you’ll see my friend in a few of these picture too.
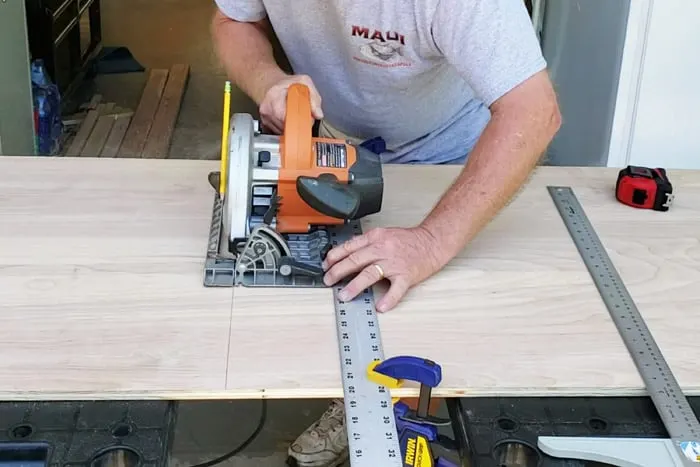
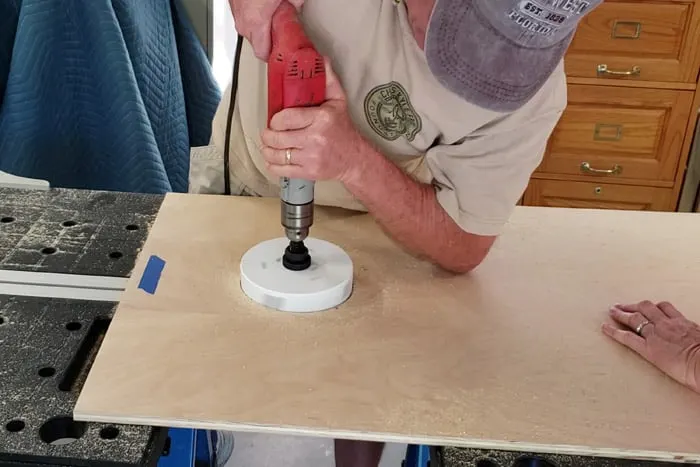
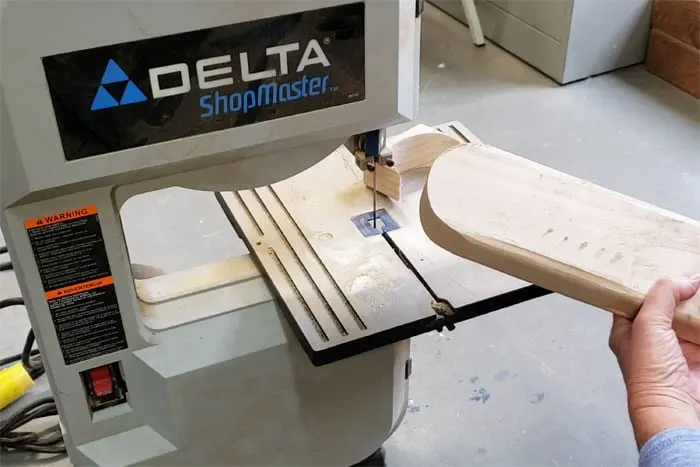
Step 1: Cut out all boards
Cut your boards per the plans. You can use either 5/8″ or 3/4″ plywood. We used 5/8″ but we learned that 3/4″ would result in a quiet play when the the cornhole bags land on the board
You can use either a table saw or a circular saw with a straight edge to cut your. We ripped them to 24″ wide on the table saw and then cut to length with the circular saw.

To make the hole you can either use a hole saw attached to your drill, or use a jigsaw. Honestly if I didn’t have my husband helping with this part I would have reverted to using the jigsaw.
He’s very strong but it was still tough. When that hole saw catches on the wood the drill has the potential to hurt your wrists.
If you buy a hole saw just remember you get what you pay for. There are cheaper options than this hole saw we purchased. But I saw lots of reviews of the cheaper ones breaking.

Using your miter saw cut the 2×4’s to the proper length per the plans.

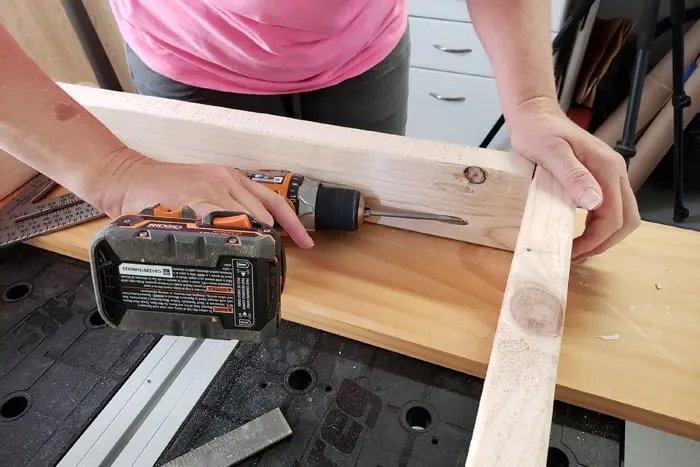
Step 2: Predrill all pocket holes
- Set the pocket hole jig the correct depth and make all pocket holes in both ends of the short boards.
- Make sure you’re setting the jig for the thickness of the both the 2x4s and plywood.
- Alternatively you can assemble with 2-1/2″ wood screws if you want.
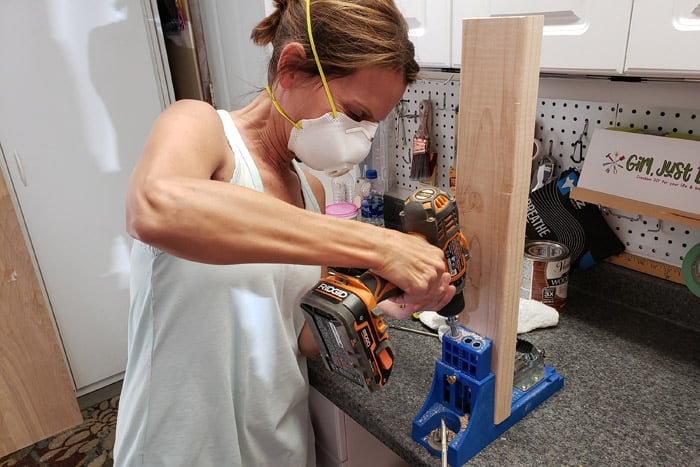

Pre-sand the 2x4s if you choose.

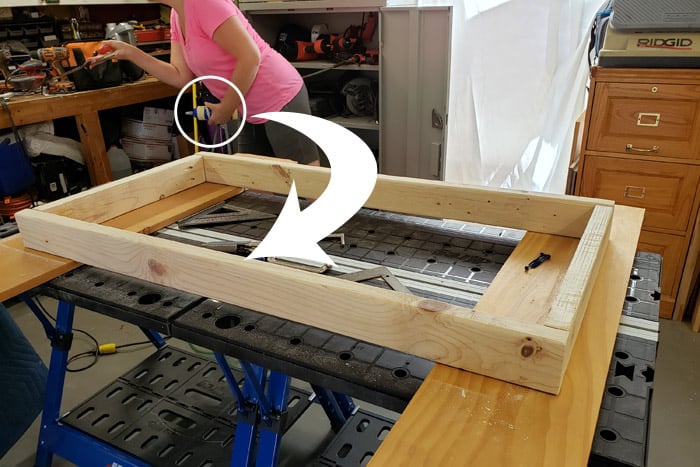
Step 3: Assembling the cornhole boards
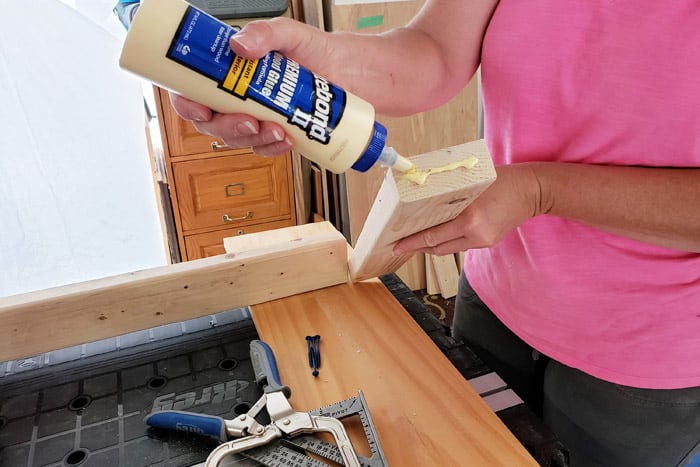
- Apply wood glue to one end of a short end board.
- Face pocket holes inside.
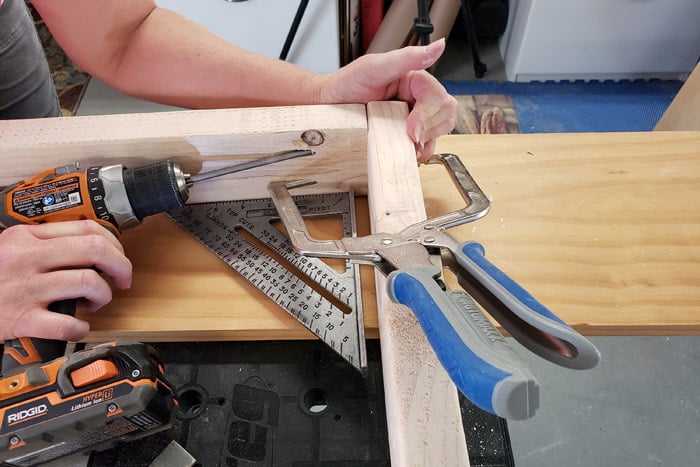
- Line up a long side board making sure the ends are flush.
- Insert the right-angle clamp in the bottom pocket hole and clamp tight.
- Insert a pocket hole screw with the cordless drill into the top hole.
- Remove the right-angle clamp and insert the second screw.


Repeat all steps on the other side side and on the opposite end.
Check for square by measuring across corner to corner. If one side is slightly longer than the other whack the longer corner gently with a mallet until both measurements are equal.
Step 4: Attaching the top
To attach the top of your DIY Cornhole Board you can do this two ways. The fastest is to use a brad nailer. But the old school method of using finish nails and a hammer works just as well if you don’t own a brad nailer.
Some people use screws and those work too but that’s not necessary.
I missed taking a few pictures so I’ll mostly describe the steps.
- Run a bead of wood glue all around the 2×4 frame you just built and spread it out to cover the edges.
- Lay the top of the cornhole board on the 2×4 frame and adjust until flush and even all around.
- It’s OK if your frame is a tiny bit larger or smaller than the top.

- Once you have the top in position tack the corners with the brad nailer.
- Go back and add more brads every 6″ or so.
- If you’re using a hammer and nails, or even screws you might want to clamp the top to the frame so it doesn’t move.

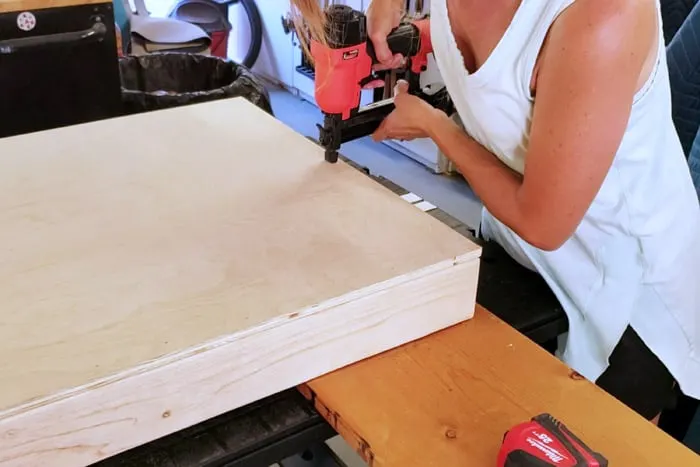
- Fill in the tiny brad holes with Spackle or wood putty.
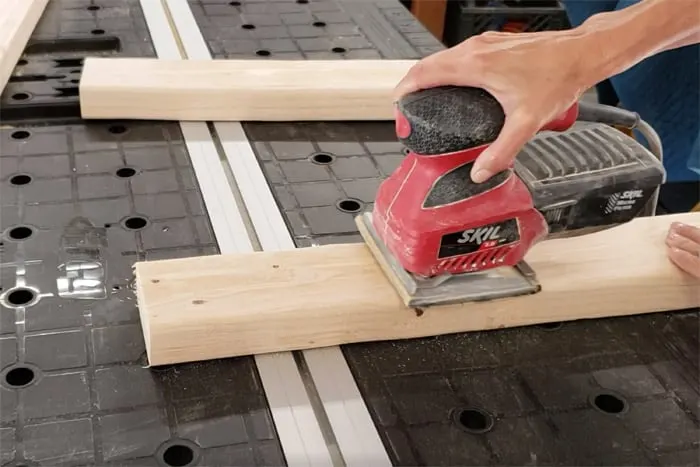
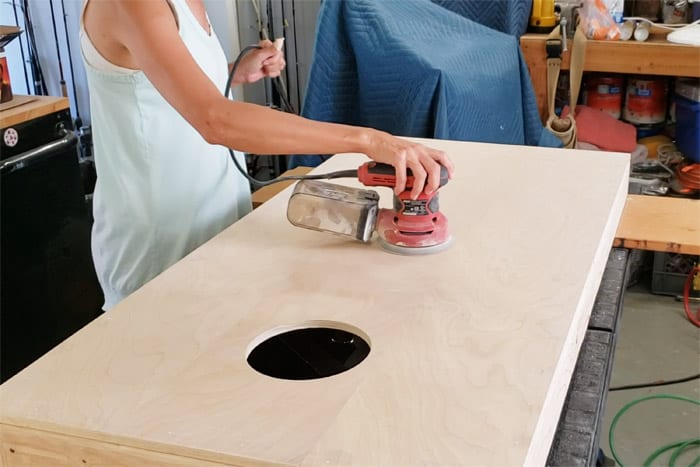
- Let it dry and give the top a good sanding until it’s smooth.

Step 5: Painting your cornhole board
Our cornhole game won’t be left out in the rain but we still chose to use exterior paint on ours. You can use whatever kind of paint you feel will work best.
Whatever you use if you’re painting the top of your board it should be glossy paint so the bags slide easily.
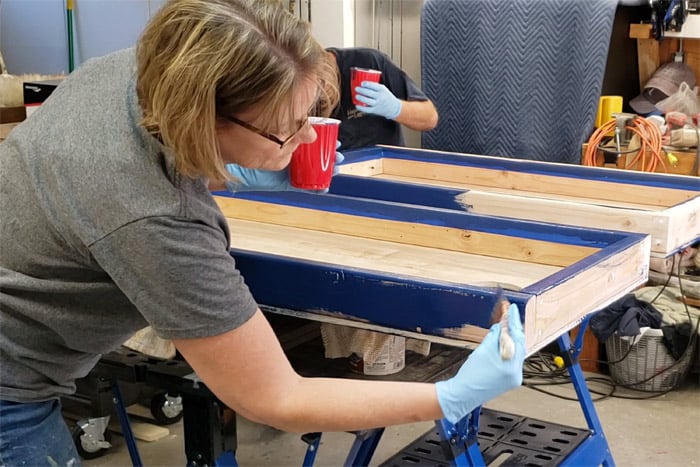

When my friend and I built the one for her husband we turned glossy black rust-oleum paint into DIY chalk paint like I used for my Industrial End Table Makeover. It worked perfectly because we needed it to dry fast for her trip back home. And she purchased a decal for hers (more on that below)
As you can see we didn’t paint the entire underside, again they won’t be left in the weather.
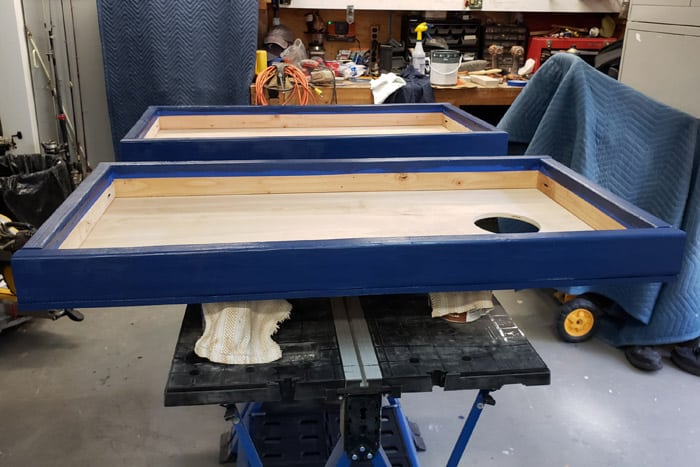
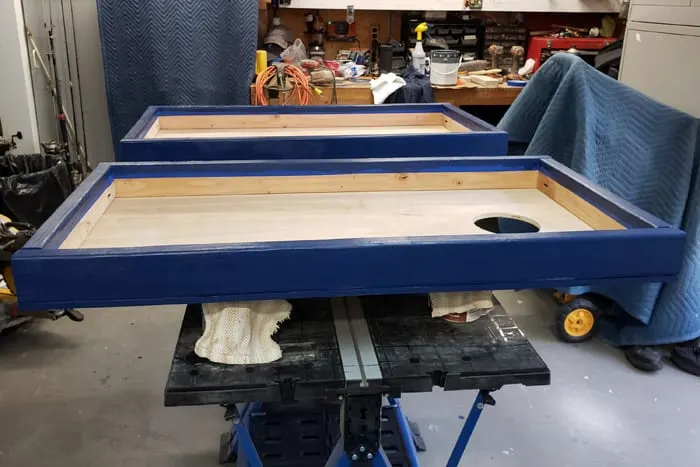
We also didn’t paint the top because we used a pre-made skin/decal. Well, we painted just a tiny bit onto the top, I’ll explain why when I talk about attaching the skin.
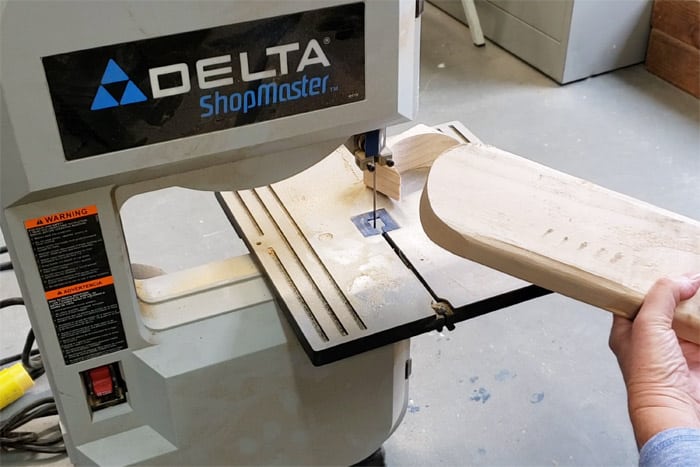
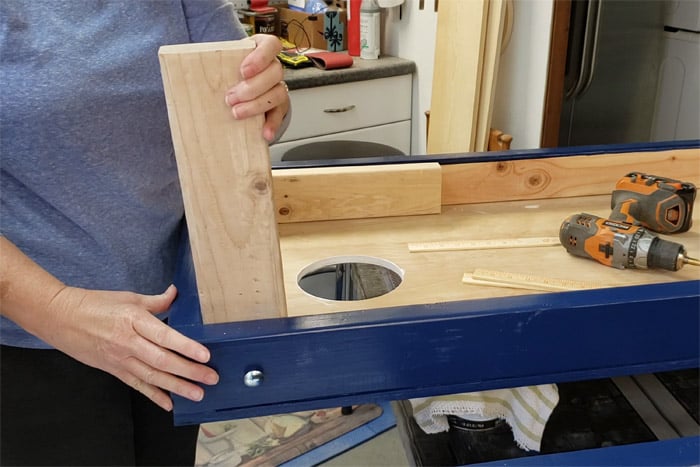
Step 6: Best way to make and attach cornhole board legs
You don’t want to just wing this part because it can end up frustrating you. We pulled our hair out a little the first go around and then figured it out the fastest way on the second set.
You can probably make the legs out of 1×4 boards if you want but they could warp over time. That’ll make it easier to cut the curve of the legs with just a jigsaw. Otherwise I suggest using a band saw on the 2x4s if you have one.
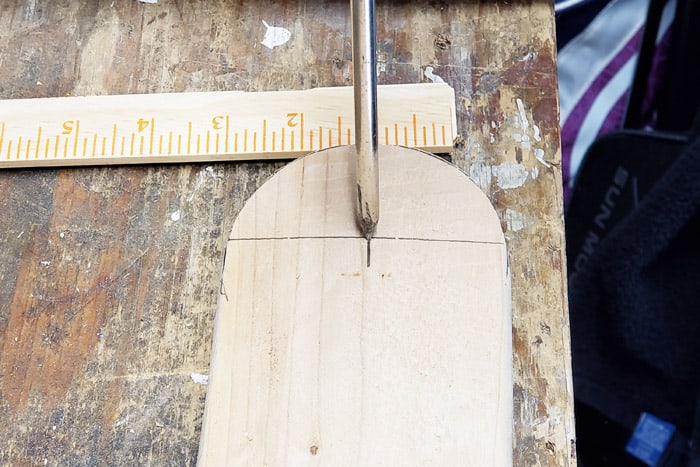
- After you cut the rounded top of the leg make the mark for the holes per the plans.
- Drill a hole as straight as possible that is slightly larger than the carriage bolt.

- Clamp the leg inside the cornhole board at the top near the hole.
- Use two paint sticks as a spacer between the leg and frame as shown.
- Place the drill bit through the whole in the leg and drill through the cornhole frame.

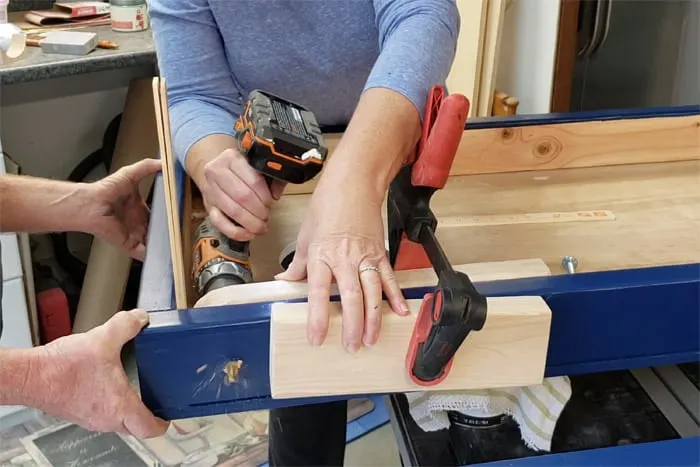
- Remove the very fancy paint stick spacers and insert the carriage bolt and test the swivel of the leg.
- If the leg sticks or catches a bit you can either trim a bit more or sand down any high spot.

You can paint your legs before or after, I chose to paint them after we knew they would fit properly.
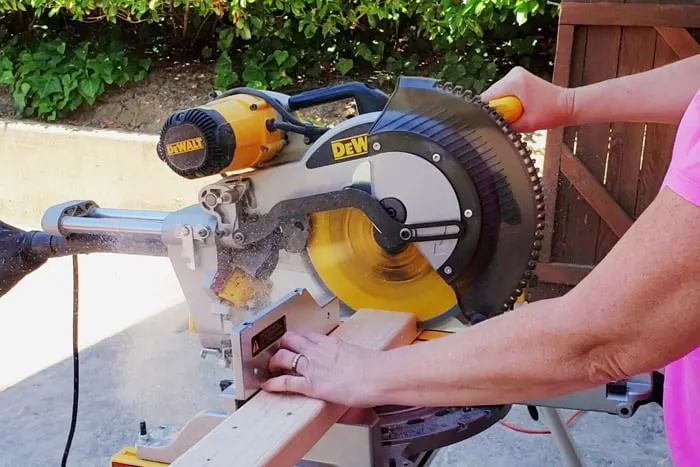
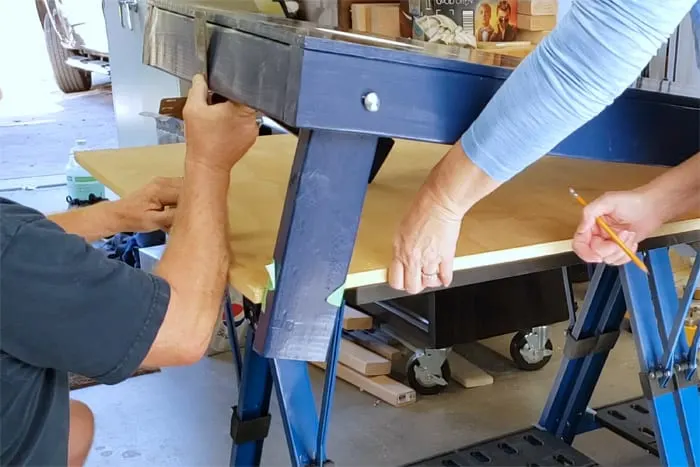
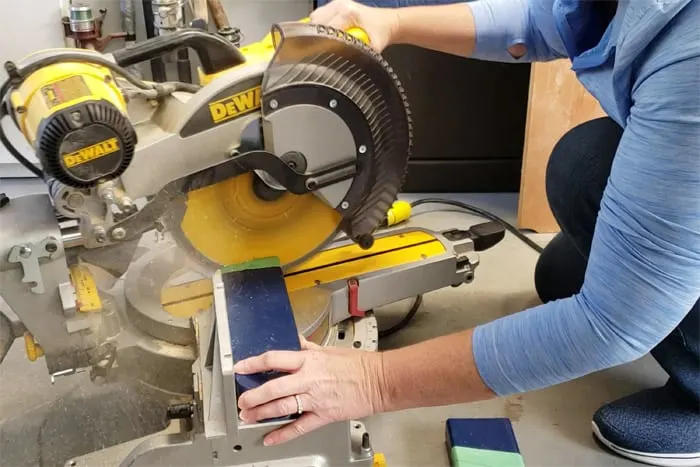
Step 7: How to measure and trim cornhole board legs
This part goes easiest with two people. But I have a shortcut I’m sharing in the plans if you’re building solo.
If you want to make your board as legit as possible (tournament worthy) then the height from the bottom of the leg to the top of the board should measure 12″.
- Place painter’s tape on the legs as shown.
- Hold the end of the board off of a raised flat surface and lift until the top is even at 12″.
- Mark the inside of the leg with a pencil.

- Take the leg off and adjust the miter saw until the blade is aligned with the the pencil mark you drew.
- Starting away from the line slowly lower the saw and test the cut.
- Once you have the angle correct make the cut at your marked line.
- Repeat for the other side.
- After painting the bottoms of the legs attach them to the board with with the carriage bolts, washers and wing nuts.

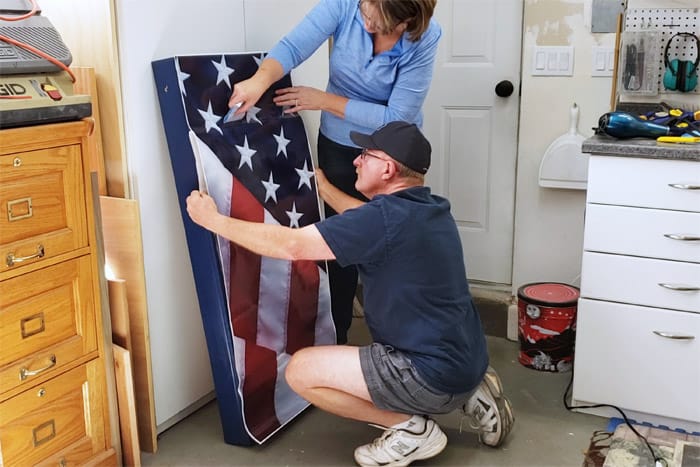
Step 8: Should I paint my cornhole board?
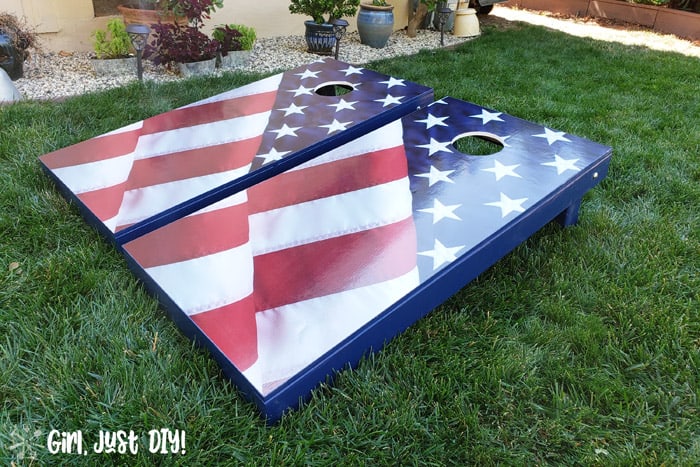
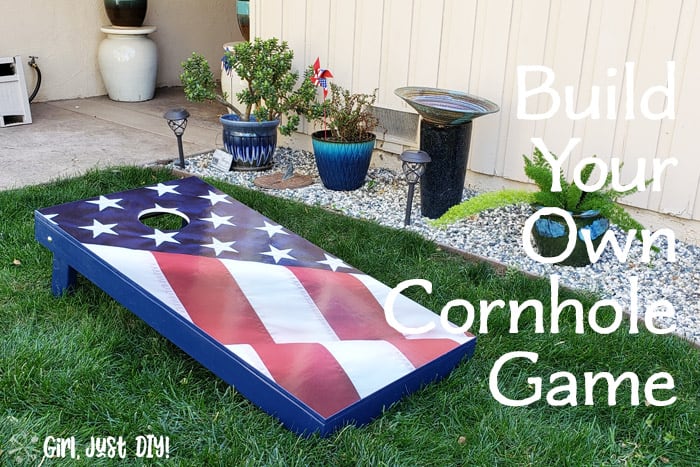
I’m not a freehand artist and we wanted our boards to look really good and patriotic. So we decided to follow what my brother did and purchase a set of cornhole skins for ours. It’s like a gigantic decal that sticks on.
If you choose to go this route here are my tips (but they come with instructions too).
- Paint the sanded plywood with clear poly so the decal sticks better.
- Two people are better but it can be done with one.
- If you do this on a hot day it works best. Otherwise warm the first decal with a hairdryer.
- Pull the backing down a few inches from the top and fold over.
- Align the top edge and gently press into place. Check that the bottom is lined up correctly. Make adjustments to the top if needed.
- Press firmly into place.
- Pull down on the decal backing a few inches at a time and use a felt covered credit card (or the tool they sell) to smooth.
- Work from center outward smoothing and pushing out bubbles as needed.
- Repeat until the decal is completely attached.
- You can lift it a bit if needed as you go to get out air bubbles. Again the hairdryer is very helpful if your decal is creased (ours came with creases).

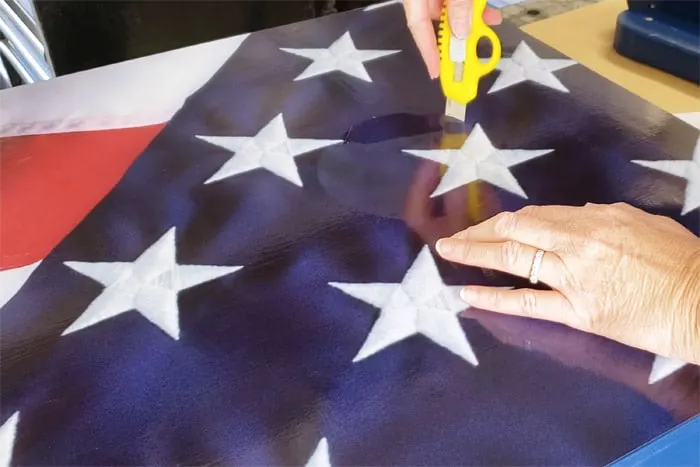
- Move the board to a work surface and trim excess from edges.
- Clamp a straight edge 1/16″ from the edges of the boards and trim off decal with a sharp box knife. This will keep the edges of the decal from lifting if hit with a cornhole bag. This is why we painted a tiny bit onto the top of the board.
- Use the felt covered tool and press around and inside the hole then gently trim the decal from the hole.

We couldn’t wait to try them out, they look so great with the decal we picked.


I’m so happy we chose the American Flag decals! There’s lots of Flag and other styles available to choose from.