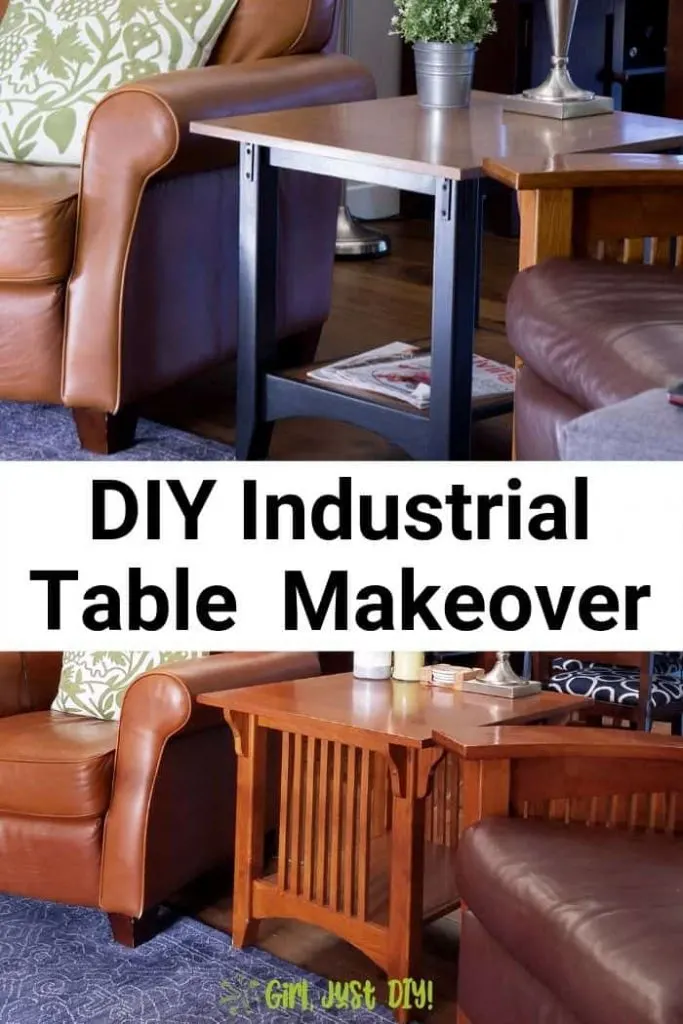
How many times have you spent good money on something you loved, then later your style tastes change? Me too!! I used to love Mission furniture and had quite a few pieces. Now, not so much. That’s why I’m sharing my DIY Industrial End Table Makeover. So you can restyle your own furniture.


Many years ago we bought a 3-piece set of Mission Tables from Lamps Plus. I love them and they were great but don’t get me started on matchy matchy stuff. Anyway, then my husband bought a recliner that was also Mission, now we were on Mission overload.
Years go by and I’m done with that style; but it’s costly to start replacing furniture. And it takes me a while to find what I really want. In the mean time I decided to give my mission end table a makeover, industrial style.
DIY Industrial End Table Makeover
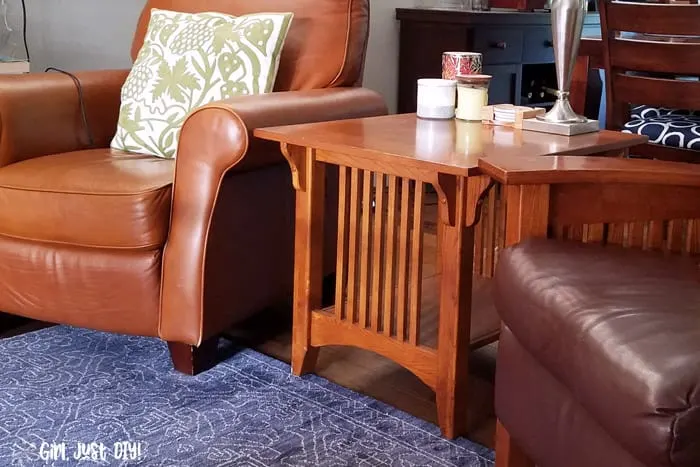
We won’t even talk about how so much of my furniture is brown….. but here’s the before of this table as it sits between our two side chairs. It’s way bigger than I want for that space but still, I’m going with it for now.

This page contains links to products, if you purchase something after clicking on a link I may earn a small commission (at no cost to you). If you do make a purchase, thank you!
You can read about affiliate links here.
Mission furniture is pretty much the same. My tutorial is written to my specific furniture so yours might be slightly different.
Supplies for DIY Industrial Makeover
- Jigsaw or a Pull Saw
- Paint Stripper – here’s a popular green option
- 3″ Putty Knife
- Protective Gloves
- Chalky Paint or Calcium Carbonate to make your own
- Wood Stain – I love this brand
- High Performance top coat
- Painter’s Tape
- Stir sticks
- My favorite Paint Brush
- Foam Paint Brush
- Pliers
- Clamps or Vice
- Rotary Cutting Tool
- Safety Glasses
- Cordless Drill
- Random Orbit Sander
- Sandpaper disks in multiple grits
- Sanding sponge
- Dust Mask
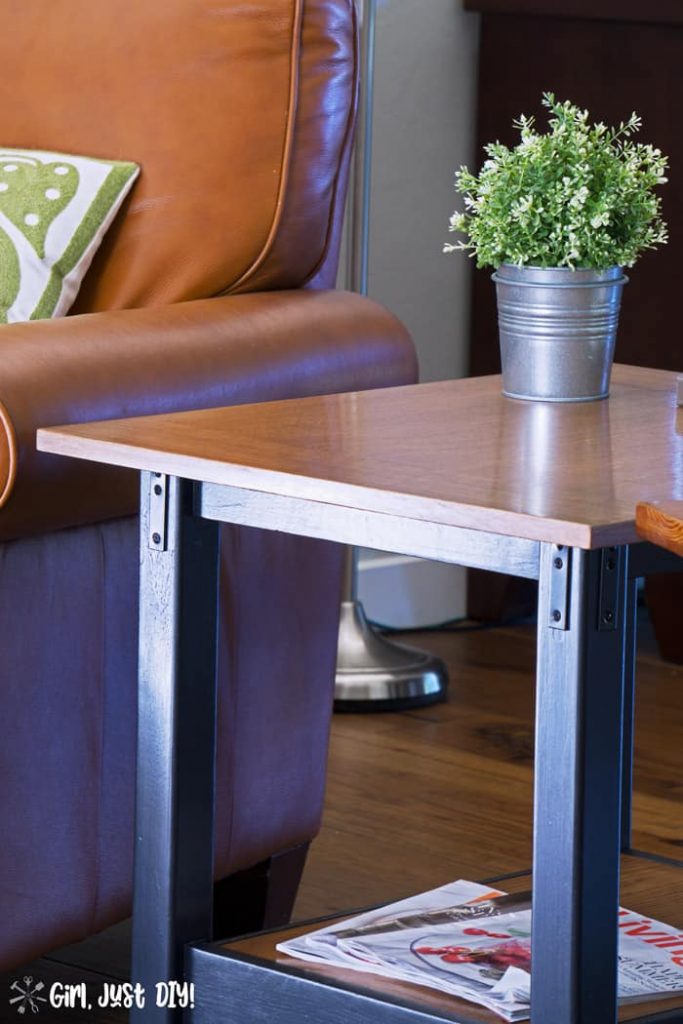
- Black L Brackets (measure your space for proper size)
- Spackle
- Narrow Putty Knife
- 3″ wide Chip Brush
Deconstruct your Mission Table
Step 1: Remove wooden slats.
- Using your jigsaw or pull saw start cutting the slats along the bottom edge.
- Be careful to hold the saw blade level with the table surface to get the best flush cut because this area will be visible.
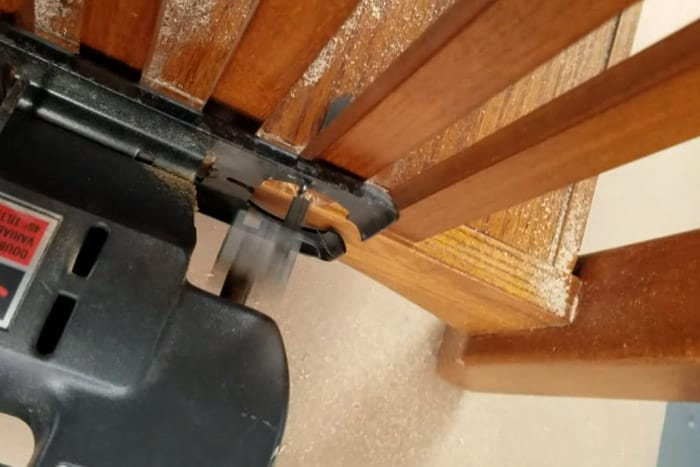
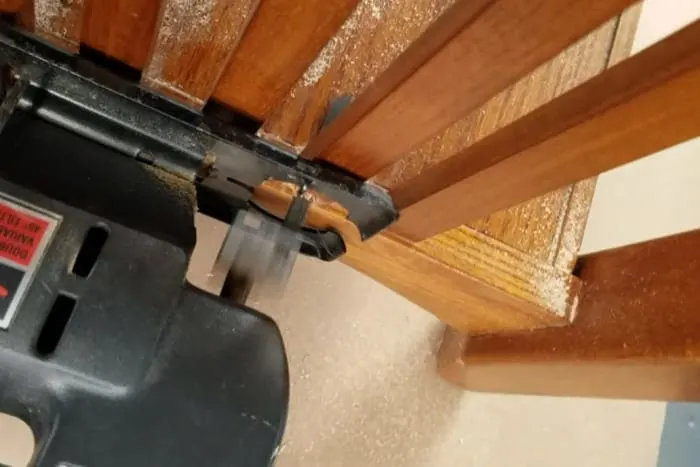
- Cut along the top edge in the same manner. You can try pulling them out if you wish but some of mine left the dowel, which I still had to cut off.
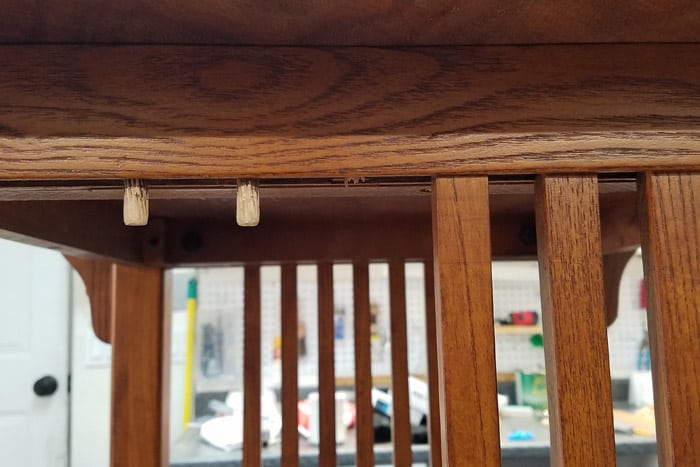

Step 2: Remove corbel pieces from under table top.
- Remove the wooden screw hole covers using a flat screwdriver.
- Remove all the corbel (braces) from around the legs of your table.
- Dry fit the L Brackets to see if you need to do any patching or trimming.
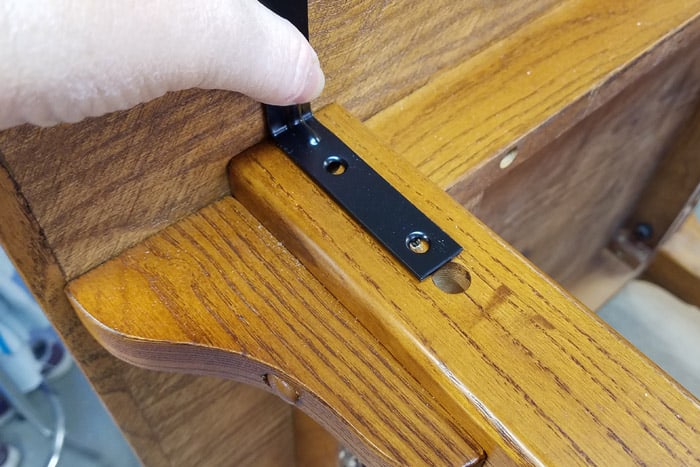
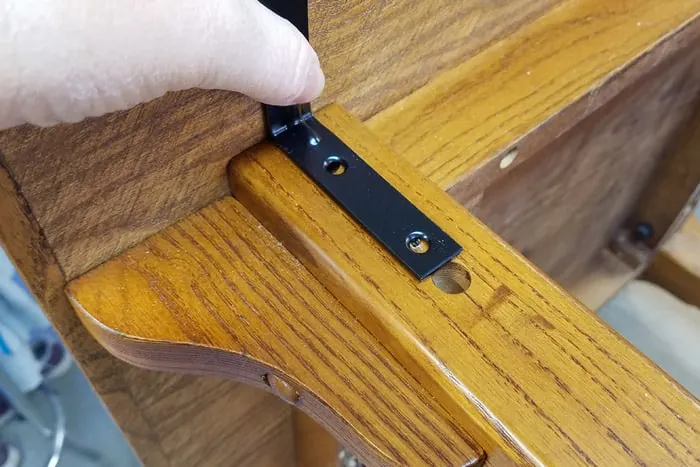
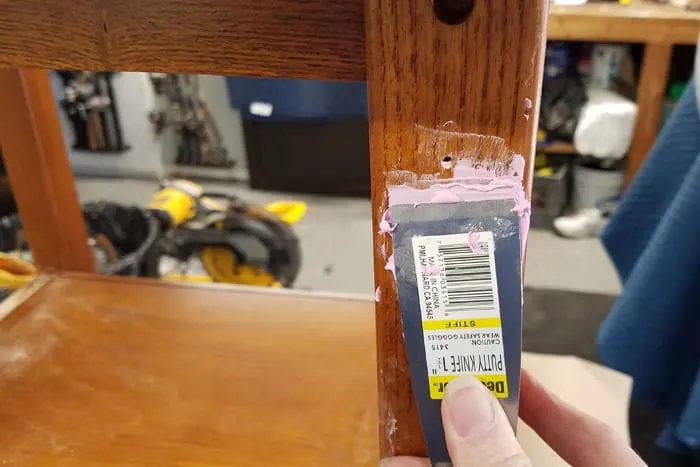
- If the L Brackets don’t cover the dowel hole made by the corbel fill them in with Spackle and let them dry fully.
- With a sanding sponge sand smooth and fill again if necessary.
- Sand smooth to achieve a smooth finish.

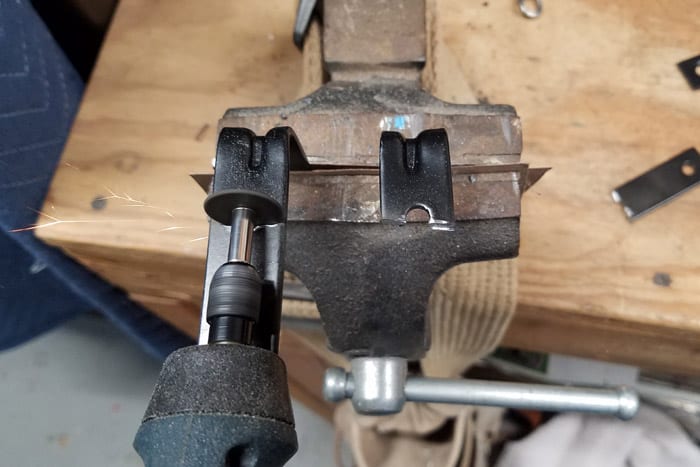
Step 3: Trim metal L Brackets, if necessary.
- Measure how much needs to be cut off from your L Bracket and mark with a permanent pen.
- Place one end into a vice or clamp it securely to a sturdy surface.
- Don your safety glasses and use your rotary cutting tool with the cutting disk to trim off the excess from the L Bracket.
- Use the flat edge of the cutting disk to smooth any rough edges.

Remove old finishes from the table
Step 4: Strip top coat and stain from table.
Paint stripper can burn your skin if you’re not careful. Not permanently, but from experience it really smarts if you get any on your skin. You’ll know it, believe me. So keep a moist rag nearby just in case.
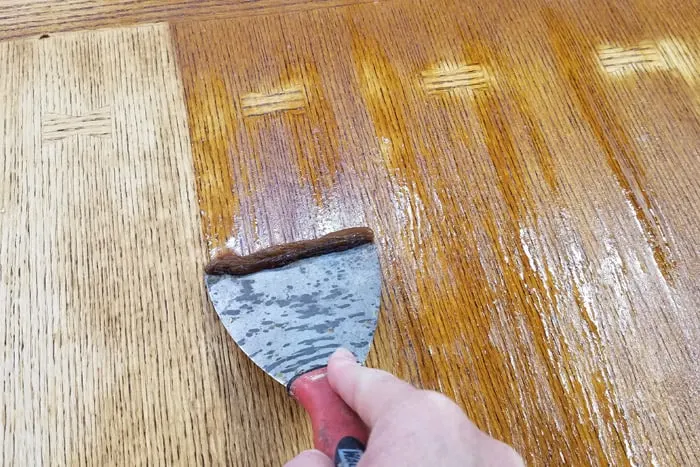
- Working quickly spread on a thick layer of stripper all over the surface an sides of your table with the chip brush.
- Wait as directed on the can for the stripper to work. This will vary depending on the top coat and layers of paint or stain you’re trying to remove.
- Going with the grain use your 3″ putty knife to remove the stain. Drop the gloop onto newspaper or into a paper bag.
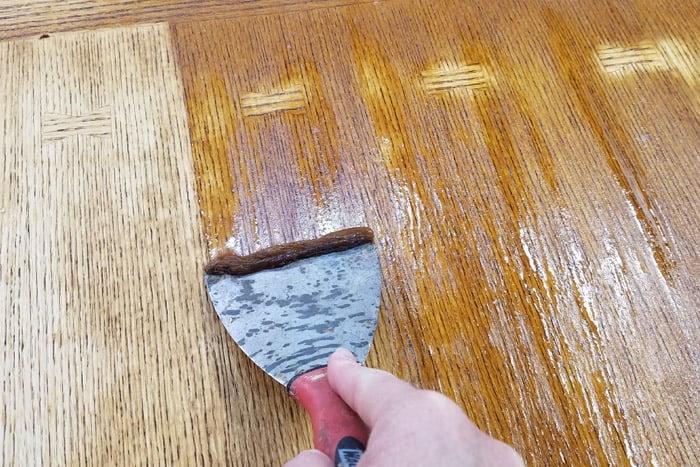
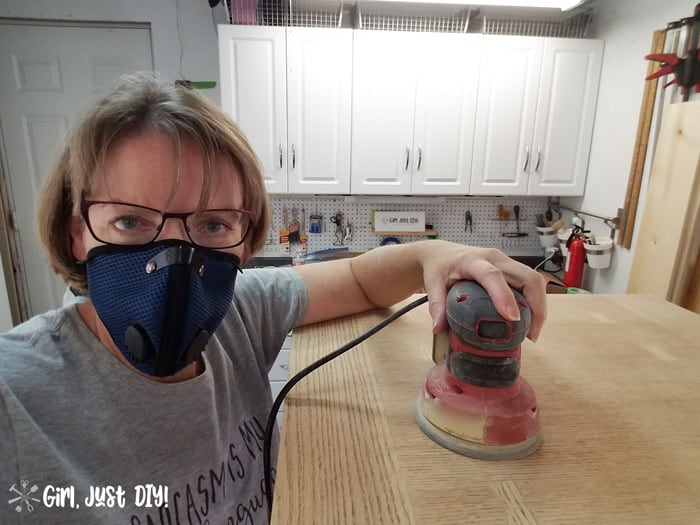
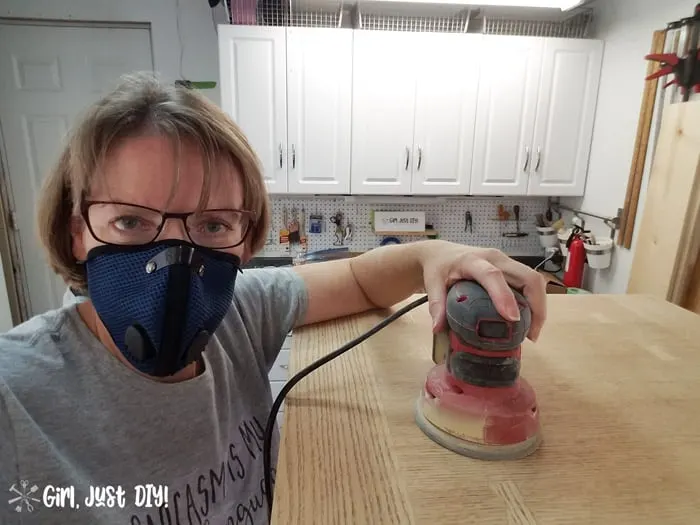
Step 5: Sand for a smooth table
After all the stripping gel has been removed and the table is dry it’s time to sand.
- Put on your safety glasses and your dust mask.
- Start with a heavier grit sandpaper like 120 on your orbital sander to sand away surface imperfections.
- Switch the sanding disk to 220 to give it a smoother finish. You can even go to 320 or 400 for an even smoother surface.
- Give the legs and apron of the table a light sanding as well so that they have a little tooth when they are painted.
- Wipe down completely with a tack cloth.
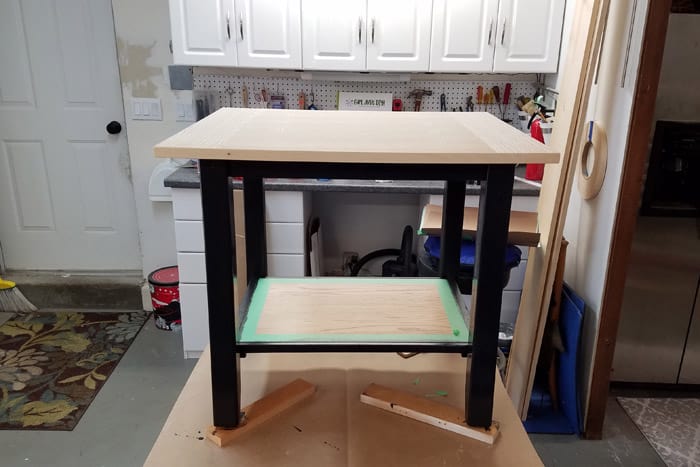
DIY Industrial Makeover Transformation
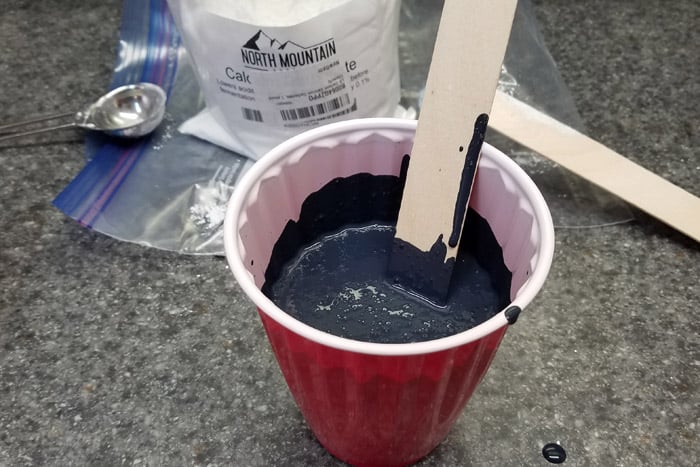
Step 6: Chalky painting your industrial table.
- Use painter’s tape to protect any portions table that will be stained.
- Mix up your chalky paint mixture with this formula
- 1 cup latex paint
- 2 T Calcium Carbonate
- 1 T Water
- Mix all the ingredients well and apply with your paint brush.

- Start applying your paint first to the apron and then to the legs.
- Let dry fully before applying a second coat if needed.
I’m not a fan of really matte finishes you see with some chalk or chalky paint. So I used a Rust-oleum Glossy paint in black and mixed it with a little gray for a custom color blend similar charcoal.

More Furniture Makeovers
IKEA Nightstands – Mid Century Modern – Office Chair Makeover
Step 7: Stain and seal your new DIY Industrial End Table
When the chalky paint is dry to the touch you can start staining the table. I love General Finishes Gel Stain. You can read my Floating Wood Shelves tutorial for the proper method to apply gel stain.

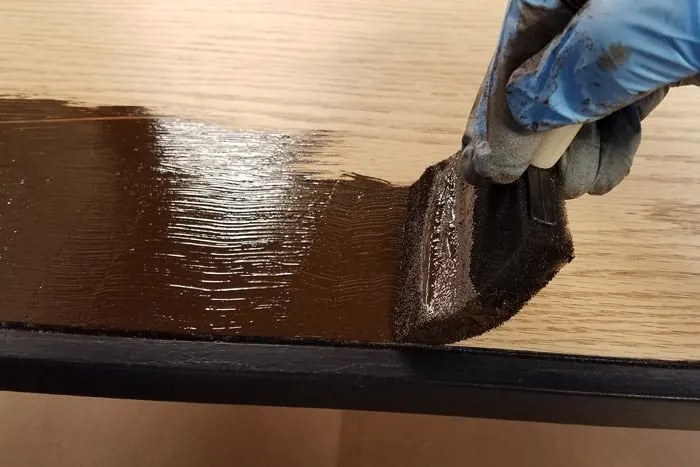
- Let the stain dry completely according to can directions.
- Apply a few layers of top coat allowing proper dry time between coats.

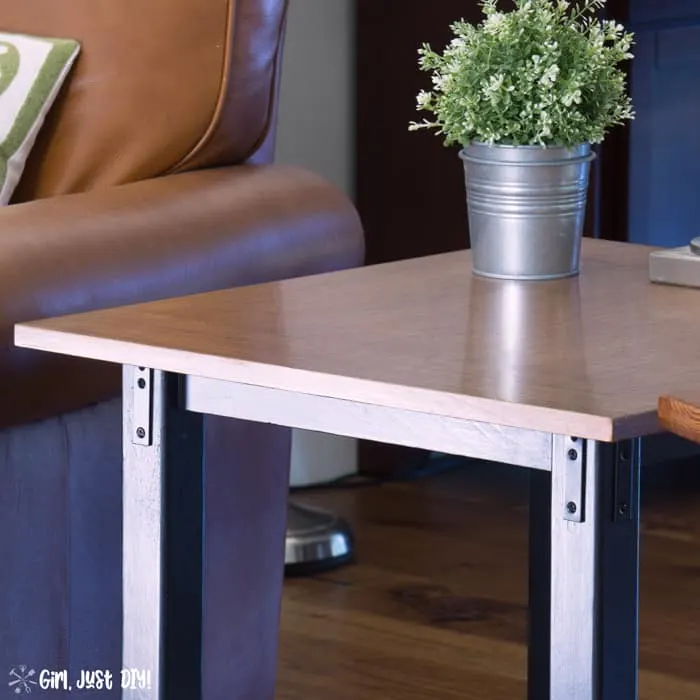
Step 8: Install L Brackets
- Using your cordless drill install the L Brackets over the holes where you removed corbels.
- You may need/wish to pre-drill the holes for your screws.
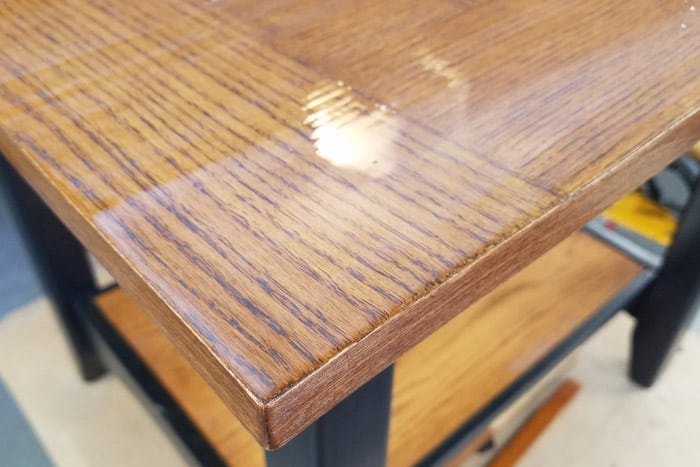
Didn’t it turn out fabulous!?! Look at how those L brackets and charcoal paint give this table an industrial feel!!

Let’s review the ugly before…
And now the easy and inexpensive DIY Industrial End Table Makeover is completed.

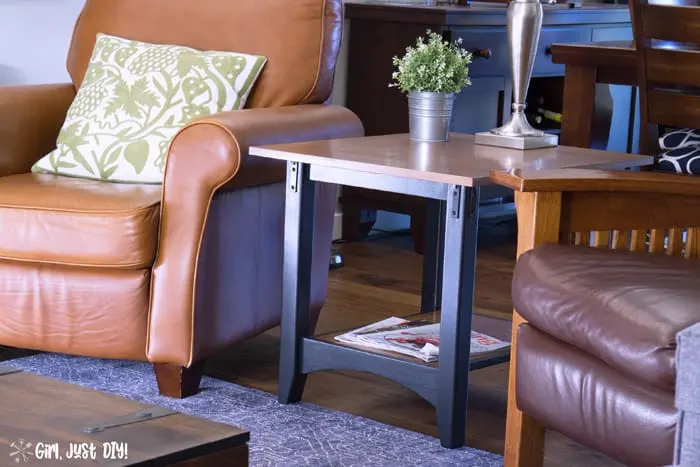
I’m so happy I don’t have to see that mission-style table any longer. Such simple changes make the table look totally different. I’m so glad those slats are gone.

Pin it for later!!

Tell me, do you have a furniture style that you’ve fallen out of love with? What style would you love it to be?
Susanne
Saturday 3rd of August 2019
Toni that looks wonderful!! I use to love Mission style furniture too, luckily I left it at the store, lol!! We have so many pieces of furniture that just aren't my style anymore....they need a makeover if I can get the hubby to agree ;)
Toni | Girl, Just DIY!
Monday 19th of August 2019
Haha, just get started on a makeover and then ask for forgiveness instead of permission LOL