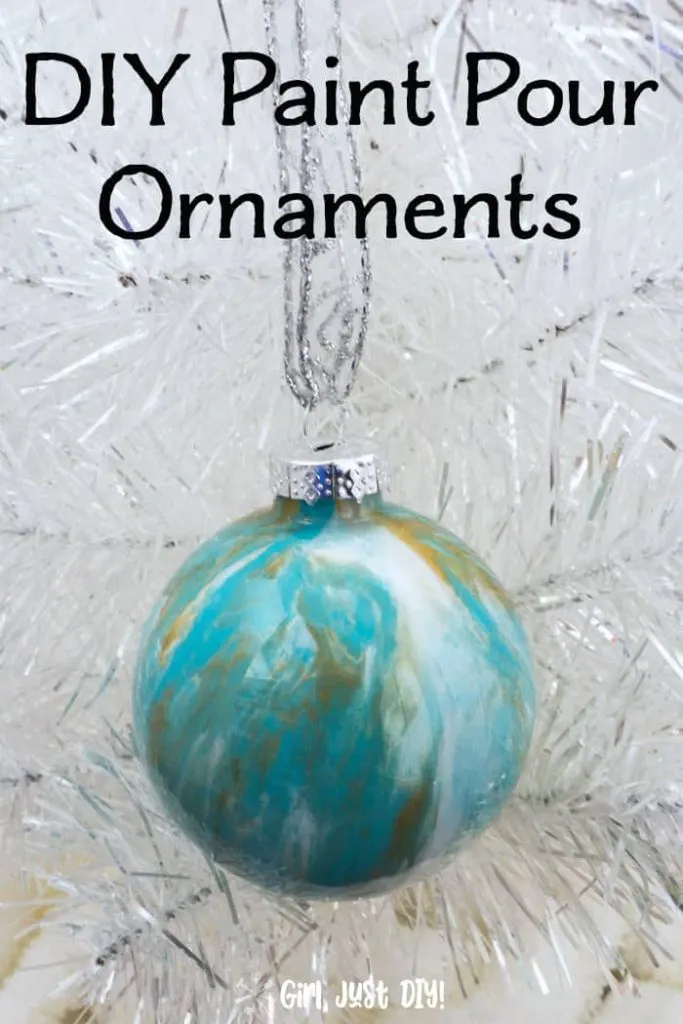
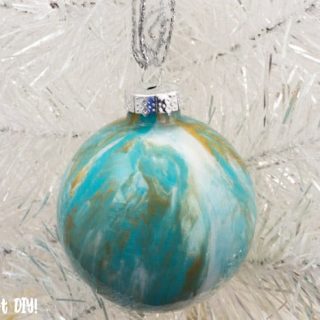
Oh my gosh, so fun!! It’s like finger painting but for adults!! Yep, today I’m going to show you how easy it is to make these DIY Paint Pour Christmas Ornaments.

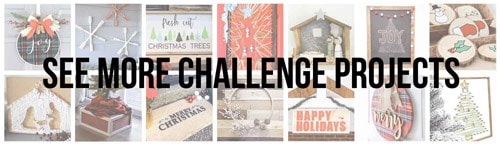
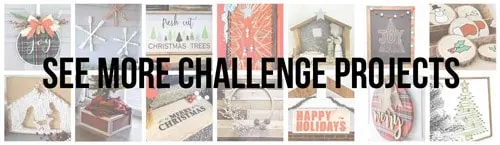
It’s the last official week of this year’s Deck the Home Challenge. This week was all about DIY Ornaments so be sure to click the link at the bottom of the page to see all the other beautiful ornaments my friends made this year.
Making ornaments is so fun and easy to do, it’s one of my favorite things to make this time of year.
This page contains links to products, if you purchase something after clicking on a link I may earn a small commission (at no cost to you). If you do make a purchase, thank you!
You can read about affiliate links here.
Paint Pour Ornament Supplies
- Clear glass ornaments
- Shatterproof is a good option too (read about my oopsie)
- Acrylic Paints in various colors (see the combinations I used below)
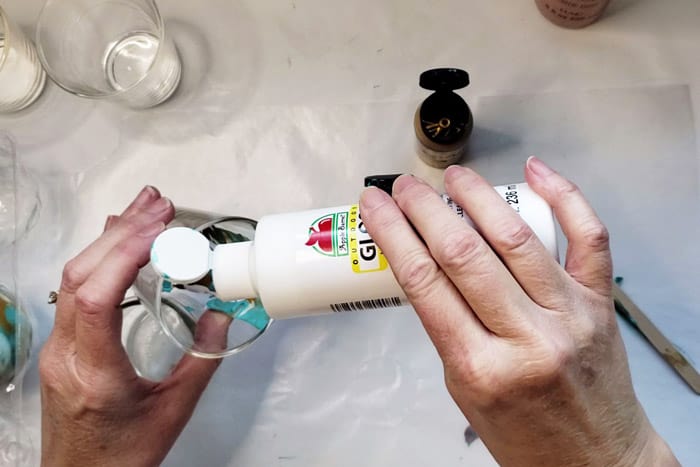
- Paint Extender (optional)
- Craft sticks
- Glass jars or candle holders
- Wax Paper or Craft Paper
- Silver Ribbon for hanging
- Scissors
How to create paint pour christmas ornaments
Step 1: Pick your paint pour colors
The first thing you want to do is pick your paint colors to mix. You can go with traditional Christmas colors, or you can go with some modern mixes.
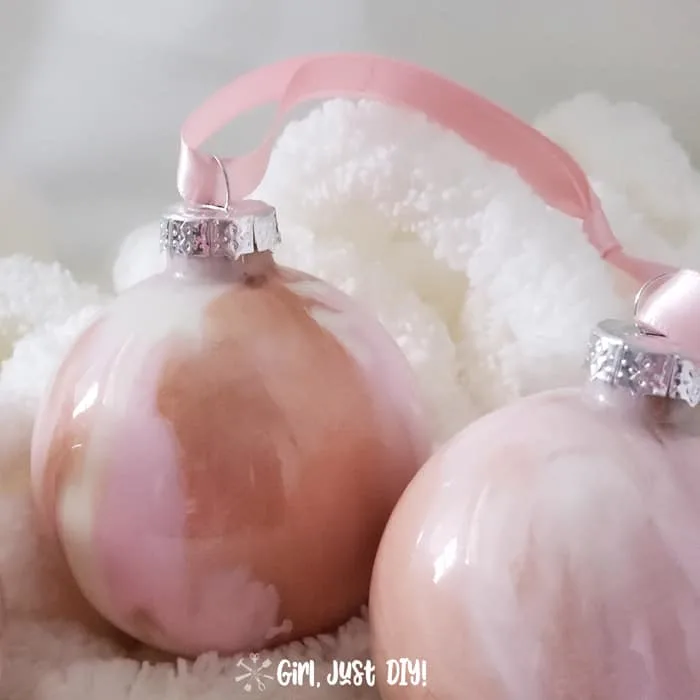
I’ve loved seeing the pinks and cream combinations in the stores this year so that was one of the color mixes I chose.
Step 2: Gather your paint pouring supplies and prep the ornaments
This might get messy (or am I the only messy one?) so it’s best to have some small containers handy. You’ll need some for mixing the paint and some for letting excess paint drain.
I used yogurt jars lined with sandwich bags for the dripping, and small votive candle holders to mix the paint.
You could use plastic cups but if you have glass it’s easy to clean up and you can reuse them over and over.
You’ll want one small enough on which to rest the ornament.
I read that swishing Alcohol inside the ornament is good to remove residue from the factory. Shake out the excess and let dry.
Wax paper is great for catching drips and keeping your work surface clean.
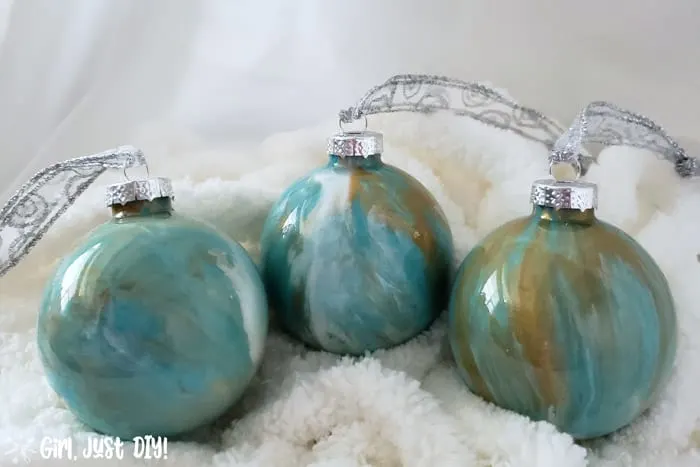
DIY Paint Pour Christmas Ornaments Color Combinations
Here are the color combinations I used
- Folkart Baby Pink
- White
- Metallic Rose Gold
- …and this combo…
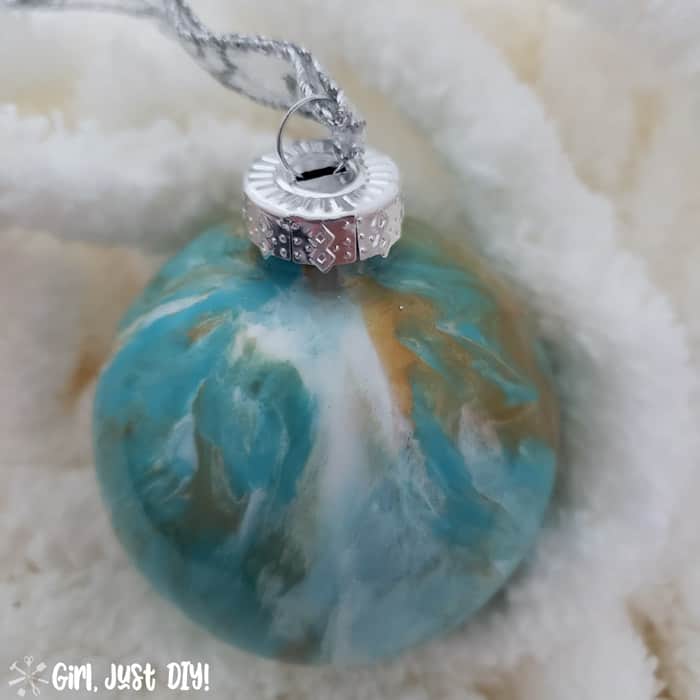
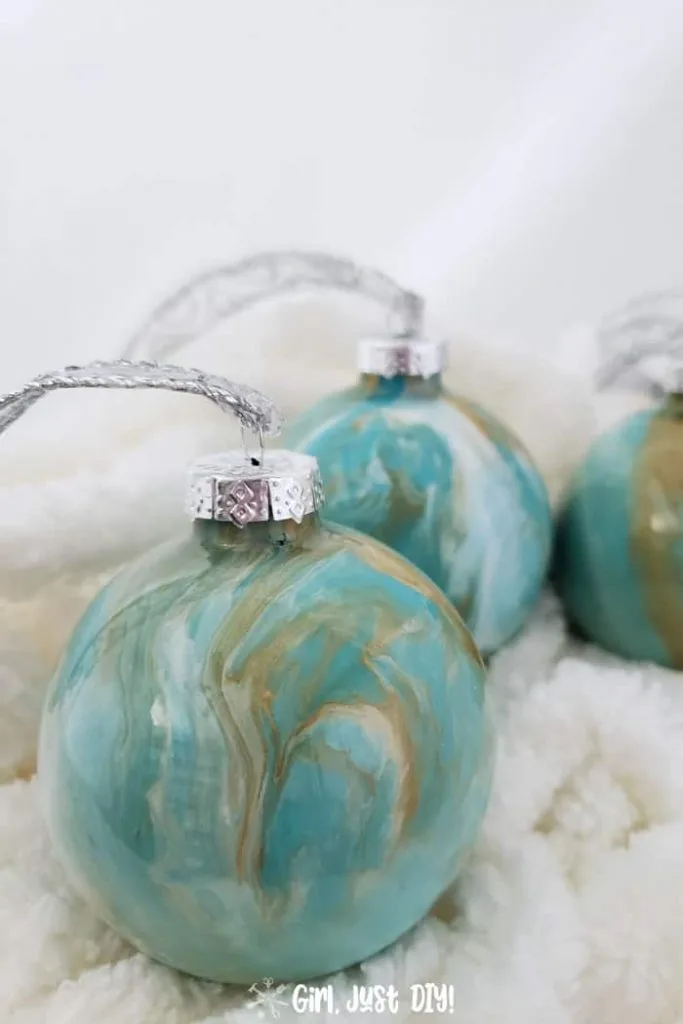
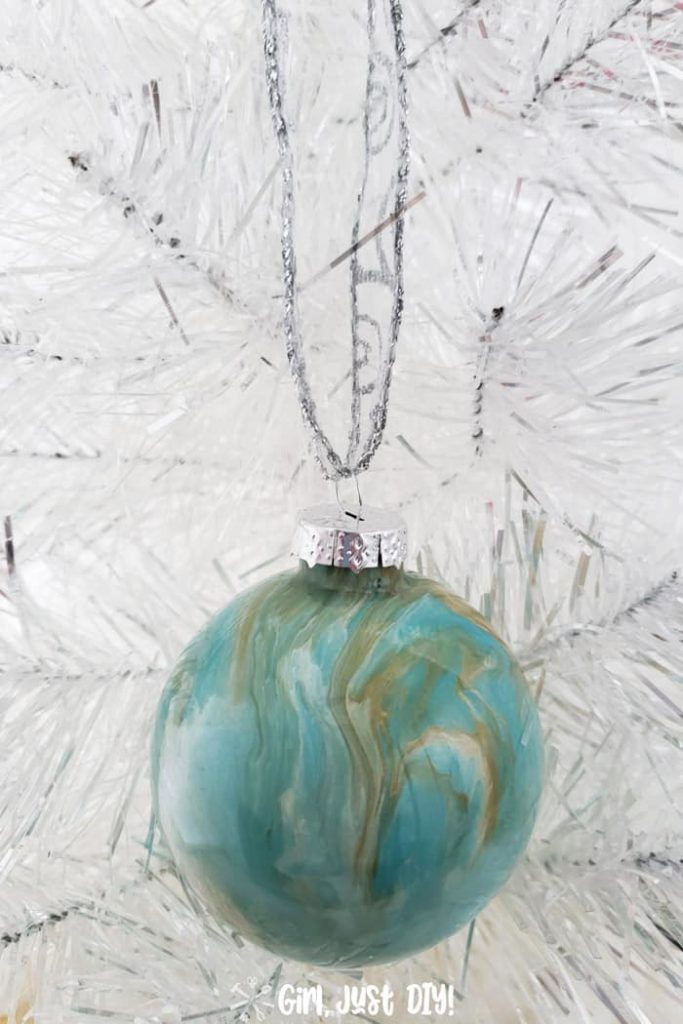
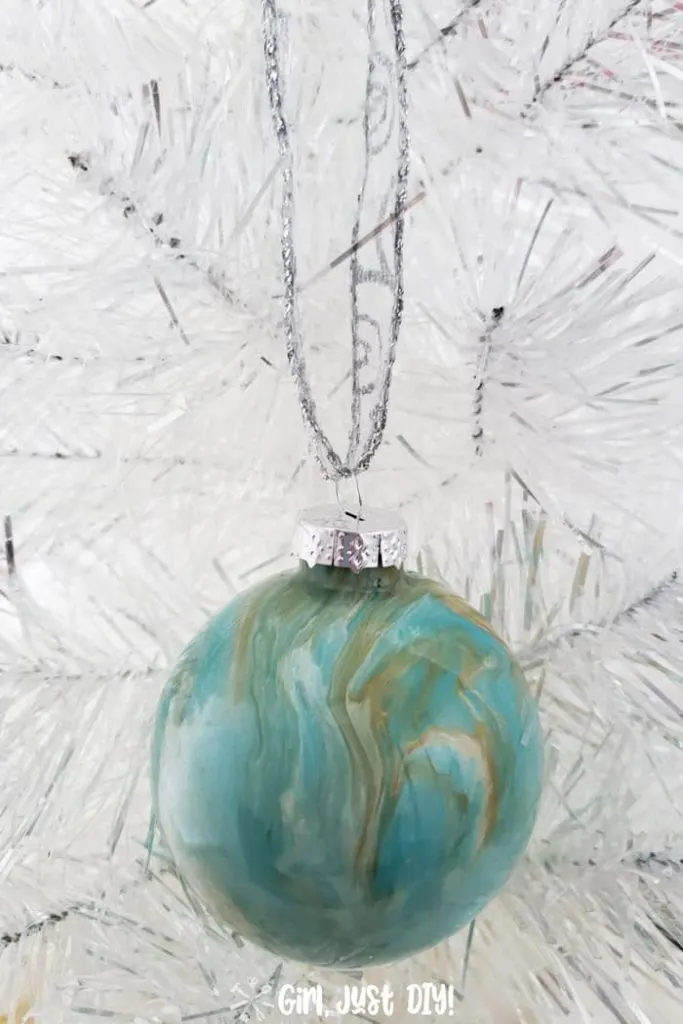
- Turquoise
- Metallic Antique Gold
- White
- …more combinations I made and love
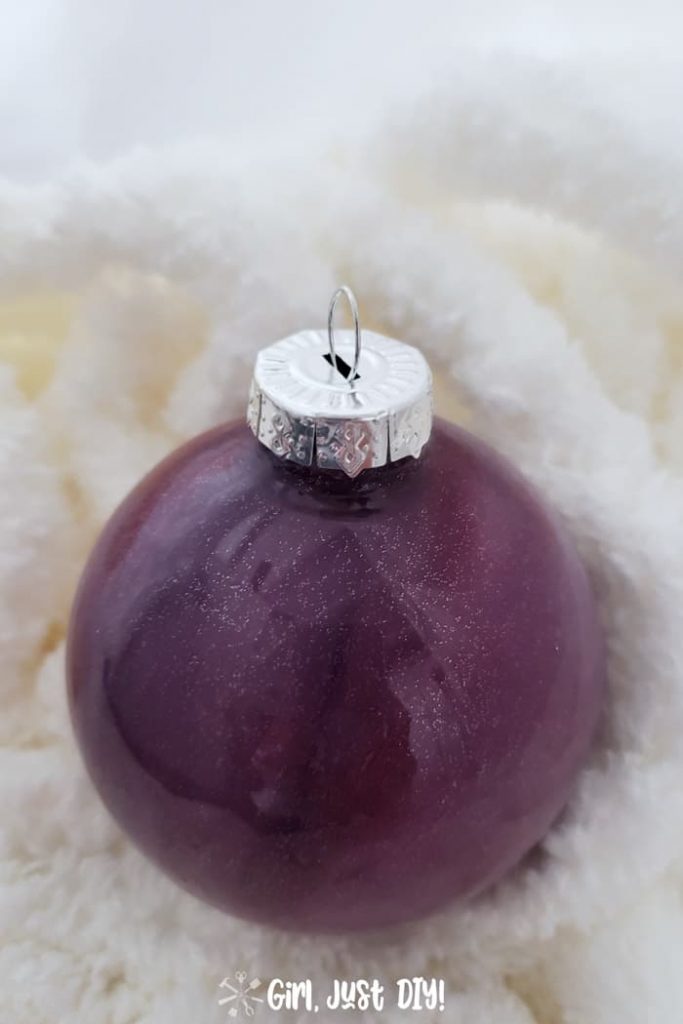
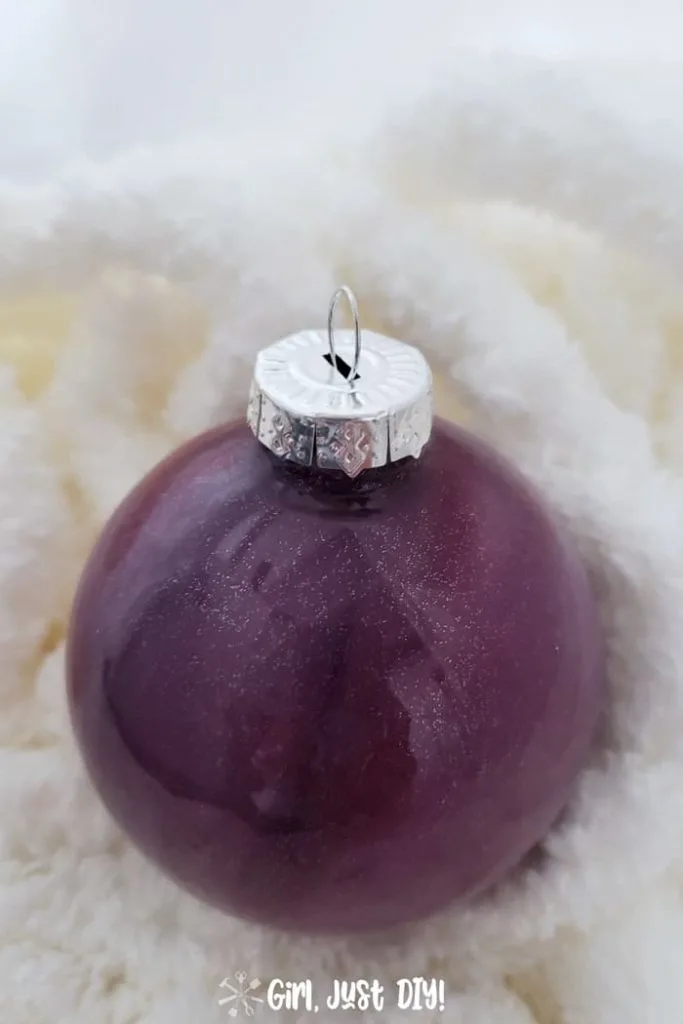
- Color Shifting Green Flash
- DecoArt Eggplant
- White
- ….and this combo too…
- Red Barn
- White
- Silver Glitter Finish
Getting started with paint pouring clear glass ornaments
Step 3: Paint Pouring Christmas Ornaments – let’s do it!
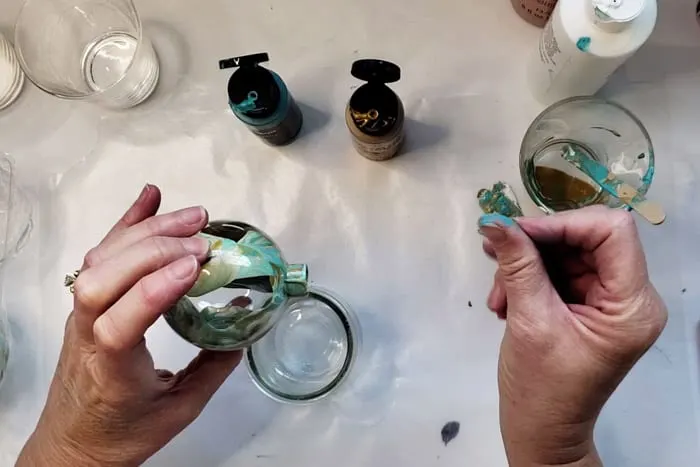
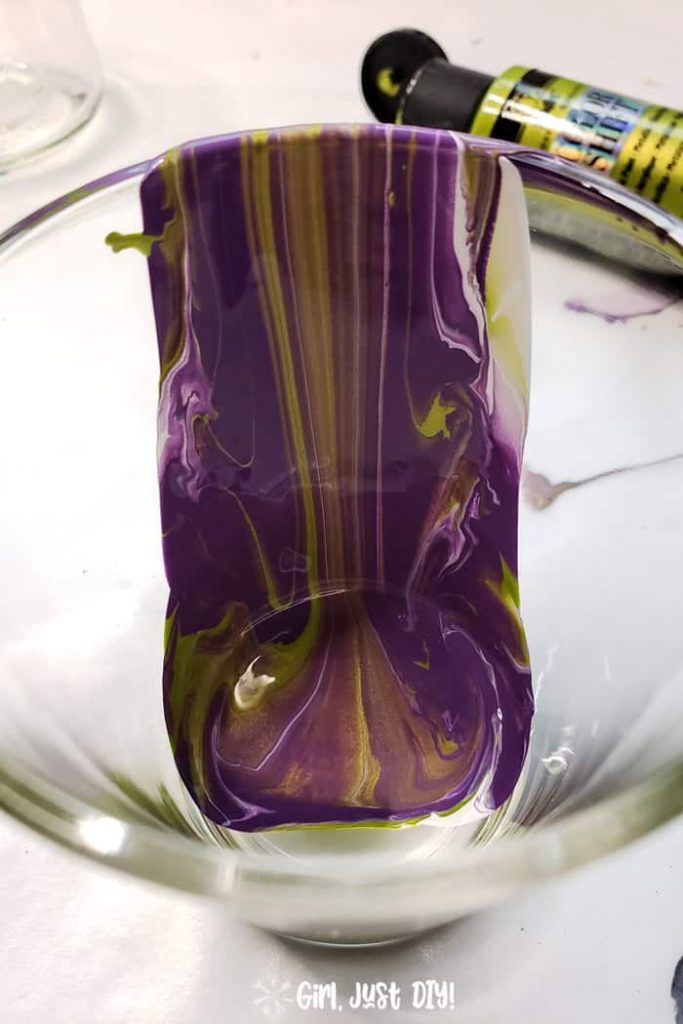
Ok, now for the fun part. I tried a few different methods. Squirting paint right into the glass ornament, and doing a mix, what they call “dirty pour” method.
The latter is what I’ll illustrate.
- Pull the metal tops out of all your ornaments and replace then in the box
- Select your paint colors and open the caps. I found that 3 colors worked best and adding a little white creates a nice contrast.
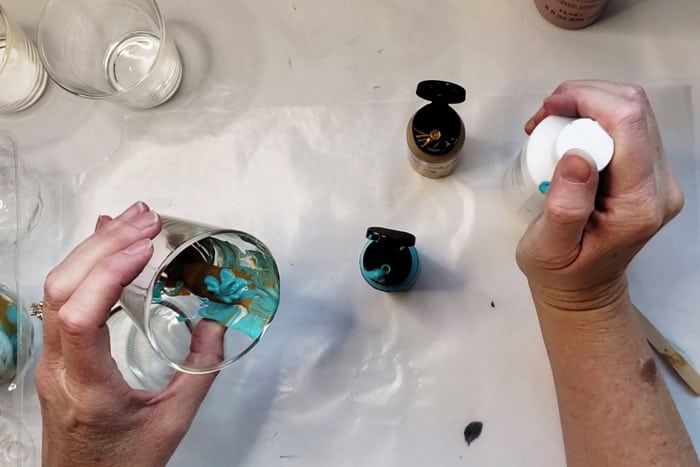

- Into your votive, or other pouring container, layer the paint colors. Squirt three rotations of the colors until you have about 3 tablespoons of paint.
- Hold the glass ornament or rest it on a jar or votive holder at an angle.
- Slowly pour the paint into the neck of the ornament so that it will roll down the inside.


- As you pour the paint slowly rotate the ornament.
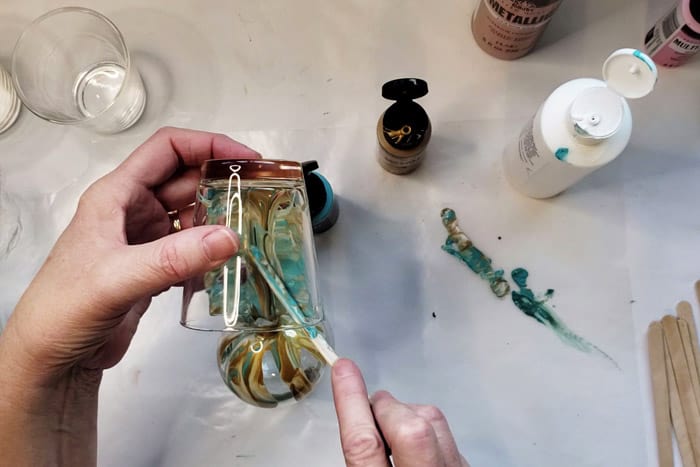
- Roll the ornament around to let the paint cover the inside fully. Add more paint as needed.

- If more paint is needed use a craft stick to coax the rest of the paint out of the votive.

- Alternatively you can also squirt a little paint directly into the glass ornament bulb.
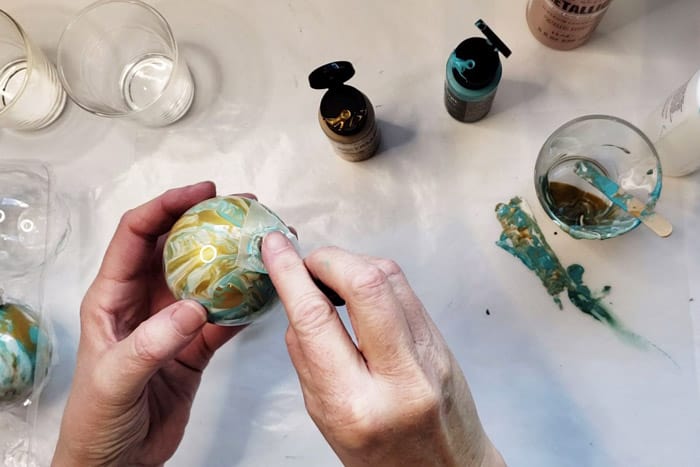
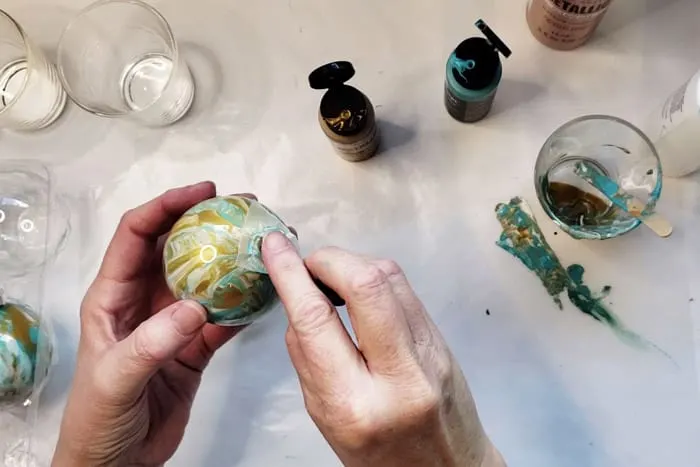
- If you want a more subtle look to your paint pour Christmas Ornaments cover the end of the ornament with wax paper and give it a little shake to cover all remaining spots and blend the paints a little.
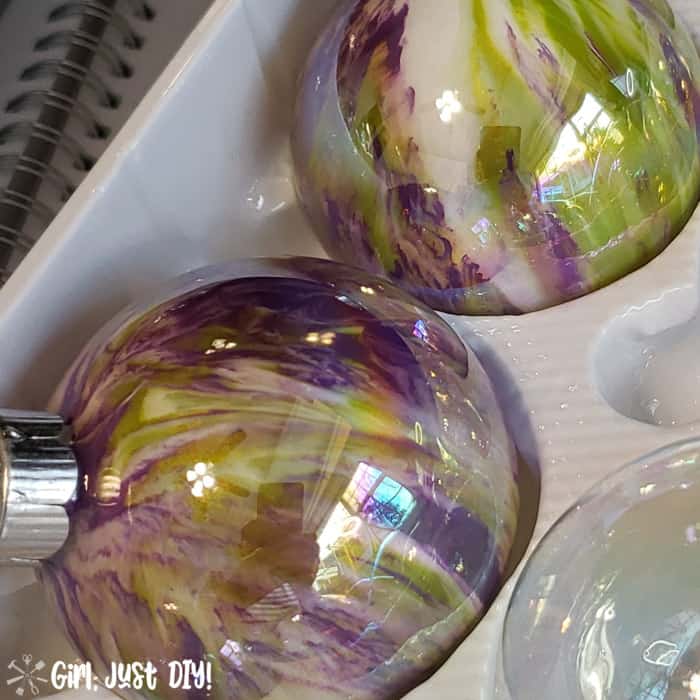
Step 4: Finishing off your ornaments
- Wipe the outside of the ornament’s neck with .
- Turn upside down and let excess paint drip out into a plastic baggie lined votive or small glass jar.
Warning: I thought I could skip much of the dripping process and immediately insert the bulb tops. Big big mistake, while taking pictures, two days later, one rolled off my desk onto the thin throw rug…..
Break and splat, pink paint all over my blue rug. So I pulled the tops off all the ornaments I made to let them dry completely before reinserting the bulb top.
- When all the paint has dripped out turn them upright and let them dry overnight.
- Insert the bulb tops by squeezing tightly on the metal prongs and insert into the painted bulb without scratching the paint from the sides.
- White ornaments clean with a damp cloth.
Here’s what the paint looks like after you’ve poured it into the ornament. One set I made used Green Flash and Eggplant with a touch of white paint.
It’s my favorite combination but they were so hard to take good pictures of because of the iridescent bulb I used on some.

MORE DIY CHRISTMAS ORNAMENTS
Button Christmas Ornaments Tinsel Wreath Ornaments
Reversible Buffalo Plaid Ornaments
I took some pictures of them by the window the day I made them. Here’s a rough shot of what this beautiful combo looks like.

Isn’t it gorgeous? This is the best picture I could get, I had to hide the camera reflection in the top of the ornament. I’m going to make more of these in clear glass.
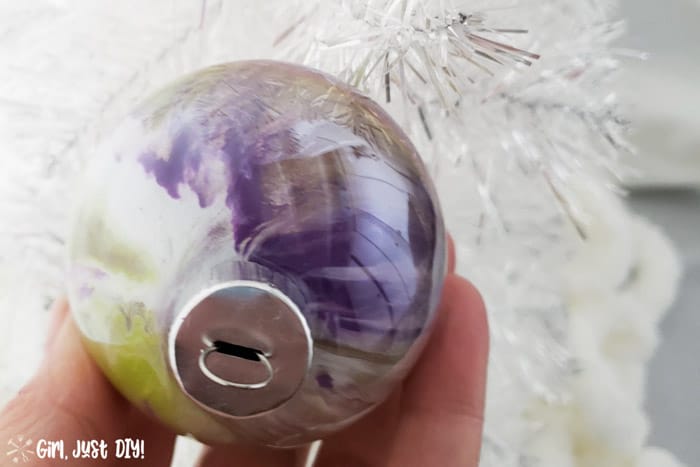

When you make your DIY Paint Pour Christmas Ornaments buy clear bulbs and not iridescent. It’s harder to see the paint pour effect through the iridescent bulbs.
Add some sparkle to your beautiful paint pour ornaments
Tie a beautiful ribbon for hanging that compliments your Paint Pour Christmas Ornaments color. I used some thin silver ribbon for these and purchased some pink ribbon the other set you’ll see below.

Get ready for some over sharing, because I love them #notsorry 😀 Below you can see the set of Pink, Rose Gold and White that I made.


Here are he Pink ones I made using Baby Pink, Rose Gold and White paint.

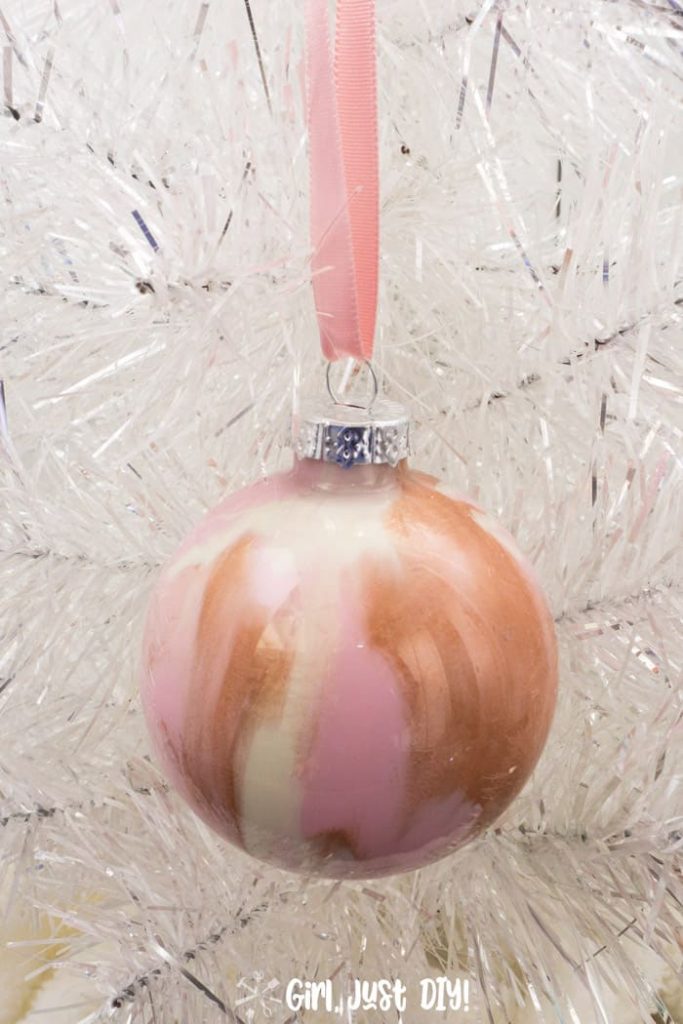

I really love them, the combinations are endless. I made sets of 3 in various colors but check out this solo ornament I made using all the paint that dripped from the other Pint Pour Christmas ornaments I made.
As promised, below are the links to over 20 DIY ornaments made by my friends. You’re going to be so inspired!


DIY Paint Pour Christmas Ornaments
Make these fun DIY Paint Pour Christmas Ornaments in a variety of colors for an inexpensive and budget friendly Christmas craft. Give them as gifts to family and friends. It also makes a great neighbor gift. Your holiday tree will be beautiful and unique with acrylic pour Christmas ornaments you make yourself with this easy How-to tutorial.
Materials
- Clear Glass or Plastic Ornaments
- Acrylic Paints in Color Variety
- Paint Extender (optional)
- Craft Sticks
- Wax Paper or Craft Paper
- Ribbon for Hanging
Tools
- Glass jars or votive holders
- Scissors
Instructions
- Pick your paint colors. Sets of 3 look really good with white or a light color being one color choice. I really love Turquoise with Antique gold and White. Also, Green Flash combined with Eggplant and White is stunning.
- Gather your supplies and lay down wax or craft paper to protect your work surface. Pull the tops from the ornaments and return them to the tray. Line some glass jars with plastic baggies for paint dripping
- Layer your three colors in rotation until you have about 3 Tbsp of paint. You can use a paint extender if you wish to thin the paint before layering.
- Prop the clear ornament on a small jar and start pouring the paint into the neck of the ornament so that it drips down the inside of the bulb. Slowly turn the ornament as your pour.
- Lift the ornament and keep rotating it until all of the glass is covered. Add extra paint as needed.
- To make the effect more subtle cover the opening with a little wax paper and shake in all directions.
- Set aside upside down to drip for a few minutes. Then turn upright into the original tray and let dry overnight.
- Cut some beautiful ribbon as your paint pour Christmas ornament hanger.
Notes
You can make a dozen of these ornaments for less than $20. They make beautiful gifts, or make an entire set for your own tree in your favorite color combinations.
Maggie
Thursday 28th of August 2025
Could I do camouflage pattern? What colors of paint would I need?
Toni
Thursday 29th of January 2026
I would google images of camo, or buy a little bit from a fabric stor and choose your paint colors that way.
Patsy
Friday 9th of December 2022
Beautiful!!! I am going to try making them with my 4th grade class. I will let you know how it goes.
Lauren
Thursday 8th of December 2022
Hi Toni! These are gorgeous, I tried making these and thought I did it right, but can’t figure out why mine aren’t working out?
Toni
Tuesday 3rd of January 2023
Oh no, I'm sorry yours aren't working. I took my ornaments right out of the package and poured in the paint. We're you able to get them to work?
Felicia
Friday 25th of November 2022
I wanted to say 'Thank You'! I just finished painting my first batch and am so very happy with the results. They are absolutely gorgeous!
Toni
Tuesday 3rd of January 2023
Yay, this makes me so happy!
Anna
Wednesday 23rd of November 2022
I tried this twice using glass balls from Joann’s and Liquitex paint mixed with pouring medium (Floetrol). Both times all of the paint dropped out of the ornament after several days leaving them essentially bare. One time I tried to dry them in the sun a bit and the side facing the sun kept color and the rest dropped out (again, the glass became bare). Any idea what I’m doing wrong?? Are you using a different medium? Are you pouring into plastic balls?
Toni
Tuesday 3rd of January 2023
Mine were all glass and I didn't use floetrol at all on mine. Maybe that extra workingvtime let the paint drain our faster? I used a variety craft paints on mine.