I’m back, that was quick, right? I told you I had another fun project to share with you. This time I’ve tried my hand at a laser engraved tumbler. It was fun, come on, let’s check it out.

When xTool sent me the Riser Base I used to engrave a cutting board, they also generously sent me the RA2 Pro so I could engrave on round objects.
I had a lot of fun engraving my new coffee coasters too.
How fun, now I can customize my own tumblers, glasses, ornaments, you name it, if it’s round I can engrave on it.
There are tips to learn and again I gleaned some helpful information from their official facebook group.
This page contains links to products, if you purchase something after clicking on my link I may earn a small commission (at no cost to you).
Supplies to make Engraved Tumblers
Now until 12/31/23 Save 15% on xTool Selected Materials
Currently $400 off – xTool M1 Laser
Find even more Holiday savings deals at the bottom of this post!
What is the RA2 Pro?
The RA2 Pro is rotary tool for xTool lasers. It has has rollers and a chuck to enable engraving of round objects. It comes with it’s own risers which allows for engraving on items with handles. You can do ornaments, mugs, glasses, even rings.
For my first project I started small and engraved a drink cooler that we already had. I’ll share my mistakes, my discoveries and what I would do next time.
Before Engraving Tumblers
Do some research before you get started. I found a few helpful videos on YouTube to get the RA2 setup properly. It’s really pretty easy. If you don’t have the the unit Riser the RA2 comes with little risers to lift your laser up to get the proper distance.
If you’re only using the basic rollers for a cylindrical object all you need to do is plug it in to the machine, set the rollers to the proper width after measuring with the provided ruler, and line up the square with the laser chasis.

Here’s a link to a setup video I watched which helped me a ton. And this video helped me with the settings I needed to use for a more successful engraved tumbler. Don’t forget to bookmark the videos that help you.
Also, make a note of the settings you use so you can easily duplicate them.
Engraving Beverage Tumblers
1. Connect the RA2 to your Laser
- Remove the bottom plate from your xTool M1 and use the risers to lift your laser.
- Or use the Riser and honeycomb grid.
- Place the bottom plate underneath your laser to protect your work surface.
- Measure the size of your tumbler and set the roller distance accordingly.
- Line up the RA2 so the housing is square to the right side of the M1.
- Insert your tumbler with the opening on the left.
- Measure the distance from the tumbler to the top of the laser head. If the top of the laser head is above 30mm or below 0mm raise the RA2 and tumbler up or down as needed.
- Make a note of the measurement.
- Plug the provided cable from the RA2 into the back of the laser.
2. Choose a Graphic File for your Tumbler
There are so many great SVG files available on Etsy you can purchase. Just make sure you check for the size of the tumbler you plan to engrave.
If you want to sell tumblers, don’t forget to check the commercial license details before you purchase.
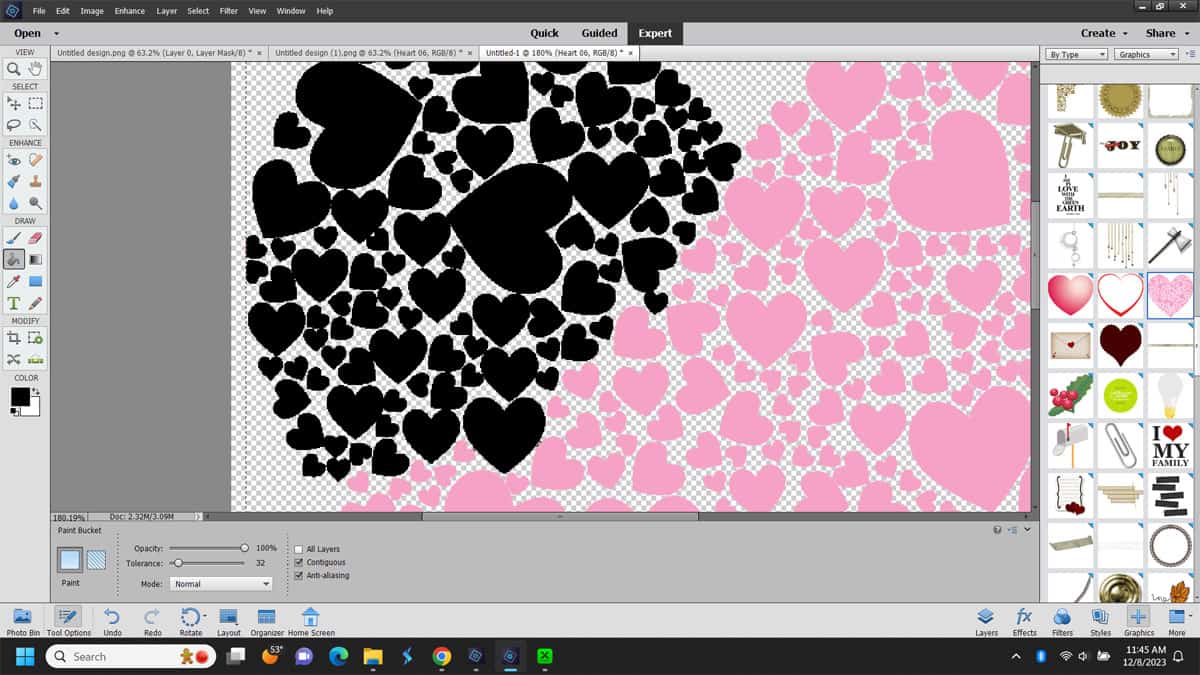
I went simple for my first project and grabbed a graphic from my Adobe Photoshop Elements. You could also use one of the files available in XCS, which is xTool’s Creative Space.
I’m normally a jump-in-with-both-feet kind of person, but this time I decided to start small so I could get a feel for how it works.
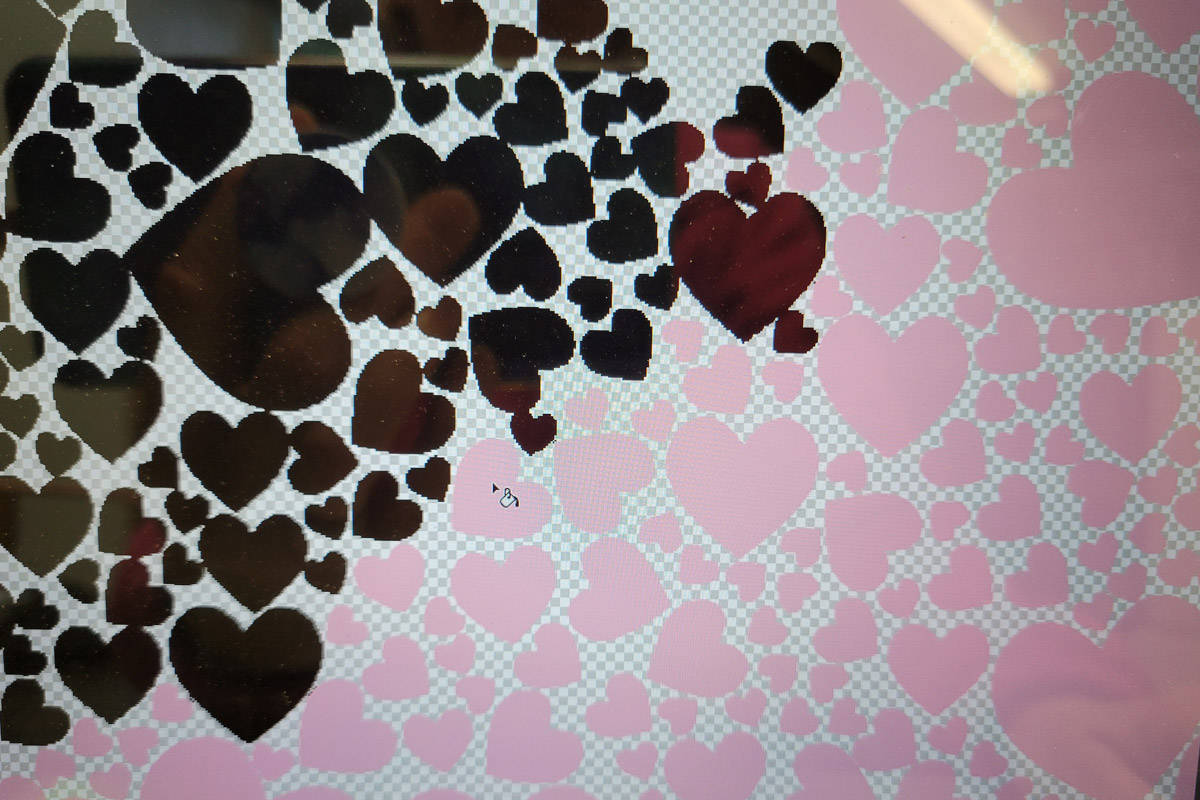
I’m glad I did because my image originally was Pink, so my first attempt was more of an etch than an engrave. Even though the settings were the same.
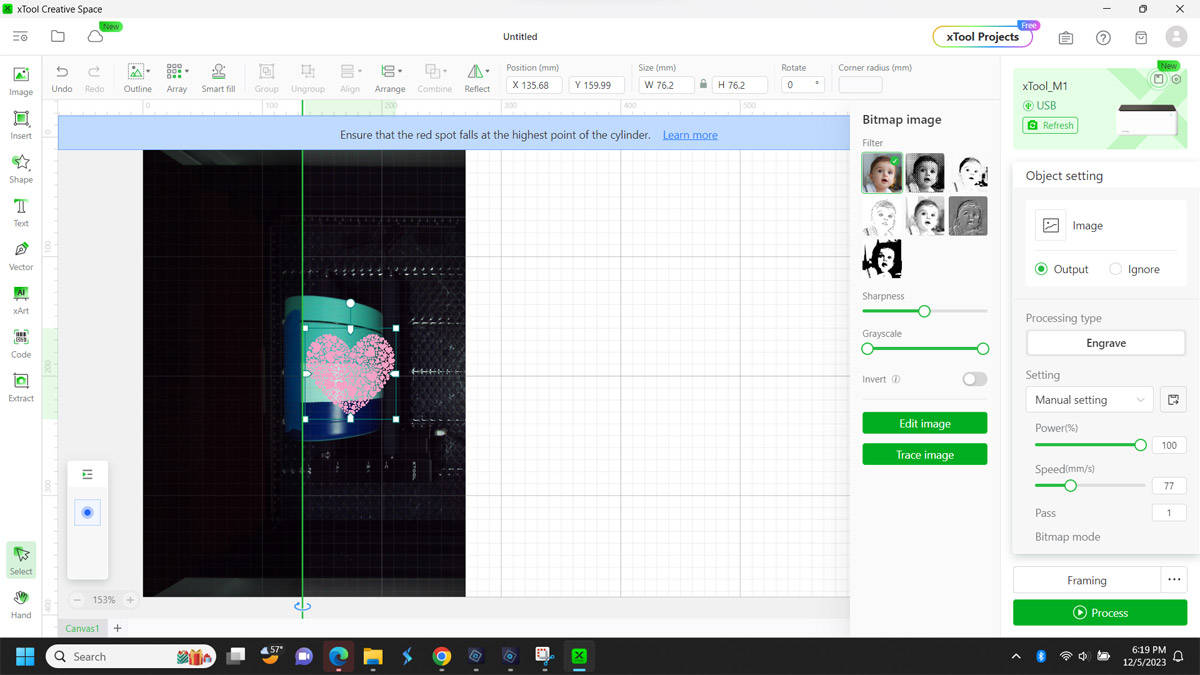
3. Working in XCS
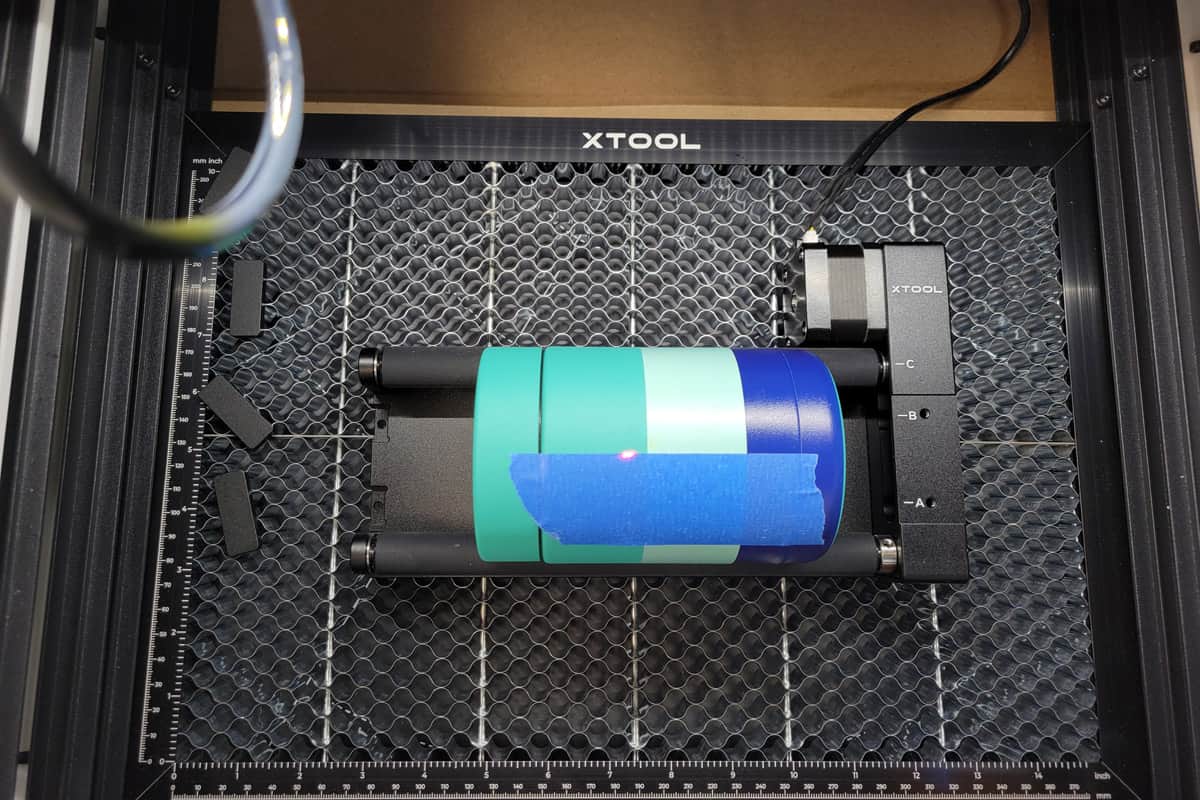
- With the RA2 connected to your laser power it on.
- Place your tumbler on the rollers with the mouth on the left
- Connect XCS to your Laser in the upper-right menu.
- After it connects change “Laser Flat” to “Laser Cylindrical”
- That change will cause the view in the app to flip. It will appear distorted but don’t worry about that.
- Import your image and resize if needed to fit on your tumbler.
- If you purchased a file for a 40 oz tumbler you shouldn’t have to make any adjustments.
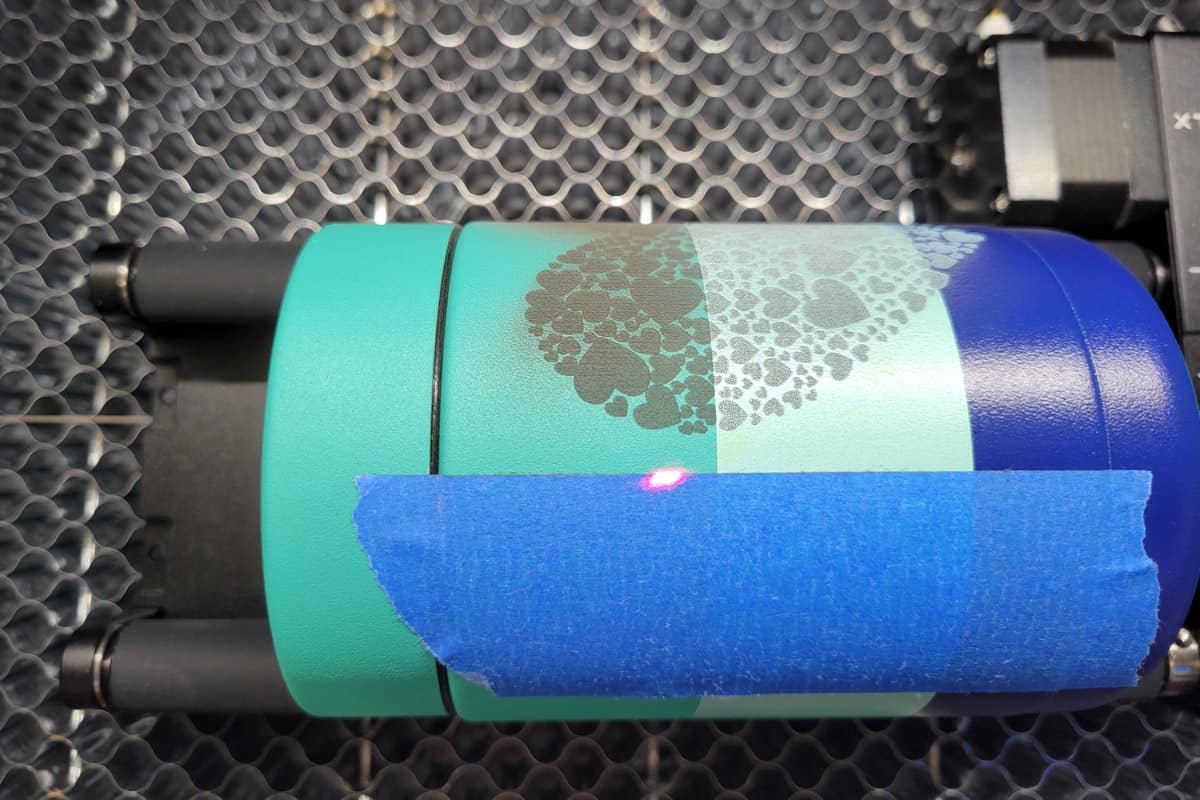
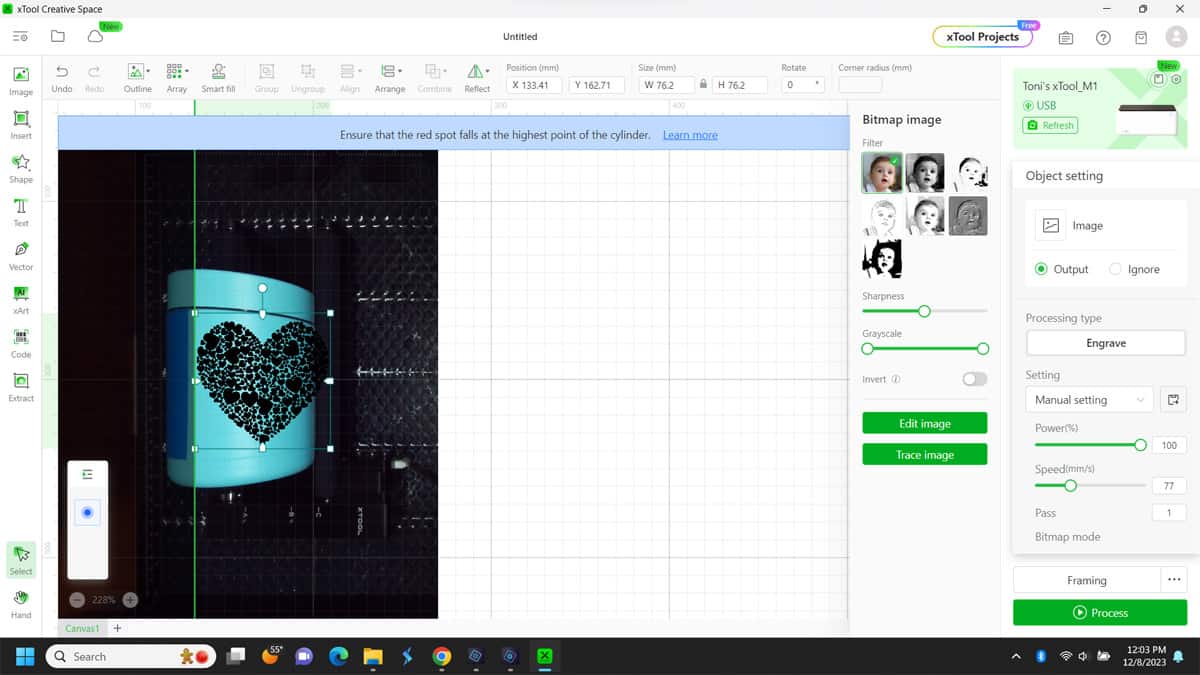
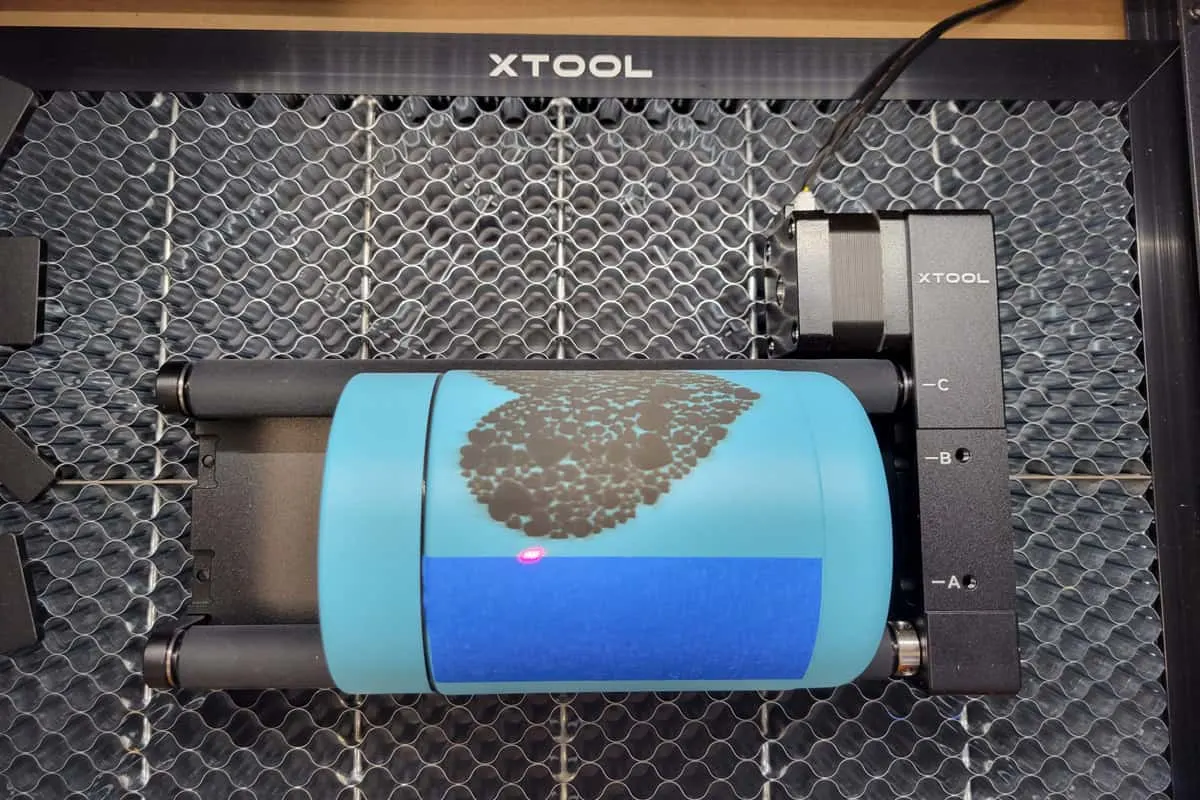
It’s helpful to place painter’s tape vertically on the tumbler where you want the left edge of your design to begin engraving. As you can see from the blue warning on the image below, the red dot should be on the highest point of the tumbler. This might require to you to reposition the RA2 slightly.

- Rotate the tumbler so that the painter’s tape lines up to the red dot.
- Align the graphic in XCS to the edge of the greenline that runs through the screen and position vertically on the tumbler.
- Change the Settings for your Object:
- Process Type will default to Engrave
- I used Power 100 / Speed 77 / Pass 1 / Lines 100
- Run a Frame Test and when satisfied press Process.
Cleaning up the Laser Engraved Tumbler
- Wipe away the dark residue with an alcohol soaked rag.
- Wet malamine sponge and scrub away to remove any risidual coating.
- It’s going to take some elbow grease and rubbing from several directions.
- If you’ve got it right you’ll start to see the stainless steel appear.
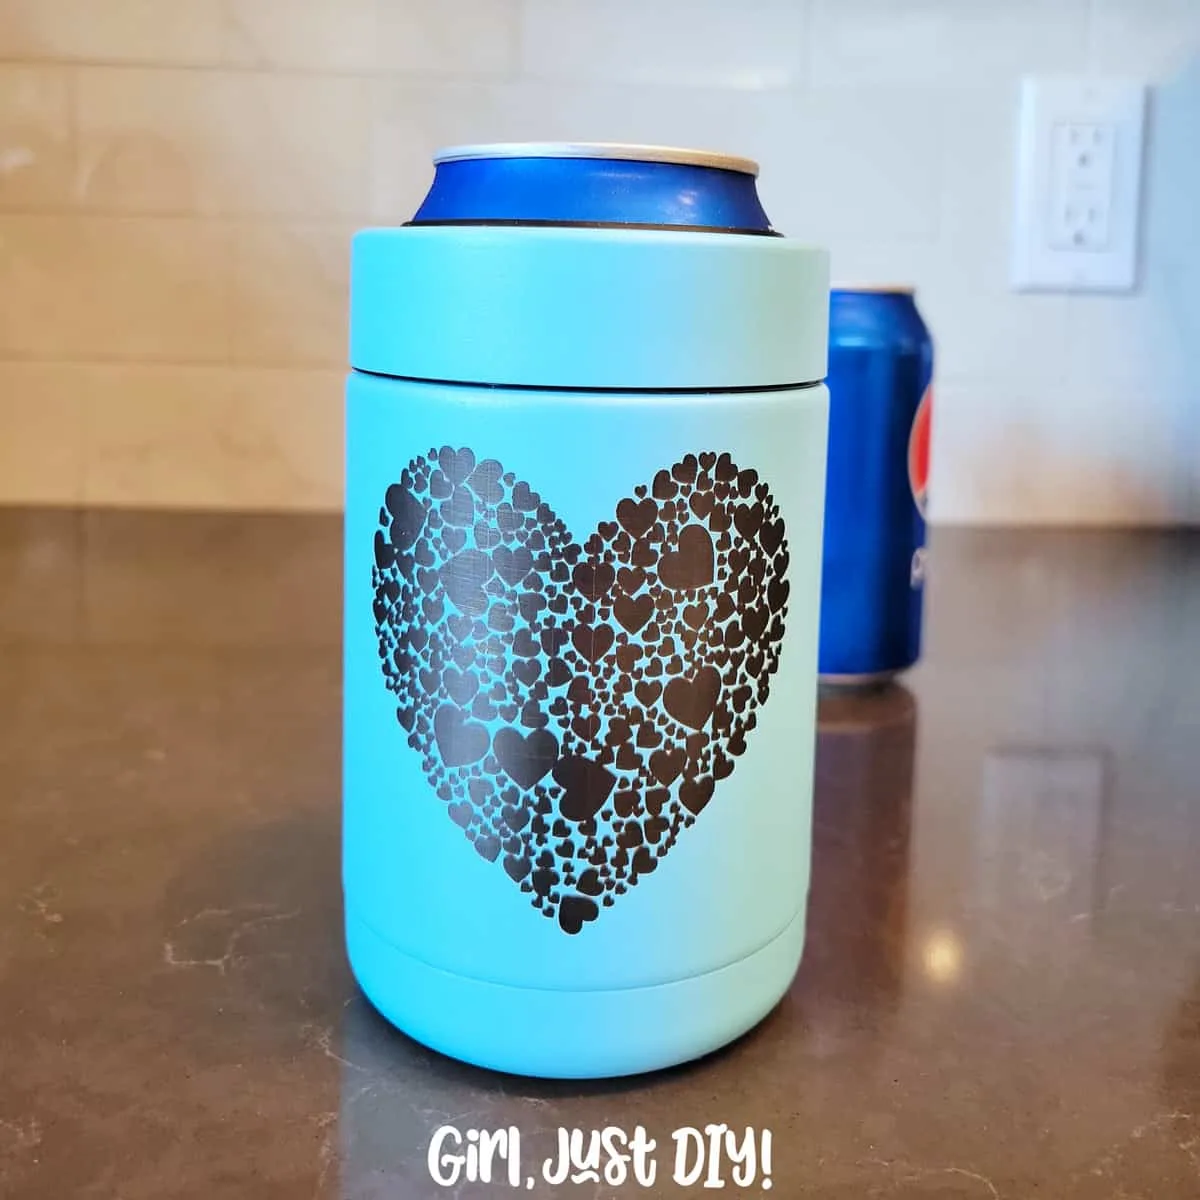
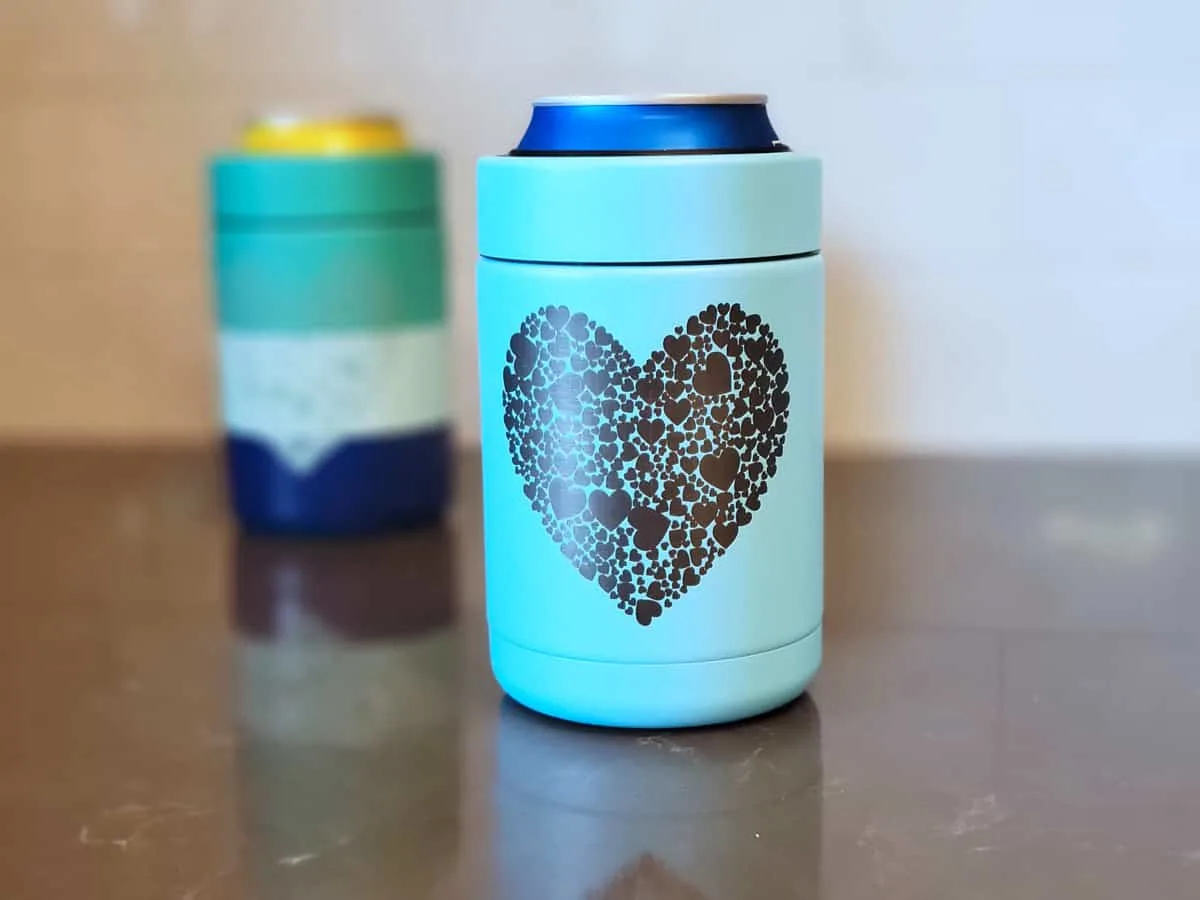
1. My Results
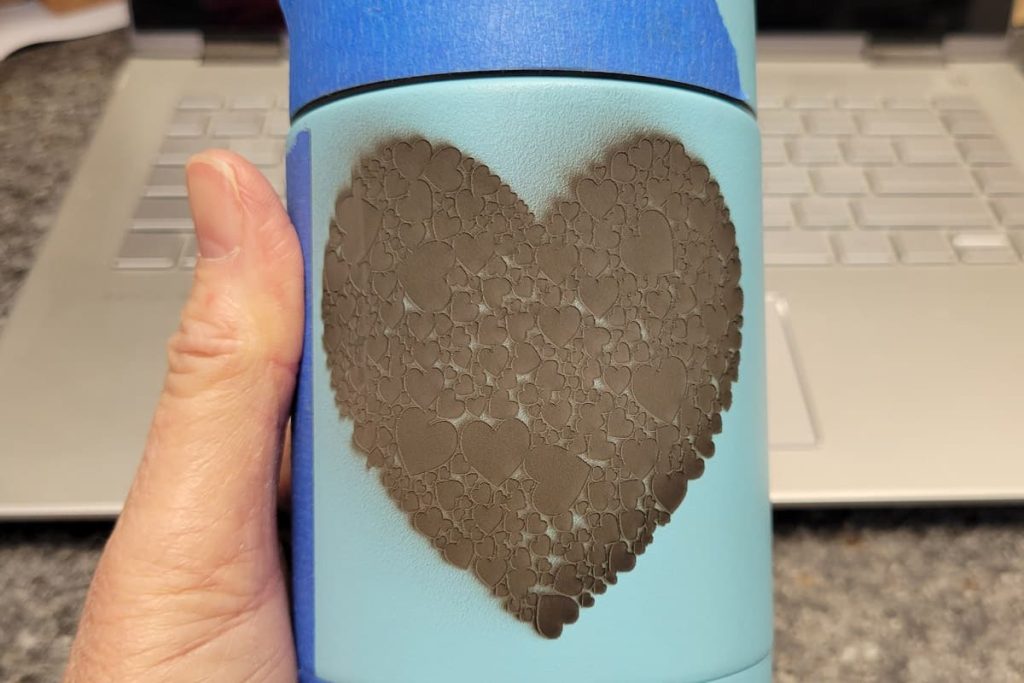
Here’s my first attempt where it seemed to just etch and never made it through the power coating. I’m not unhappy with how it looks. after cleaning it up. It wasn’t what I was going for but I’ll call it a happy accident.


You can see a gap between the red dot and the image, that’s because my image had a bit of a border to it. Also, after cleanup there’s a faint line on the the left side of the heart. I’m not sure what caused that
I forgot to turn on the Air Assist until I’d already started engraving, so the debris could have had an impact.
2. Troubleshooting
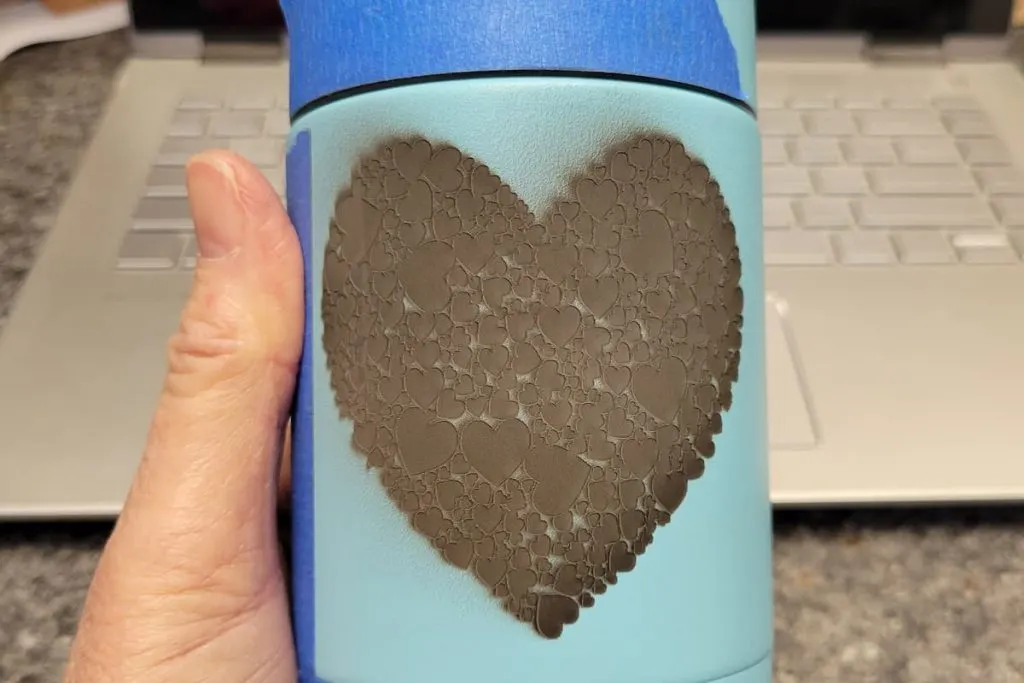
Figuring that my light image resulted in etching versus engraving, I changed the color to black and tried again.

3. Adjusted Settings
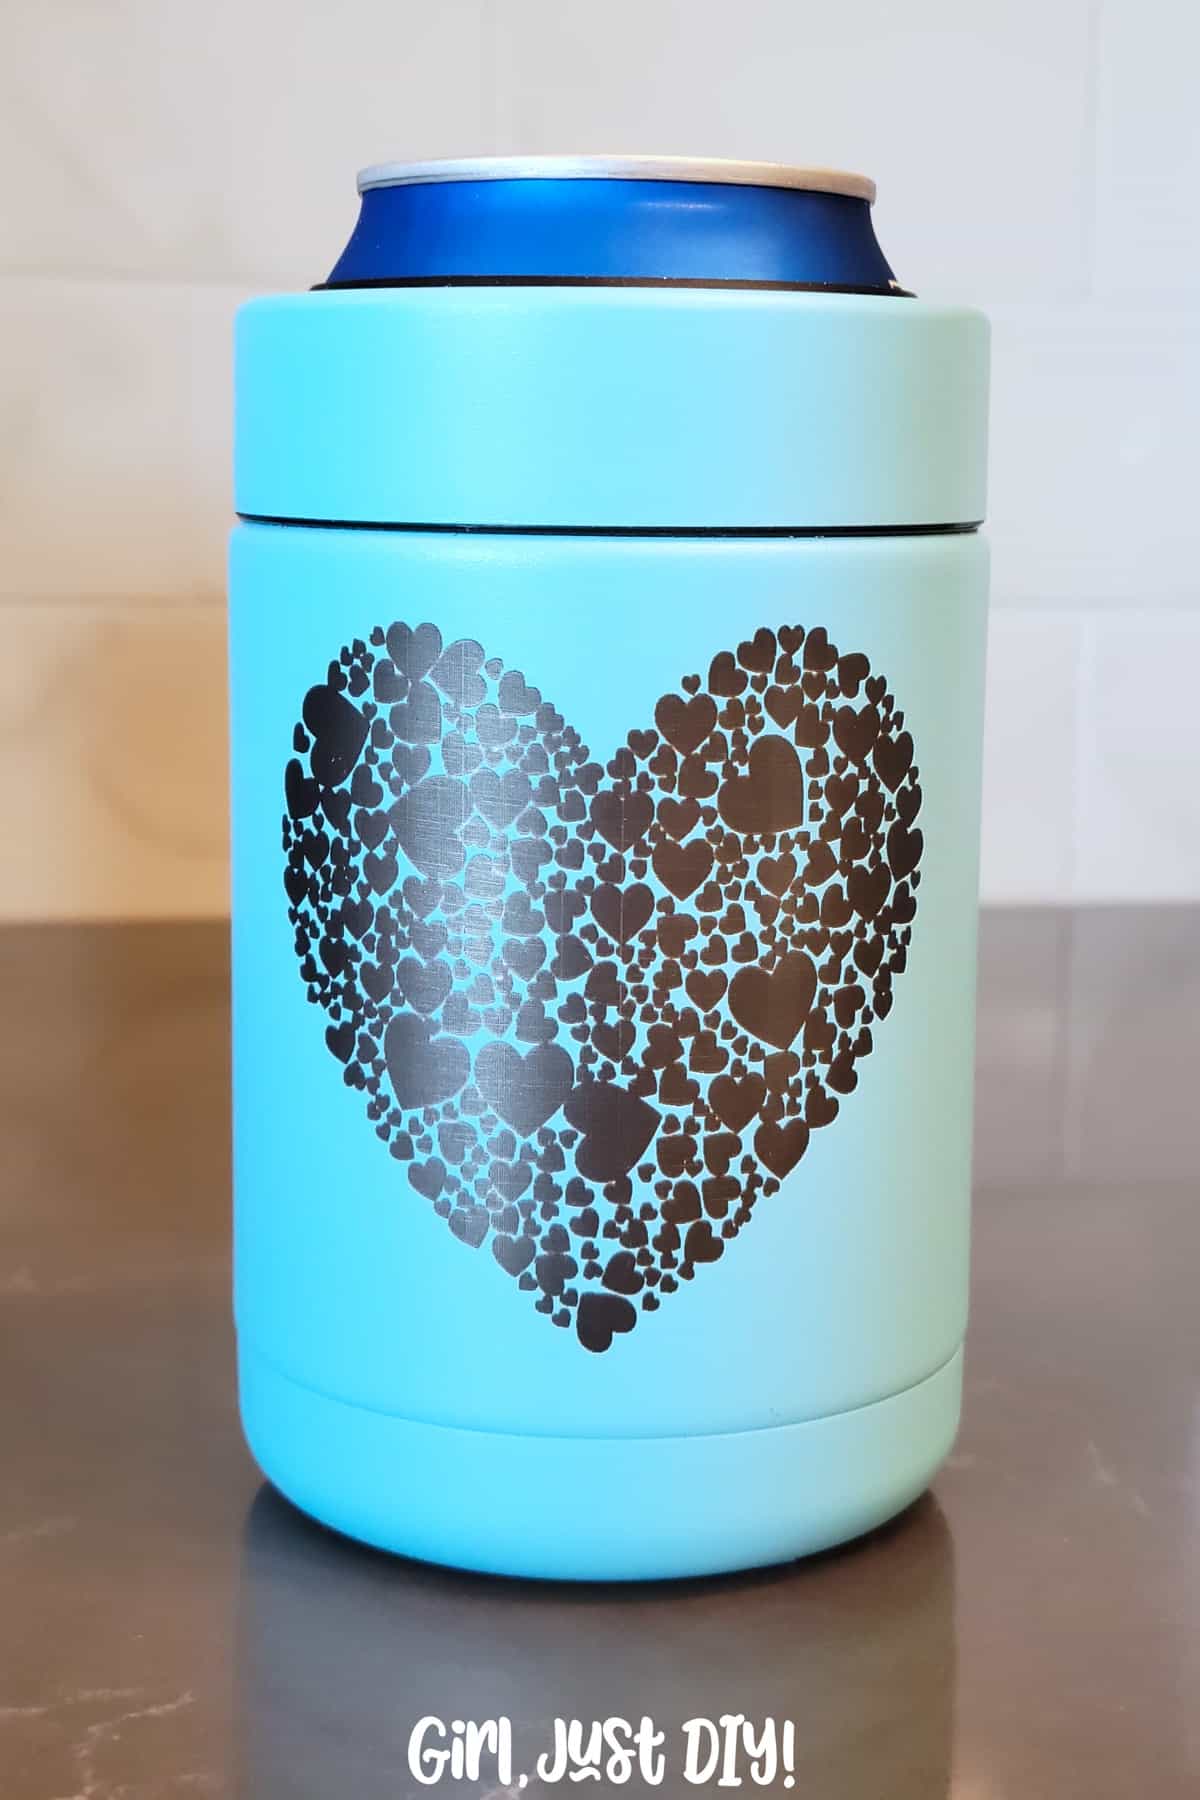
I ran the darkened image on a second engraved tumbler using the same settings as my first try (100/77/1/100).

While it looked good after I cleaned it up, I could easily see some lines etched in the stainless steel.
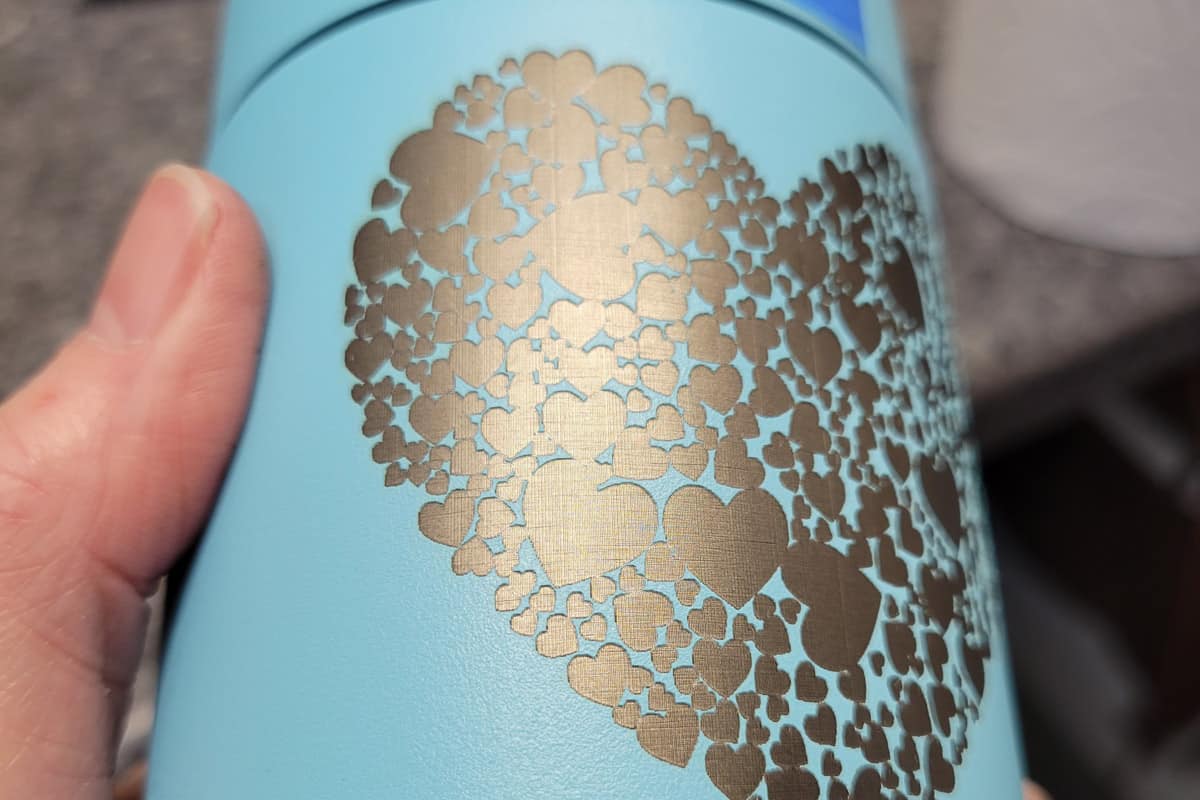
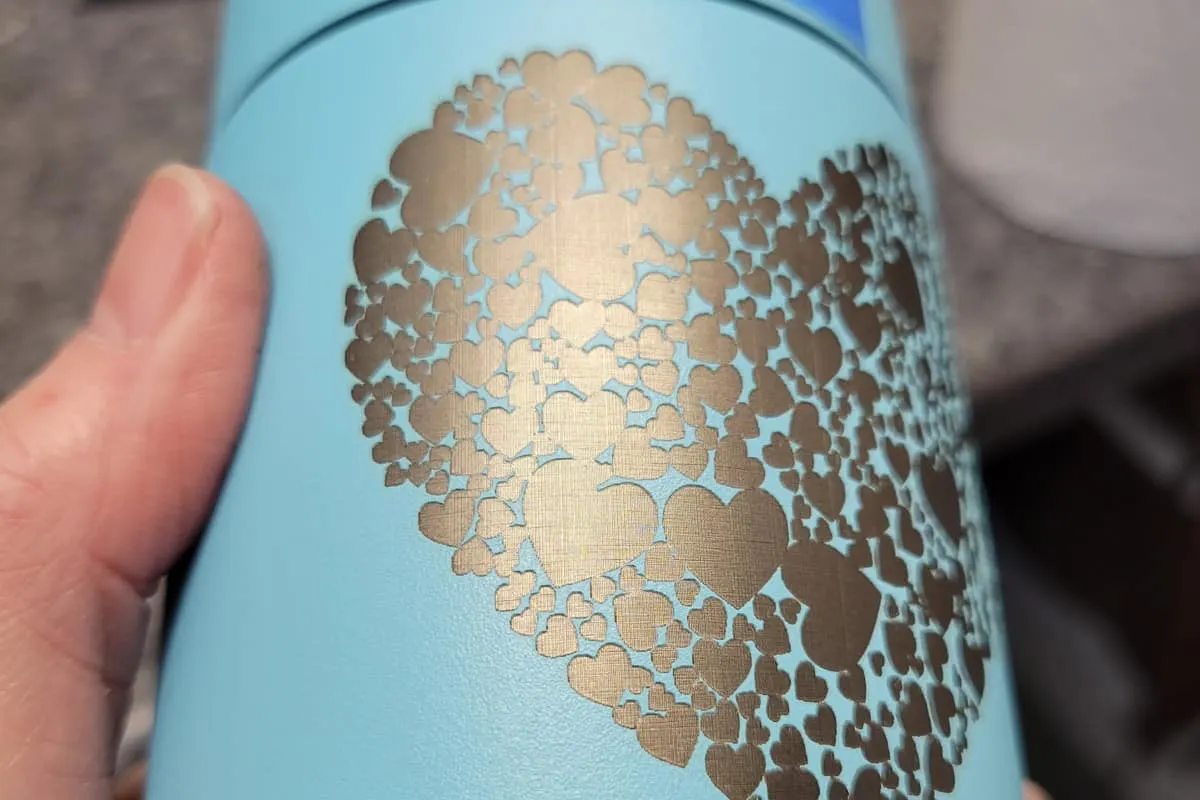
I did a bit more research and found this video that helped me choose better settings of Power 100 / Speed 50 / Pass 1 / Lines 160.

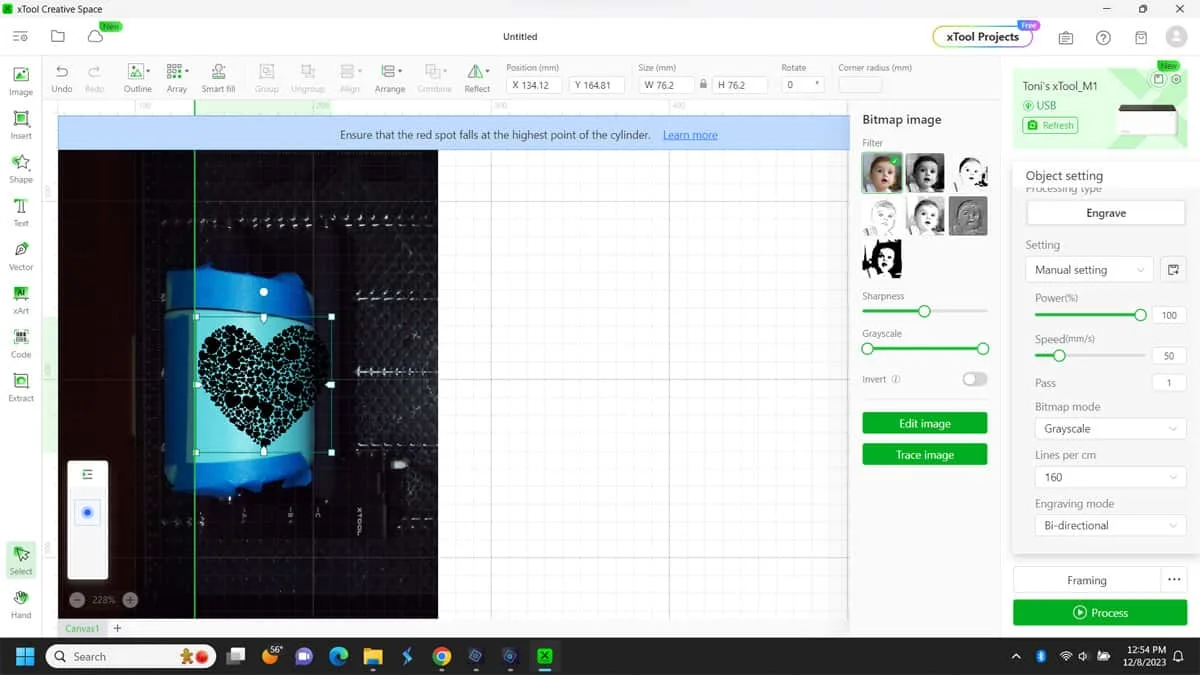
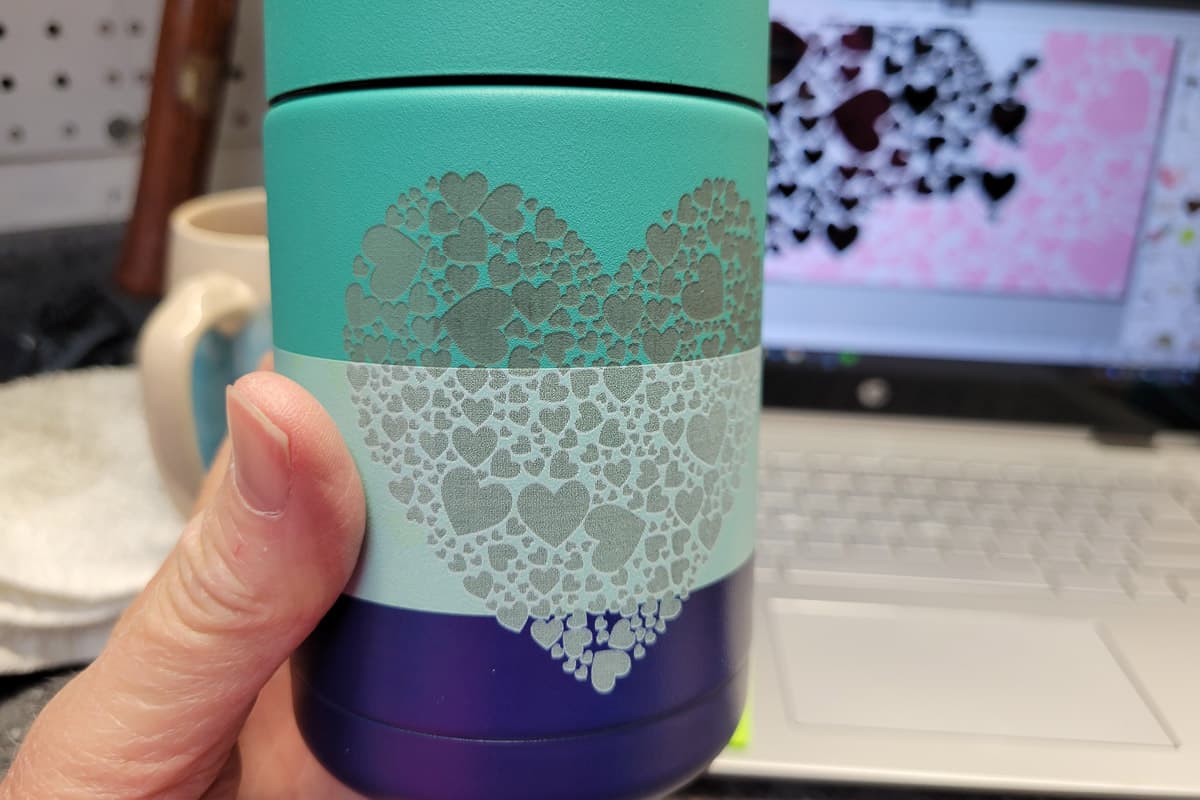
That seemd to do it, you can tell by the soot created that I got a better engraving this time.
It cleaned up nicely and the engraving was much smoother.


You can see the shine after scrubbing it with the malemine sponge.
Overall I’m very happy with my first laser engraved tumbler. There are some imperfections but I’m so happy I did it. I can’t wait to try again.
But practicing on these tumblers could get very expensive if they don’t turn out great. So I had a great idea to find various sizes of tumblers at thrift stores and engrave on those as practice to perfect the process.
Even if they had some company’s logo on them I’ll practice on the other side. Maybe even a full wrap would be okay for practice.
What do you think, are you ready to try engraving on a tumbler?

LOVE IT!! PIN IT!!
SPACER
EVEN MORE XTOOL SAVINGS
Machines up to $1728 off and Free Santa Gift (worth up to $100) Accessories up to 12% off
Buy 2 get 10% off. Code: CHRISTMAS10 – Buy ≥3 get 12% off. Code: CHRISTMAS12
xTool P2 CO2 Laser: Up to $ 1700 off – Fulfill All Inspirations
xTool S1 Diode Laser: Up to $ 1014 off – Entertain with Family & Friends
xTool F1 Portable Laser: Up to $ 1365 off – Everyone Could Be a Santa
xTool D1 Pro Laser: Up to $ 1052 off – Have Fun with DIY from the Start
xTool M1 Smart Bundle: Up to $ 1462 off – Minimum Budget Big Satisfaction