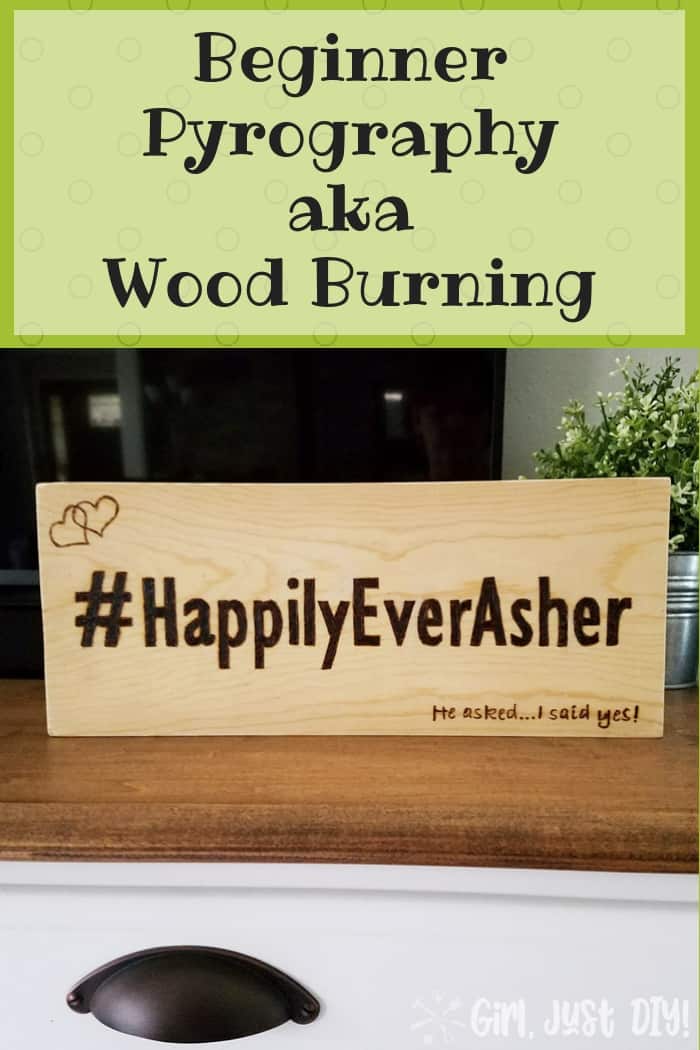
Raise your hand if you’ve used a wood burning tool before. I had used one before I made this cute little beginner wood burning sign, but not freehand. That’s a little more challenging but I tackled it to make this cute sign last year as a surprise after my daughter got engaged. If you’ve never tried it then this (or similar) beginner wood burning project is perfect for you.

For a very long time I’ve been saving “pyrography” projects (the technical name for wood burning art) to one of my many pinterest boards. Since it was time for the monthly Pinterest Inpiration blog hop I thought it was perfect time to share my project and one of the projects that inspired me to finally use my wood burning tool.
The Pinterest Inspiration Blog Hop is hosted by My Pinterventures, where a group of bloggers get together and make our version of something we love from Pinterest. And we get to share them with you all in one inspirational post. You’ll find the rest of the group’s inspiration projects linked at the bottom. You don’t want to miss what they created!
You can check out this beautiful inspiration project, it’s really one of many I’ve seen and wanted to try. This is my version and I’ll give you the breakdown of how easy it is to get started on your beginner wood burning project.
This post contains links to products, if you purchase something after clicking on my link I may earn
a small commission (at no extra cost to you).
Beginner Wood Burning Supplies
- Wood Burning Kit (I have this one)
- Needle-nosed pliers to switch burning tips
- Transfer Paper
- Painter’s Tape
- Printed Design (the simpler the better to start)
- Board in proper size for your design
- Pencil, ball-point pen, or similar for tracing
- A bowl or coffee cup to rest your hot wood burner (on a coaster or trivet)
Preparing to Wood Burn
- Print out your design onto a piece of paper to fit your sign. (You may have to splice your design like I did below.)
- Line up your design and tape the top edge to the board.
- Slip a piece of transfer paper under the design sheet.
- Holding the paper in place carefully trace around the letters/design using a dull pencil, a ball-point pen, etc.
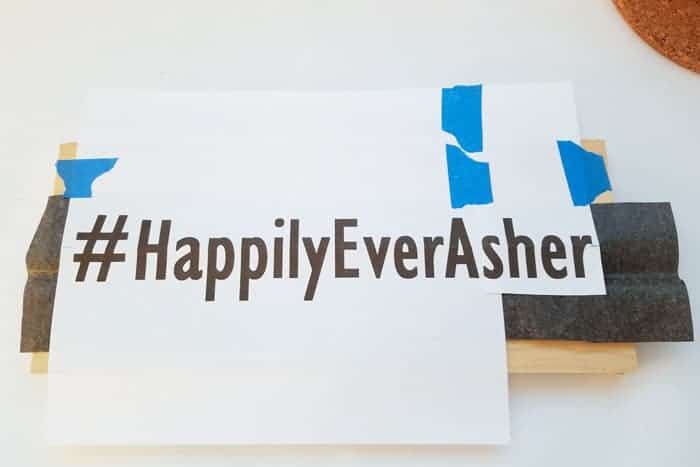
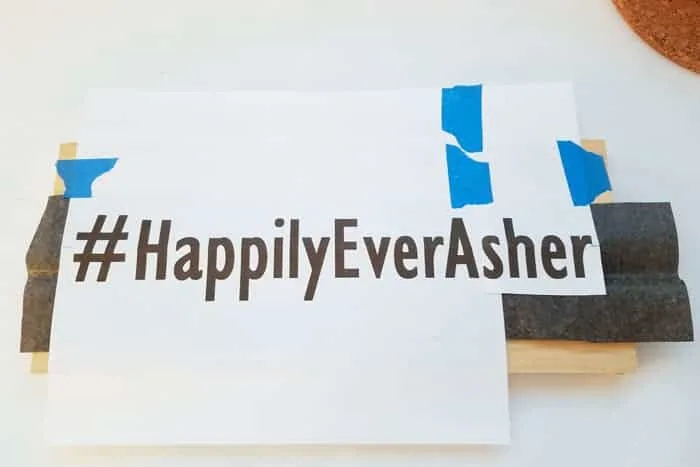
- After your first letter (or symbol) check to see that you are using enough pressure to transfer the design.

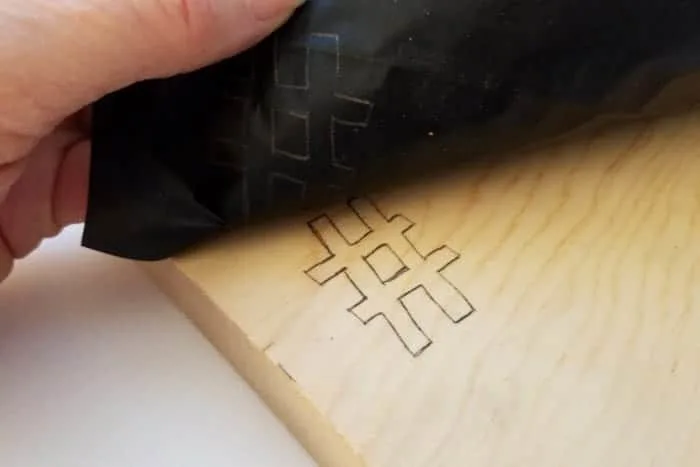
- Continue until all the design is transferred to the wood.

Transfer paper is amazing stuff that I’ve used on several other projects, including the Welcome Sign on my front porch.
If you’ve never used a wood burning tool before please take some time to do some testing on a piece of scrap wood. It’s much easier to make your beginner wood burning sign or design on a piece of birch-faced plywood. Dealing with wood grain in the pine I used made it a bit difficult to get a smooth line. The grain is harder to burn than the softer areas between.
Also, please think about safety first and foremost. These tools can cause a fire if you aren’t attentive to it when it’s not in your hand. The wood burning kit I have has a variable heat dial so you want to test that out to get the proper heat setting for the wood you choose.
The kits come with a little metal stand where you can lay your wood burner when not using it. I prefer to put mine into a deep coffee cup on a cork trivet or similar. The cup will still get hot but there’s no chance of it rolling off the metal stand.
Ready, Set, Wood burn
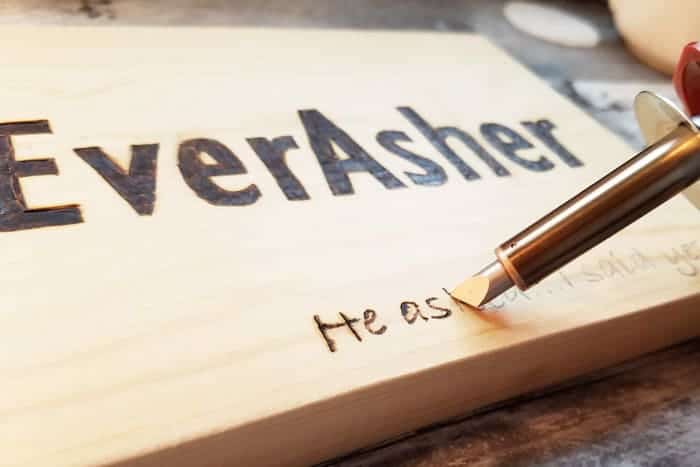
Well, I missed taking a picture of me doing the outline of the block letters so I’ll come back to those in a second. Do the outline first and then fill in. Kind of like coloring.
- To outline the letters or when outline a design, always move in a downward/pulling motion toward yourself.
- Rotate the board as necessary to continue wood burning the outline.
- To get a fine line use the standard tip (usually comes installed with the standard tip) like when I worked on the smaller more curvy letters.

- With the letters or design outline completed use the needle-nose pliers to change the tip to similar rounded-tip as shown below.
- Use a “coloring” motion to skim the surface to burn and fill in the outline.

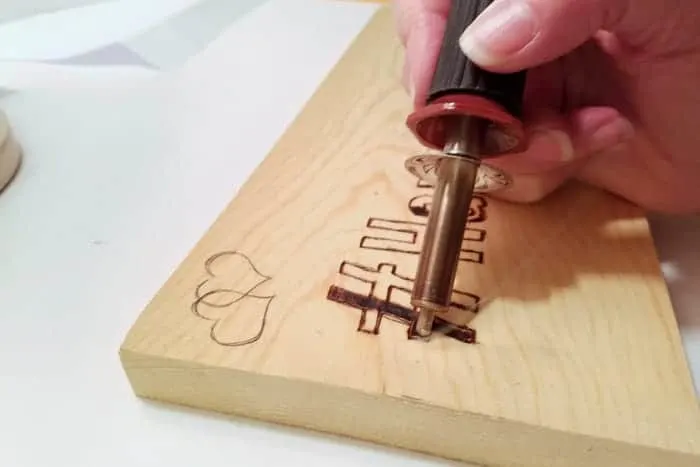
- Continue the coloring motion until all letters in your beginner wood burning sign are filled in.
- This can take some time and you can always burn over areas a second time if necessary.
- The tool will get quite hot so be very careful when handling it.
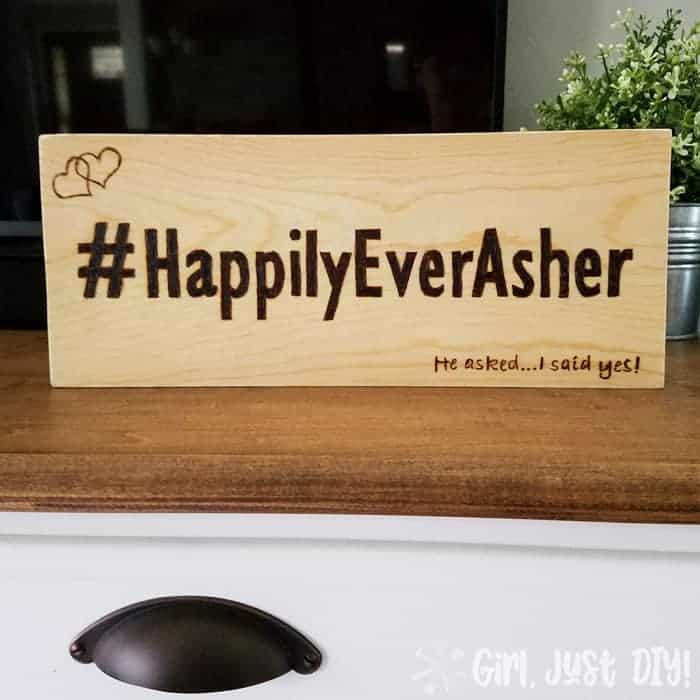
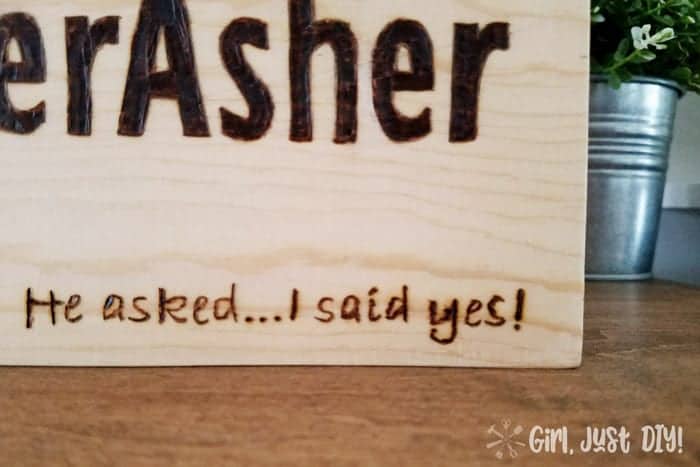
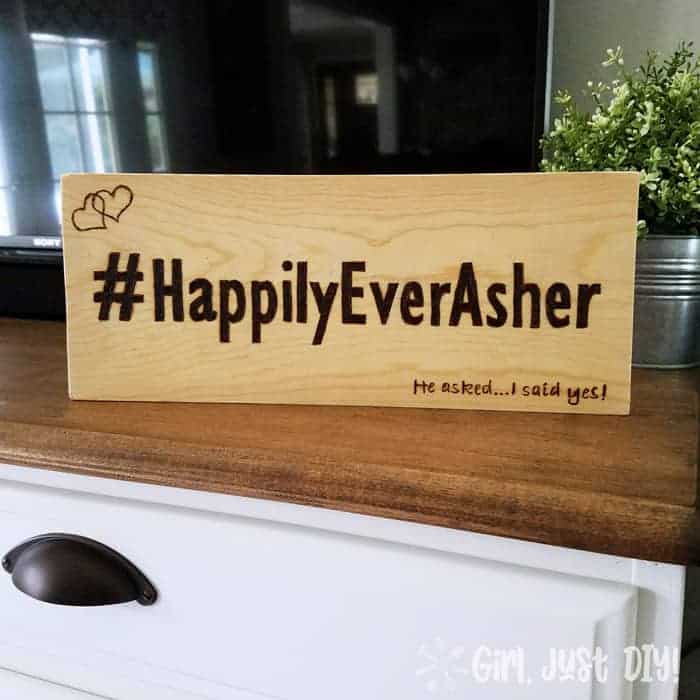
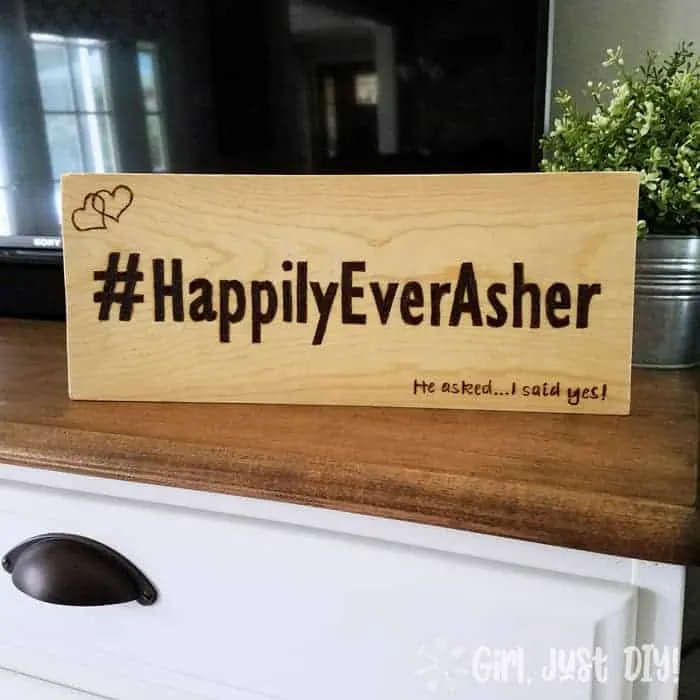
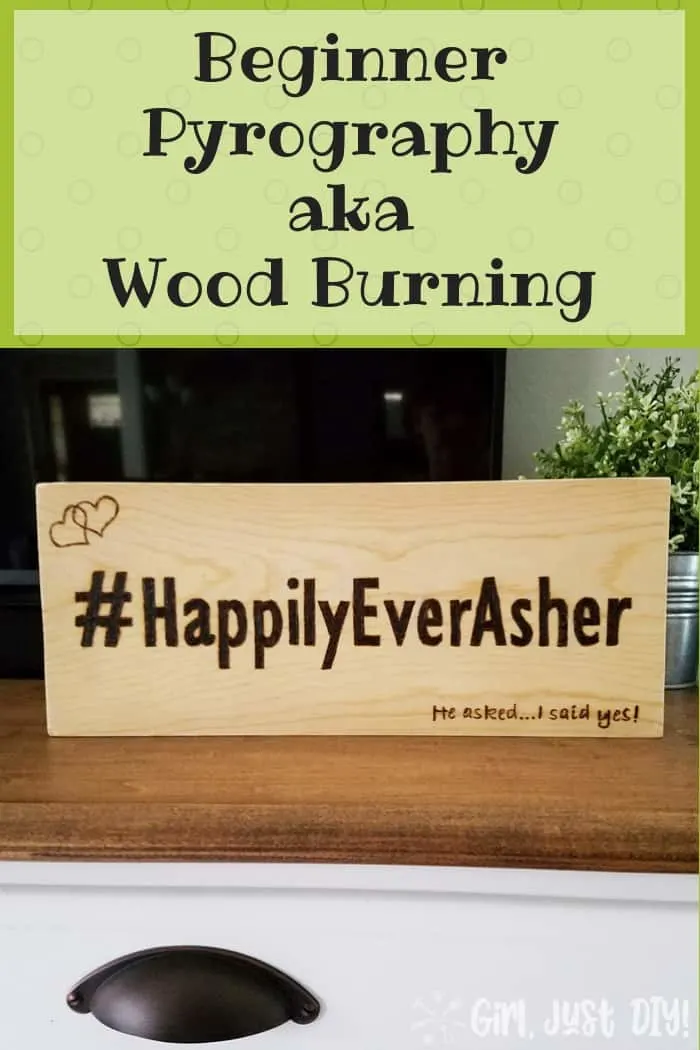
Here’s a closeup of the lower section of the sign. There are some areas I goofed a little but overall it’s not too shabby for my first freehand wood burned sign. I did my second one on a vintage rolling pin for my sister’s birthday.
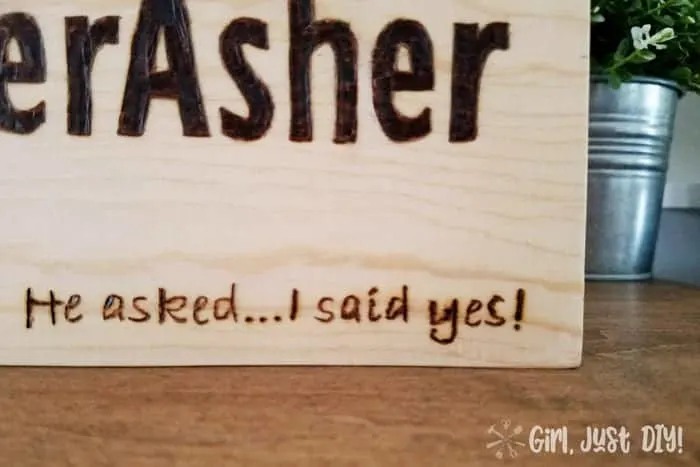
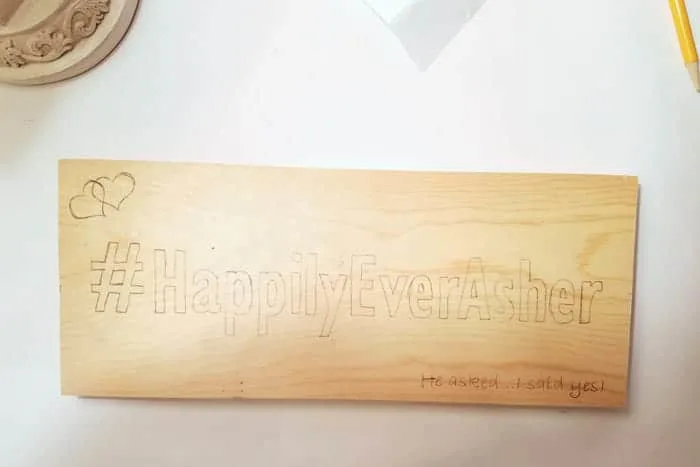
The weekend my daughter got engaged a friend and I sneaked into her condo and set up a little surprise homecoming for her with flowers and balloons. This little sign was front and center. I chose this saying because they immediate chose a personal hashtag for their engagement/wedding. It fits perfectly since her last name is now Asher. They are going to be Happily Ever Asher 🙂
I had planned to do a light stain over the top, or filling in the hearts with a little red paint. after they got back but my daughter loved it just like this.
This is an easy project and I know you could have a ton of fun with your own beginner wood burning project. Would you make a sign, do some wooden spoons, or maybe a cutting board?
Whatever you choose, get busy Girl, Just DIY!
Don’t forget to check out the other Pinspirational projects below.
PIN IT FOR LATER!
To join next month’s #pinterestchallenge, click here to sign-up ⇒ November Pinterest Challenge
Now let’s see what other things Pinterest inspired! Head over and visit the other hosts to see what they crafted, cooked, built, or tried!

Erlene – My Pinterventures • Gail – Purple Hues and Me
Kristie – Teadoddles • Lynne – My Family Thyme
Joanne – Our Unschooling Journey • Jenny – Cookies, Coffee and Crafts
Shirley – Intelligent Domestications • Debbee – Debbee’s Buzz
Beverly – Across The Boulevard • Julie – Sum of their Stories
Michelle – Our Crafty Mom • Marie – The Inspiration Vault
T’onna – Sew Crafty Crochet • Laurie – My Husband Has Too Many Hobbies
Alexandra – Eye Love Knots • Emily – Domestic Deadline
Terri – Our Good Life • Leslie – Once Upon a Time & Happily Ever After
Roseann – This Autoimmune Life • Toni – Girl, Just DIY
Kelley – Simply Inspired Meals • Lauren – Mom Home Guide
Debra – Shoppe No.5 • Lydia – Lydia’s Flexitarian Kitchen
Susan – Suzer Space • Habiba – Craftify My Love
Easy DIY Welcome Sign - You Can Make This! - Girl, Just DIY!
Friday 8th of March 2019
[…] Transfer Paper ProjectsDIY Yarn Bowl | Beginner Wood Burning | Rolling Pin […]
Habiba
Friday 26th of October 2018
Toni, finally I've made it through the link Party. I love how this sign for your daughter tunred out. And the rolling pin, too. I am pinning them both to my wood burning board so my followers can find Inspiration in your wonderful crafts.
Sew Crafty Crochet
Wednesday 24th of October 2018
This looks like a really fun project! My father made me a wood burned sign with my name. I keep it on my desk. ?
Jenny
Friday 19th of October 2018
What a wonderful surprise you did for your daughter. This is beautiful! Wood burning looks like so much fun.
Kelley
Wednesday 17th of October 2018
How fun! I've always wanted to try this.