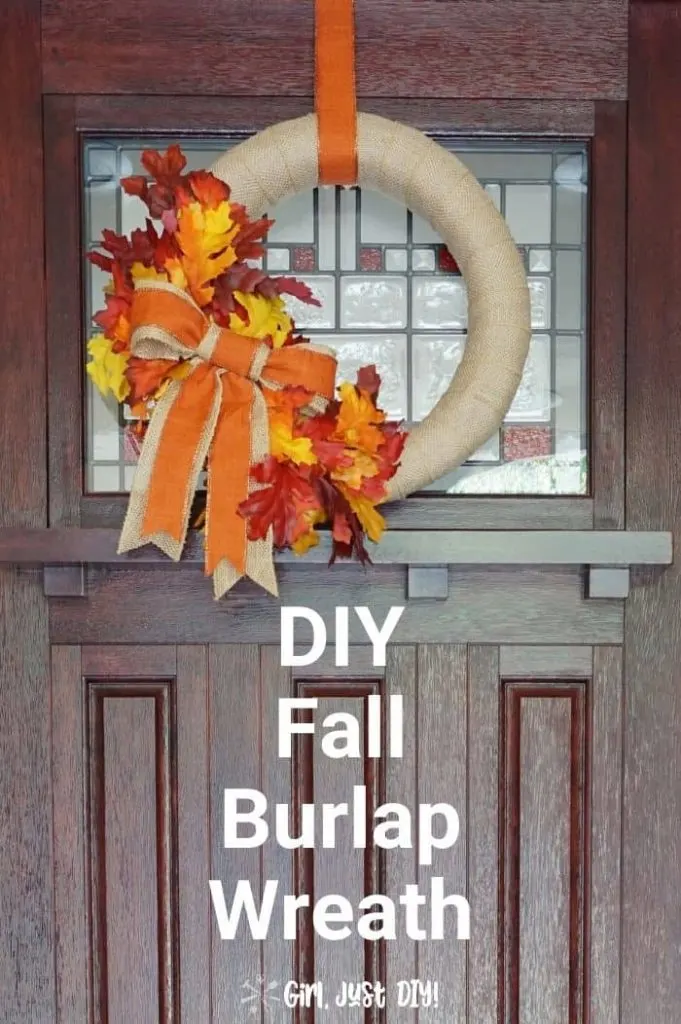
Hi fiends, today I’m going to show you how I made this Easy DIY Fall Wreath. I’ve had a few wreaths on my door but until now I’ve never tried making my own.

It’s not as hard as you might think so I encourage you to give it a try this year. I’ll show you how easy it is to make your own fall wreath below.
This project originally appeared on Today’s Creative Life as part of her Celebrate Summer series with a bunch of other creative guest bloggers. My post date was closer to Autumn than summer so I made a Fall Wreath.
My neighbors might think I’m rushing Fall since it’s still pretty warm in Northern California. But I’m usually a last minute decorator so it’s nice to be ahead of the curve for a change.
School just started for the kids in our area and Halloween stuff is already in the stores. So I think I’m good 😉
This page contains links to products, if you purchase something after clicking on a link I may earn a small commission (at no cost to you). If you do make a purchase, thank you!
You can read about affiliate links here.
Easy DIY Fall Wreath DIY Supply List
- 14″ Straw Wreath Form
- 15-18′ Burlap Ribbon (2-1/2″ wide)
- Glue Gun & Glue Sticks
- Sharp Scissors
- 1 Bunch Silk Fall Leaves
- Wire Cutters
- Fall Bow for Decoration
- Fall Ribbon for Hanging
Simple Steps to Make a DIY Fall Wreath
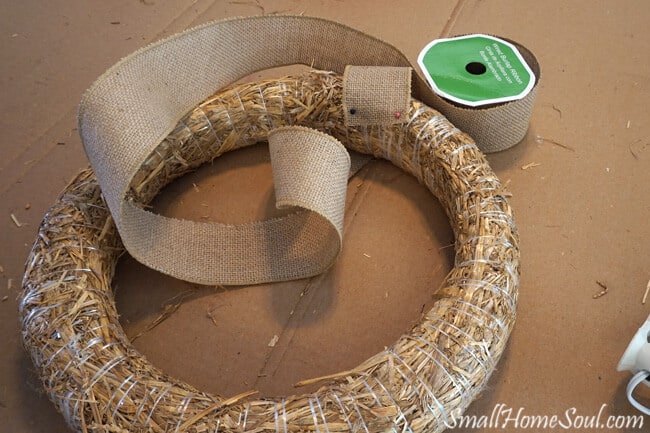
Step 1: Cover your wreath form.
Start with your burlap ribbon at a bit of an angle since you’ll be wrapping it around the wreath form.
- Use a glue gun and glue the end of the ribbon to the wreath form
- Secure it with a few pins while it dries and to ensure it’s stays put as you begin wrapping.
- Keep wrapping the burlap ribbon around the form.
- If your roll runs out simply glue it to the form (trim so the seam will be on the back).
- Over the top of that piece glue the end of the next roll and keep wrapping until you get to the start.


I used a high heat glue gun this time and it took forever for the glue to dry. I’m impatient, thus the pins. For most projects I prefer my low heat glue gun, they don’t get as hot and the glue sets up quicker.
If there are gaps or bumps in the ribbon as you wrap just fold them over into a pleat on the back side of the wreath and keep wrapping. This will keep the front looking smooth. You can see a few folds in the pic above.
My roll of burlap ribbon came in 15′ rolls and one wasn’t quite long enough. I cut off the ribbon that wouldn’t loop around one more time and glued it down on the back.
Continue with the second role until the wreath form is fully covered. Cut with your scissors and hide the end on the backside. It took approx 18′ to cover the wreath.
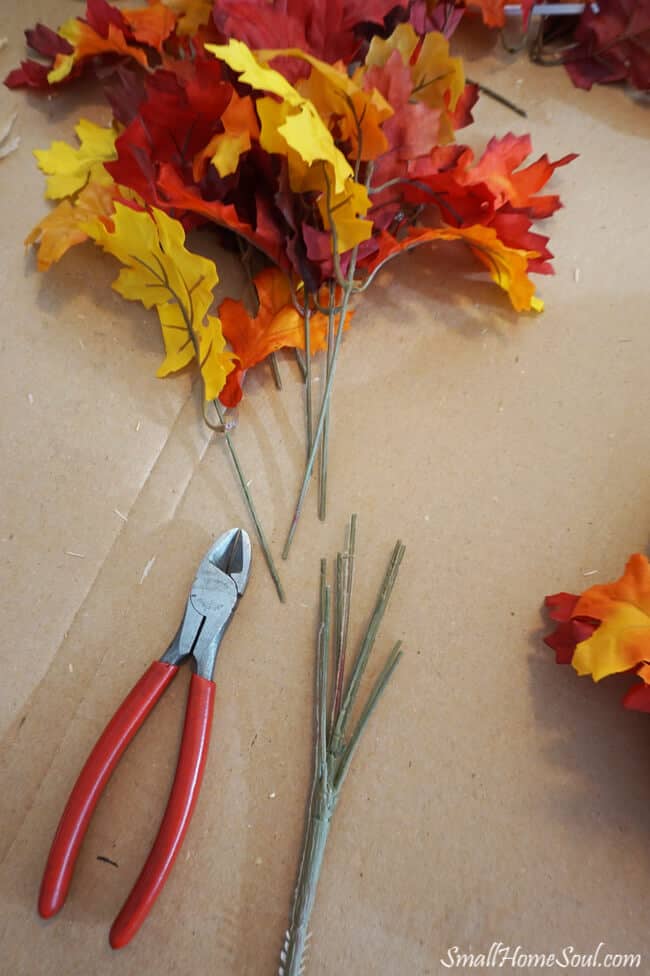
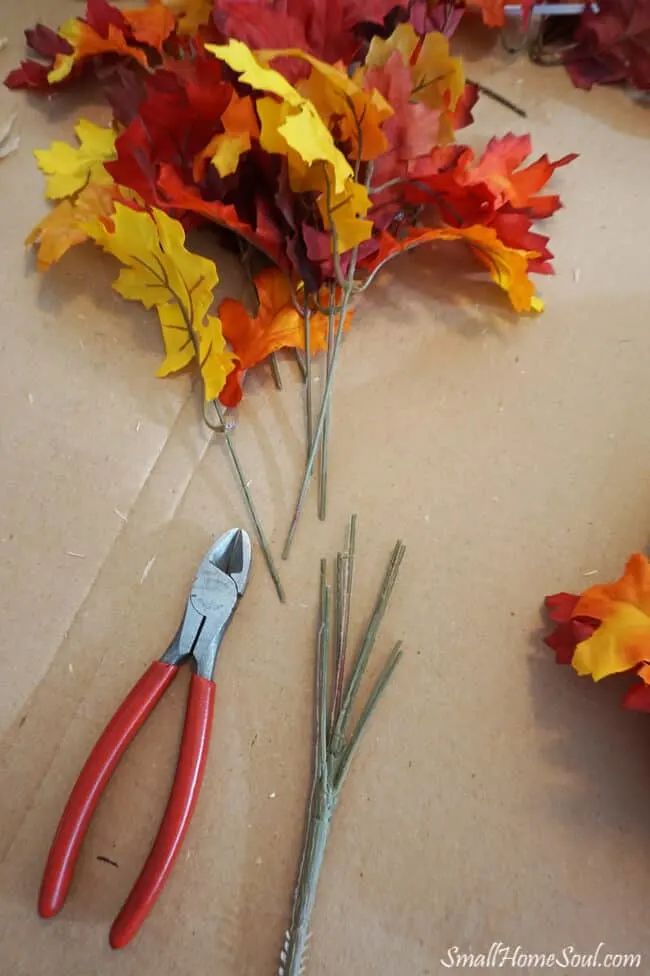
Step 2: Prepare foliage
When the wreath form is fully covered move on to the leaves.
- Use wire cutters to clip each stem from the bunch.
- I left them a little long until I was ready to attach them to my wreath. Each stem usually has two or three bunches of leaves.
- Push each bunch up almost to the end and leave a little space between each leaf bunch.
- Divide up the stems and lay them out in a spray pattern that you like. Enough to cover about 1/3 – 1/2 of the wreath.
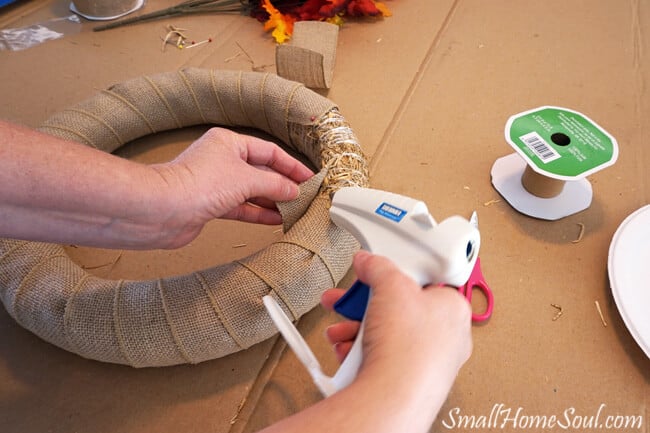
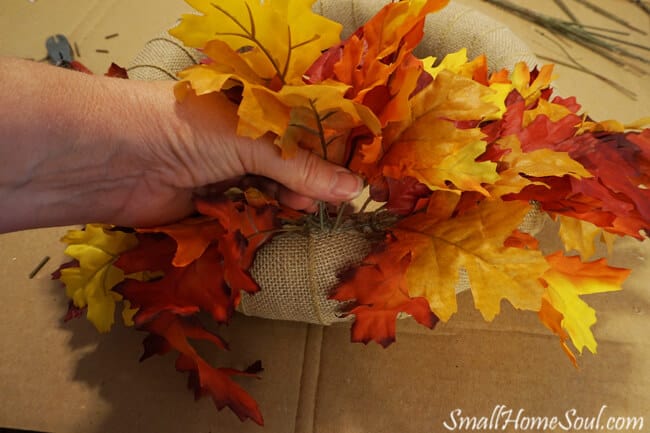
Step 3: Attach the foliage to the wreath.
This is where your Fall Wreath really starts to come to life.
- Cut the stem about 1/2″ from the bottom leaf and glue it to the burlap.
- Layer a few and work toward the middle.
- Do the same on the other side leaving a small gap in the middle as shown.
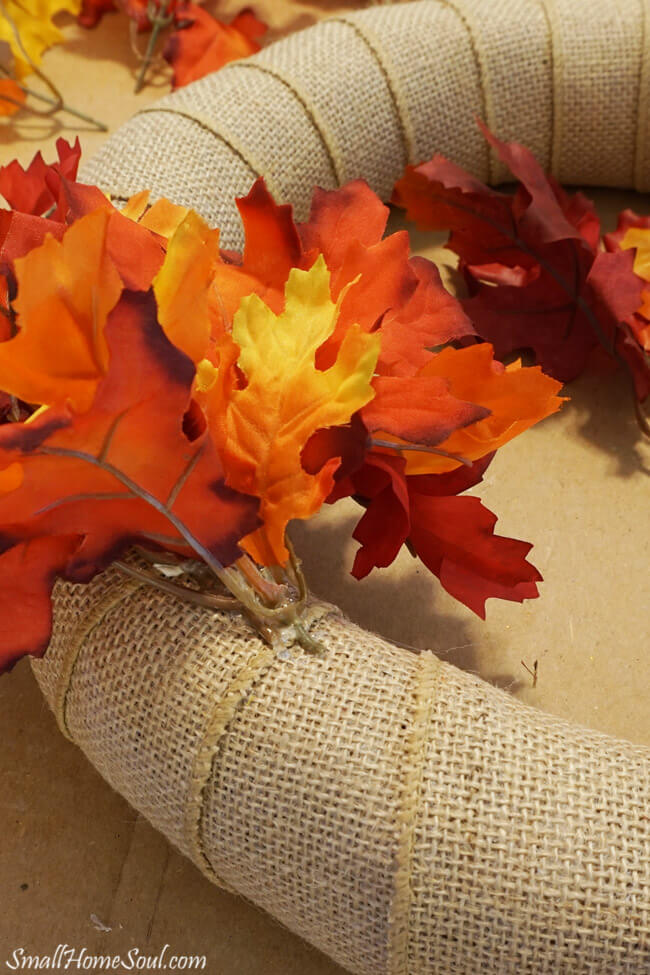
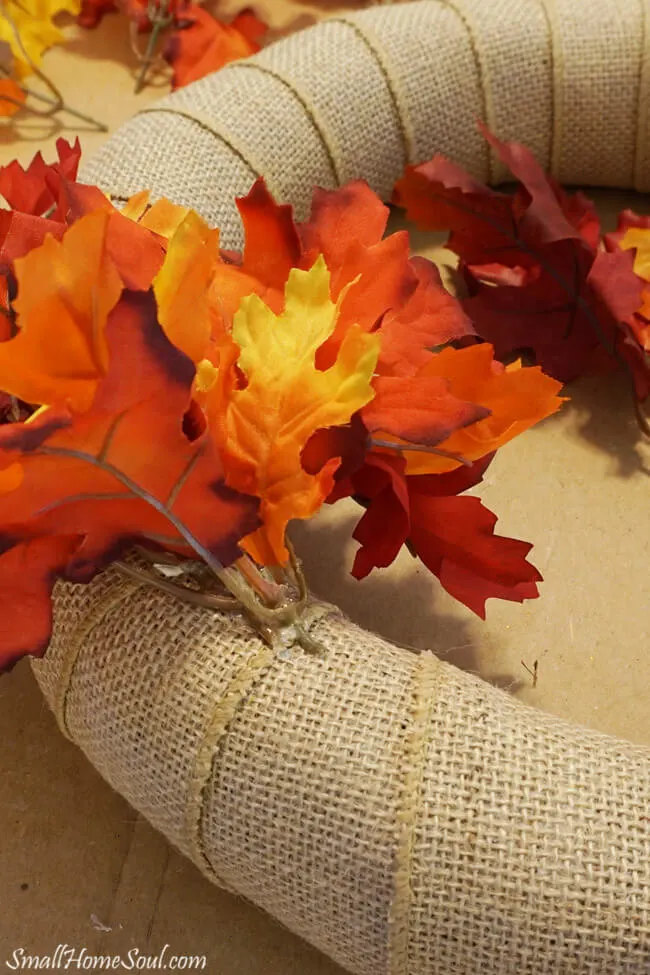

- Finally, to close up the middle use two leaf sets with a little longer stems.
- The longer stems created a pick that you can push into the straw wreath and hot glue in place.

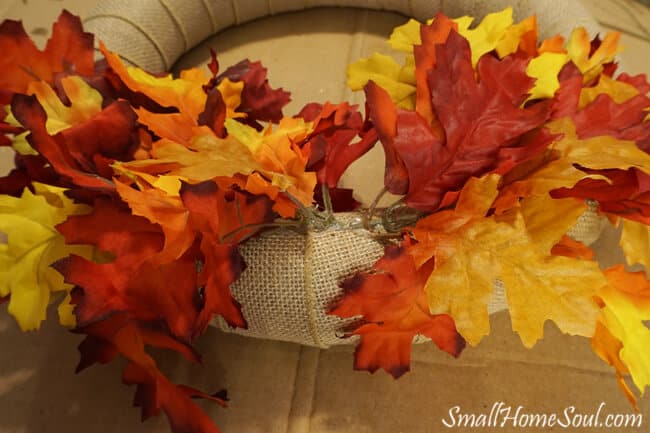
Pretty Finishes for a Fall Wreath
You can put just about anything you want on your fall wreath. On my Pumpkin Wreath Update I used some really cute Fall picks with gourds.
For this wreath I decided to make and add my own ribbon.
MORE FALL PROJECTS
Dollar Store Fall Flower Bucket – Grateful Wall Hanging
Fall Pumpkin Wreath
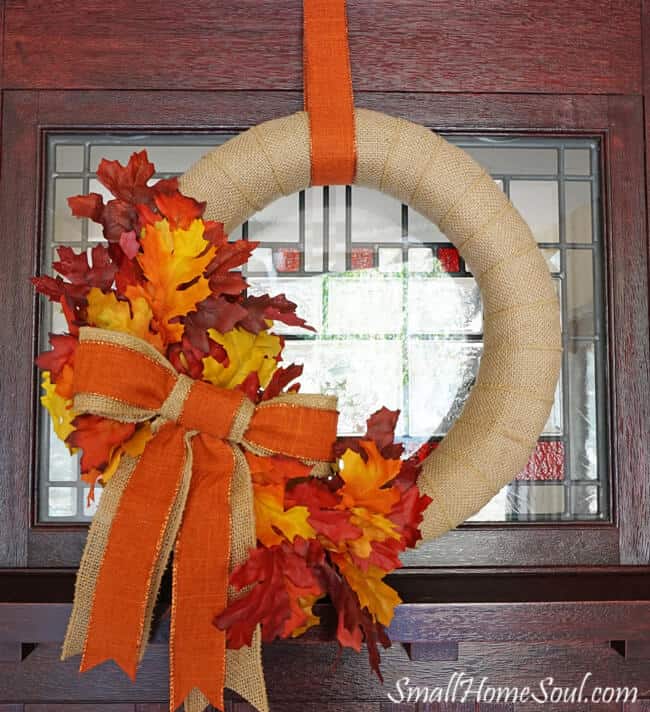
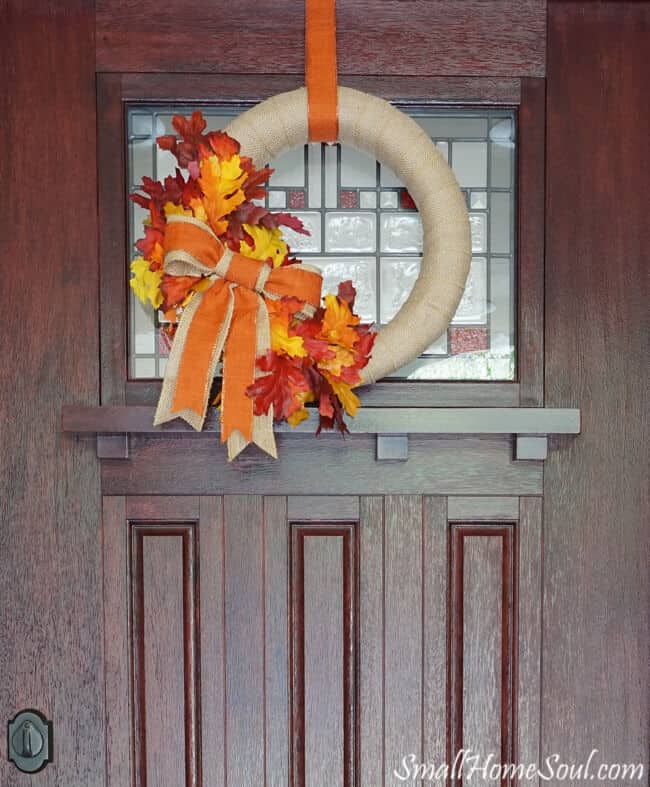
Step 4: Add a decorative ribbon.
Lastly, add a decorative bow and hang your new DIY Fall Wreath on your front door with more fall themed ribbon.
If you like the bow I used be sure to check out my Five Minute Fancy Bow Tutorial, and please watch and share the video too.

Now I’m ready for Fall, I’m so glad to be ahead in decorating for once.
LOVE IT!! PIN IT

I hope you like my first ever Fall wreath!

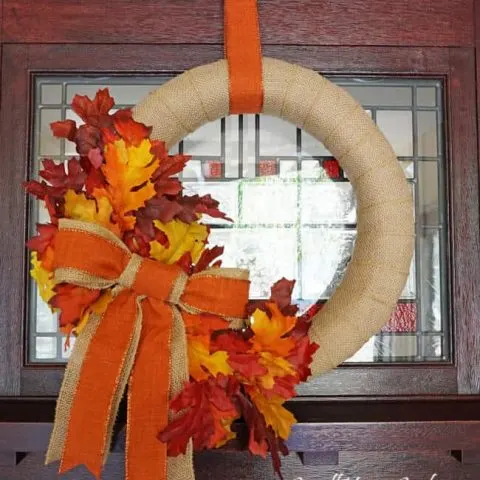
DIY Fall Wreath with Burlap
Let me show you how to make this quick and easy DIY Fall Wreath with Burlap and maple leaves. It's a beautiful and welcoming craft project for your front porch. Perfect Fall decor for Thanksgiving.
Materials
Tools
- Scissors
- Wire Cutters
- Glue Gun
- Pins
- Wreath Hanger
Instructions
- Wrap ribbon at an angle around the form. Secure at the back with hot glue. Keep wrapping it around and around and make pleats if necessary as shown above.
- Bunch leaves together and cut them from bunch with wire cutters.
- Use a glue gun to attach leaf bunches from the center out to cover 1/3 of the wreath.
- Add decorative bow in the center of the leaves. Or even add some decorative fall picks.
- Use more fall ribbon for hanging.
Notes
That's it, easy peasy and you're ready for Fall.
Mary-the boondocks blog
Thursday 27th of October 2016
Toni this is a marvelous wreath for fall. The colors are perfect and the bow is so big and makes an impression. And you can easily change it out for Christmas while keeping the neutral base.
Emily
Sunday 23rd of October 2016
This is lovely and so perfect for fall! Thanks for linking up with Merry Monday last week.
Toni Harvey
Monday 24th of October 2016
Thank you Emily, I love your link party. I'll be back :)
Kayla
Friday 21st of October 2016
How cute! I made a wreath from an old hose back in the spring and it was super fun. I would love to try it this way too. Thanks for sharing!
Laura
Friday 7th of October 2016
I am a big fan of seasonal decor and your fall wreath is attracted to me, it is easy to make. I love fall leaf but maybe i will chose other colorful ribbons. But i hope it still looks beautiful as you did.
Thomas
Wednesday 5th of October 2016
I have found lots of ideas for making the fall wreath on the internet, but they seem too difficult to make. This one from you appears to be easier, thanks for the easy tutorial !!! :)