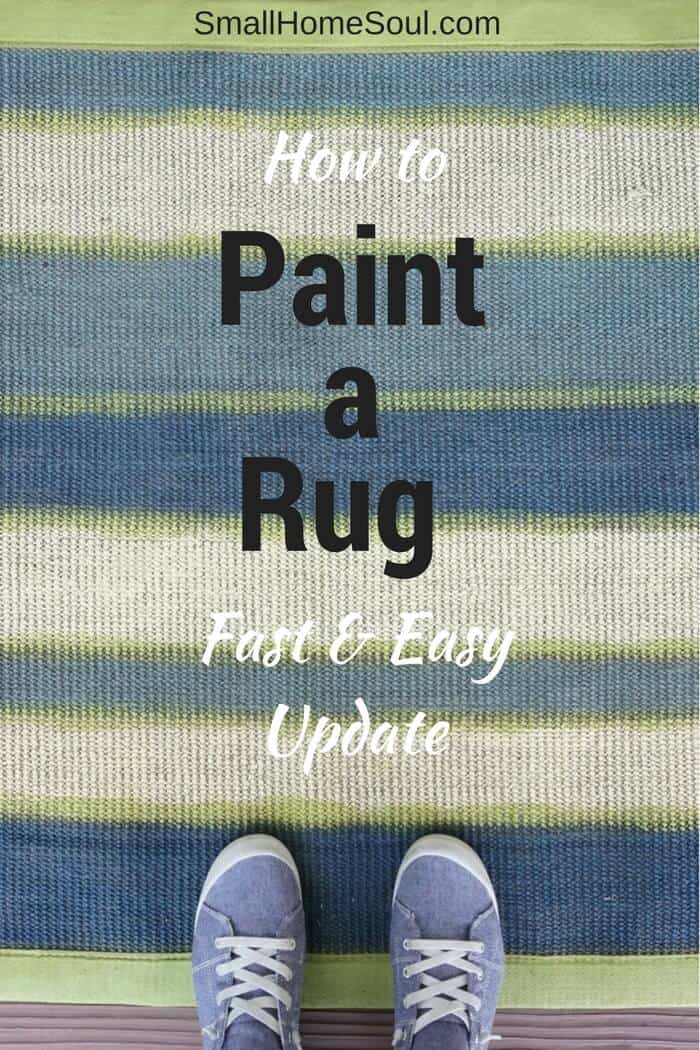
If you’re tired of the old natural fiber rug you have, or it’s been water damaged like mine was , don’t throw it out. I’ll show you how to paint a rug and make it look brand new. The best part about this project is it’s super fast and super inexpensive. And that’s just Super!
My old front porch rug got moved to patio step after I finished our Front Porch Makeover and I forgot about it when it started raining. It was already kind of tired from all the years on the front porch but after the rain it was looking pretty bad. Now it had dark areas from the water.
My husband threw it out (it’s like he doesn’t even know me 🙂 ) so I retrieved it from the trash and put it in a safe place until I could work some paint magic on it.
This isn’t the first time I’ve painted a rug so I knew I could make it look good again. I livened up an old seagrass rug for a patio refresh I did a few years ago. I didn’t want to spend a ton of money on a new rug and it turned out great. Bold, but great 🙂
This post contains links to products, if you purchase something after clicking on my link I may earn a small commission (at no extra cost to you).
Supplies Needed to Paint a Rug
- 3×5 Natural Fiber Rug
- 2″ Wide Chip Brushes
- Large Putty Knife
- Plastic Tarp or Painter’s Drop Cloth
- Paint in colors of your choice
- 0.94″ Painter’s Tape (optional)
- Water
- Small Bowl or Red Cup
I’ll step you through the basic steps to update this rug. Look for and watch the video below where you’ll see an example of the technique and consistency of the paint from my first painted project. That’s about the same time my friend Janine painted her first rug.
Preparing to Paint your Rug
- Give your rug a good vacuum or sweep your rug thoroughly.
- If needed hose it off and lay it in a sunny spot to dry fully
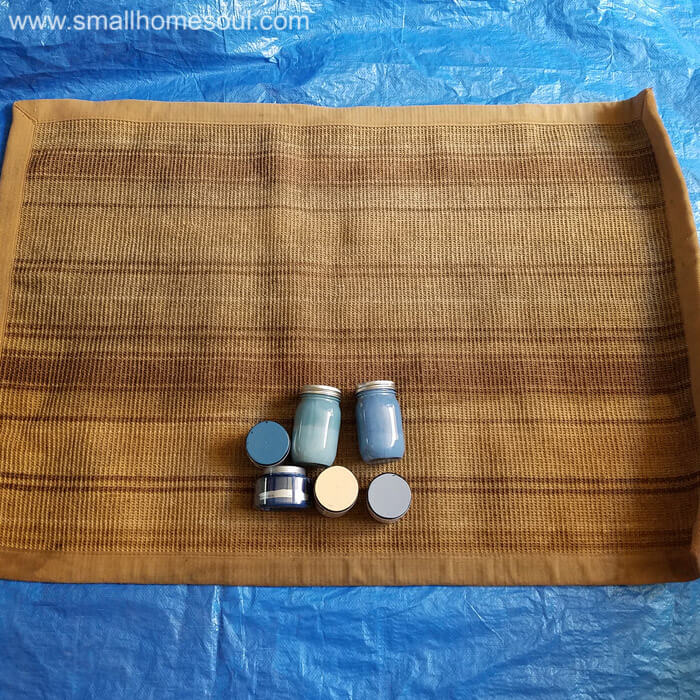
- Choose your paint color(s).
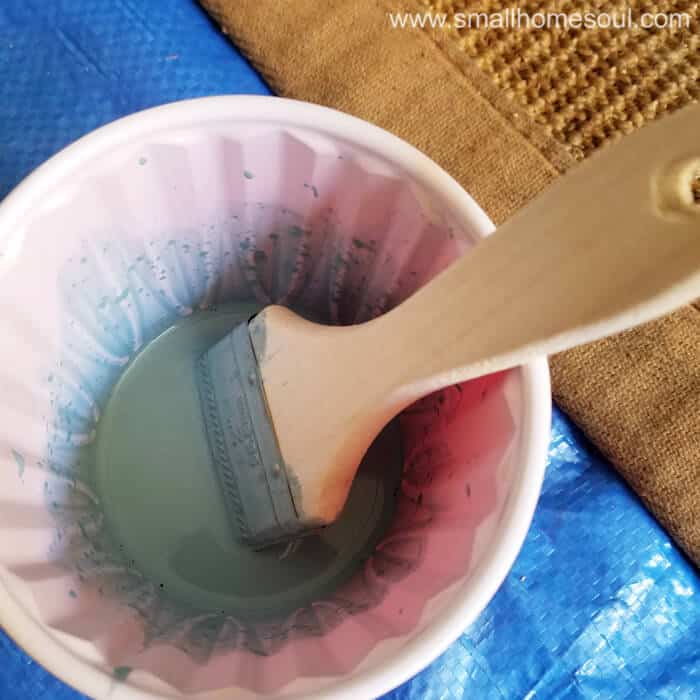
- Thin the paint with water. Start with 1 part paint and 1 part water. Thinner is better.
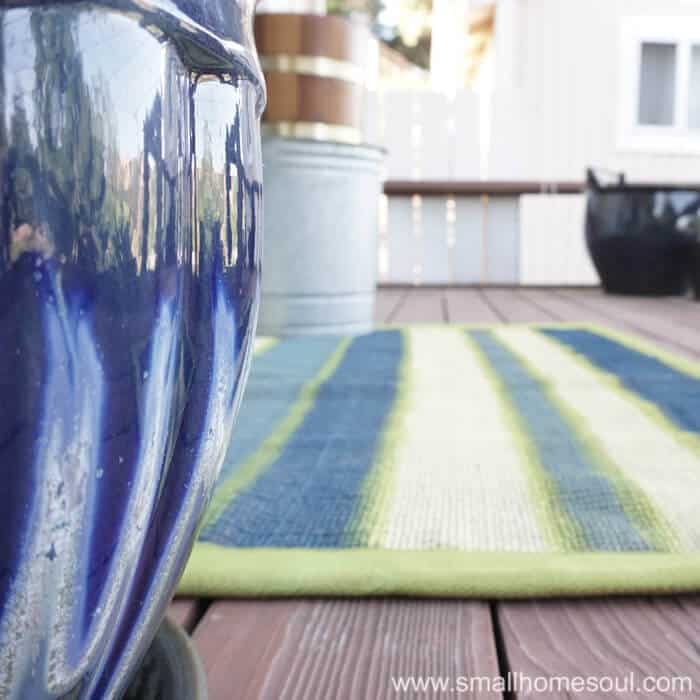
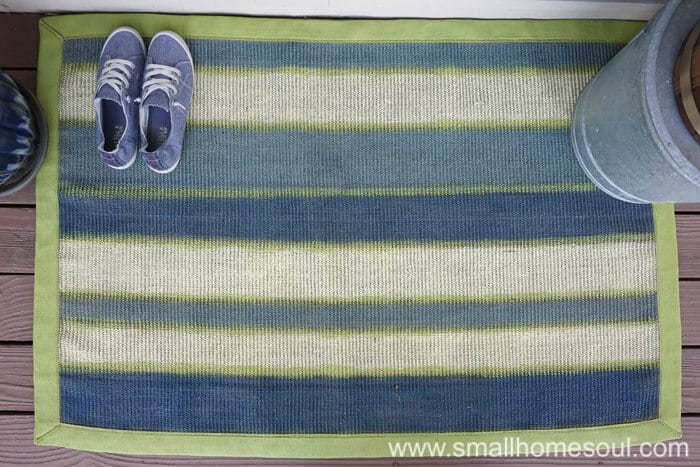
My rug already had strips on it which gave me a good pattern to follow. If you have a similar rug you can paint it one solid color but remember any color variation in the original rug may show through lighter paint.
You can see above that 2/3 of the rug is darker. That’s where the rug got wet. And that’s why I went with multiple paint colors.
Painting your Rug
- Lay your rug on a tarp or drop cloth because the thin paint may bleed onto or through the backing.
- Load up a chip brush with paint. You can use a regular brush but the natural rug materials might be hard on good brushes.
- Lightly start applying the paint in small strokes with the weave of the rug.
- Keep loading your brush and applying until all the brown of the rug is covered.
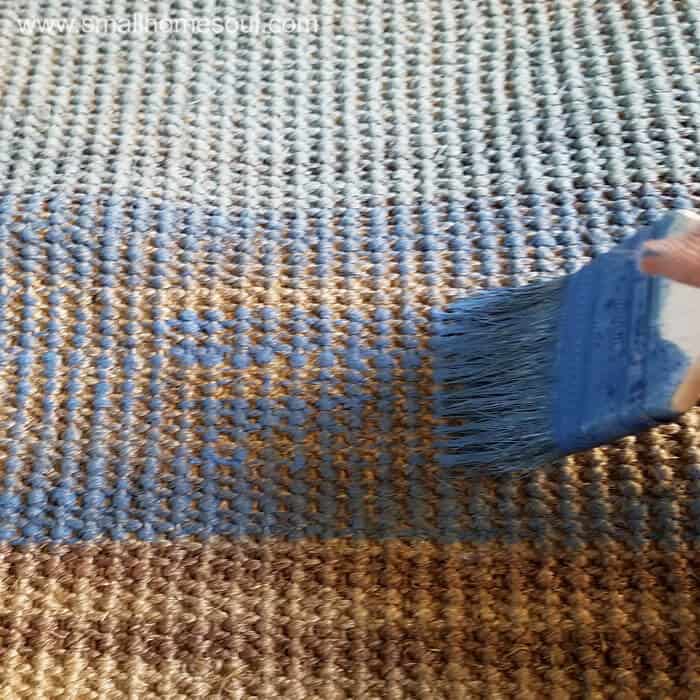
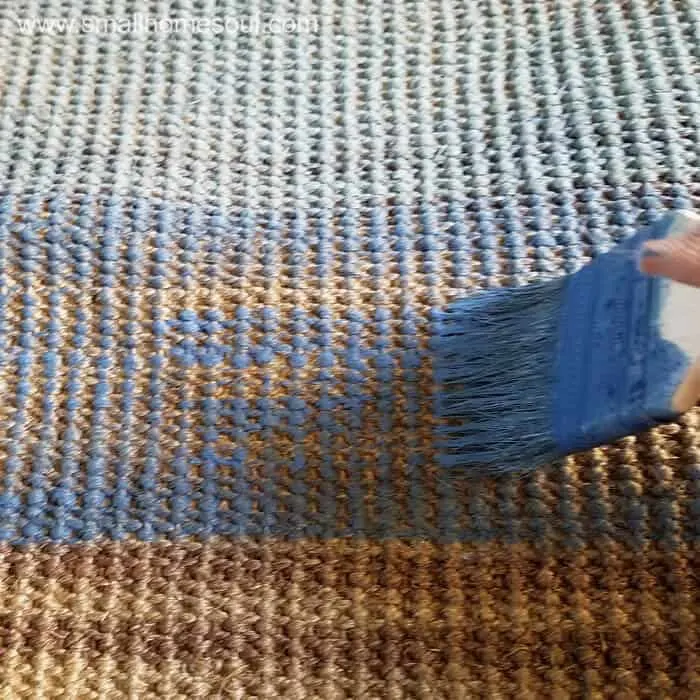
You’ll likely need a few coats. Don’t worry the thin paint dries pretty quickly.
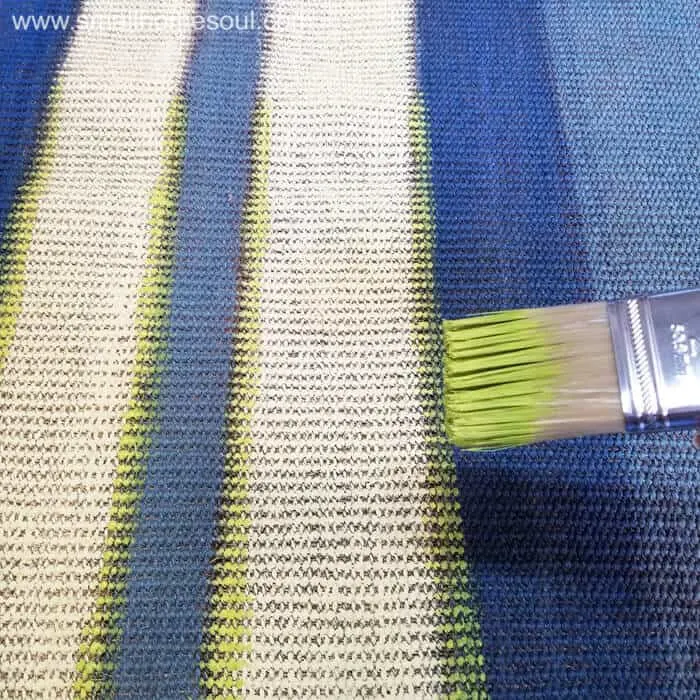
- Keep working on your stripes/pattern applying additional coats until you get the color you want.
- Add skinny stripes or details. I added skinny stripes of green between the bigger blue stripes. I free-handed the stripes but use painter’s tape if you want.

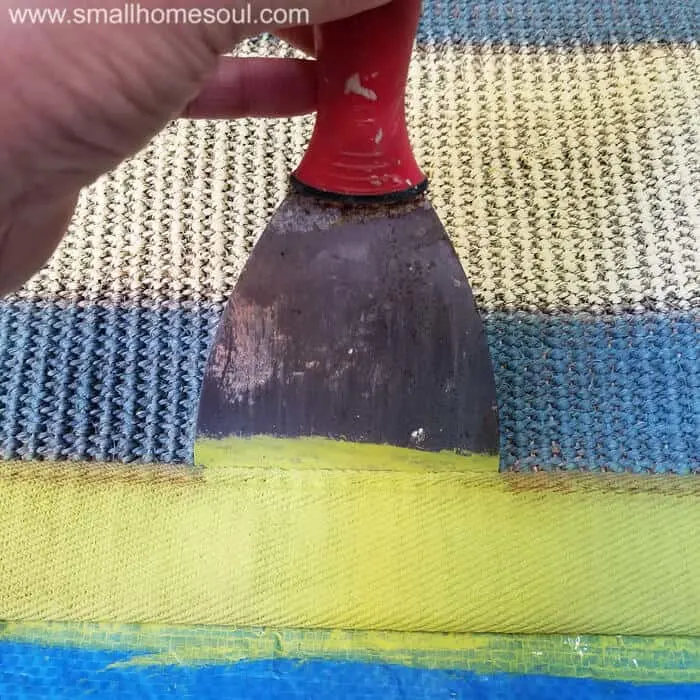
- To paint the rug border use a large putty knife to protect the rug area while you apply paint the border. The border took a few coats to cover the original brown and to look rich.

- Let it dry fully before moving it to it’s new home.
That’s all, it’s that easy to paint a rug and I just saved that old rug from the landfill as well as a few dollars from my pocket. I also have a bright update to my forgotten side deck. Let me remind you of the ugly before.

And now the lovely after….

LOVE IT! PIN IT!!

That was easy! It took me less than an hour to paint, it felt like therapy, and it looks brand new. If you want to see the technique up close and see how much I thinned the paint please check out the YouTube video below I made when I painted a larger rug a few years ago.
Until next time,
Toni
Krista
Friday 26th of January 2024
Do you think I can paint a Ruggable rug? And than still be able to wash it? They are made from polyester with a polyurethane water-resistant barrier, they are stain and water resistant. Thank you
Toni
Saturday 5th of October 2024
Oh, I have no idea. I've seen the rugs but I guess it depends on how fiberous they are for the paint to get into the fibers of the rug so that it wouldn't flake off in sheets or wash out. If you were to try it, and I'm not advising you to, you'd want to buy paint specific for launderimg and probably still need to thin it somewhat. Good luck!
Mary
Thursday 15th of March 2018
I really love this idea Toni. We have lots of small rugs that are just blah! But with paint we can transform them into fun rugs instead.
Julie & Jodie
Thursday 1st of March 2018
I love this project. You made it look easy and so tempting I wanted to just drop my to do list and find a rug to paint. :) Also, the colors you chose were perfection. Kudos! Thanks so much for joining our Friday Friends Parade Linky Party! We are thrilled to have you here. We hope you link up each week. Best, Julie & Jodie
Toni | Small Home Soul
Monday 12th of March 2018
Hi Julie & Jodie, I'm so glad you like my little rug. It's such an easy and inexpensive update to save an otherwise perfectly good rug. xoxo
Susie
Monday 26th of February 2018
Love, love, love the colors you chose. What a great save! Fabuous! Susie from The Chelsea Project
Toni | Small Home Soul
Monday 12th of March 2018
Aren't they fun, you can totally customize it with any colors you want :D Thanks for stopping by XOXO
Janine
Monday 26th of February 2018
Toni, This looks awesome! I remember talking to you when I did mine and I'm super happy with how mine came out. Your rug is amazing and so pretty!
Toni | Small Home Soul
Monday 12th of March 2018
Thanks Janine, I remember when you painted your rug too :) yours turned out fantastic!