Hi friends, I’ve been planning to reupholster our dining room chairs for many years and finally got it finished last week and I saved over $200 doing it myself. A few years ago I bought some upholstery fabric but after I did a reupholster job on one chair I wasn’t thrilled with the fabric and I lost all motivation. So we’ve literally had one mismatched chair for probably 3 years. Thankfully it was usually tucked into the spare room and only brought out when we needed the 6th chair at the table. I always felt like I had to explain to guests why we had one mismatched chair. Thankfully, never again 🙂
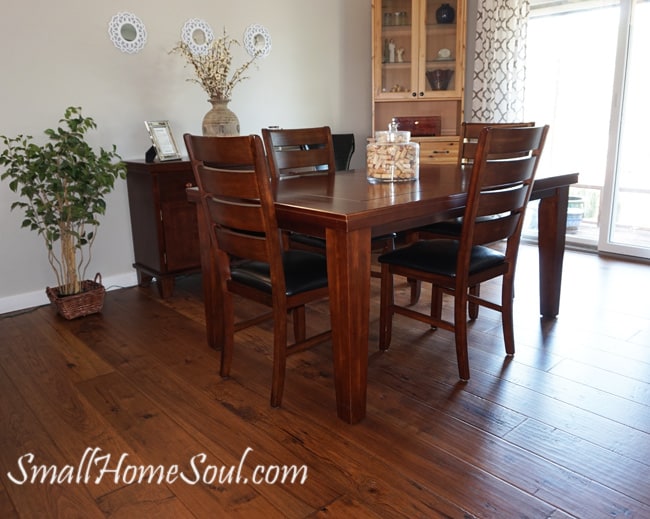
When we bought the dark table we had light gray carpet but after we installed wood floors last Fall it was just too dark in the dining room with dark floors and dark furniture. Here’s the before picture; I don’t want a rug in the dining room right now and I knew reupholstering the seats would lighten up the room.
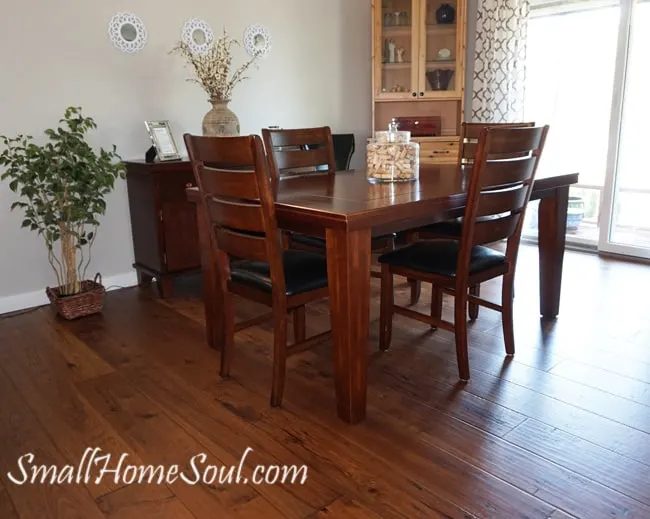
Reupholstering a dining chair isn’t difficult but doing anything for the first time can be intimidating. I know because I let intimidation stop me all the time only to find out it’s not as hard as I imagined once I get started. I want to show you how easy it can be so I’ve created this tutorial hoping it encourages you to give it a try.
This post contains some affiliate links for your convenience. You can read my full disclosure here.
How to Reupholster Dining Chairs Supply List:
- Fabric of your choice
- Polyester Batting, you can order it here.
- Scissors
- Automatic Staple Gun, I have this one.
- Extra Staples, I used these 3/8″ staples
- Tack puller (or Flat-head screwdriver)
- Pliers or wire cutters to help pull staples
- Elbow grease 🙂
First select your fabric, I got mine at a discount fabric and rug store for $3/yard. It was a total score but sadly they were closing most of their locations. You can go to any yardage store like JoAnn’s and they’ll help you calculate how many yards you need, if you use one of their coupons you can save 40%-50% off.
If you don’t have a fabric store nearby there are some great deals online but the endless selection might make your eyes cross. You’ll also need to know how much to order. Most standard dining chairs are 19″ deep x 19″ wide and you have to allow extra fabric for stapling to the underside of the seat. Use a plastic tape measure (like for measuring your waist-ugh) and hold the tip at the bottom of the seat on one side, then measure across the top of your seat to the bottom of the other side. Add 3″ to that measurement for the bottom overlap allowance. Do the same thing from front to back for that measurement. Upholstery and drapery fabric usually comes 54″ wide so you should easily be able to cut two seats out of each width. If you have a standard size chair you should be able to cut 6 seat cushions from 2 to 2-1/2 yards of 54″ wide fabric. See my tips at the bottom of the post for purchasing fabric with a repeating pattern.
The other thing to consider is whether to add some batting over the foam. My chairs didn’t have any batting under the “Corinthian leather” so I needed to add some. I bought a roll of quilt batting for a twin bed and doubled it up on each chair. This gives a more polished look and keeps the fabric from sticking to the foam.
The fabric I took off my chairs was 22″ x 23″ so I used the first one as my template to cut my fabric sections. My fabric has a pattern repeat but it’s such funky fabric I wasn’t worried about making each chair identical. I ironed each piece since the fabric had been folded for a while. Ok, now that we have all that out of the way let’s get started.
How to Reupholster Dining Chairs Tutorial:
Turn your chair upside down and locate the screws that hold the seat to the frame. There is usually only one on each side. Remove the screws and set them aside in a safe place. Lay the seat upside down on a work surface. I don’t advise using your dining table if you have a work surface elsewhere. If not then you can lay a sheet or a towel underneath to protect your table top. I finally got out a cutting mat to protect my table from the tools and staples.
Gently remove the black fabric and set it aside to reattach later. It’s ok if some of it get’s torn, it won’t show once you reassemble the chair.
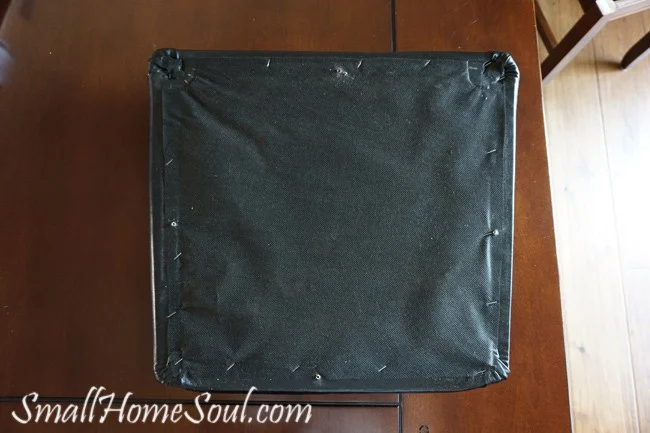
Now you can see all those staples you’ll have so much fun removing. If the original fabric is thin you could leave them in and cut the fabric off with a box knife if you want. But you’ll have a less lumpy finish if you remove them all first, which is what I recommend. It took me about 10 minutes per chair to remove all the staples, and you get faster as you go.
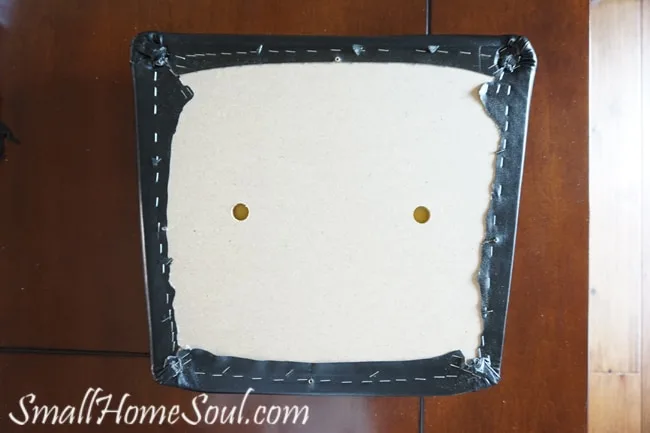
Ok, all done, that wasn’t so bad. Mark where the screw holes are so you don’t accidentally staple directly over it which might affect things when you reattach the seat to the chair.
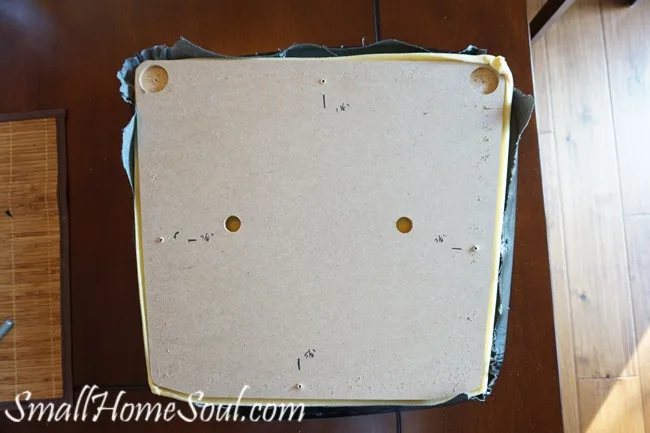
Toss that old fabric aside and let’s get busy attaching the batting. Lay out your batting and center the seat on it. It’s important to work in a specific order to get the best looking final product. Starting on the first side pull your batting up and staple the middle first, then staple on alternating sides until you get close to the corners. This will keep the batting smooth. Don’t staple into the corner just yet, we’ll do those last. Once the first side is stapled spin the seat around and staple in the same pattern on the other side, pulling it a bit so the batting is a little tight. Don’t pull too hard because it could tear. Now staple the last two sides.
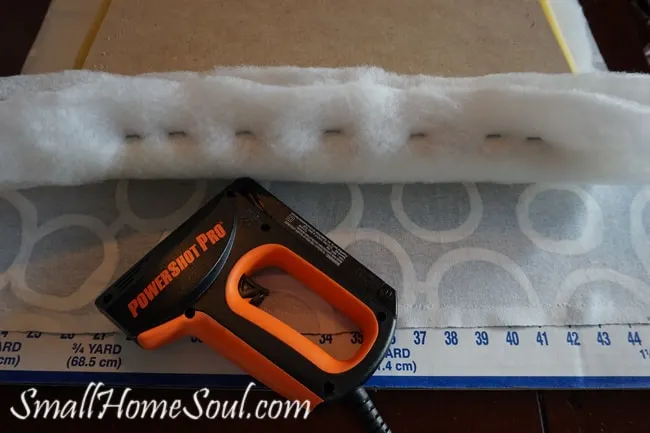
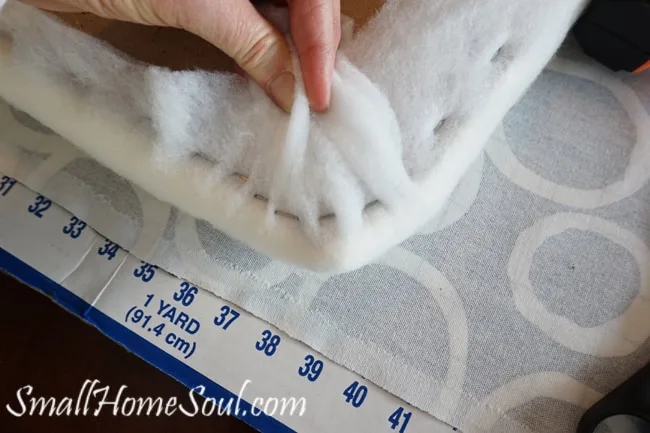
It’s time for the corners. Pull the corner of the batting up and staple the center first then around the sides. You want it to be smooth around the corner and not bulky. You can trim the excess batting close to the staple line if you want.
Now we get to the fun part of the transformation and attaching the fabric. Follow the same steps as we did for the batting and alternate the staples. If you look close you can see the fabric looks a little bumpy on the edge between where there is no staple, don’t worry simply pull the fabric between the staples and then add another staple in between to smooth it out. My finished seat has many more staples that what you see below. Thinner fabric might require stapling side by side to get it as smooth as possible.
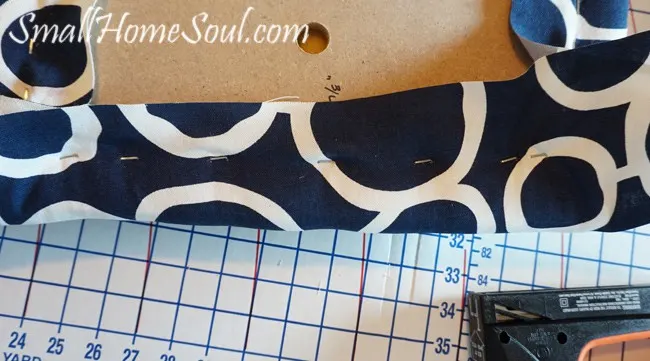
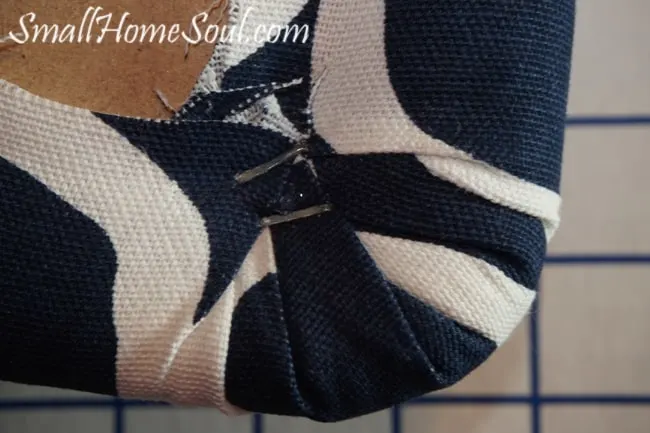
Once you’ve stapled all four sides you’re ready for the corners. You don’t want obvious folds showing on the top or sides of the seat if possible so start in the middle by holding the fabric and on the right side in small increments fold the fabric up and tuck it under your finger. Staple it and do the same on the left side.
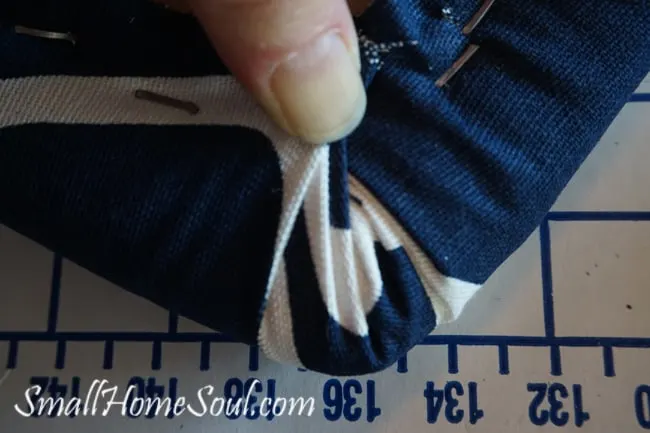
Here’s one of my finished corners; sometimes you have to work at it a few times before you get it the way you want it. My seat bottom had those recessed circles at the front. I made sure I stapled the fabric down into those recesses so the seat wouldn’t stick up when I reattached it.
OTHER PROJECTS USING FABRIC
Office Chair Makeover – Stencil a Dropcloth Pillow – Stencil a Dropcloth Pillow
Here’s my first finished seat and all that’s left is to staple on the black liner and reattach it to the chair.
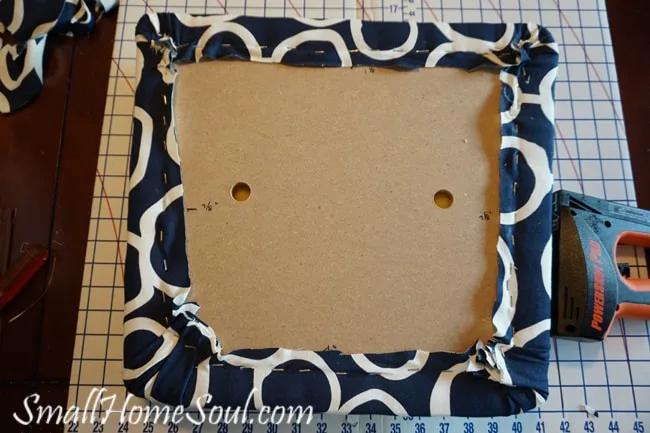
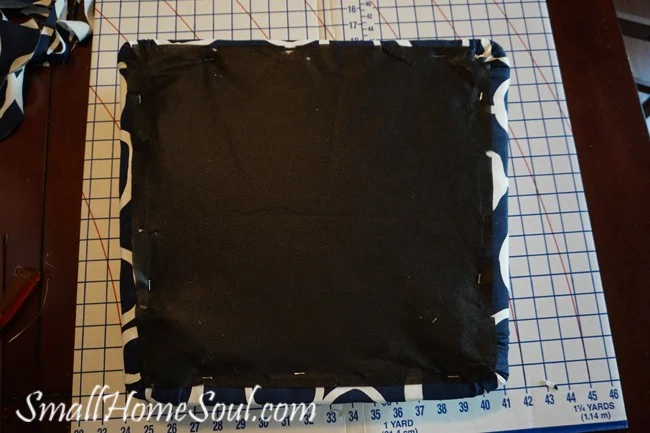
The before and after, I’m pretty happy with it, now just five more to go.
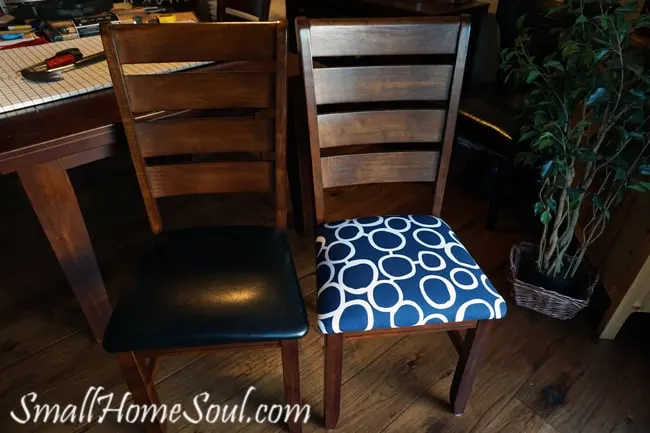
Remember I told you I did reupholster one chair before? Here it is, yuck. I was stuck in a Fall color pallet I didn’t know how to get out of, and I chose the fabric on the left because it fit my other colors. Sometimes you just have to stop until you know which direction you want to go in. For me that meant I had to paint my walls from a dark tan to a beautiful gray. I’m so glad I saved my energy until I found fabric I really loved.
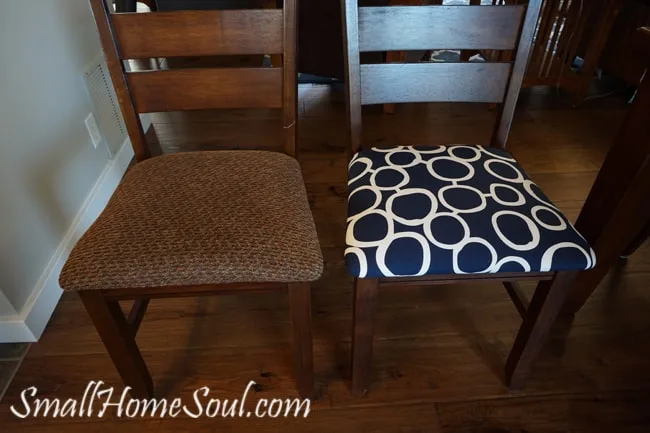 Let me remind you of the before.
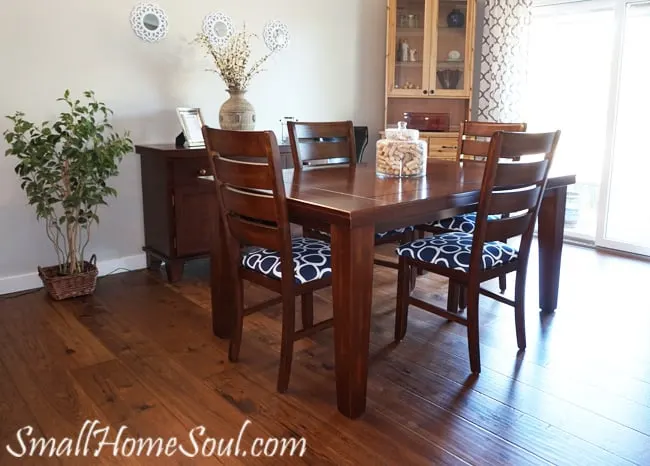
And here’s the after that I love love love!
Before I end this tutorial I wanted to share a few tips:
- If you can afford to buy an electric stapler/brad gun like I have it will save your hands and you’ll have it for other fun projects.
- If one of the staples breaks off make sure you either hammer it in or pull it out with pliers or wire cutters otherwise you might cut yourself and bleed on your fabric.
- Don’t bleed on your fabric. Yep, did that because I apparently missed my first tip. Thankfully it wasn’t a lot and was on the bottom so no one will ever see it.
- If your staples don’t go all the way in you might have to hammer them down. I had to do this, I guess the fiberboard seat is harder than wood?
- If you buy fabric with a pattern you will need to purchase extra for the repeat. Say you buy fabric that has a big beautiful flower that you want to center on each chair, you will need to find out the distance of the pattern repeat and calculate that in to how much fabric you order.
Thanks for visiting today and viewing my tutorial. If you decide to reupholster your own dining chairs I’d love to hear how it turned out and see a picture too.

Until next time,
Toni
Angie ~ ambient wares
Sunday 1st of January 2017
These are awesome Toni! The corners are the hardest part for me and I agree 100% about getting an electric stapler. It was one of the best buying decisions I ever made! Thanks for sharing these with us at Funtastic Friday!
Toni Harvey
Tuesday 3rd of January 2017
Thanks Angie, and thanks for hosting a great party! Buying the stapler saved my hands for sure, and the money I saved doing it myself more than paid for the expense of buying it. I love how they turned out, so much better than the boring stuff that was on there before.
Happy Happy Nester
Tuesday 8th of March 2016
Toni, Such a great post and I love the results! I have the same issue with my barstools, I got them painted and they are all different colors. I stopped mid-project and haven't been motivated to finish. I couldn't decide on a color, so I have multi!!!! I love your chairs and hooray, your project is complete and beautiful!
Toni Harvey
Thursday 10th of March 2016
Thank you so much! I'm glad to know I'm not the only one who gets midway and then gets derailed. What color were they and what color(s) are they now?
Sam @ Raggedy Bits
Tuesday 8th of March 2016
I LOVE your chairs new look and your dinning room! The fabric you chose is perfect!!
Toni Harvey
Thursday 10th of March 2016
Thank you Sam, I was nervous about such a bold pattern but I really do love it! I think it will look even better if I paint the chairs and bottom of the table white :D
Sarah
Tuesday 1st of March 2016
Toni, this is such a great tutorial!!! You explained everything very clearly and I LOVE the fabric you chose!!! Well done, my friend!! ?
Toni Harvey
Wednesday 2nd of March 2016
Thank you Sarah, I was nervous about using such a bold pattern but I really love it too :)
Susie
Tuesday 1st of March 2016
Beautifully done! What lovely fabric. .... It really brightened your space.. And added a flair. Your tute is also awesome. You're a natural at this.. Kudos!!
Toni Harvey
Wednesday 2nd of March 2016
Thank you Susie you are so sweet, it's amazing what a dramatic change it made to the dining room.