Hi Friends, I’ve finished a collaboration build I’ve been working on and I can’t wait for you to see it. This beautiful DIY Chevron Storage Cabinet is a beautiful addition to our dining room.
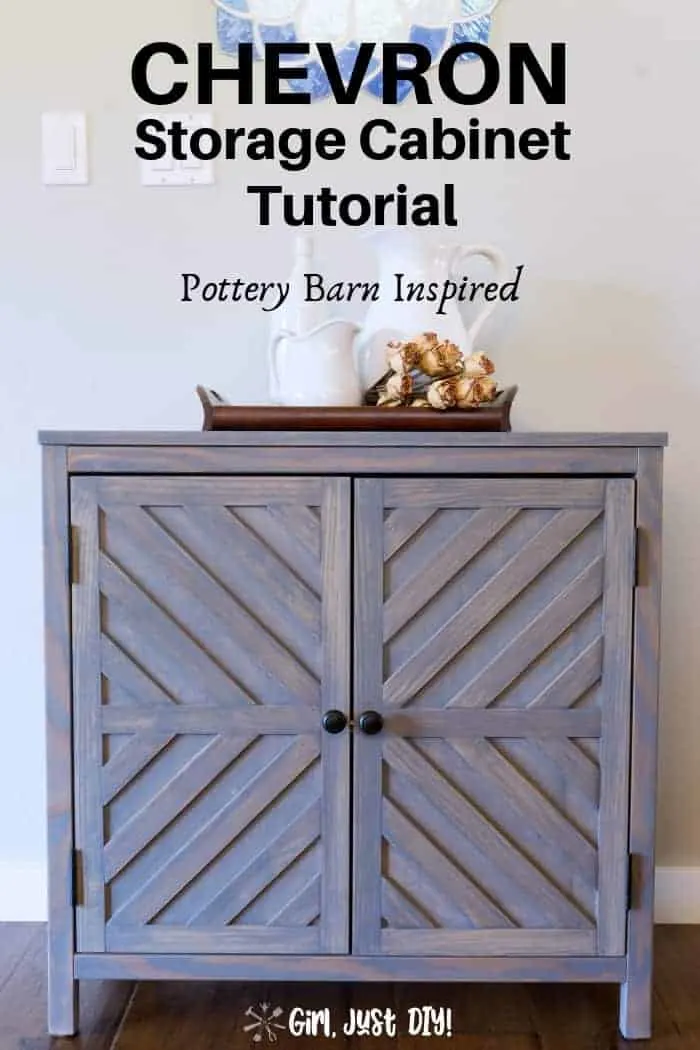
I built this built using plans designed by the very talented Jen Woodhouse at The House of Wood.
Look for the link to the plans at the bottom of the post.
This is the first large piece of furniture I’ve built myself and I’m honestly so proud of how it turned out. Last year I made some 2×4 Outdoor Side Tables for our patio.
They turned out pretty awesome, and the Rolling Printer Cart too. But this cabinet is the first big piece I made specifically for inside.
It’s more involved than the side tables but the plans are step-by-step and detailed so if you’ve had any experience using saws you can totally make this too.
This page contains links to products, if you purchase something after clicking on my link I may earn a small commission (at no extra cost to you). You can read about affiliate links here.
Tools to build a Chevron Storage Cabinet
- Table Saw, or Circular Saw with Kreg Rip Cut Saw Guide
- Miter Saw
- Kreg Tools K4 Pocket Hole Jig
- Kreg Face Clamp
- 24″ and 36″ Clamps
- Brad Nailer
- Cordless Drill
- Tape Measure
- Carpenter’s Speed Square
- Orbital Sander or Palm Sander
- Pin Hole Jig (optional)
- Breathing Mask
A full and complete Materials List, including detailed measurements, is included in the building plans linked at the end of the post.
Materials List
- 1 Full Sheet of 3/4″ Cabinet Grade Plywood
- 2″ x 2″ x 8′ Boards
- Quarter Sheet of 1/4″ Plywood
- Lath Strips (I used Lattice which also worked nicely)
- Pocket Hole Screws
- Brad Nails
- I used these Hinges (4) – (get them cheaper at Lowe’s)
- Magnetic Catch (2)
- Knobs (2)
- Wood Glue & Wood Filler
- Foam Ear Plugs or Hearing Protection
- Stain or Paint
- Sanding Block
- Edge Banding & Edge Banding Trimmer (optional)
The Inspiration Piece at Pottery Barn (their Irene Cabinet) retails for $520! The raw materials for this cabinet cost me only around $150!! That’s a huge savings for a beautiful piece of furniture I’ll have a long time.
I hate paying for something I know I can make it myself.
Prepping for construction
Gather all of the supplies and materials needed to get started building the Chevron Cabinet. We were able to get most of the materials we needed locally. Any Home Improvement store should have most of what you need.
I bought the Magnetic Catch and the Edge Banding and Edge Bad Trimmer on Amazon.
My tutorial steps may not align perfectly with the step numbers in Jen’s plans because I did some things in a slightly different order. Read her plans and this tutorial and use them as a guide when you build your own Chevron Storage Cabinet.
Let’s get started.
Step 1: Cut the wood pieces to size
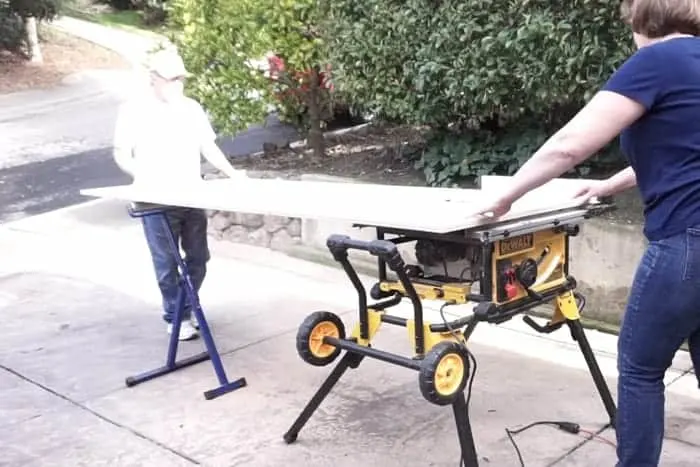
- Cut your plywood pieces using a table saw (and a helper if necessary). You could also use the Rip Cut Guide and a circular saw.
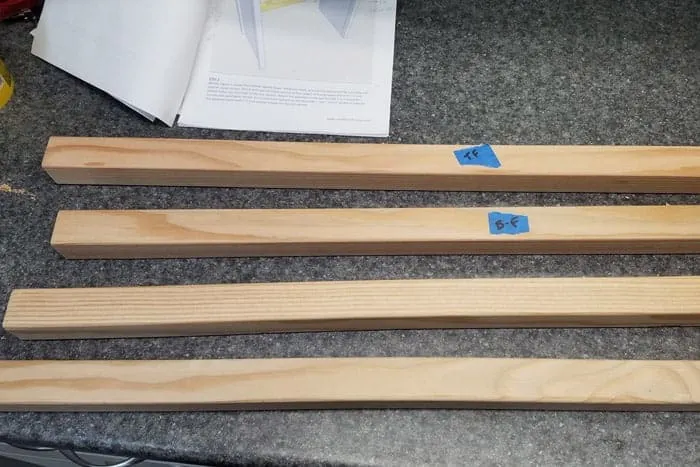
- Use some painter’s tape and pencil to label each piece.
- After measuring the 2x2s to length use a carpenter’s speed square to mark the line across the full width of the 2×2. This will help when lining up the saw blade with the measurement.
- Use the miter saw to cut the 2×2’s to length for the Cabinet legs and the top and bottom aprons.
Because I bought 2×2 construction lumber the grain looked different from side to side. I took a few minutes to determine which sides I wanted to face the front of the cabinet and labeled them with a piece of painter’s tape.
Step 2: Adding Pocket Holes
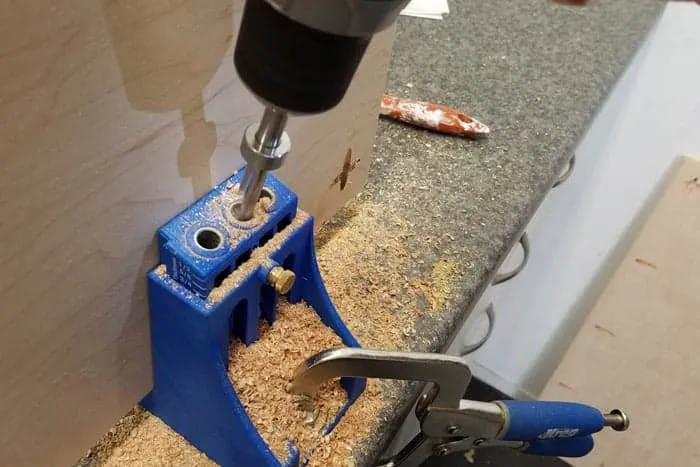
Drill pocket holes in all plywood and 2×2 pieces according to the plans. Be careful to follow which pieces have pocket holes and where. I accidentally put pocket holes on the bottom edge of the side panels where they aren’t needed.
Step 3: Attaching the Shelf
If you want your cabinet to have a fixed shelf then add at least two pocket holes (for 3/4″ thick material) to the short ends of the shelf piece.
If you’d rather your Chevron Storage Cabinet has an adjustable shelf you’ll want to add the pin holes before assembly.
A Pin Hole Jig will be very helpful for this step to ensure perfect spacing. I don’t have one (yet) so I made my own following the steps below.
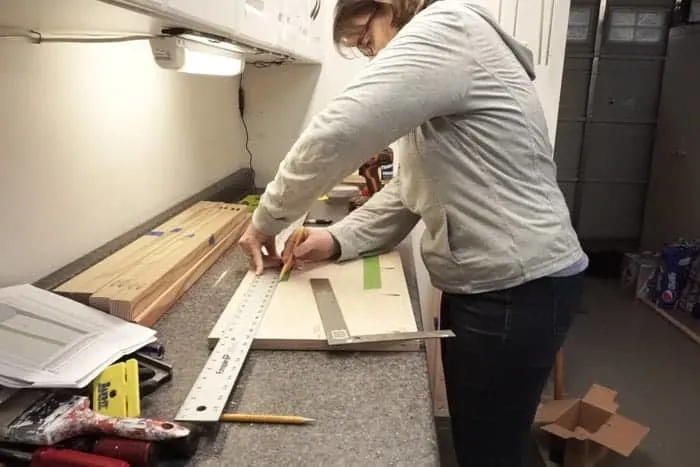
- Place painter’s tape along the area(s) where you want to create your pin holes.
- Measure from the top edge using a Carpenter’s square and mark a line along which you want the holes.
- Measuring from the top edge again mark your first hole and then make a mark every 1″
- Use a Scratch Awl to make an indent on your marks where the drill bit will rest.
- Make sure your marks line up across so your shelf is level and stable.
- Use your cordless drill with a drill bit slightly larger than the shelf support pins to drill pin holes.
- Make the holes slightly deeper than the shelf support pin.
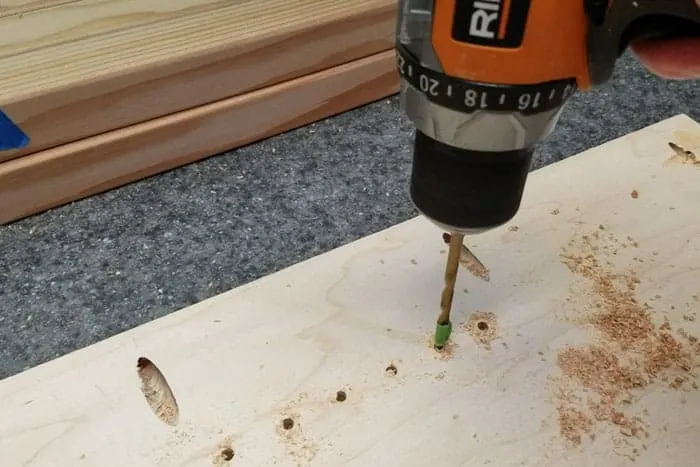
So full disclosure…. I started out going for an adjustable shelf but in the end I decided to attach the shelf permanently.
Chevron Storage Cabinet Assembly
Gather all the needed supplies when you’re ready to start assembling your storage cabinet.
Step 4: Assemble Side Panels
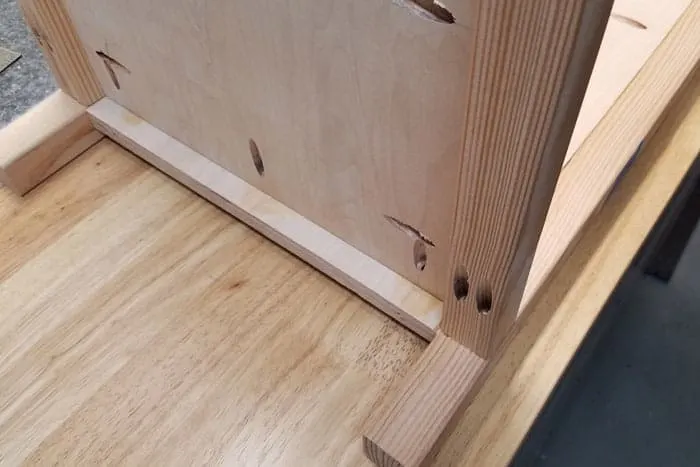
Note that the cabinet side panels are inset and flush to the inside edge of the legs.
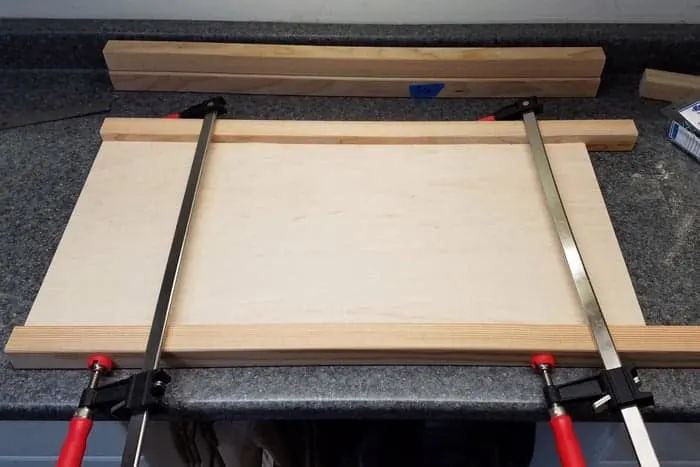
- On your work surface place two legs and one side panel so that the inside (with the pocket holes) face down.
- Apply wood glue to the long edges of the plywood side.
- Align the top edges of the two legs and side so they are even and square.
- Clamp tightly in two places
- Carefully flip the side panel over and connect using the 1-1/4″ pocket hole screws.
- Wipe off any glue that squished out before it has a chance to dry. Wood glue that dries will affect stain finish.
- Repeat this same process for the other side panel.
Step 5: Assembling the bottom panel
I missed taking a picture of assembling the bottom panel. The process is similar to the side panels in Step 4 with one exception. The smooth side of the plywood bottom will be flush to the top edge of the bottom apron.
You’ve done it correctly when you can see the pocket holes inset from the 2x2s. You’ll see what I mean in the pictures in Step 6.
Step 6: Cabinet Body Assembly
It’s best to have a flat surface on which to assemble the body of the cabinet.
Right Side to Bottom
- Lay the right side panel on your work surface with the inside facing up. Measure and lightly mark 3″ up from the bottom of either leg.
- Add a bead of wood glue to the edge of the bottom panel.
- Place the bottom panel at 90 degree to the side panel and align the bottom edge of the aprons to the pencil marks at 3″.
- Place the Face Clamp into the center pocket hole and clamp to keep in place.
- Double check the 3″ measurement and place a clamp directly behind the bottom panel to hold the ends firmly in place.
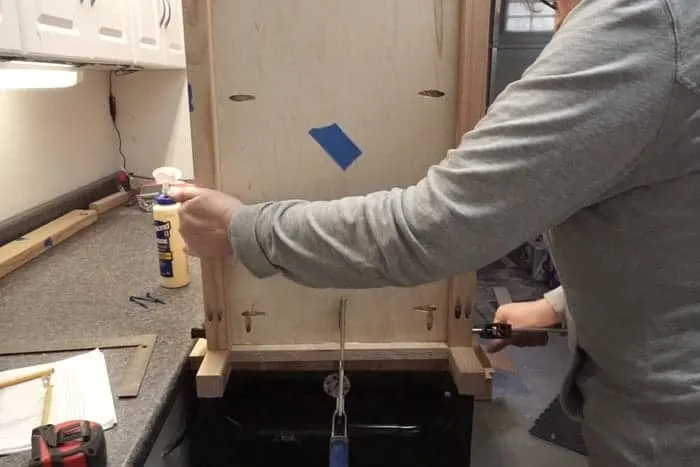
- Attach the two sections using the 2-1/2″ pocket screws in the 2x2s on the bottom panel to the 2×2’s of the legs.
- Use the 1-1/4″ pocket screws and attach the plywood bottom to the plywood sides.
Left side to bottom
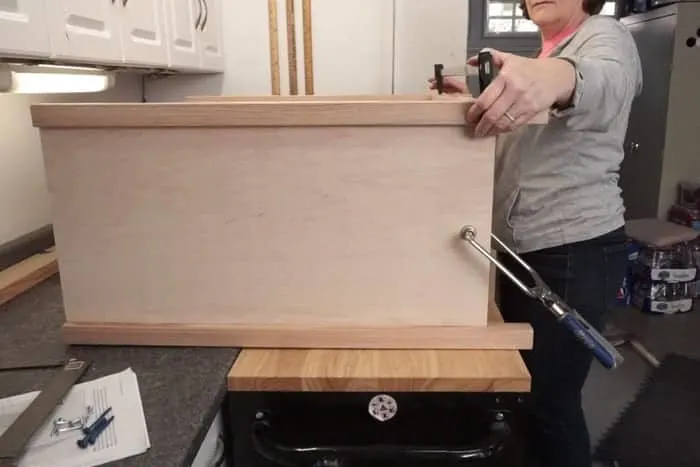
Carefully lift the connected pieces and turn them so the side and bottom are vertical to the work surface.
- On the left side measure and mark 3″ up from the inside bottom of the legs like before.
- Add a bead of wood glue to the edge of the bottom panel.
- Place the inside of the 2nd side panel against the cabinet bottom and align the bottom edge of the apron to the 3″ mark on the legs.
- Place the face clamp (if you have one) into the center pocket hole to hold the side panel to the cabinet bottom.
- Position the bar clamps on the left and right legs as shown.
- Attach the 2x2s on the bottom panel with 2-1/2″ pocket screws to the 2x2s of the legs.
- Use the 1-1/4″ pocket screws and attach the plywood bottom to the plywood sides.
Top Aprons to Cabinet
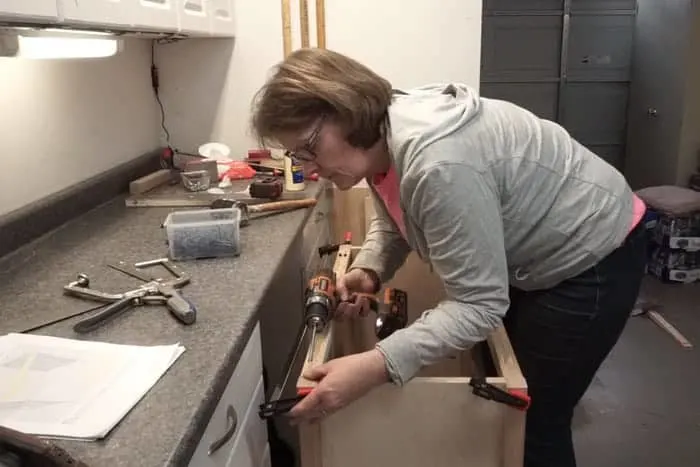
- Add some wood glue to the ends of the front and back top apron pieces and clamp between the left and right panels.
- Attach using the 2-1/2″ pocket screws.
Step 7: Edge Banding (optional)
If using edge banding add it before attaching the top to the cabinet base.
- Using an iron set to “cotton” attach the 3/4″ edge banding to the sides and front of the cabinet top and the front edge of the shelf.
- You can use one long piece and coax it carefully around the corners or you can cut pieces to length and then apply. Edge banding cuts easily with sharp scissors or a box knife.
- After the edge banding has cooled trim off excess with an edge trimmer.
- Sand lightly with a sanding sponge.

You can see how we used the iron to attach edge banding when we built our L-Shaped Desk.
Step 8: Attaching the top
- Align the top of the cabinet over the storage cabinet body.
- Using 36″ clamps hold the top in place by clamping from the top to the underside of the bottom apron.
- Using 1-1/4″ pocket screws attach the top to the cabinet from the underside.
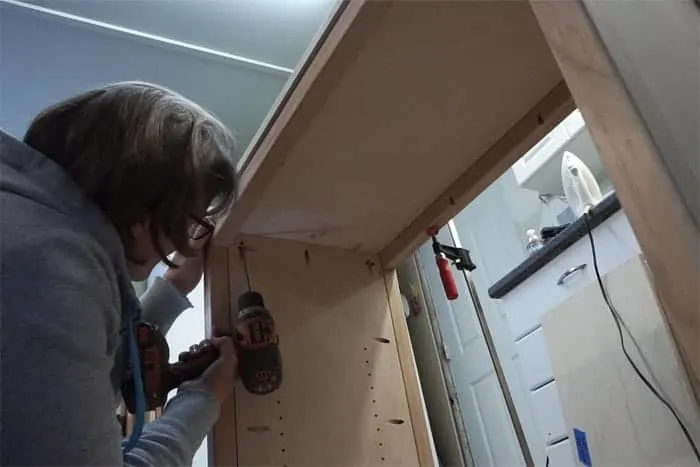
Note: Following the plans for the Chevron Storage Cabinet the corners of the top will be flush with the corners of the legs. Because I used construction lumber the 2×2’s are actually 1-3/8″ x 1-3/8″ which created a small overhang, which I really like.
If you want no overhang and you use construction lumber you’ll need to trim your top piece to fit. I would do this before making the pocket holes.
Give the entire cabinet a good sanding with a hand or orbital sander and 220 grit sandpaper.
Build the Cabinet Doors
Step 9: Trimming out the Doors
Trimming out the doors was time consuming but a fun challenge which really sets the chevron storage cabinet apart from any other storage cabinet I’ve seen.
I purchased and used lattice strips because the lathe strips at my local store were really rough. Lattice strips will likely require some sanding to remove the faint saw marks since they aren’t really intended for furniture.
When choosing make sure they’re straight and that they’re all the same thickness. One board I selected was thicker than the others which made for some extra sanding where they butt against a thinner section.
Note: Read and re-read the details of this step in the plans regarding measurements before you proceed.
Here’s the method I used and recommend in addition to what Jen has outlined in the build plans.
- Measure and cut the tall side pieces first.
- Line up the trim piece to the edge of the door and attach with wood glue and the brad nailer. (I used 3/4″ brad nails using a compressor so I always recommend testing on scrap pieces to ensure the proper depth.)
- Measure, cut and attach the top and bottom trim pieces.
- Measure, cut and attach the middle trim piece so that it’s centered between the top and bottom trim.
- When adding the center trim piece to the second door, lay them side by side to ensure the center piece lines up exactly.
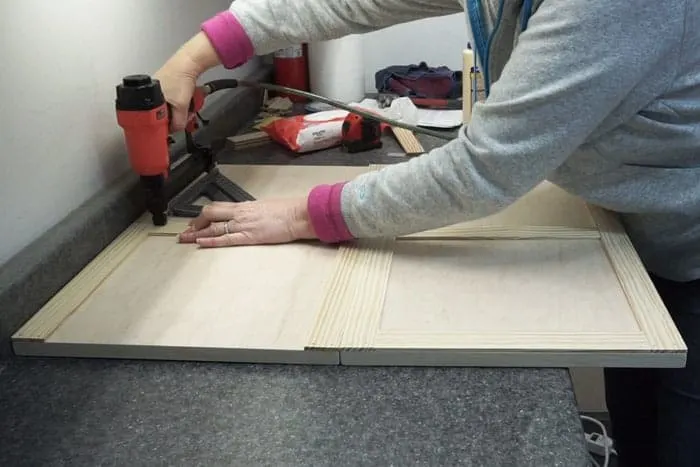
Measure and cut the angled inside trim pieces that create the chevron for the chevron storage cabinet. Do not attach them yet.
The measurements on the plans for the trim are all given for the longest edge of the trim piece.
- All the cuts are made at 45 degree.
- Start in the corner with the smallest piece first.
- Cut and dry fit all pieces for the bottom section of one door. In theory you should be able to cut an identical piece for both top and bottom. However, if your center trim piece isn’t perfectly centered this method won’t work and you’ll end up with gaps.
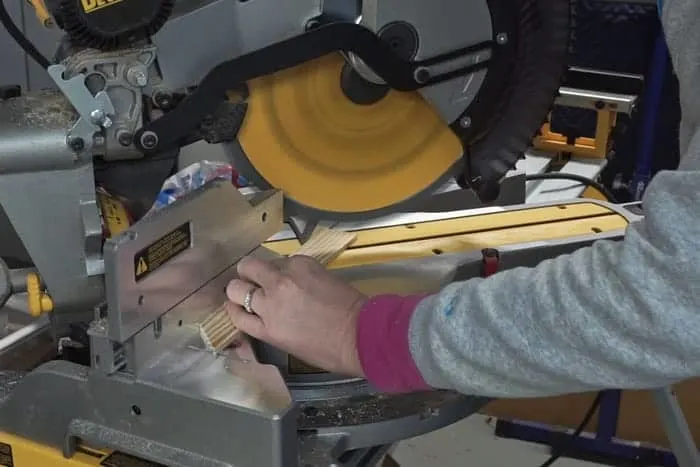
As the plans suggest, cut slightly long and shave/trim as necessary. This is especially important to fit the center piece.
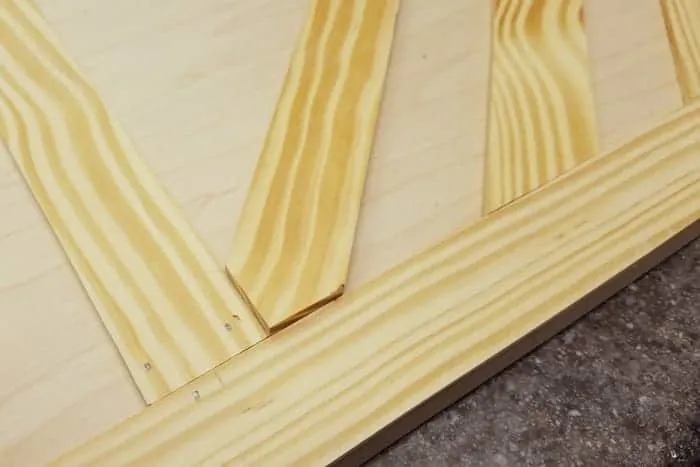
Visually it’s important that the top and bottom trim line up perfectly. I chose to cut mine separately instead of cutting 2 at the same length.
The spacing between the pieces can vary slightly and no one will notice; but if the points of the pieces don’t line up, everyone will notice.
With all the trim pieces cut and dry-fit to your liking it’s time to assemble.
- Apply wood glue to the back of the trim piece and fit it into place.
- Using the brad nail in each corner attach the trim to the door.
- Wipe away any wood glue as necessary.
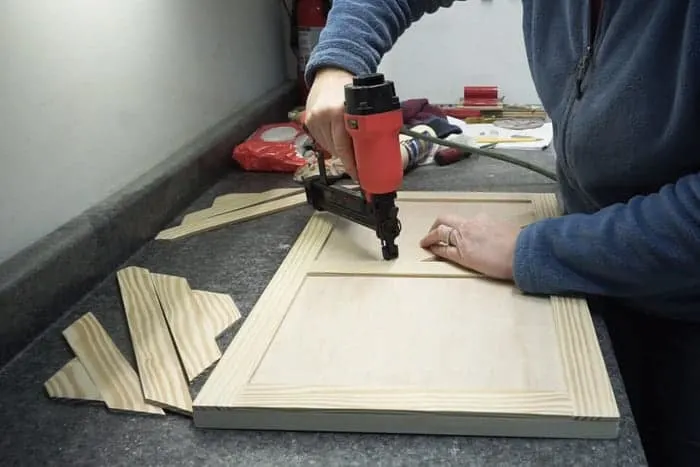
- Repeat this process for the second door.
- I recommend dry fitting the cuts for the second door with the first door side-by-side so you’re certain the trim pieces line up across the doors as well as top to bottom.
Step 10: Finishing touches
- Fill the pocket holes on the inside of the cabinet with wood filler. Let it dry and sand smooth.
- Give the newly built chevron storage cabinet a final sanding then wipe clean with a tack cloth.
- Stain or paint your cabinet before attaching the doors.
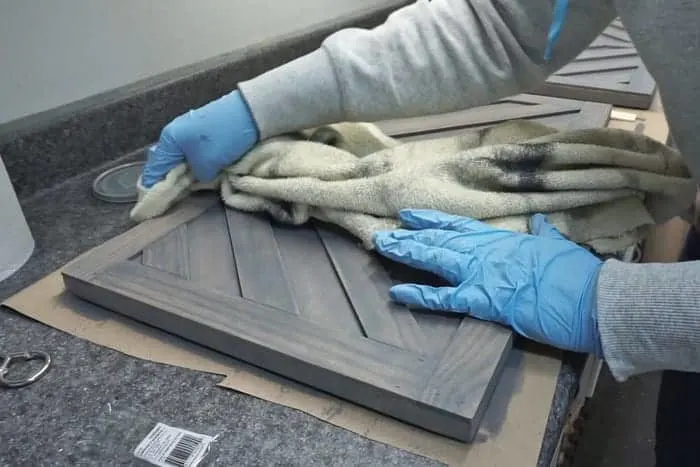
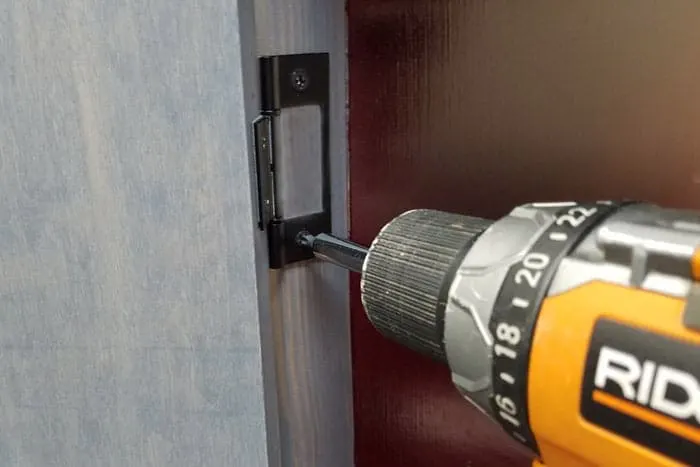
- Measure and attach the hinges first to the doors and then to the inside edge of the cabinet body.
- Determine the placement of the hinges so you have a similar gap at the top and the bottom of the door.
- Depending on the hinges you choose you might have a slightly larger gap between the doors. If this happens remove the doors and place a scrap piece of edge banding under the hinge where it meets the door and the cabinet. (if you look closely you can see the edge banding behind the hinge below)
- Drill and attach the knobs so they’re centered in the outer trim and cross trim piece.
- Attach the magnetic clips to the inside bottom of the cabinet and the metal piece to the cabinet door.
- Attach the 1/4″ plywood backer to the back of the cabinet with the brad nailer.
- I had to trim my backer slightly from the plan measurements because of the narrower 2x2s.
I’m so excited for you to see how it turned out. After I hung up the DIY Tiffany Mirror I decided my new Chevron Storage Cabinet would look fantastic on the wall in dining room.
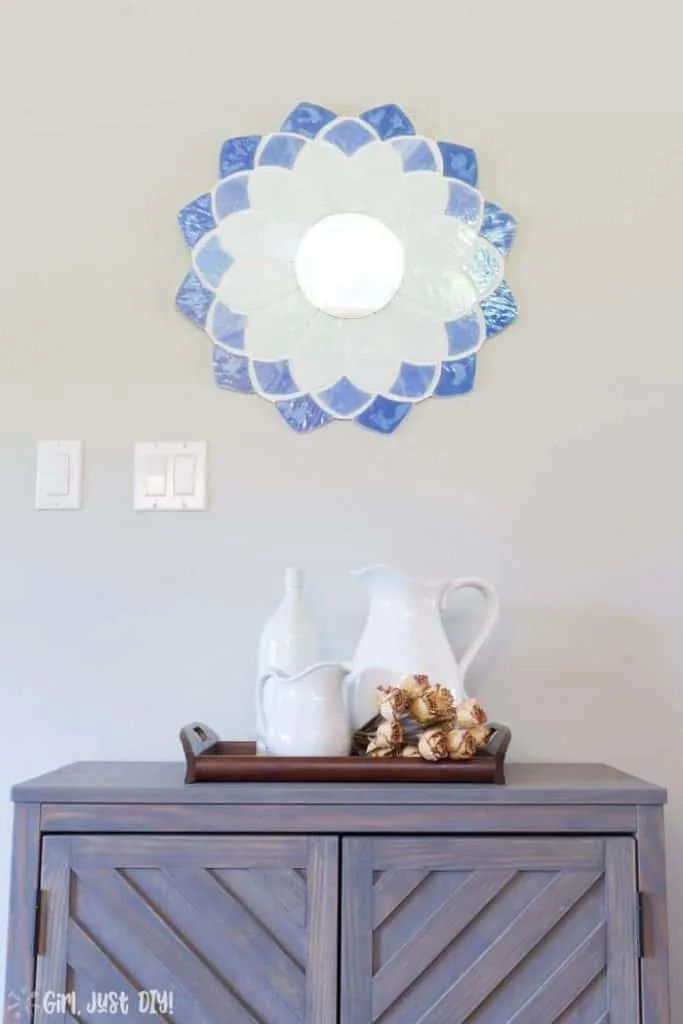
It’s sort of a tight squeeze so I might have to relocate it but it looks so good I’d really rather relocate my husband’s recliner.
Sorry for the tease, here’s my beautiful new cabinet….
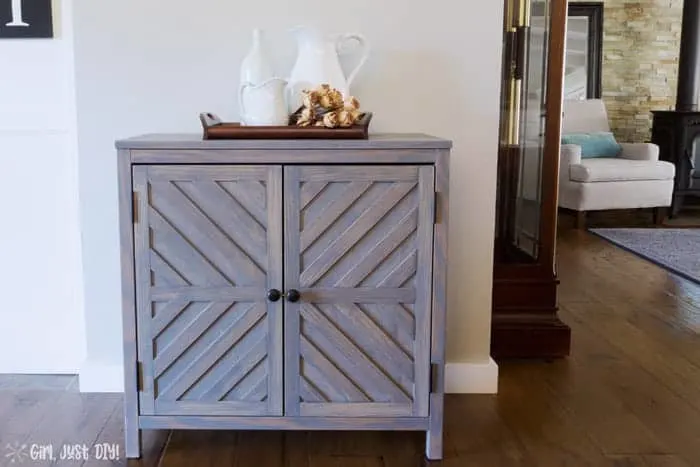
Look at all that space inside! You could store dishes in here, board games, make it into a bar, or use it in your entryway to store shoes and umbrellas.
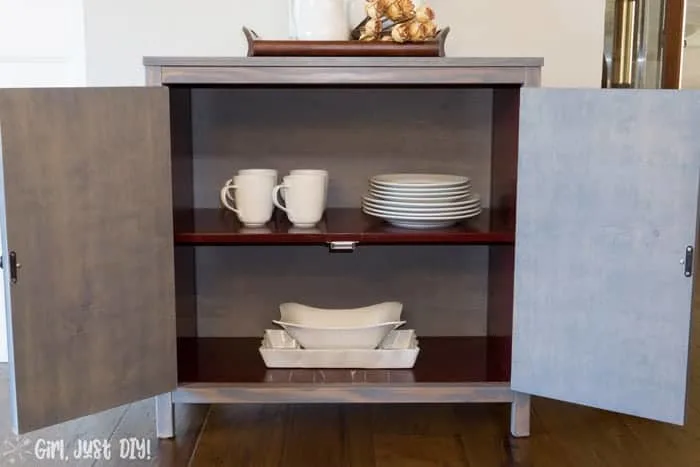
I painted the inside a pretty plum color but I was really disappointed when it really turned out maroon. I still like the contrast but I wanted an unexpected fun pop of color on the inside.
From this angle below you can see how the sides are inset from the legs. This little detail keeps it from feeling too boxy.
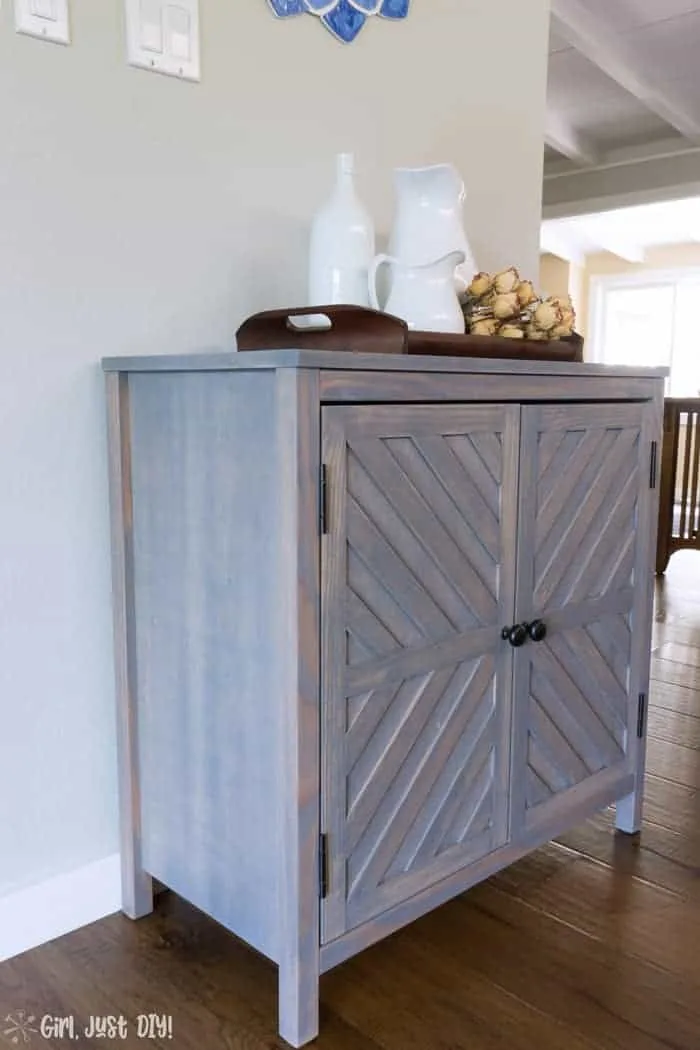
Be sure to scroll down and see a few more closeups. AND be sure to click the link to get the plans from Jen Woodhouse’s blog.
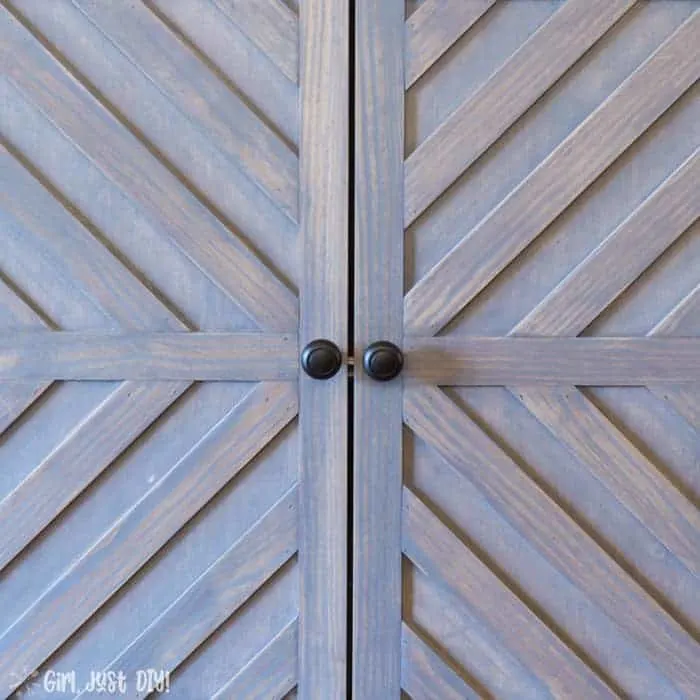
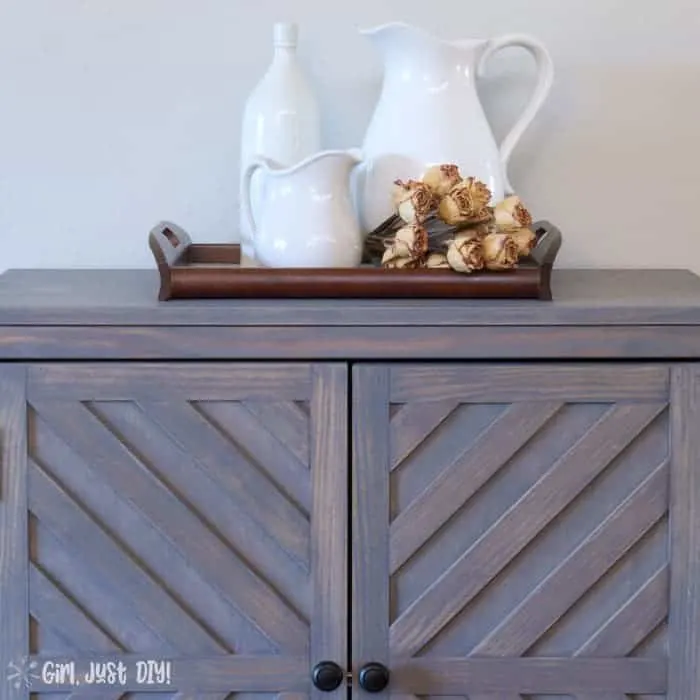
Isn’t she a beauty? It took some work but I love that I built this beautiful Chevron Storage Cabinet all by myself.
It took longer than I wanted to get this done but taking it one step at a time and not rushing really helps.
If you don’t feel you’re ready to tackle the trim on these doors then start with the basic cabinet and do basic trim on the doors. It will still be beautiful!
If you love DIY as much as I do the important thing is to just start!

Brian
Thursday 22nd of April 2021
Don’t see the plans. Is there a cut list I’m missing? Thanks
Toni
Monday 26th of April 2021
Hi Brian, the link to the plans is near the bottom of the post in a Teal colored box. That link will take you to Jen Woodhouse's blog, she created the plans that I used. You can request them from here there.
Paula Troncoso
Tuesday 6th of April 2021
Muy bonito, especialmente el diseño de las puertas
Toni
Thursday 8th of April 2021
Thank you so much Paula! I saw that design on Pottery Barn and Jen Woodhouse recreated the essence of the cabinet perfectly. It was a fun project to build!
~ Translated comment "Very nice, especially the design of the doors" ~
Justene
Sunday 3rd of January 2021
What was the stain color you used on the outside?
Toni
Wednesday 6th of January 2021
Hi Justene, I linked to it in the supply list toward the top of the post. I think it's Classic Gray.
Cindy
Friday 19th of April 2019
This turned out so nice! Your instructions are so thorough. I am not a builder but with your instructions, I think I could tackl this - with some help from my hubby ?
Marie
Tuesday 16th of April 2019
Wow, you did a fantastic job on this cabinet! I saw the link at the Homestyle Gathering party and just had to pop over to take a closer look. Your carpentry skills impressed the heck out of me, Toni! Pinned :)
Toni | Girl, Just DIY!
Tuesday 16th of April 2019
Oh Marie, thank you so much for taking the time to come over and leave a comment. I am so happy with how it turned out!