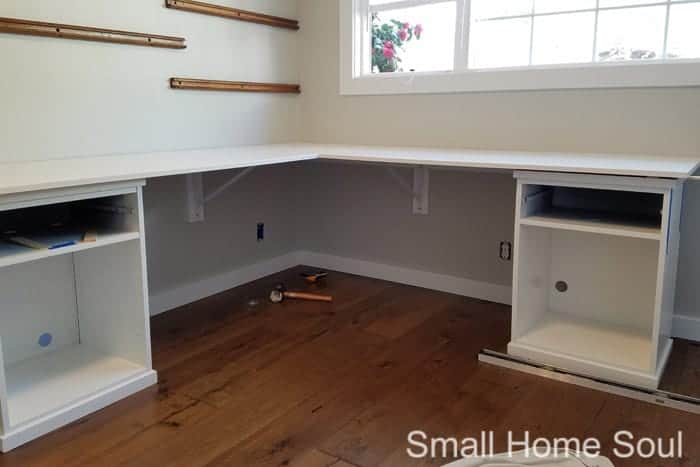
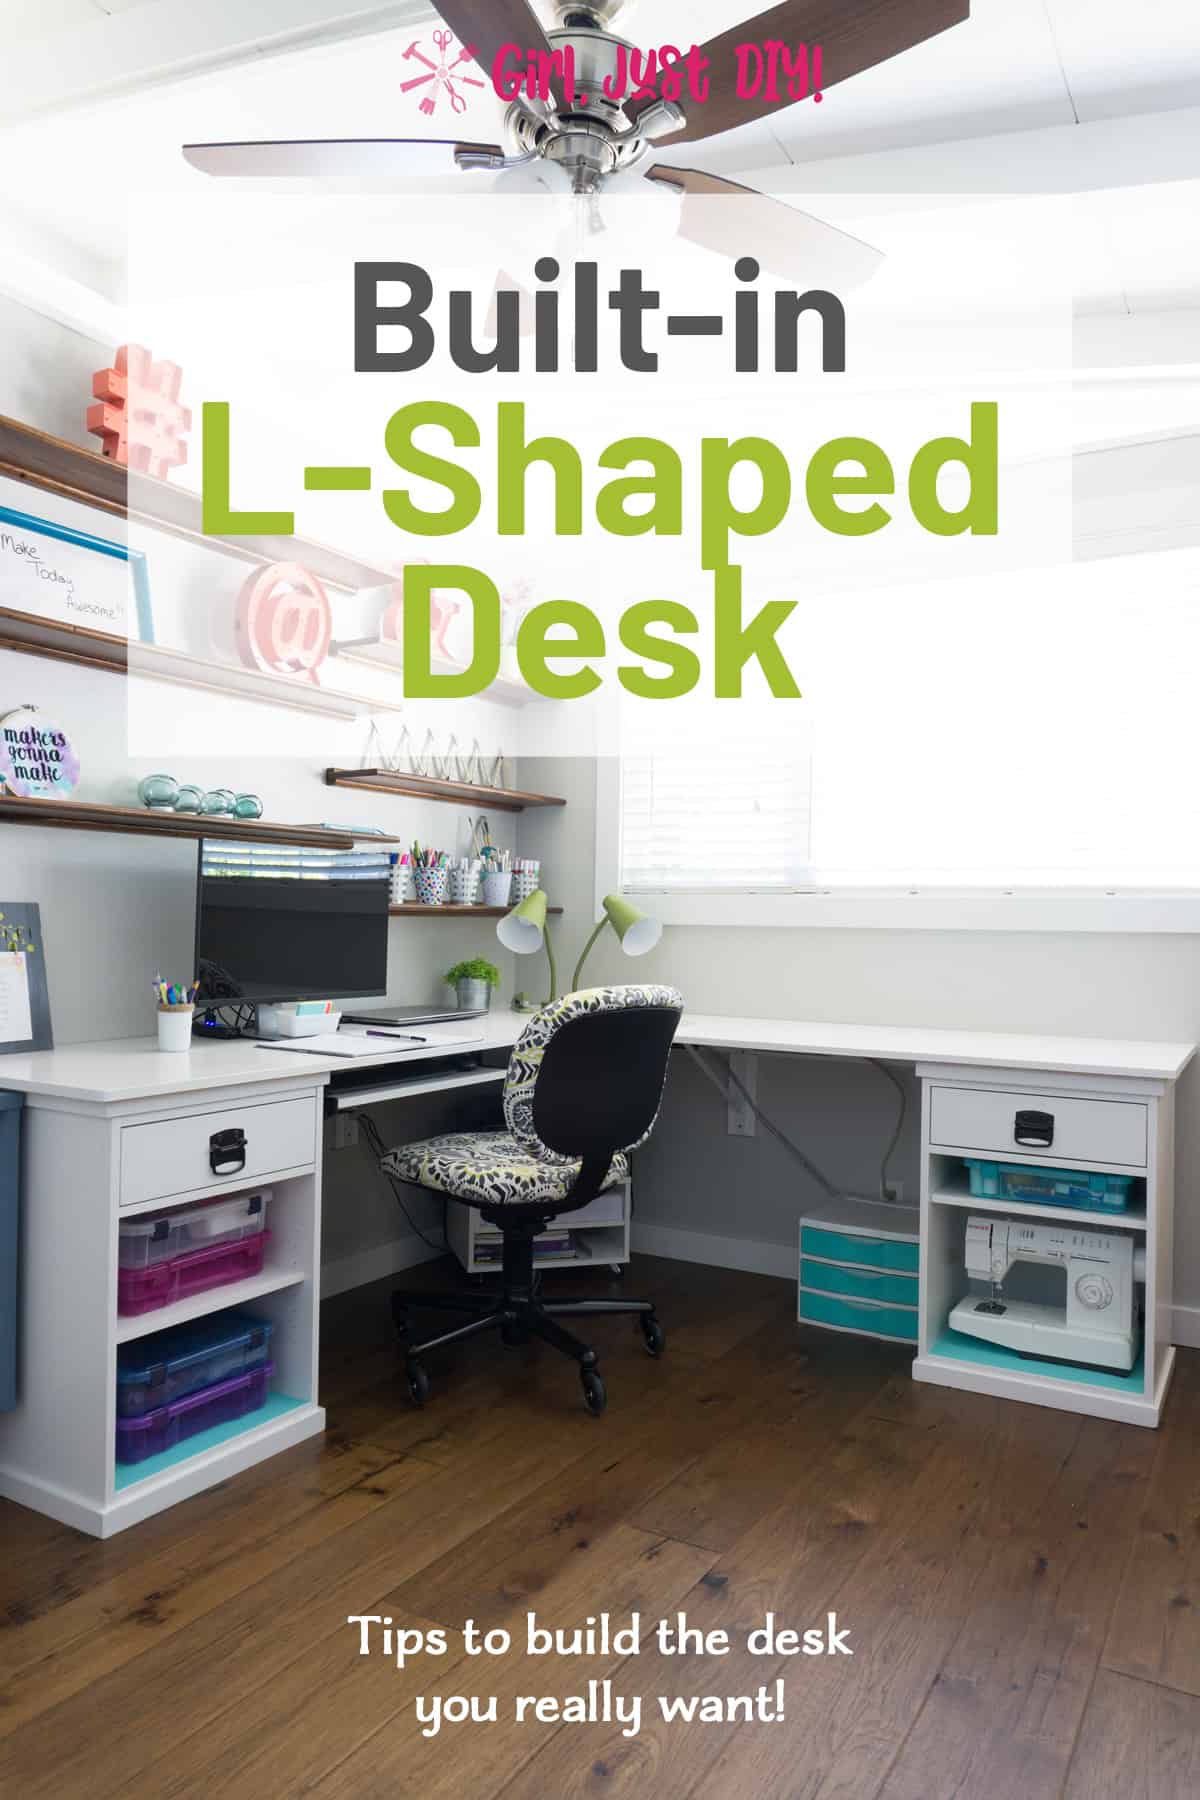
Whoop Whoop!! I’m so excited because I get to check off a huge project on my office makeover to do list. We’re in Week 4 of the One Room Challenge and I finally got our DIY L Shaped Desk installed.

I can’t tell you what a relief it is to finally have it finished. It’s only one item from my to do list but it was the largest of them all.
I owe so much thanks to my awesome husband for all his help and support! He’s an amazing husband and he said he doesn’t want any credit, so please don’t tell him 😉
We installed our L shaped desk as a built-in of sorts. We used and built around some Pottery Barn desk components I scored in a FB buy/sell group for $0.
Yep they were free!! I love free stuff and I’ll tell you how I pulled that off in a bit. But first let me show you how we built this corner desk.
The desk measures 81″ from each corner. Your desk might need different dimensions depending on the size of your room. But you can follow these steps.
This page contains links to products, if you purchase something after clicking on a link I may earn a small commission (at no cost to you). If you do make a purchase, thank you!
You can read about affiliate links here.
In addition to affiliate links a portion of this project has been sponsored by Wagner. I met them last year at a blogging conference and I loved their demonstration. They agreed to provide me with a large Studio Spray Tent and a Studio Home Decor Sprayer in exchange for writing a post.
I was happy to use their products to paint the desk parts. My thanks to them as well!
L Shaped Desk Supply List
- Two (2) Desk Components or Wooden File Cabinets
- One (1) Sheet 3/4″ thick Premium 4′ x 8′ Ripped into two 24″ wide sections
- (premium has a one side that’s paint/stain quality)
- 15′ of 1″ x 4″ Pine
- Two Heavy Duty Shelf Brackets – 19″-20″ that will support at least 200 lbs.
- Eight (8) Corner Brackets (two holes on each side)
- 5/8″ wood screws (for corner braces)
- Four (4) 3/4″ Wood Screws
- 2.5″ Wood Screws
- Four (4) 6″ Flat Brace Brackets
- Cordless Drill
- Stud Finder
- Framing Square
- 4′ Level
- Miter Saw
- Skil Saw
- Kreg Rip Cut Circular Saw Guide
- Zinsser 1-2-3 Primer
- Acrylic Paint (I use an enamel for durability)
- Paint Sprayer
- Spray Shelter
- Paint Brushes
- Saw Horses
- Spray Paint
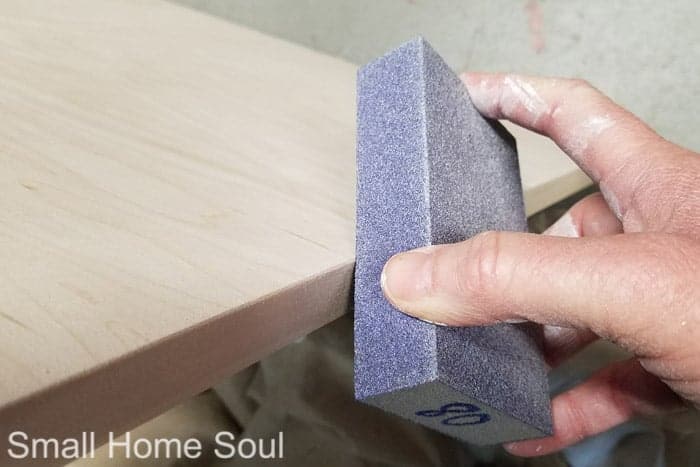
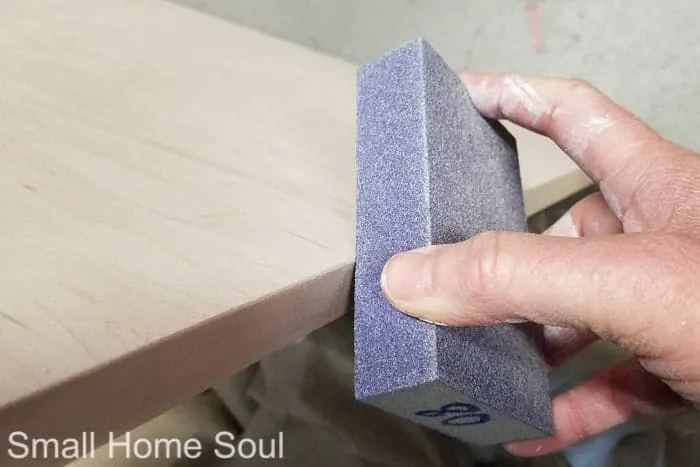
- Sand Paper (150 Grit)
- Sanding Sponge (80 and 150 Grit)
- Iron
- Edge Veneer Tape 3/4″ x 25′
- Bandit Edge Trimmer
- Box Cutter
DIY L Shaped Desk Preparation
Step 1: Cut pieces to size for your desk
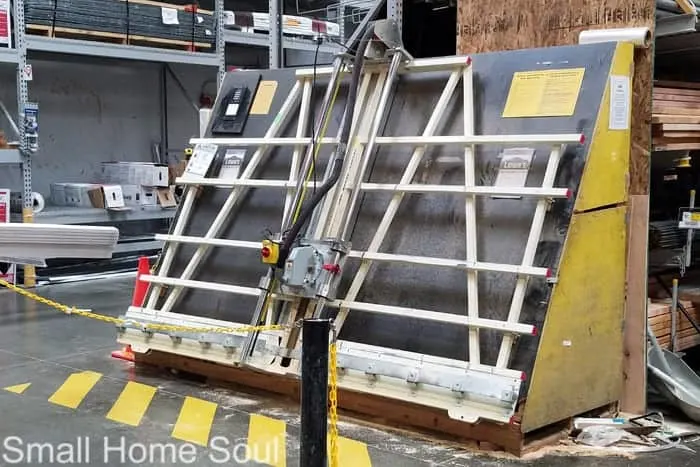
- Purchase a 4′ x 8′ sheet of 3/4″ plywood and ask the hardware store to rip it for you if you don’t have a table saw. The blades on these aren’t changed often so determine if you’re willing to risk it. We did and there was a tiny bit of splintering that luckily was on the underside.

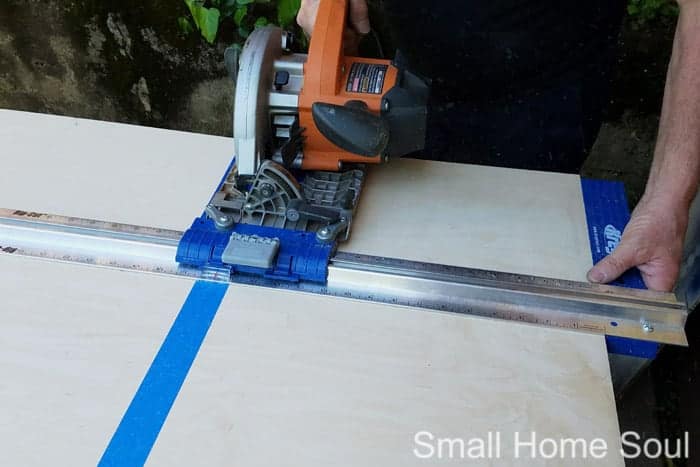
- When you get the half sheets home use the Kreg Circular Saw Guide to cut one 81″ long and the other at 57″ long.

Step 2: Apply edge banding (if used)
- Sand down the edges that will be your front and sides and ease the edges of the outside corners with sandpaper.
- Use the iron to apply the edge banding to the edges of the plywood. Align the top edge just slightly higher than edge of the plywood.
- When applying the edging around the eased corner work slowly to ease the wood around the corner so it doesn’t crack.
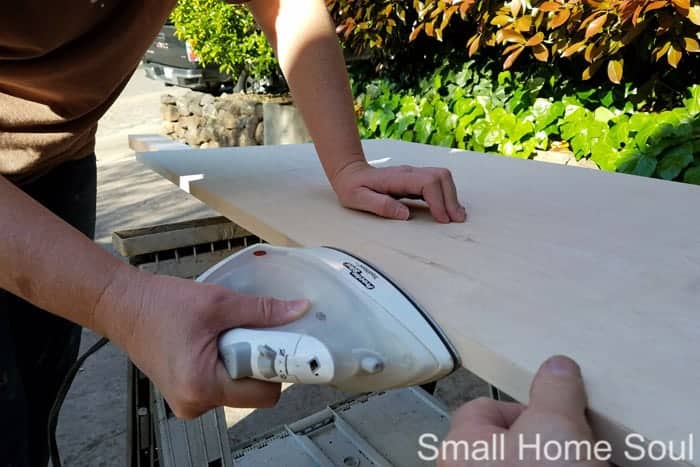

- Use the Edge Trimmer to trim off any high edges, then sand the edges of the plywood to remove the sharp corners.
Painting L Shaped Desk Parts
Step 3: Prime and paint all parts and components.
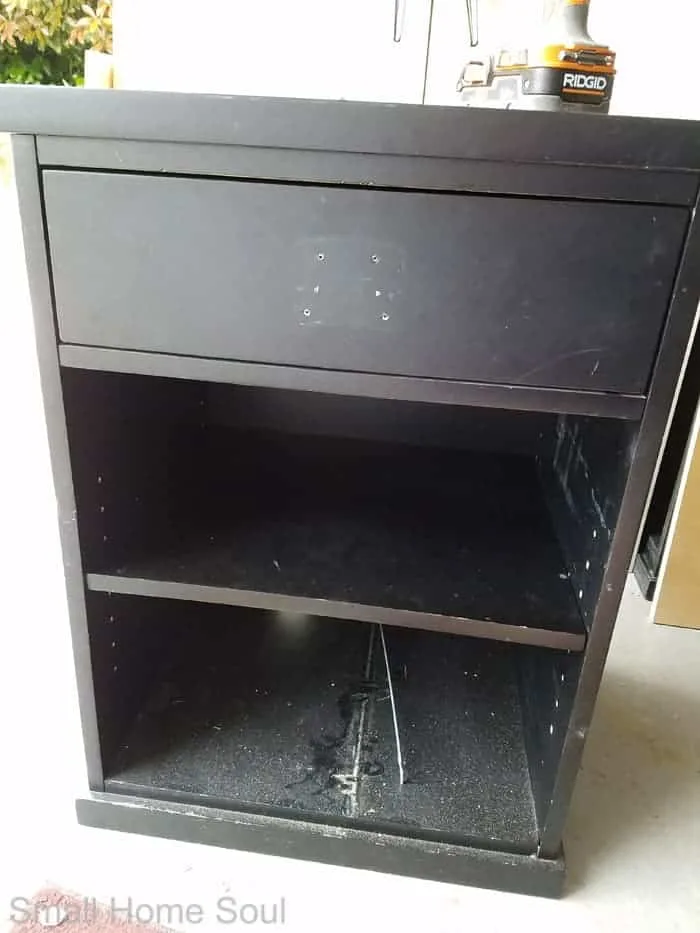
- If your components aren’t new, remove the hardware, drawers, and shelves from your desk components.
- Give everything a light sand with 150 Grit paper to rough out any dings and to give the finish some tooth for the paint to adhere.

I promised I’d tell you how I got these Pottery Barn desk components and here goes. Someone had posted two of them on a buy sell group and they wanted $125 for both.
That was more than I wanted to pay so I set Facebook to send me notifications about that post. About a week later I get a notification and the lady said “free if you can pick up today.” I jumped on it.
Within 15 minutes they were in the back of my husband’s brand new truck (shhh don’t tell him I hauled something in his new truck before he did). My patience paid off in a big way.
- Set up the Wagner Spray Shelter and thin the Primer according to the instructions on the can and as noted in the instructions for the Wagner Home Decor Sprayer. Zinsser is pretty thick so I had to thin it at about 1/3 water to 2/3 primer.
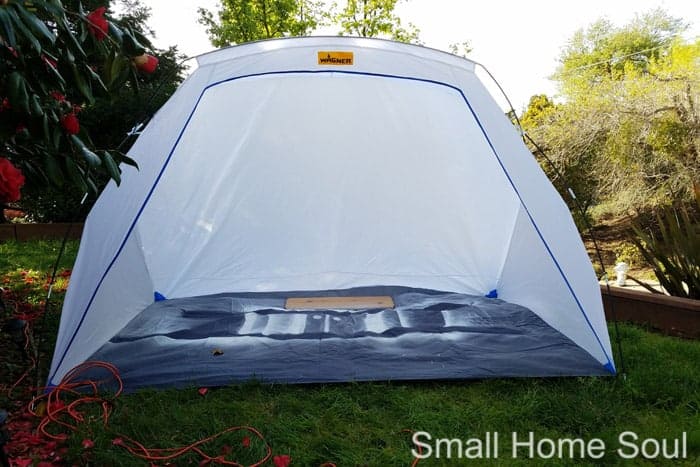
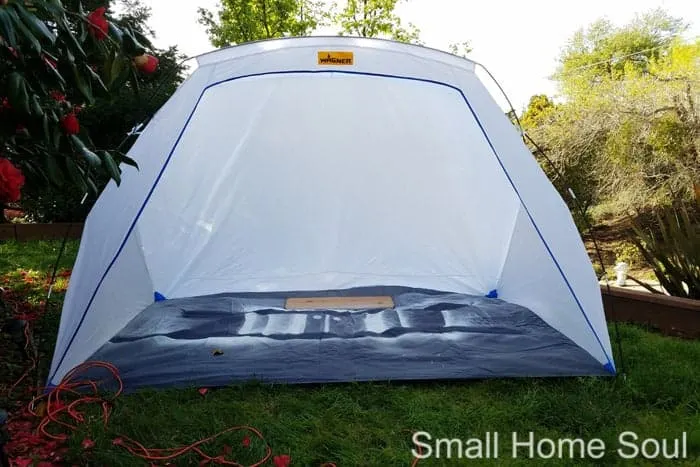
The Wagner Home Decor Sprayer is very easy to set up and I love that the motor is not connected to the actual spray head. That makes getting the sprayer into tighter areas so much easier. It sprayed on the thick primer so easily and the end result was very smooth.

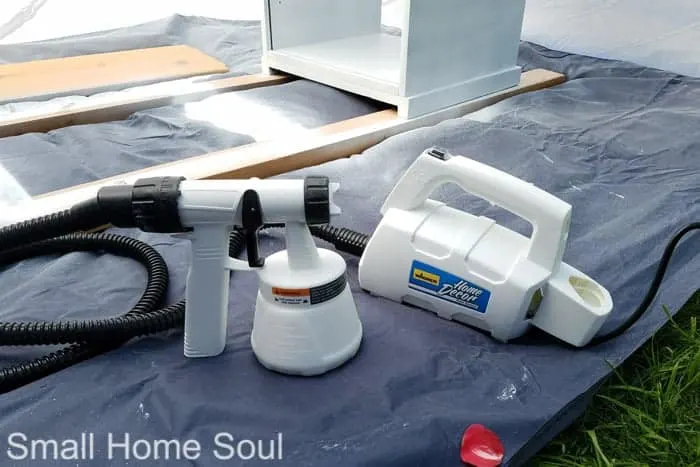
- Set your parts on 2x4s to get them off the bottom of the spray shelter.
- Use a sweeping motion with your paint sprayer like you would with spray paint. Follow the directions on the Studio Home Decor Sprayer to test your paint flow volume for the best finish.
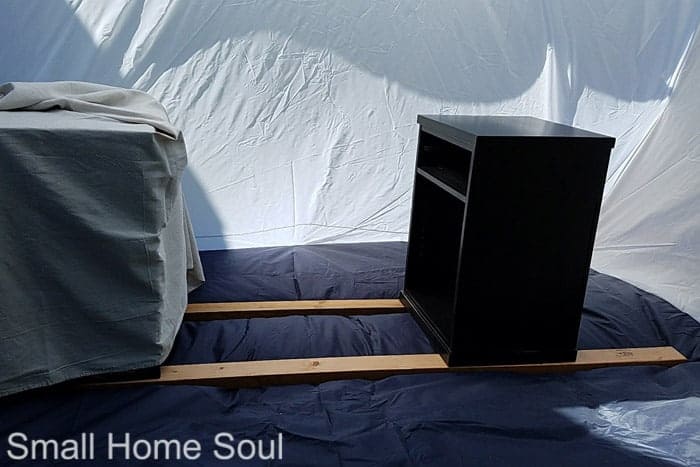
I applied one coat of primer and two coats of acrylic in my favorite white shade. Snowbound by Sherwin Williams which I used on our TV Console and on our TP Cabinet update in our Bathroom.
It’s almost always windy at our house and since the long piece of the desk was too big to put in the spray shelter and move around it I painted the two top pieces of the L Shaped Desk by hand with a brush. Floetrol is your friend when hand painting such a large area.
And here’s a little tip to get the best finish…after you get all the paint on lightly mist the top with a spray bottle to cover the entire area and then do one last swipe with your brush. It will look like glass and when it’s dry the surface will be perfect.

Step 4: Paint the hardware.
While everything is drying paint the hardware.
- Use the 120 grit sanding sponge to lightly scuff the surface.
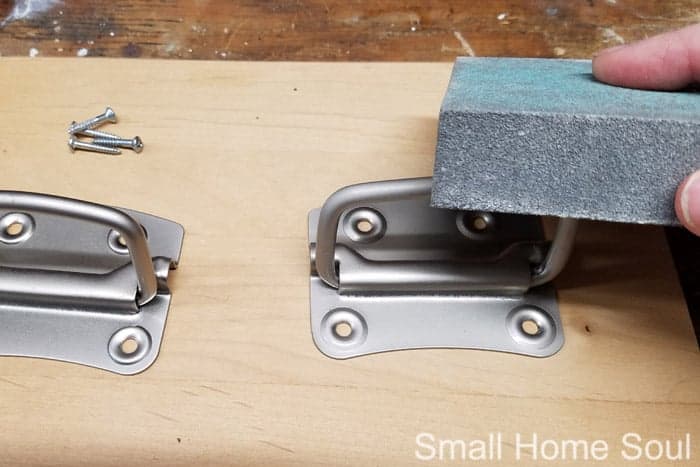

- Use random screws and attach them to a board temporarily.
- Holding it upside down spray paint in light coats all the nooks and crannies.
- Set on a board upside down until fully dry.
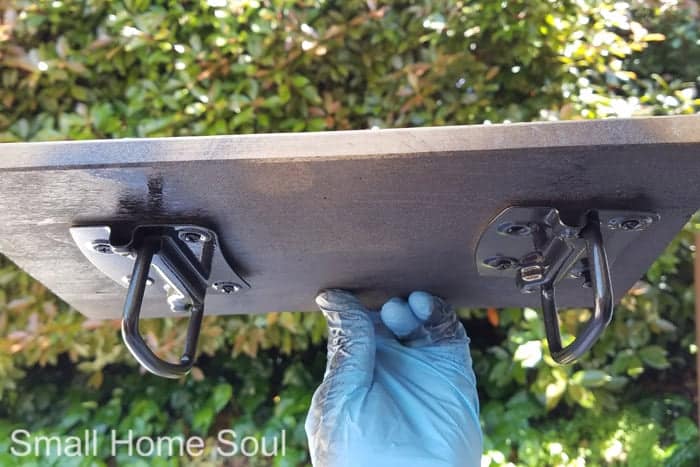
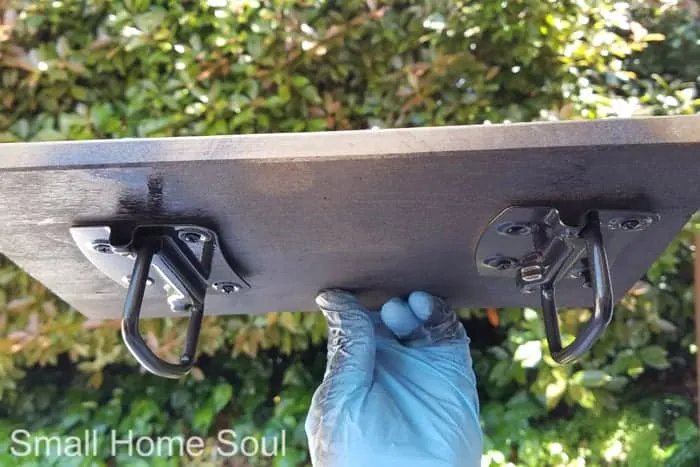
- When fully dry re-attach the handles to the desk drawers and re-install the drawers in the desk.
Installing your DIY L Shaped Desk
Step 5: Installing the wall braces.
Yay, installation day is finally here!!! It seemed like it took forever but I worked at it a little here and there and we finished installing it 3 weeks after I started the One Room Challenge.
Really it took me nine days from the time I started painting until we installed because I worked around my part time job.
Here’s the steps we took to install our DIY L shaped desk to the walls.
- Set your desk components or filing cabinets on either wall 79.5″ from the corner and adjust them so the front and sides will have a 1″ to 1.5″ overhang
- Use a framing square on the floor to ensure they’re square to the wall. My desk components are only 18″ deep so I have a gap at the wall .
- Use Painters’ tape to mark the corner of your desk. This will make it easier to get it back where it belong in the final steps.


- Span a straight 2×4 over the two sides and use a level to determine if your floors are level. If so great, move on to the next step. If not determine which side is highest. This will be the side from where you start.
In our room the left side from the corner is higher than the right. This was our starting point.
- From each corner use the Stud Finder to locate and mark the center of each stud.
- Cut two 1″ x 4″ boards, one 79″ long and the other 78-1/4″ long.
- Mark a line on the wall even with the top of your desk component on the highest side of the room.
- Line up the end of one of the 1×4’s to the line on the wall and the other end in the corner using the level.
- Using the 2.5″ wood screws and cordless drill to fix the 1×4 to the studs. Alternatively you could use a nail gun to attach the 1×4 bracings to the wall but I wanted the option of removing it without destroying the wall.
- One screw per stud is enough. However, if you can’t place a screw into the stud at the very end of the board double up the screws on the last stud.
- Using the first 1×4 as a guide now install the second one on the other wall using the level to keep it, well, level 🙂
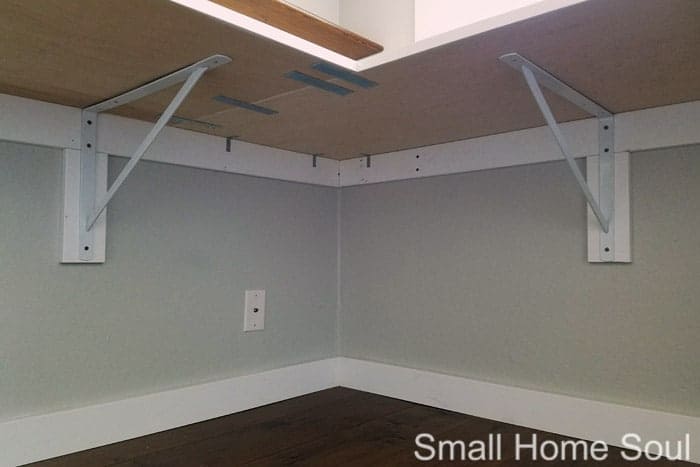
- With the 1×4 braces installed on the wall connect the eight Corner Brackets to the 1×4 so that the top is flush with the 1×4. (see pic below)
- On the second stud from each corner (approx 32″ in from the corner) install a 9.5″ piece of 1×4 below the horizontal piece. This is where you’ll install the Heavy Duty Shelf Brackets which will help support the expanse of the desk. (see below)
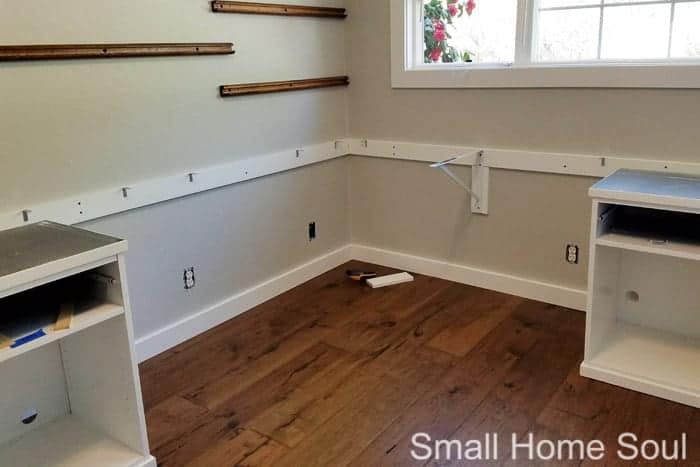

- Pre-drill holes in each corner through the top of your desk components. Drill from the underside and protect your paint job with painters’ tape. We’ll address these holes last.

Step 6: Installing the desk top.
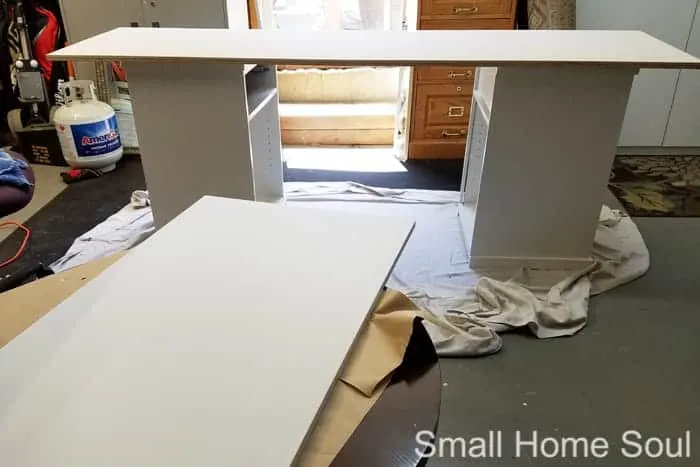
With all the corner bracings and the two heavy duty brackets installed it’s time to install the top of your desk. The 81″ board for our L Shaped desk is under the window with the shorter section on the left.
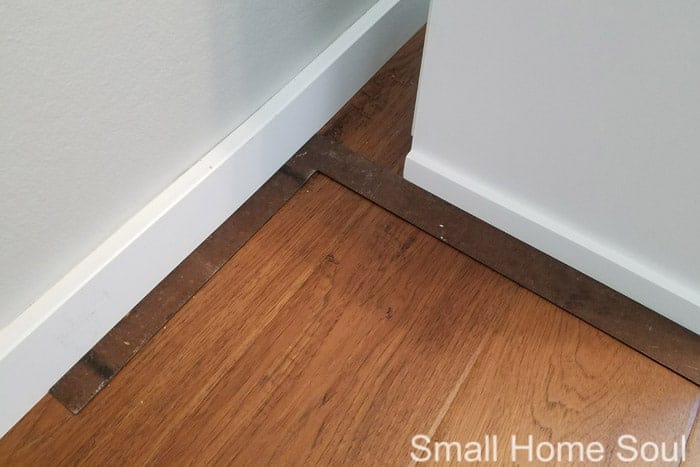
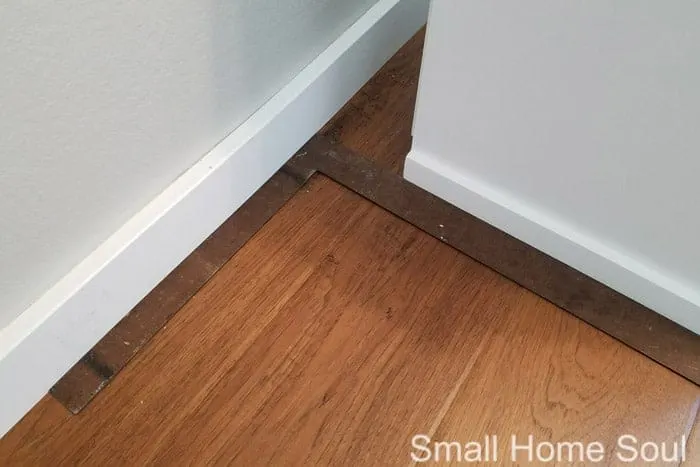
- Set the 81″ piece over the desk component and into the corner. Now, most houses aren’t perfect so be prepared to see gaps along the walls.
- Set the 57″ piece on the other side and square it up to the longer section. Again you’ll have to do some adjusting to get the square. I have about a 1/2″ gap in one section along the wall where my two boards meet. It’s ok if it doesn’t fit tight to the wall. #recoveringperfectionist
- After you get the two sides set and the sections that meet are squared up use the 5/8″ screws to attach the underside of the L-Shaped Desk top to the corner braces.
- Use the 3/4″ screws attach the underside of the desk to the heavy duty brackets.
Lastly we need to connect the short board and long board together for the DIY L shaped desk.
- Using 5/8″ screws attach the four Flat Brace Brackets across the seam where the two sections of your DIY L Shaped Desk meet.
- Line up the desk components so they are square to the wall and have the overhang you like.
- If your floors aren’t level then you may need to use some wood shims on the top of one to bring it to level. We had to shim above the right side and below the top of the desk. We were able to measure and buy a piece of trim thick enough (about 1/4″) that we cut to length.
- Attach the desk component or filing cabinet to the L Shaped Desk top with screws long enough but not so long that they pierce the top (because that would stink). Your situation may vary from mine, my screws were 2-1/4″ long since the top of my desk component was so thick.
That’s it, that was your final step 😀 You can dab a little white paint on the wall brace screws if you want. But really once you get all moved into your new desk no one will ever see them.
Here are a few pictures but I’m sorry they’re not the greatest so I’ll be reshooting them once the entire room is completed and put back together.


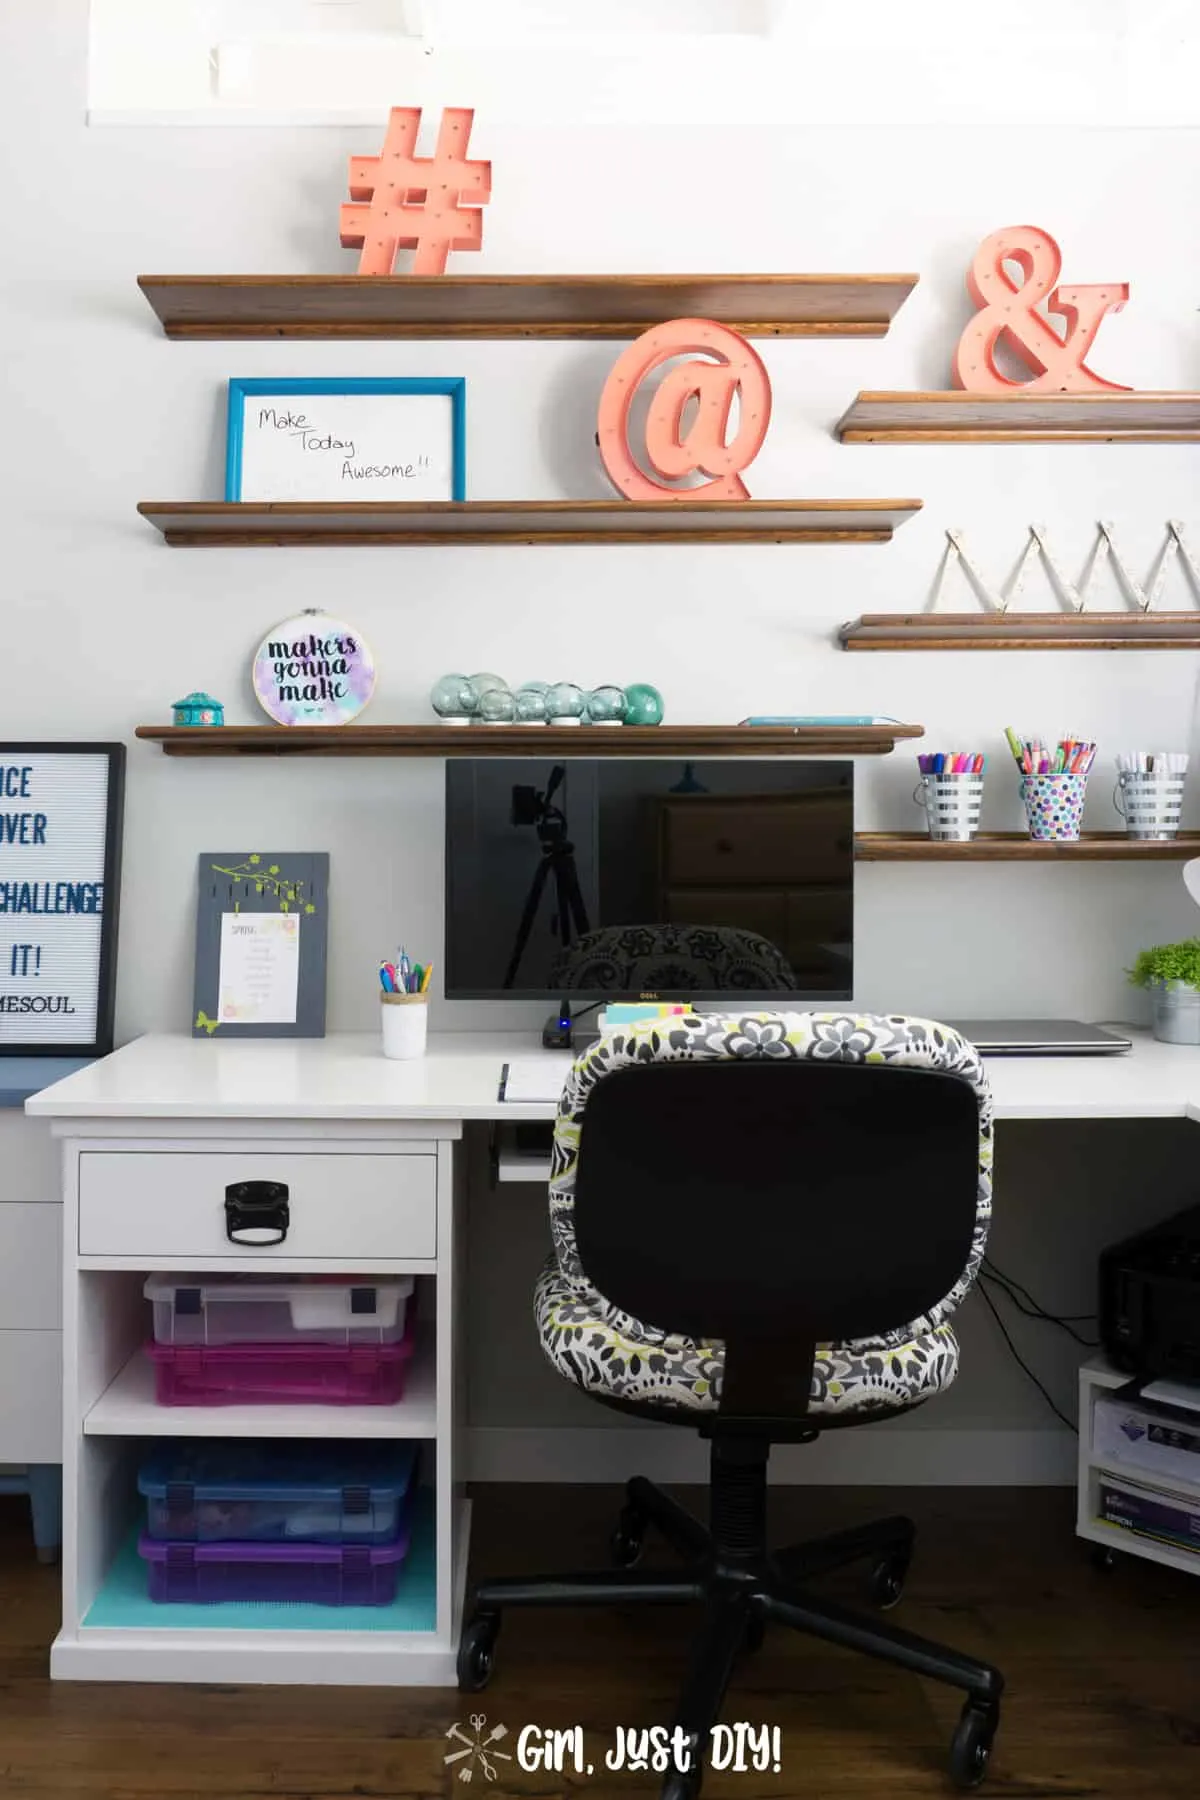
This is what my new corner desk looks like after I got the entire room completed. If only it still looked this neat and tidy 😀
LOVE IT, PIN IT!!

This was a big project. If you’re still with me this was week 4 of my 6 week timeline and you can see the updated To Do List below. I actually crossed off three projects this week because I got my chair recovered and I stained and hung the shelves.
Ah, how good it feels to be this close to the finish line 😀
Give the room a fresh coat of paint.Build an L-shaped corner desk.Recover my existing desk chair.Take down the unused TV.Updating the lighting.- Create organization with peg board or some other fun product.
- Replace the existing area rug.
Install shelves over the desk.
Check out the rest of my weekly projects below:
Week 1 | Week 2 | Week 3 | Week 4 | Week 5 | Week 6

Still tired but happy to be nearing the finish line,
Toni
DIY Coffee Filter Holder - From Wood - Anika's DIY Life
Tuesday 12th of March 2019
[…] of her favorite projects are the Dollar Store Glass Backsplash she added to her bathroom, and the L-Shaped Desk she installed in her […]
Laura Neufeld
Thursday 3rd of May 2018
You are RIDICULOUSLY talented!!!
I am honestly blown away about how successful this project is...you need to offer you services to others!
Toni | Small Home Soul
Thursday 3rd of May 2018
You fill my bucket sweet friend ??
Sarah
Wednesday 2nd of May 2018
Holy cow! It's gorgeous! You made it look like the house was already built with the desk included. I love the upside down painting tip, too. GREAT job, Toni!!!
Toni | Small Home Soul
Thursday 3rd of May 2018
Aww, you seriously just made my day <3
Diane Rath
Tuesday 1st of May 2018
You’ve taken on such big project and it came out amazing! I’m super impressed by your paint tent too!
Toni | Small Home Soul
Thursday 3rd of May 2018
Thanks Diane, those painting tents are amazing and a must have when you live where it's often breezy. Plus they keep the bugs away and the overspray contained.
Dannyelle
Tuesday 1st of May 2018
Wow your desk looks so great! What a great project to cross of the the to-do list. Looks like a great place to work.
Toni | Small Home Soul
Thursday 3rd of May 2018
Thanks Dannyelle, I can't wait to get everything back in there and get working. So much surface space, I can't wait!