I have some exciting stuff to share with you today. I’ve been waiting to share it for a little while but the timing wasn’t right. The stars finally aligned so today I’m giving you a tutorial on How to Install Shelves in your home for a big impact.
I installed shelves in my living room recently on either side of our TV Console. Getting them level on both sides was very important. I know lots of people might wonder how to install shelves on walls the right way.
This tutorial should and give you all the tips you need to get it right the first time.
This project was sponsored by HomeRight, all opinions are my own. They understand a DIY blogger’s life and how we love to share our tools with our readers.
I’d already bought their Large Spray Shelter but the small one sure came in handy for my Mirrored Milk Bottle Centerpiece.
A few of my blogging friends also received sprayers and/or a Spray Shelter so we decided to make it a group project. We’re all sharing a project today that we completed with one of the HomeRight products.
Look for the links to their projects at the end of this post.
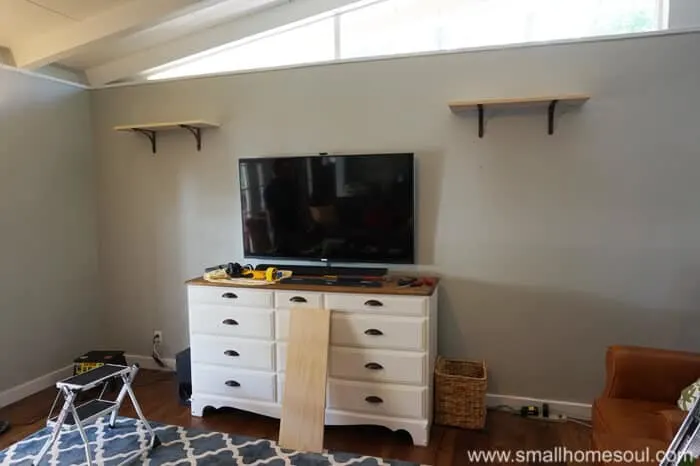
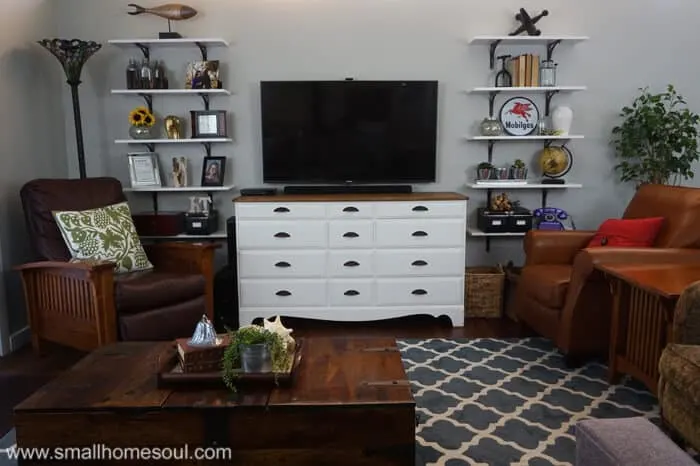
Are you ready for me to show you how I installed my shelves? Here’s my before, kind of boring, right? Well, boring except for that awesome TV Console from a Dresser I madeover a year ago.
Wait until you see the after of this wall
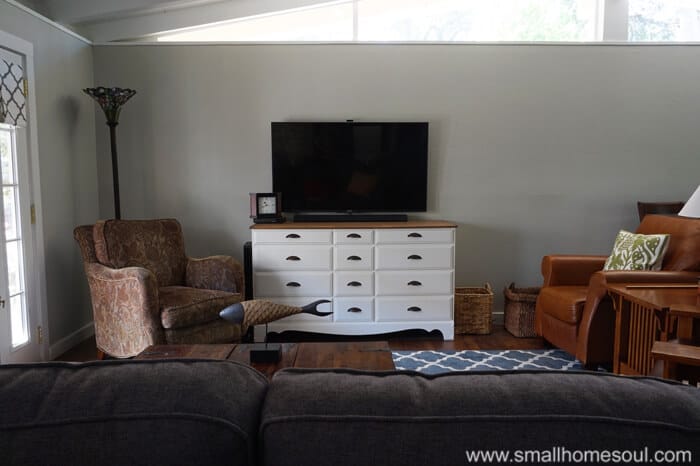

When we repainted the inside of our house last summer I knew I needed something with a big impact for that large empty wall. I didn’t want any more bulky furniture in my small house so I decided on shelves.
I wanted floating shelves but then thought about the industrial look with plumbing pipes. I was surprised how quickly the cost of the pipes adds up.
I planned to do five shelves on either side of the TV console so the cost quickly added up to more than I wanted to spend.
This page contains links to products, if you purchase something after clicking on a link I may earn a small commission (at no cost to you). If you do make a purchase, thank you!
You can read about affiliate links here.
Supply List for Installing Shelves
- 4′ Level
- 12″ Level
- Stud Finder
- Scratch Awl
- Tape Measure
- Cordless Drill & Drill Bits
- 1-1/2″ Wood Screws
- 3/4″ Wood Screws
- Electric Sander or Sanding Sponges
- Shelf Brackets
- Flat Burnished Amber Spray Paint
- Wood Boards for Shelves
- 1 Qt. Zinsser 1-2-3 Primer
- 1 Qt. White Paint
- HomeRight Finish Max Paint Sprayer
- Large HomeRight Spray Shelter
Define your Shelf Style
Consider the look and style of the shelves you want. Industrial, Modern, Classic? I really wanted simple white painted shelves with brackets that weren’t too fancy.
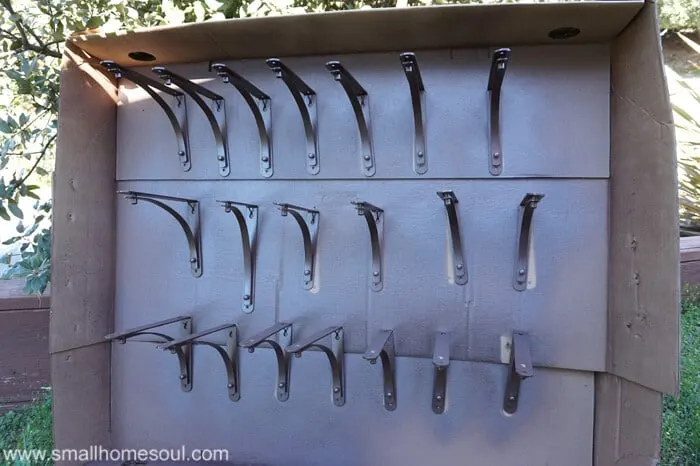
I found a nice, simple-style shelf bracket at Lowe’s that cut the cost of the hardware down from $200 (yes plumbing pipe isn’t cheap) to only $100. They’re sort of an Art Deco style but I like how simple they are.
I bought 10 packs of 2 at $9.99 each, a bargain. They didn’t come in the color I wanted so I painted them. Matching the hardware to the pulls on the TV Console was my goal so I gave them a coat of Flat Burnished Amber.

Here are some similar style shelf bracket to what I used that I found on Amazon. I used Blue Hawk but I can’t find them on Lowe’s website.
Shelf Material
For our shelves I bought clear 1″ x 10″ pine boards and had them cut in 30″ lengths at the hardware store. They are happy to make some cuts for you but don’t expect their blades to be super sharp. And tipping is always nice.]
We had ours cut at the store because we didn’t have a sliding miter saw at the time. I had to do a lot of sanding on the ends because as I mentioned, the blade wasn’t very sharp.
The lumber cost was around $60 for three 10′ lengths. So far the cost to install this many shelves is around $160, plus a little more for screws, and paint.
Priming and Painting Shelves
It’s time to prime and paint. I set up my large Spray Shelter in the front yard and got busy.

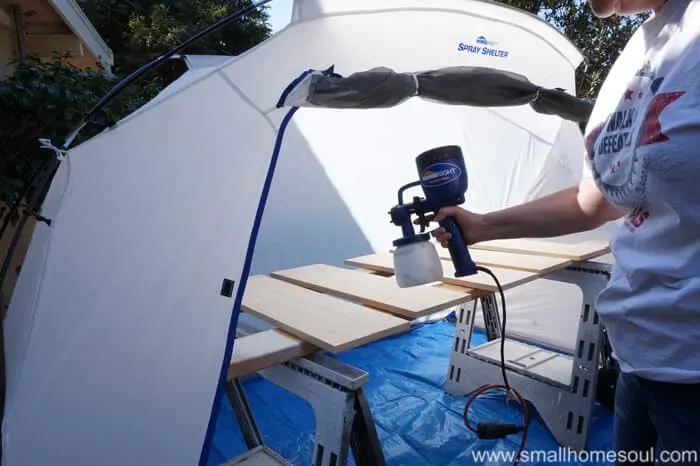
You can see how well this sprayer works in the demo I did on Facebook Live below. The HomeRight Finish Max Sprayer works great and it saved me so much time! It covers well and the finish is smooth as glass.
There are instructions for thinning your paint and primer, and it comes with a viscosity tester so you know when your paint or primer is thinned enough. My friend Tonya at Hey There Delyla made a handy video you can watch.
Using a Spray Shelter there’s no more fly away paint in the windy yard and no more bugs landing on my freshly painted stuff. We had such an issue with bugs when we painting our Murphy Bed Project.
After the shelves were painted and drying we got to work installing the brackets. I have some tips for making this process as easy as possible.
Finding the Studs to Install the Shelf Brackets
Use your stud finder to locate the studs in the walls where you want to install your shelves. In most construction the studs are spaced 16″ on center. This means that once you find the center of one stud, the center of the next one will be 16″ away.
- Using your stud finder follow the instructions to first find the left edge of the stud, then follow the same steps to find right edge.
- Make a pencil mark in the center of the stud. You’ll need this as a point of reference
- Now measure 16″ to the next stud. Use your stud finder to double check your positioning.
Marking Studs for Shelf Brackets
I wasn’t trying to line up the top of my shelves to anything in particular. If that’s your goal you’ll need to mark for your shelves taking into consideration the thickness of your shelf material and the screw slot on the bracket (if so designed).
The marks I’m making below are where the top screws for each bracket will be located
Step 1: Mark the Left Stud
- After you find the center of your studs use your 4′ Level to draw vertical lines lightly with a pencil up and down the wall over each stud where your shelf brackets will be installed. Alternately you can use painter’s tape temporarily and place your pencil marks on the tape.
- On the left stud, starting where you want the top shelf draw a dot over the pencil mark.
- Measure down the desired distance to the next shelf and make another mark.
- Continue measuring and marking on only the left stud until you’ve made a mark for all the shelves in that area. My shelves are 13″ apart so I measured down 13″ between the dots I made.
Step 2: Marking The Right Stud
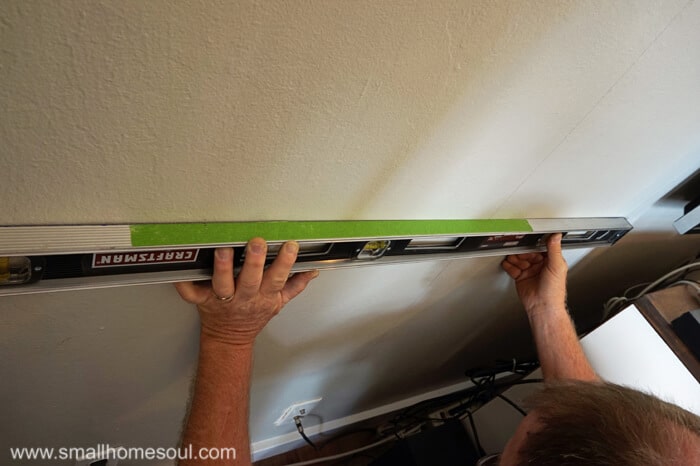
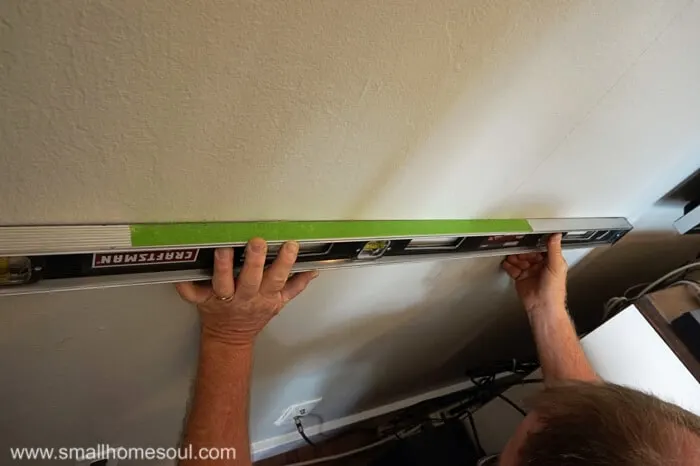
- Stick a long piece of painter’s tape across the top of your Level and make two marks at the edge 16″ apart.
- Line up the left dot on the tape to the dot on the wall at the left stud.
- Hold it at that mark while adjusting the other end of the level until the bubble is in the center.
- The level bubble should be in the center AND the left dot on the tape aligned with wall dot.
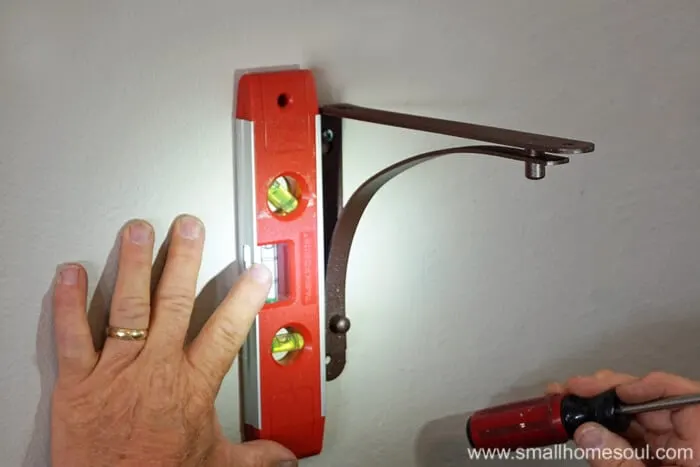
- Make a dot on the right stud directly above the right dot on the tape.
- Here’s a picture of how we did it (duh, sorry we were marking in the opposite manner but you get the idea)
How to Level Side-by-Side Shelves around a TV
When you install shelves on opposite sides of something like a TV, it’s important that they’re level from side-to-side. Measuring off the floor isn’t always an option if you have an older sloping floor like mine.
We tried an inexpensive laser level but our old wonky walls made that impossible. As a last resort while we still had some hair left we used the 4′ Level to draw a faint line from the dot for the top left-side shelf, across the top of the TV, to the stud for the right-side shelf.
Follow the steps as outlined above to mark the shelves on the opposite side. If you’re only installing one set of shelves, yay, you’re d-o-n-e! Now you get to install the brackets 🙂
Installing the Brackets
Follow all these these steps and your brackets will be in, perfectly, in no time.
Step 3: Install Shelf Brackes
Start by setting the top screw for each shelf bracket
- On each of the dots you made for your brackets, use the Scratch Awl to make a 1/8″ deep indentation. This will ensure your drill bit gets a good grip and makes the holes exactly where you want them.
- Use your cordless drill and a drill bit slightly smaller than your screws and pre-drill all the holes.
- Change the drill bit back to the phillips bit and screw in the wood screw leaving them out about 1/4″
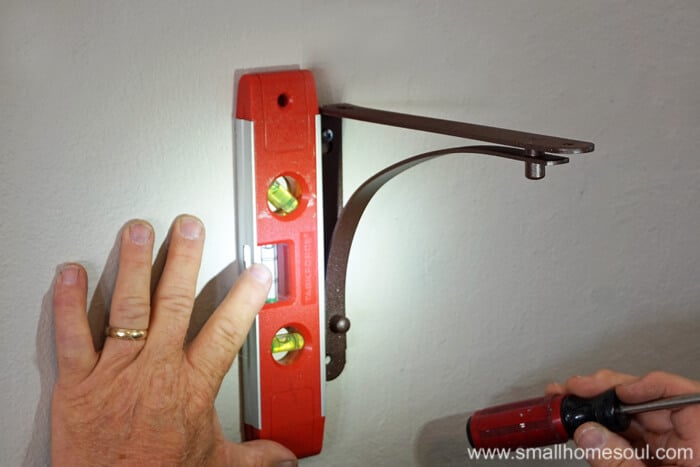
- Slip the shelf bracket over the screw and continue to screw them in until they are snug but not too tight.
- Use your 12″ Level and the end of a screwdriver or mallet and adjust the bracket left or right as necessary until level vertically. Tighten the screw so the bracket doesn’t move.
- Depending on the style of your brackets you might need a hand screwdriver or an offset screwdriver to tighten the screws.
Attach the bottom of the bracket
- Once all top bracket screws are installed check level again as you go.
- Pre-drill the bottom holes and install the second wood screw so they are securely fastened with two screws each.
- Watch your head as you do this process.
I did a dry run and started with the top shelf on either side of the TV first to make sure they were level across. As you can see we have a lot of angles and I wanted to be certain they were level before I committed to making all the holes.

Step 4: Shelf Installation
Ok, we’re getting close to the finish. The edges of the shelves should line up nice and neat or your OCD friends like me will go crazy. My shelf brackets are 16″ apart and my shelves are 30″ wide so I had to do some math to figure out the right overhang on either side. Once I did the first one the others were easy with this ingenious tip 🙂
Easy tips to line up shelves vertically
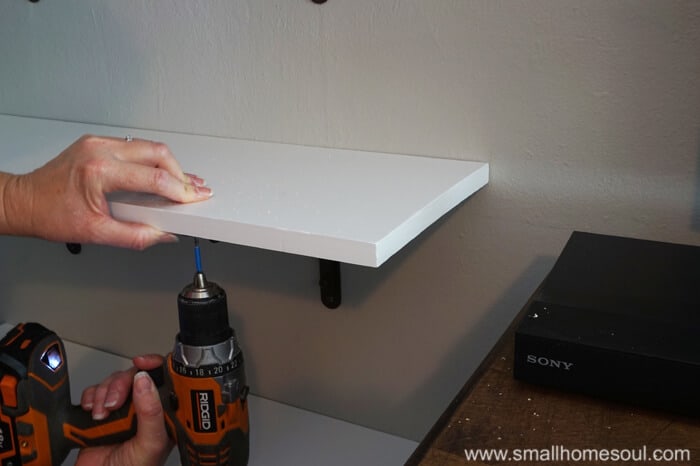
- After you center your first shelf use 5/8′ – 3/4″ screws to secure the front of the board to both brackets.

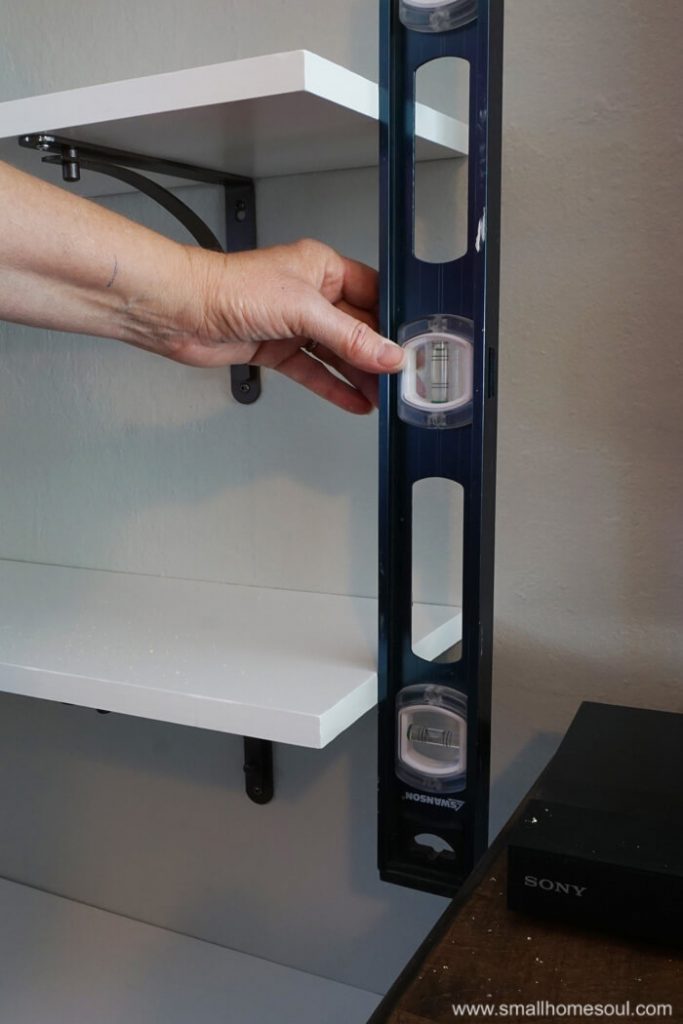
- For the next shelf use your 2′ or 4′ level. Hold the level to the board you just screwed to the bracket and adjust the shelf below it until it’s level (looking at the bottom bubble in this picture).
- This will ensure your shelves are plumb, or vertically aligned.

- Hold the shelf in place and attach it to the brackets with screws
- Continue until all shelves are attached.
And voila! It seems that there are a lot of steps to install shelves. There are but they aren’t hard steps; and it’ll go quickly if you follow the steps above. I (ok we because my husband was a huge help) did all the hard work to make it easier for you.
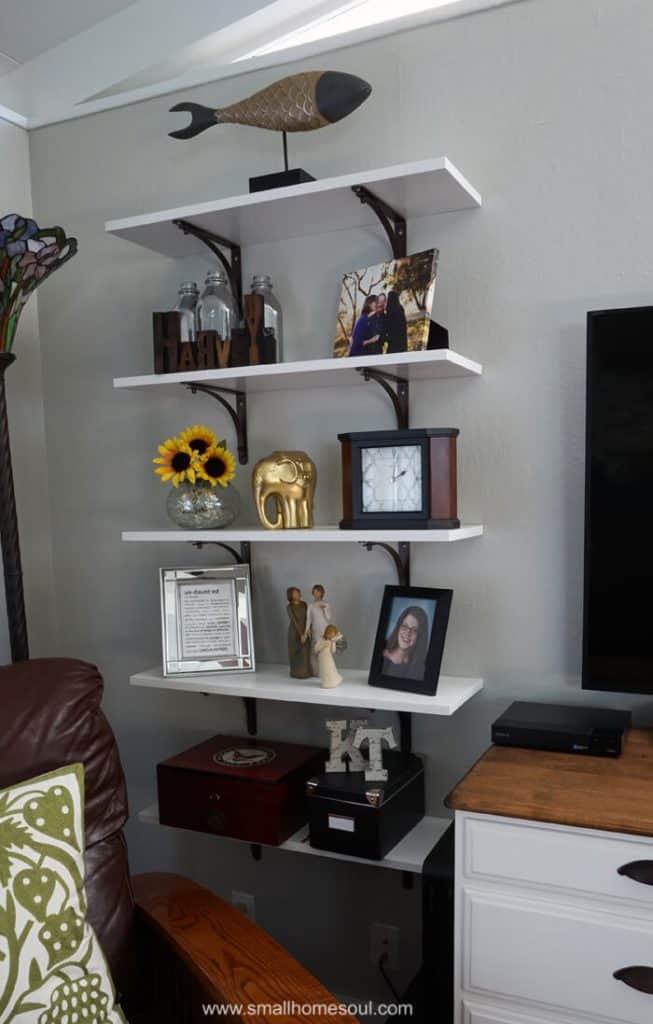
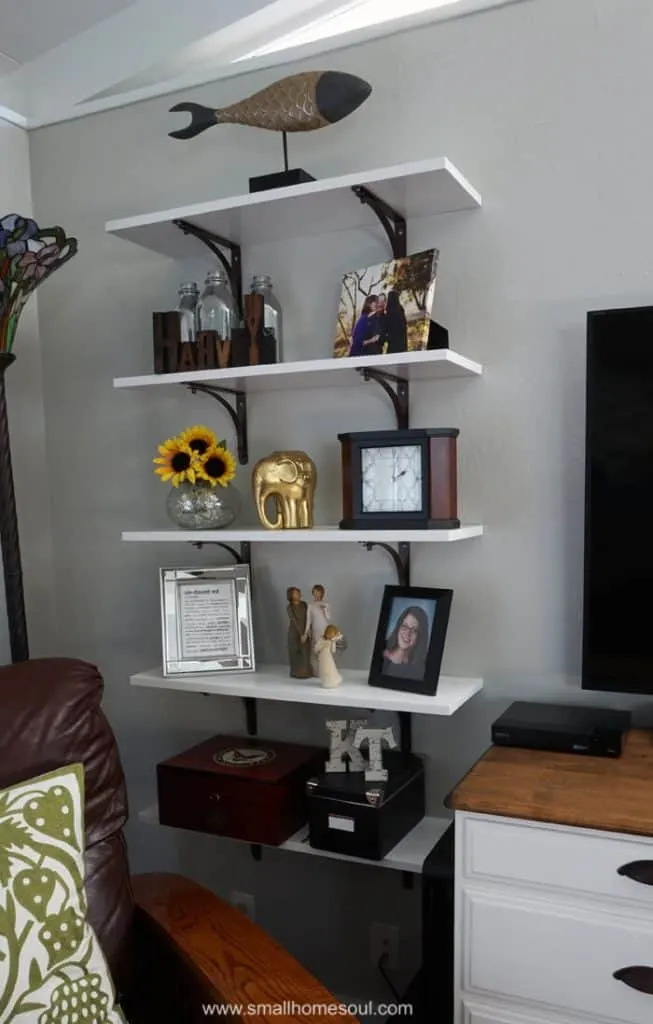
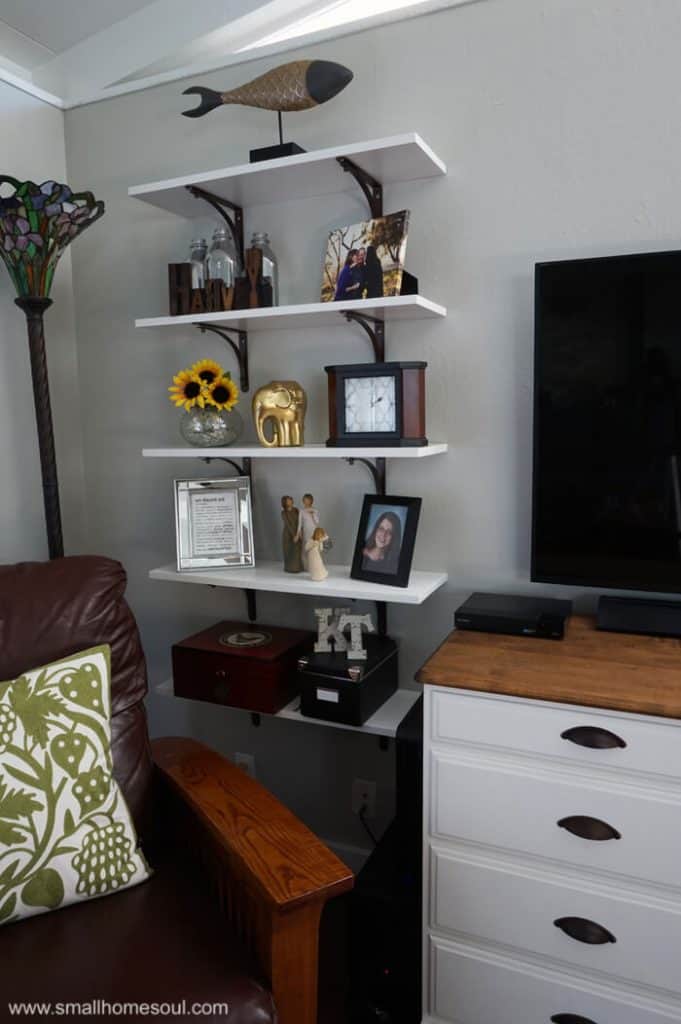
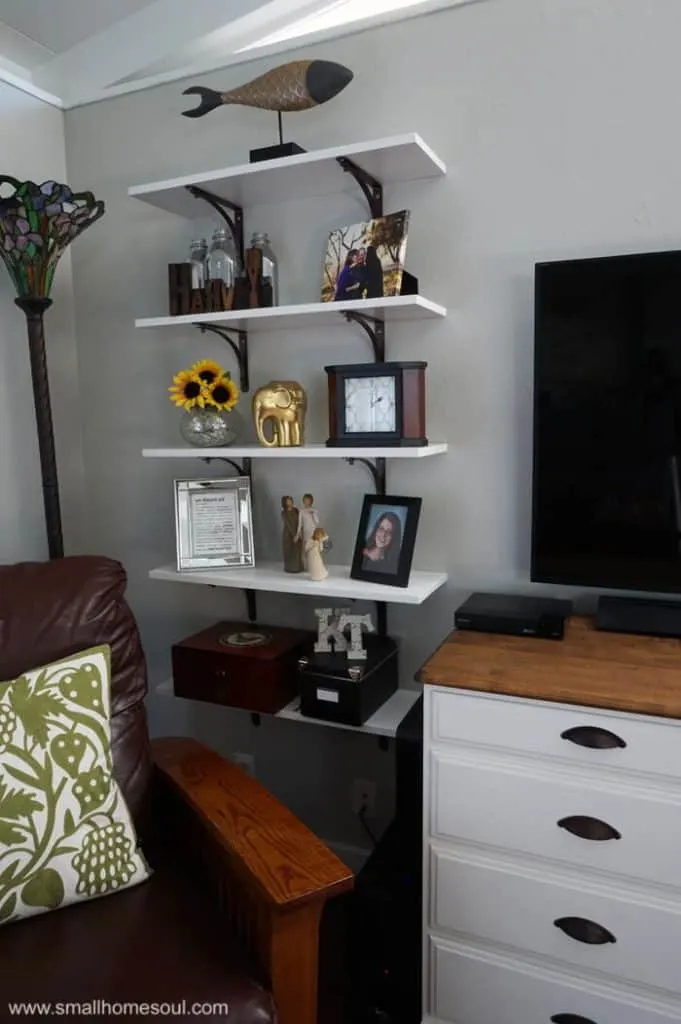
Style Your Shelves
Now you get to do some decorating and staging 🙂 oh happy day!! It can take a little time and tweaking to get the look you want but this is a good start. The impact on my living room is crazy good.

I was worried I wouldn’t have enough stuff to fill the shelves but my friend Susie from The Chelsea Project told me to shop my house so I did. Smart lady, thanks Susie!
I have some favorite things I’ve mixed in. One of our family pictures that love, the Letterpress Nameplate I made, and the Willow Tree “Sisters” figurine my sweet sister Michelle gave me. Oh, and the Navy humidor given to my husband by one of his customers. It’s more stuff to dust but I don’t mind it when it makes me this happy!
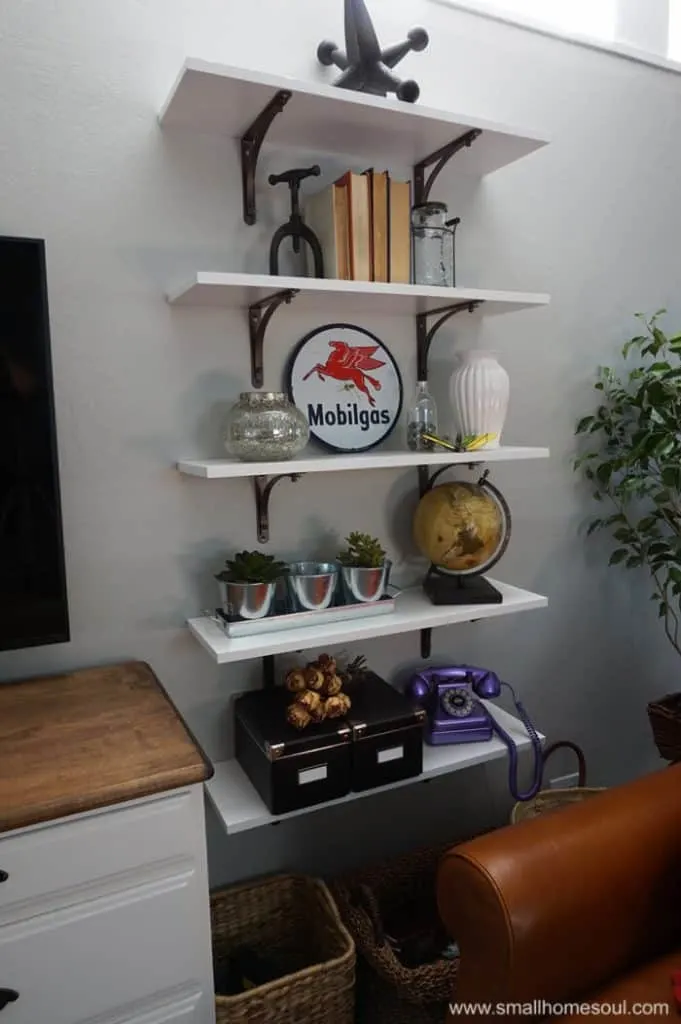
On the other side is the giant jack that reminds me of my dad. He was always stepping on the ones we forgot on the floor, oopsie 🙂 He also owned a Mobil Gas Station with my uncle. That clock makes me feel like I still have a part of him with me.

It’s not difficult to install shelves when you have all these tips for dealing with bumpy walls, and the math that makes it much simpler.
And of course, don’t forget to Pin it 🙂
Now check out what my friends did with their HomeRight products.
John
Monday 28th of May 2018
I love DIY projects. They are so much fun! Thank you for the instructions and supply list! It's the first time I hear about spray shelter. But I guess it's really useful. But the end result. Wow, such small things like shelves can make such a huge difference. Amazing!
Toni | Small Home Soul
Tuesday 19th of June 2018
Hi John, I'm glad you found my post useful. The shelves made a huge difference in our home. Yes, you need one of those spray shelters, they are a game changer when it's breezy outside and all your spray paint ends up in the bushes or on the side of your home or car.
Leela
Sunday 20th of November 2016
We bought a handyman's dream home that needs a lot of work.
Toni Harvey
Tuesday 22nd of November 2016
Hi Leela, our home was like that when we bought it, it needed so many updates. A sprayer would have saved us so much time painting the trim. Thanks for entering the contest and I'm sorry you weren't a winner. Maybe you can get your hubby to buy you one for Christmas ;)
Kelley Roach
Sunday 20th of November 2016
paint homemade bunk beds
Toni Harvey
Sunday 20th of November 2016
I bet they will look lovely! Good luck Kelley only a few hours left before we can pick the winner!
Amy Williams
Sunday 20th of November 2016
This would be so exciting to give to my husband he would love it.
Toni Harvey
Sunday 20th of November 2016
I can tell you for sure Amy that he will LOVE it!! Good luck, only a few hours left before we can pick the winner!
Christie
Sunday 20th of November 2016
I need to tackle putting up shelves in my laundry room.
Toni Harvey
Sunday 20th of November 2016
That would be so handy, my laundry is in the garage and there is no space for shelves where they sit. Good luck, only a few hours left before we can pick the winner!