Several years back (before wood floors and updated paint) we tackled a closet makeover in our master bedroom. It really brought our cramped 1950’s closet into the 21st Century, well as much as possible. We don’t have a walk-in closet and with our small home we didn’t have the option to steal from another room (like on all my favorite DIY shows) so we worked with what we had to get the most storage and function.
This post contains links to products, if you purchase something after clicking on my link I may earn a small commission (at no extra cost to you).
With all closet and storage space limited in our house we were determined to find a way to optimize every inch. We looked at hardware stores and online for modular systems we could put together and install ourselves but nothing seemed to work how we wanted it.
Our closet measures 84″ wide by 36″ deep, which seams really big. But each door opening is only 23″ so finding anything on either end was a challenge. When we saw the The Container Store’s commercial for their annual Elfa Closet System event we decided to check it out. At 30% off we had to check it out.
Planning a Closet Makeover
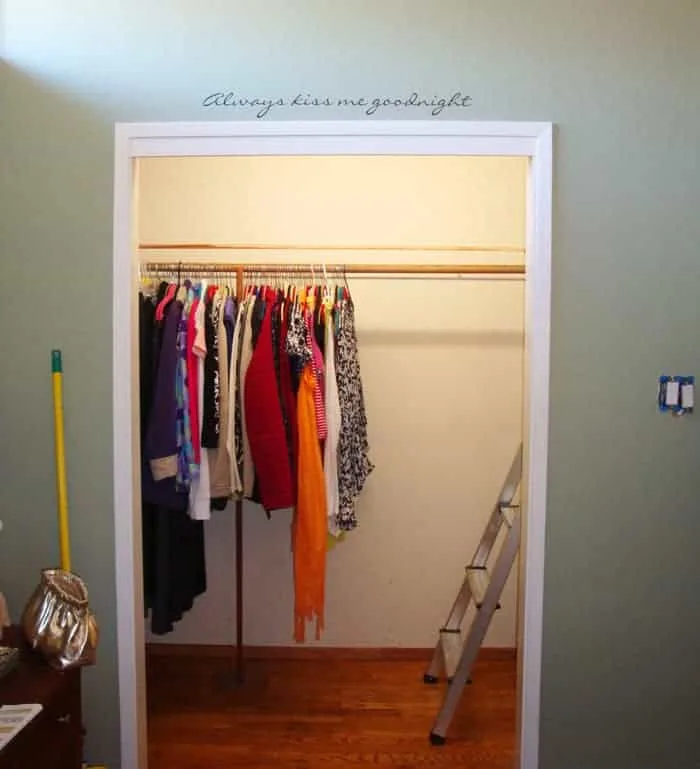
We were anxious to get started and had removed the doors before I started snapping pictures. Please forgive the poor photography, they were taken before I learned a thing or two about my camera. Either way the before pictures are still not pretty at all. All that mess and disorganization.

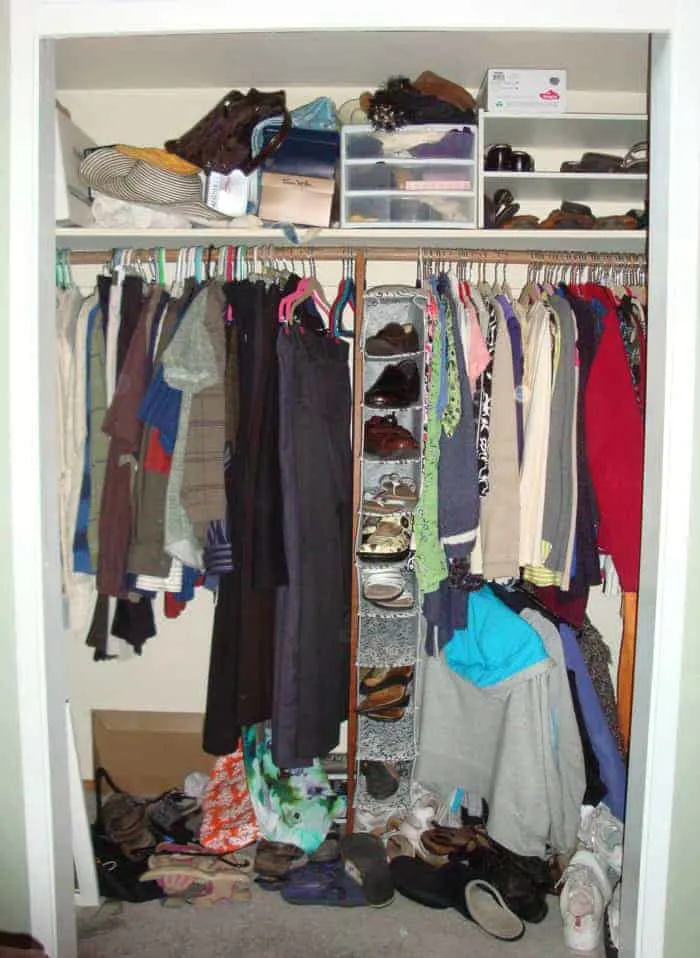
The closet was so dark it was hard to find anything. The floor was a pile up of bags and shoes. More shoes on the shelf and in a hanging shoe shelf taking precious rod space. It’s embarrassing but being transparent is a good thing to see how much more functional our closet is now.
I added a closet rod extender on the right trying to get better function. It helped with the amount we could get into the closet so they weren’t all jammed together. But as you can see the clothes were hanging on the floor and over the shoes.
So off to The Container Store we ran.
The Elfa specialists at the store are so helpful and patient. She worked with us for over an hour to get the perfect configuration. Since we’ve done almost all our own home improvement projects I know we could have done the elfa installation as well. But heck, since the installation was also on sale we gladly scheduled the installation, picked up the parts and pieces, and went home to finish the demo.
Knowing the house had hard wood underneath decided to rip out the carpet and expose the floor. That would give us an extra inch floor to ceiling, make it easier to clean the floor, and it looks fantastic!
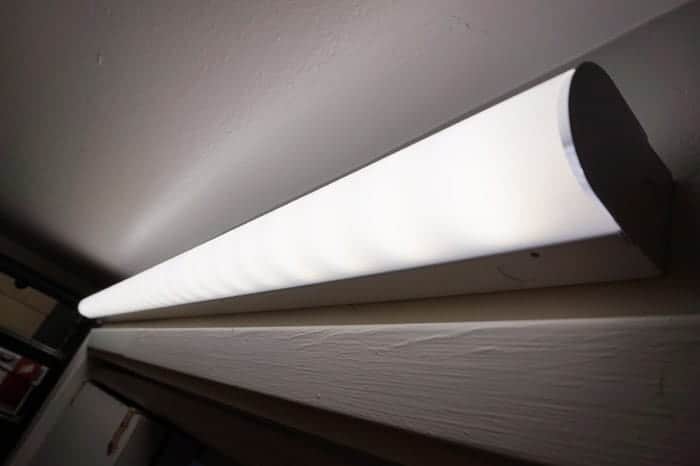
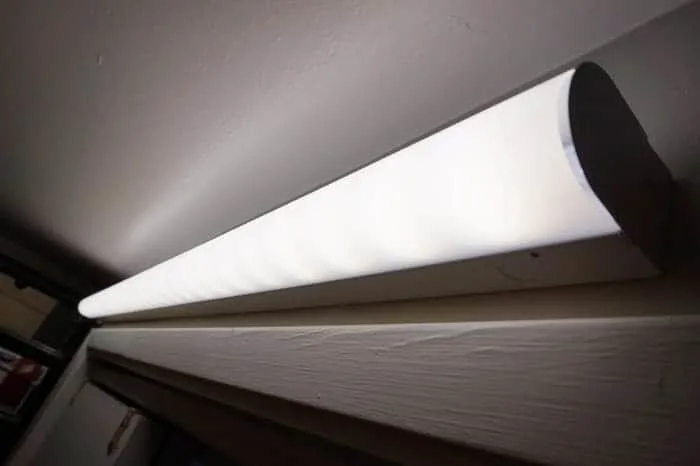
But before we did the full on demo my husband (who loves me so much) installed a light in the closet. We picked up a 48″ LED Light Bar (similar to this one on Amazon or this one at Home Depot) which he installed above the door. He even installed a light switch outside the closet so we didn’t have to reach up to turn it on. The outside switch works best because we can easily turn it on no matter which side we open
Add Lighting
Over the years I’d tried every type of battery operated fluorescent or touch light; they were either not bright enough, battery pooped out too quickly, or just plain broke. If you don’t have a light in your closet you really NEED one. I can’t believe I lived without it for so long.
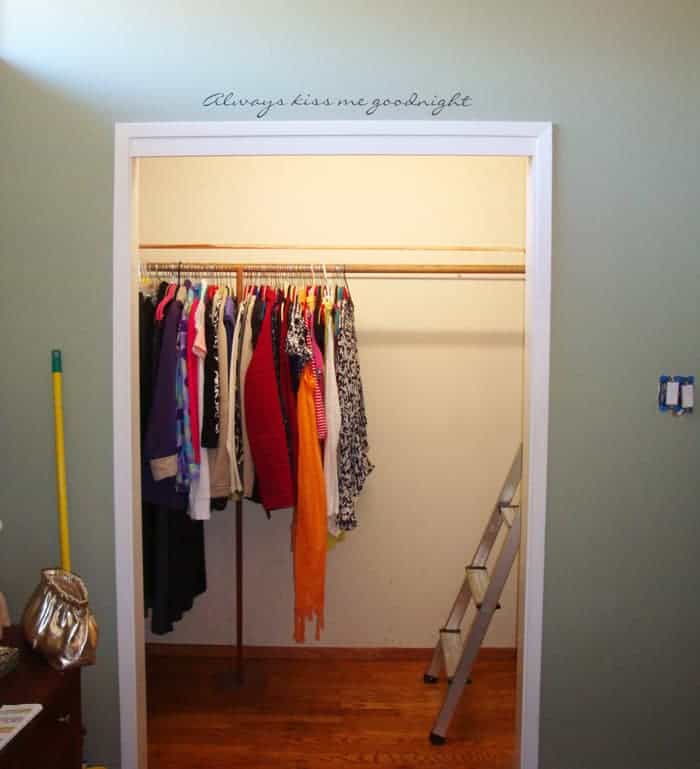
After the light was installed we finished the demo of the shelf and rod and patched and sanded the walls.

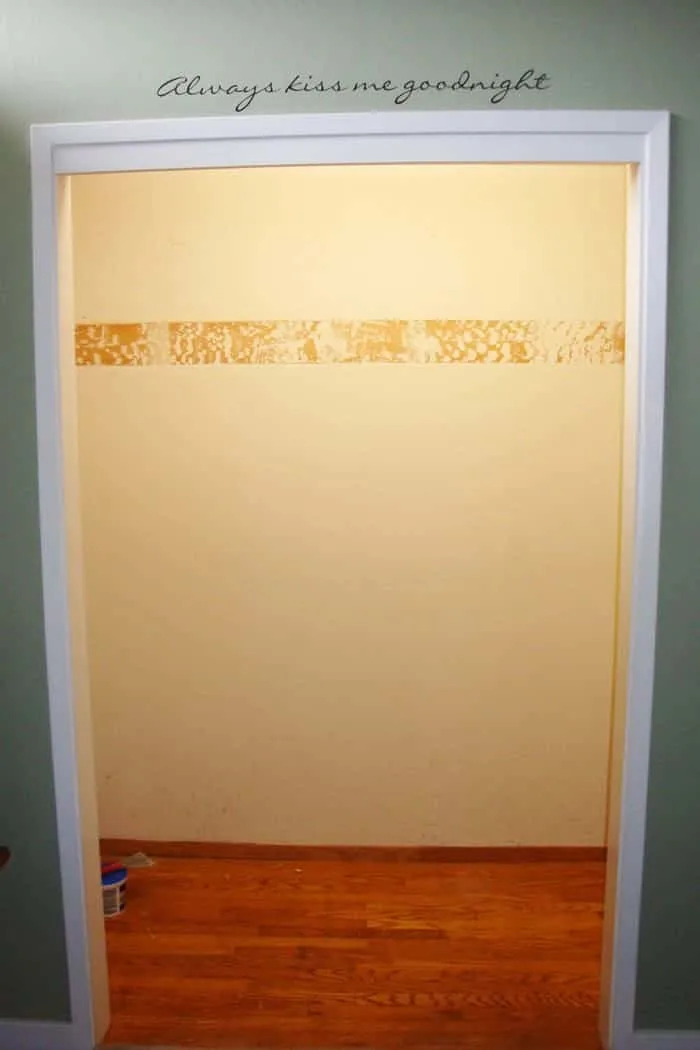
This is how deep our closet is. It’d taken a beating in its 50+ years of life.
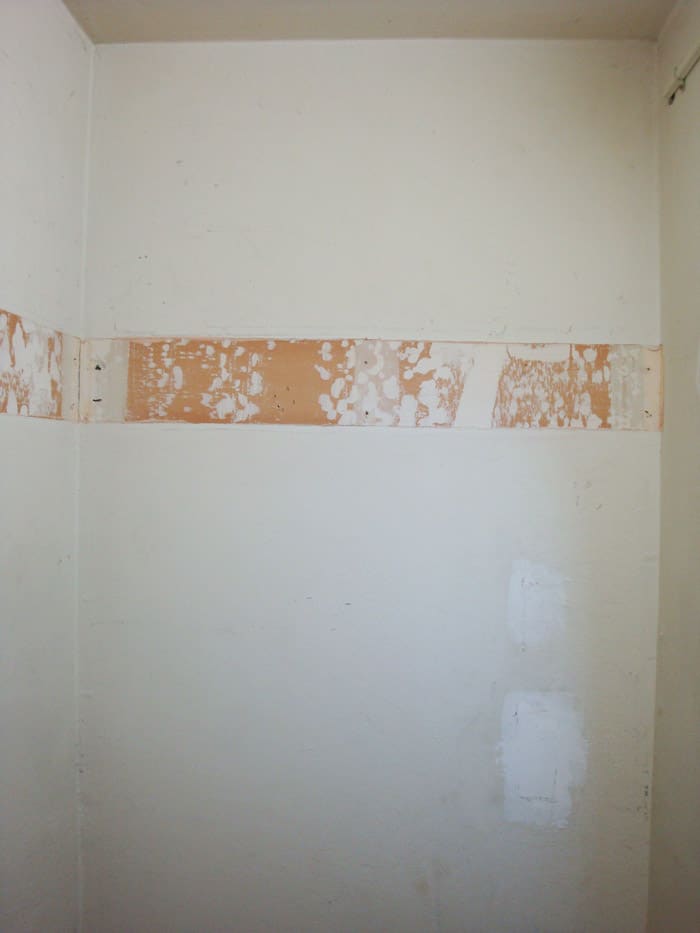
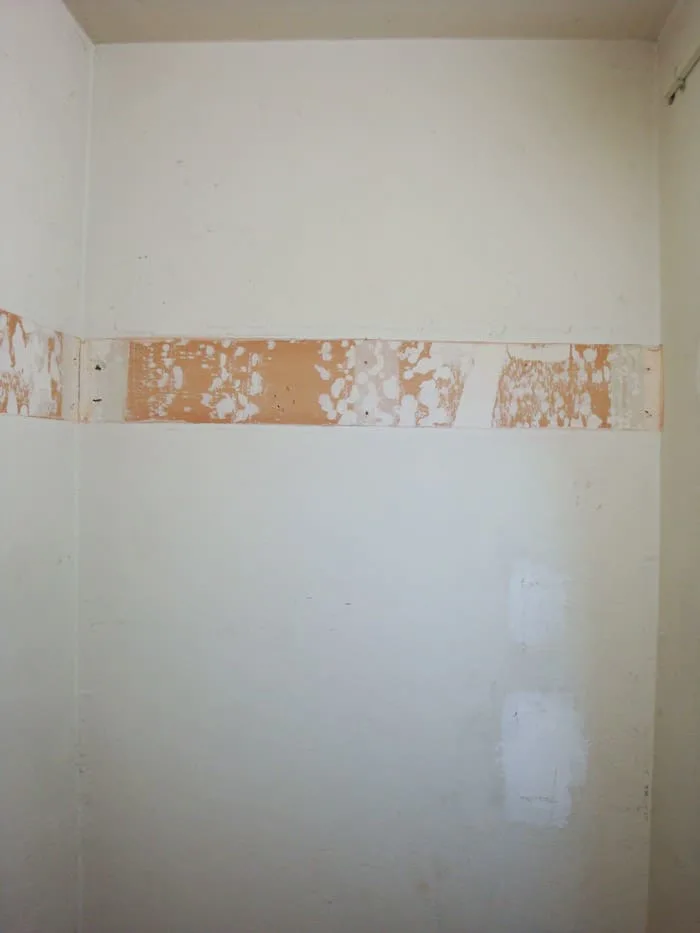
Closet Prep
After scraping, patching and sanding we painted it a pale shade of gray. If I had a big walk-in closet I’d hang a pretty chandelier and cover the walls in beautiful colorful wallpaper.
Installation Day
The installer arrived on time and got right to work. I was too timid to ask him if I could take pictures while he worked so there aren’t any progress pictures. As I mentioned there were a lots of parts and pieces so I couldn’t really do justice by trying to write a tutorial on our new elfa closet since we didn’t do the install ourselves. It didn’t take him long to finish and I’m sure he finished much more quickly than we could have done it ourselves. Sometimes it’s smart to pay someone else to do things for you.
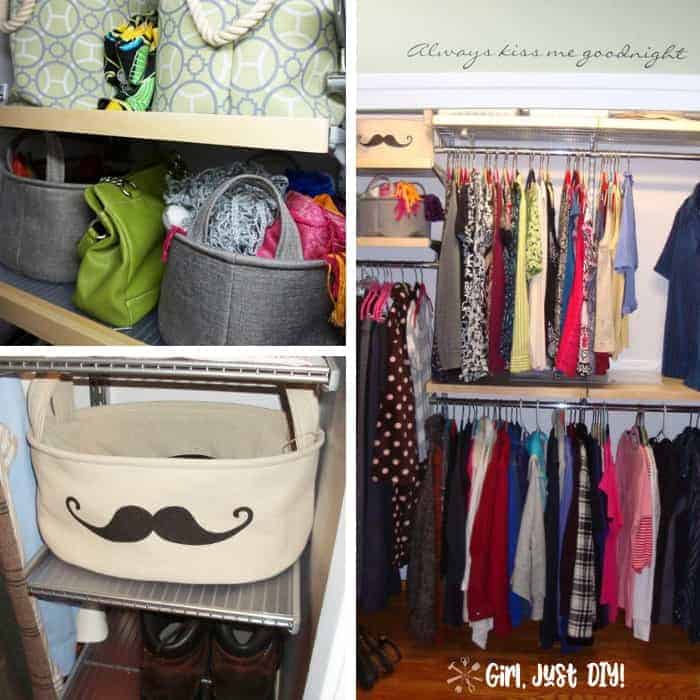
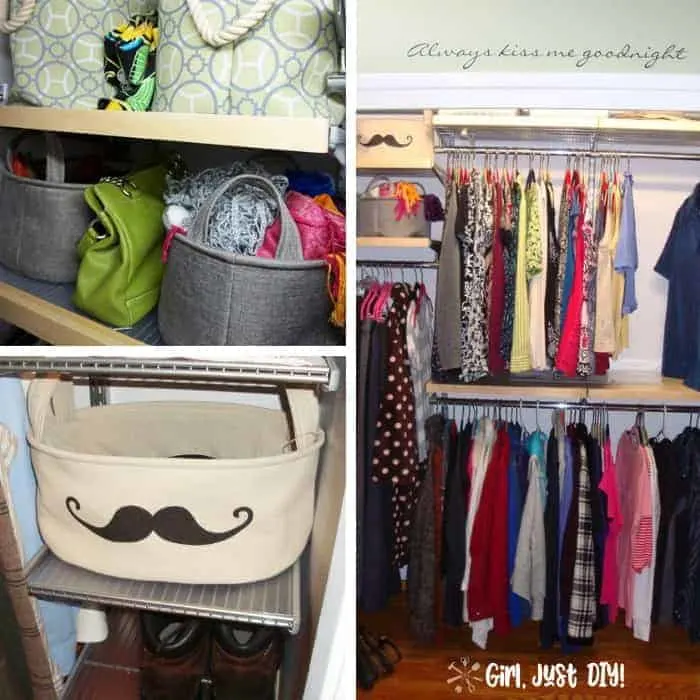
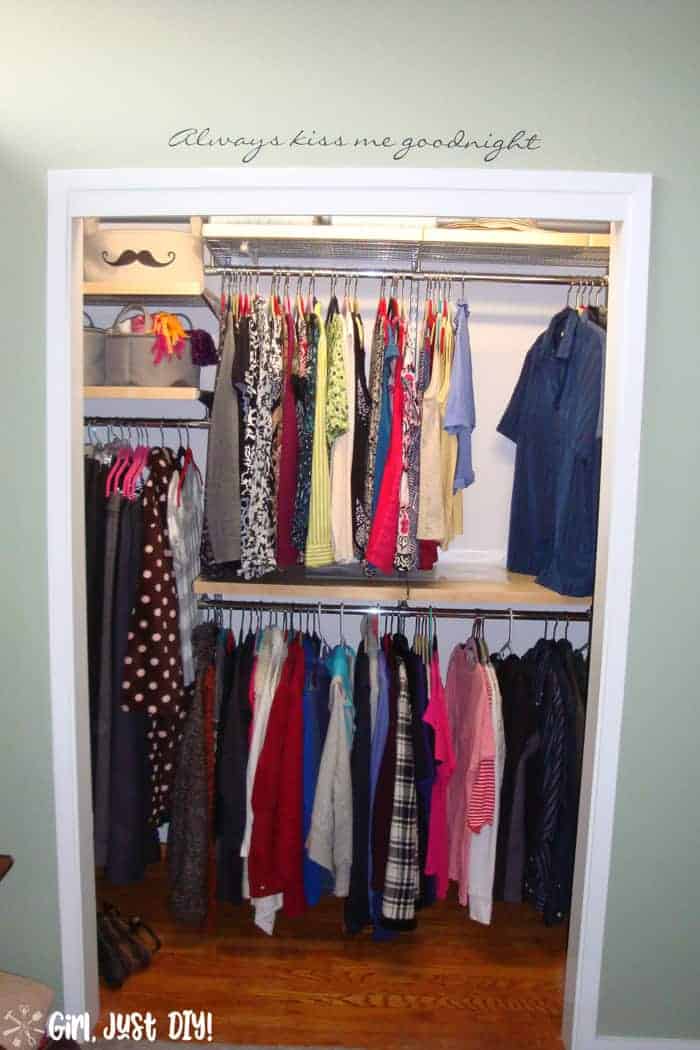
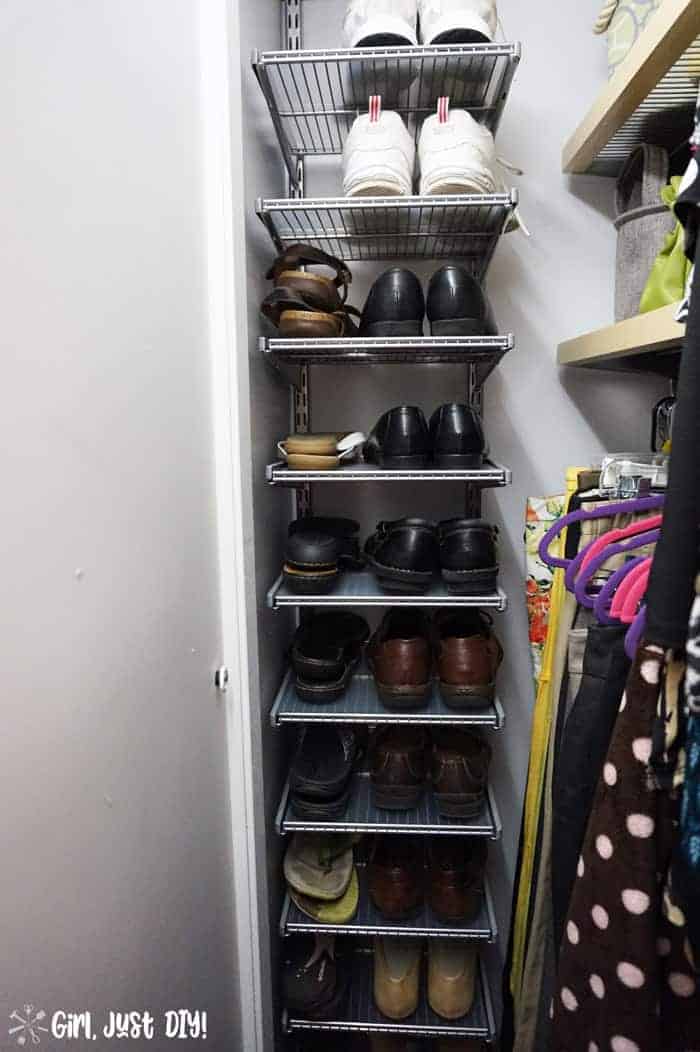
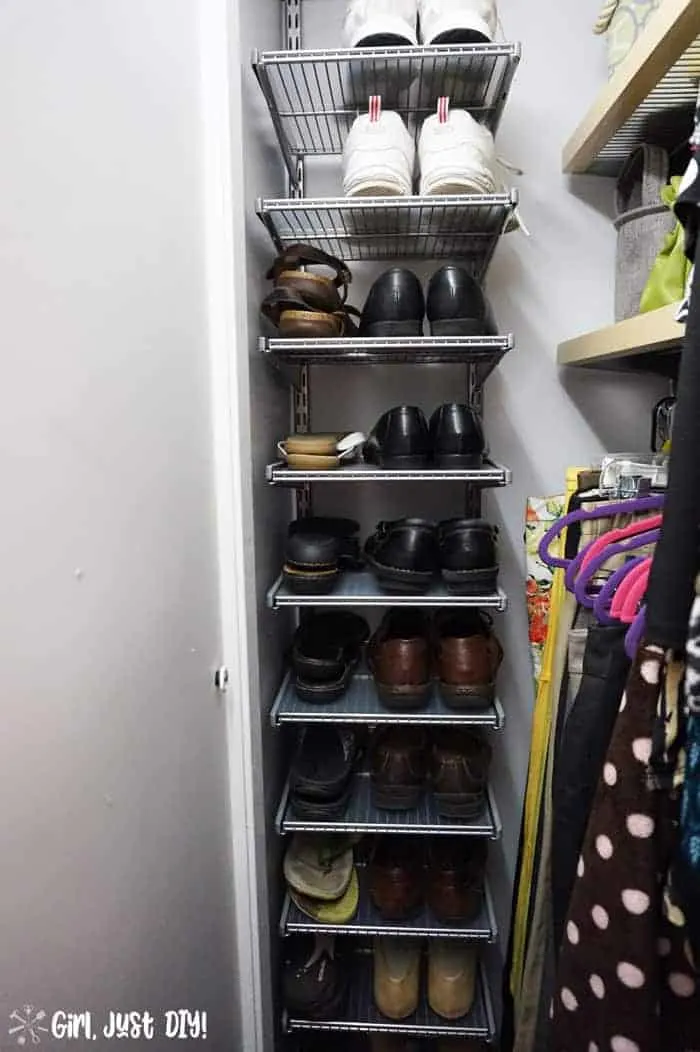
This is what our new elfa closet looked like right after the installer finished and we got to hang up our clothes. Thankfully our closet was deeper than most “reach in” closets so we splurged a bit more and had shoe shelves installed on either side of the closet. Thank you elfa Closet specialist for this suggestion!! You can just see them on the left and right of these few pics but you can see them better in a minute.
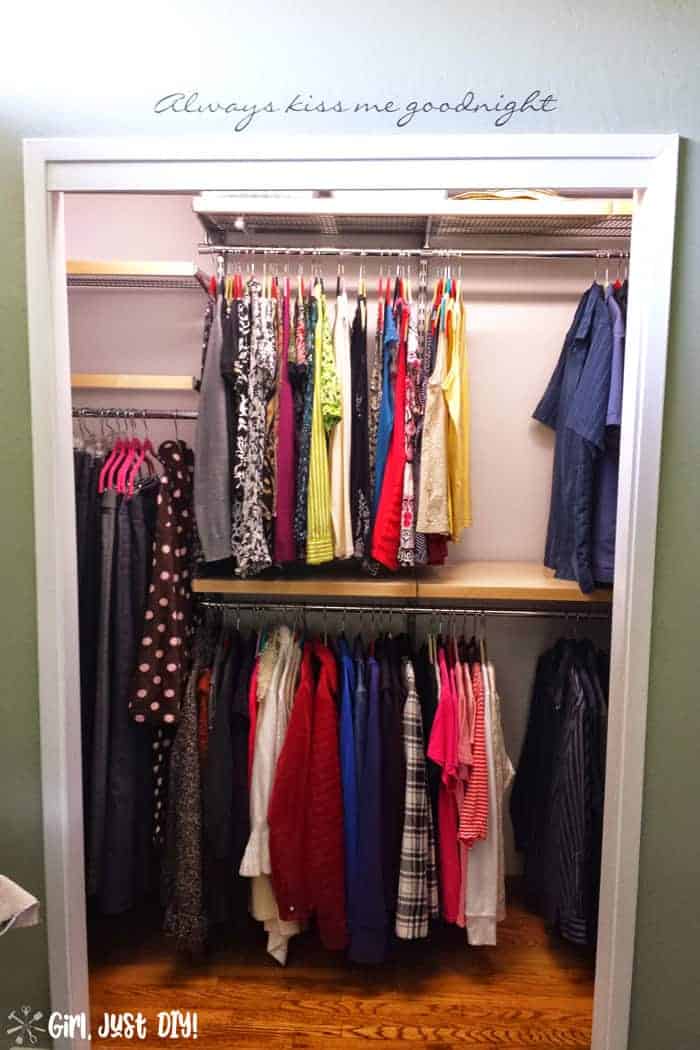

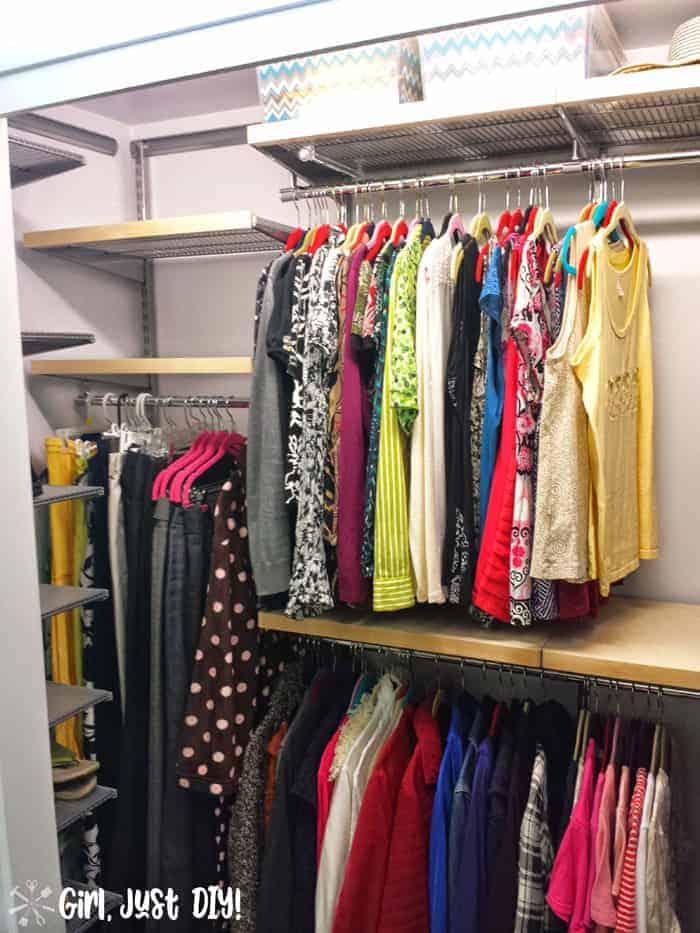

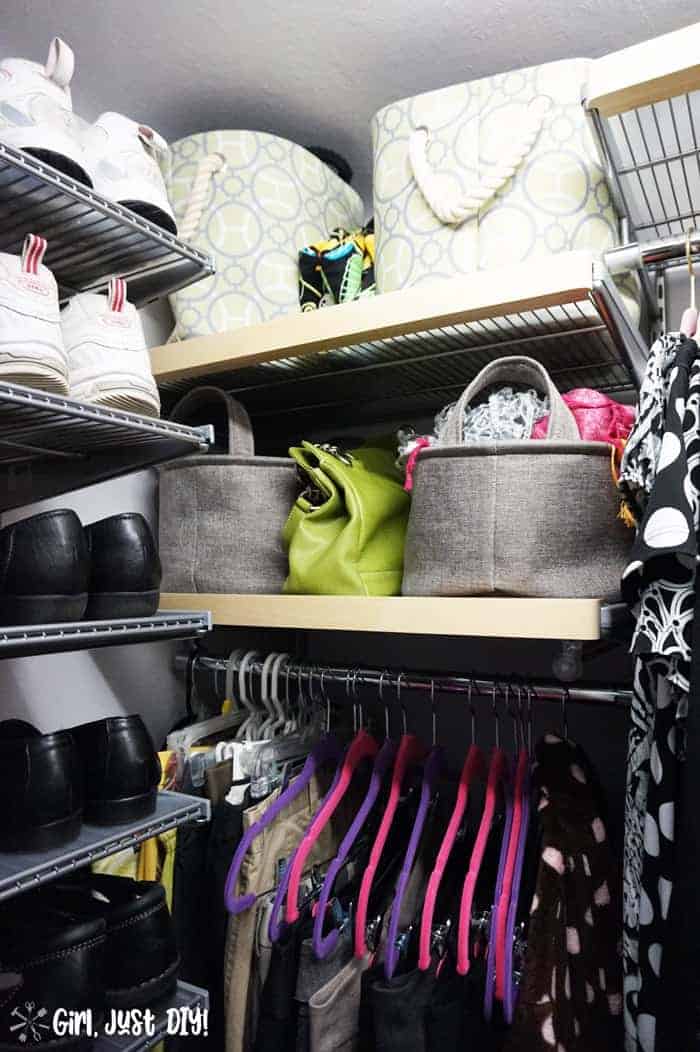
I feel like I can breath and not hyperventilate now that everything is organized and easy to see. Plus, the solid Birch elfa Decor Shelves we opted for between upper and lower rods makes it look richer. The other shelves that are easily visible have the Birch elf Decor Fascia pieces to save some money but still have a rich look.
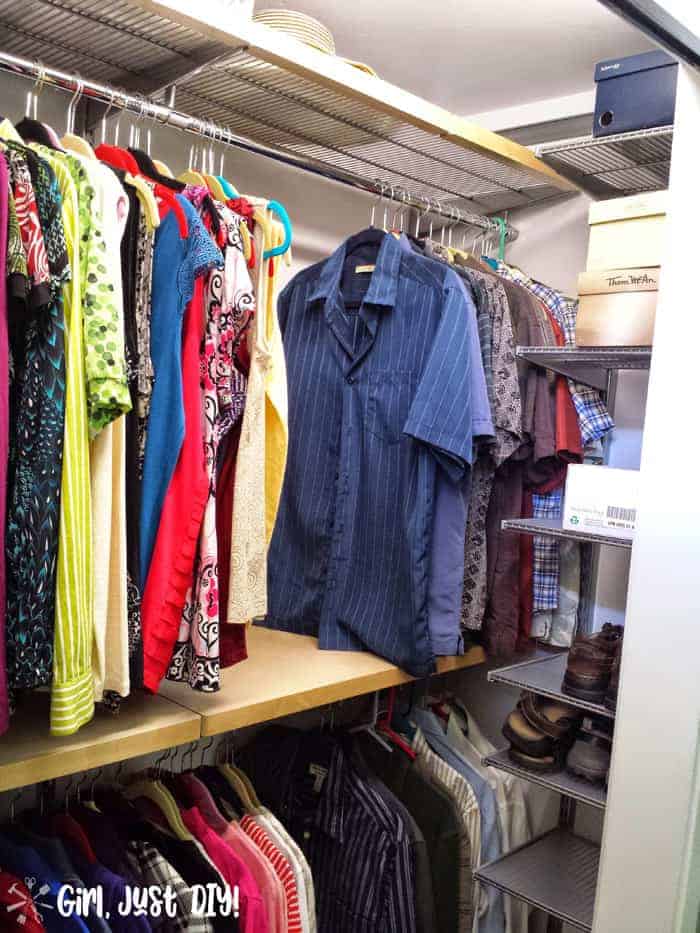

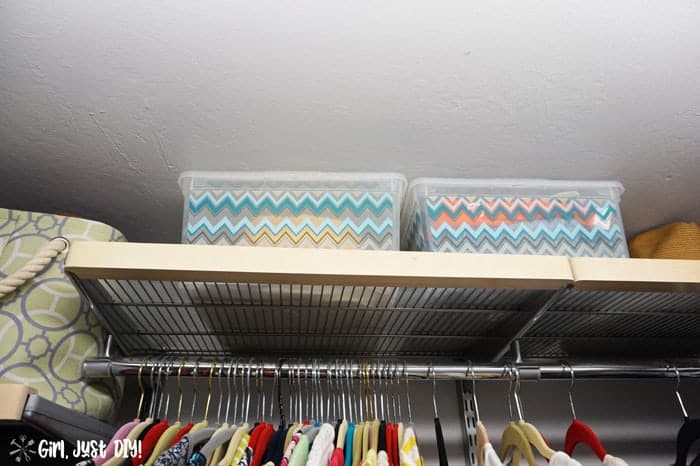
We took it as tall as we could to get two rows of clothes but that left more than enough space for some extra storage up above for hats and small bins for seldom warn items.

Great, right?! I mean you can’t appreciate it fully unless you see the before again….

Captured Storage Space
Now let me show you the cute little shoe shelves. They are so perfect, a side for me and a side for my husband. And we can store more than one pair on each shelf if we need to. I’m not a high-heel kind of girl, give me my comfy flats every day of the week. Either way shelf height is adjustable for shorter or taller shoes. And they came with these cool customizable shelf liners.
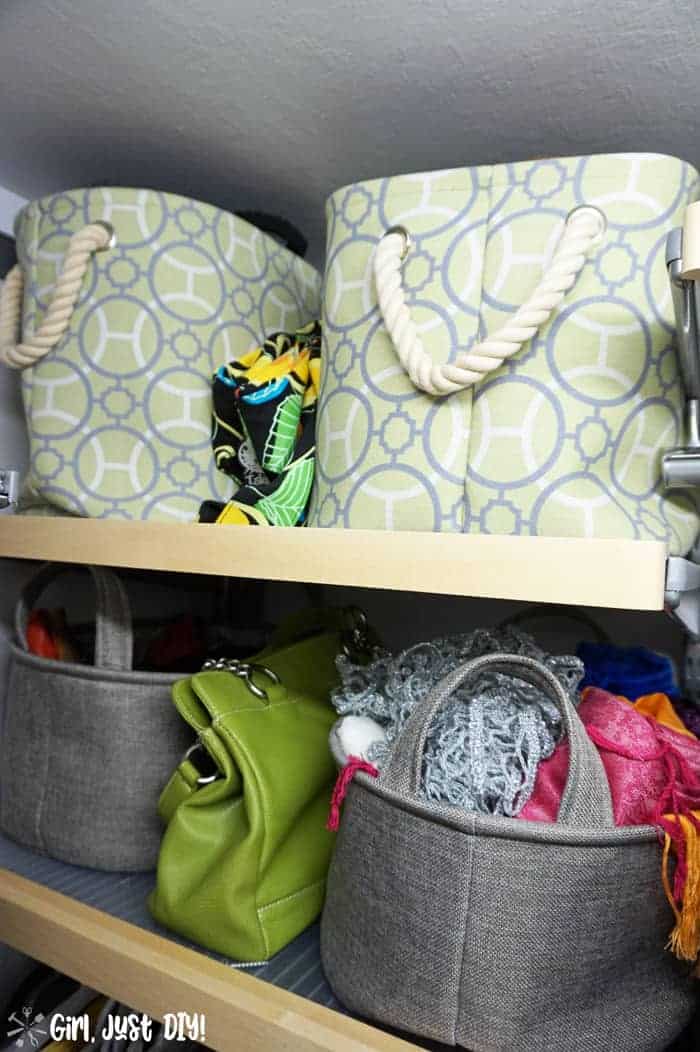
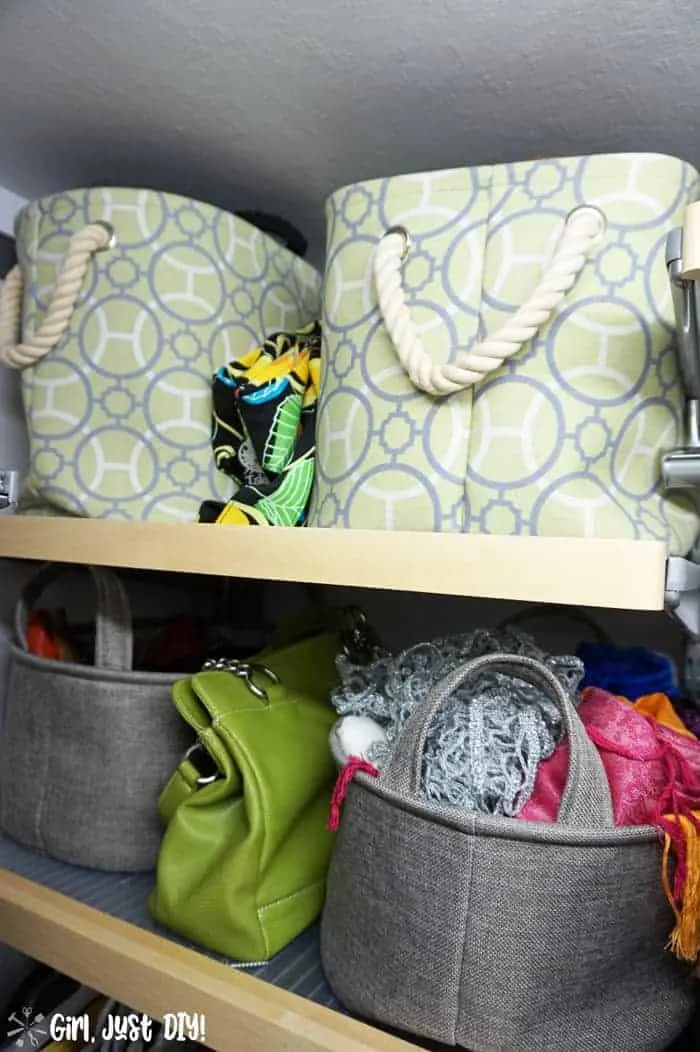
Of course I had to go shopping and get some pretty accessories for the new closet. Between Home Goods, Marshall’s and TJ Maxx (3 of my favorite stores) I found the perfect baskets for the shelves to store seldom used items like scarves, swimsuits, and extra purses.

The cute basket options online are endless.
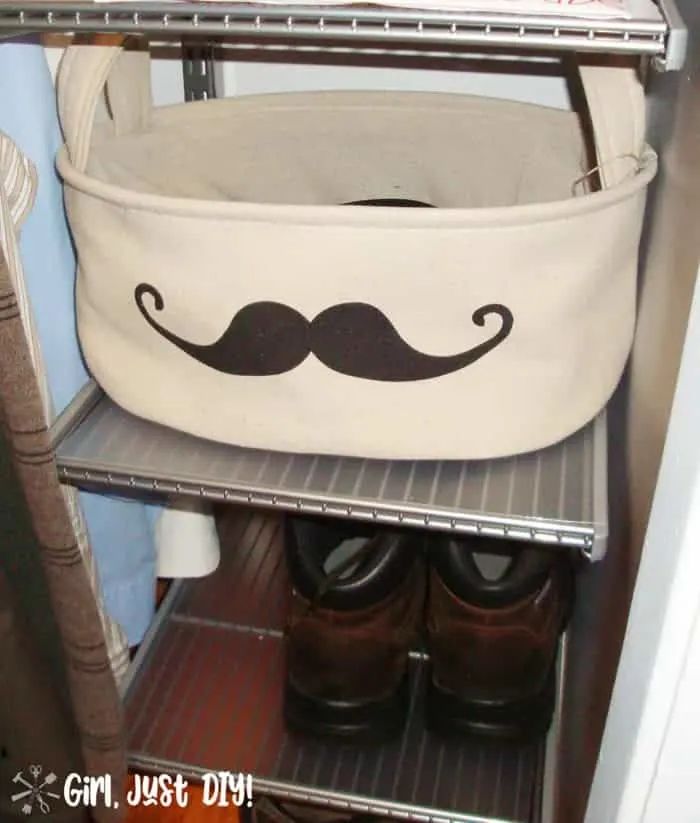
Of course I had to get a manly basket for my husband. Since mustaches were all the rage for a while, and he has a mustache, this was perfect. He appreciated the masculinity of it and stores his belts and a few ties inside.

Since I originally shared this closet system we pulled out all the carpet in the house so I shared some tips on how to pick the perfect rug. You can also see my $100 Makeover on our Master Bathroom which includes one of my reader favorite DIY projects.
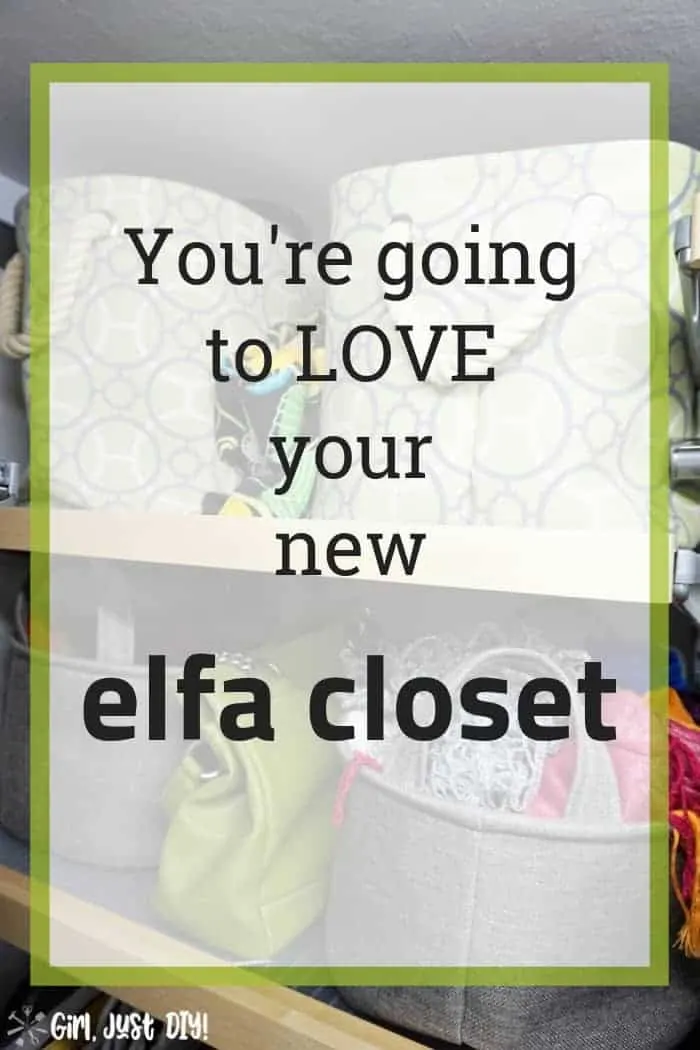
If you’re in the market for a closet makeover you don’t want to miss the Annual elfa Event. You’ll save enough money for some nice upgrades or extras, you won’t regret it.
LOVE IT, PIN IT!!

Are you ready for your closet makeover?
15 Built for Organizing Projects you can Build - Girl, Just DIY!
Thursday 28th of February 2019
[…] What I wouldn’t give to have a closet as large as hers. Here’s how we handled our much smaller reach-in closet makeover. […]
katt
Monday 2nd of February 2015
Love Elfa ! you made a great choice . you can change it over the years as your needs change .you did a great job !
Toni | SmallHomeSoul.com
Wednesday 25th of February 2015
Thank you so much Katt, I love the endless possibilities with Elfa. I just wish we hadn't wait so long to get it done.
Jeniene Cariola
Friday 23rd of January 2015
Looks great Toni! Great way to utilize every inch of that closet and I love the mustache basket lol
Small Home Soul
Friday 23rd of January 2015
Thank you Jeniene, we lived with that horrible closet for 15 years so finally getting to do a closet makeover in our master bedroom was worth the money spent and our DIY skills. I can't wait to finish the other project I have for the back of one of the doors. It will bring even more organization.