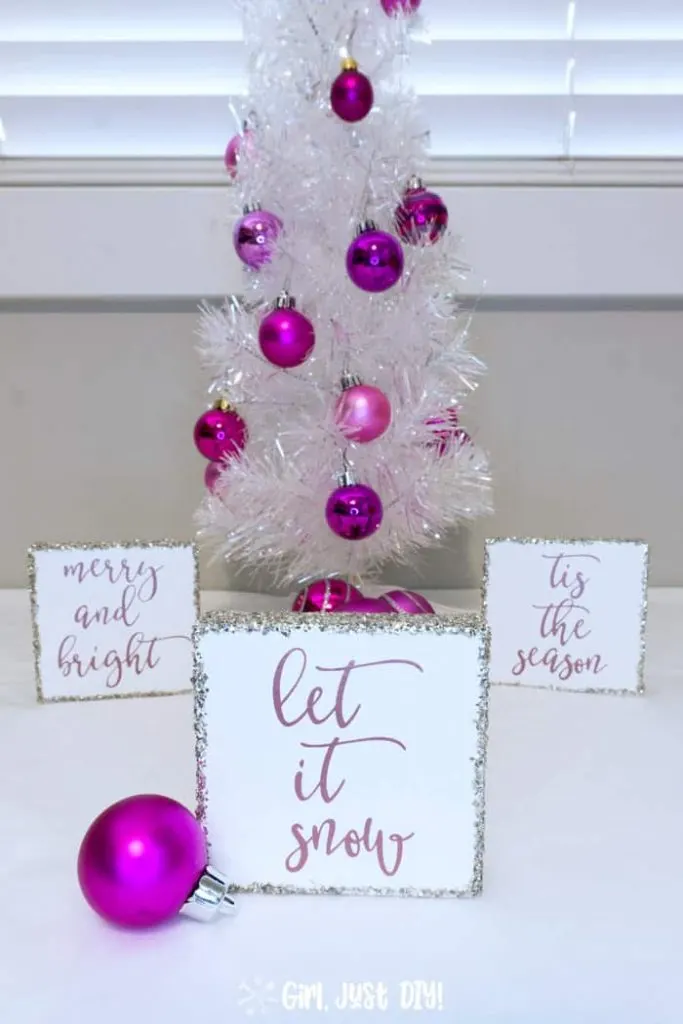
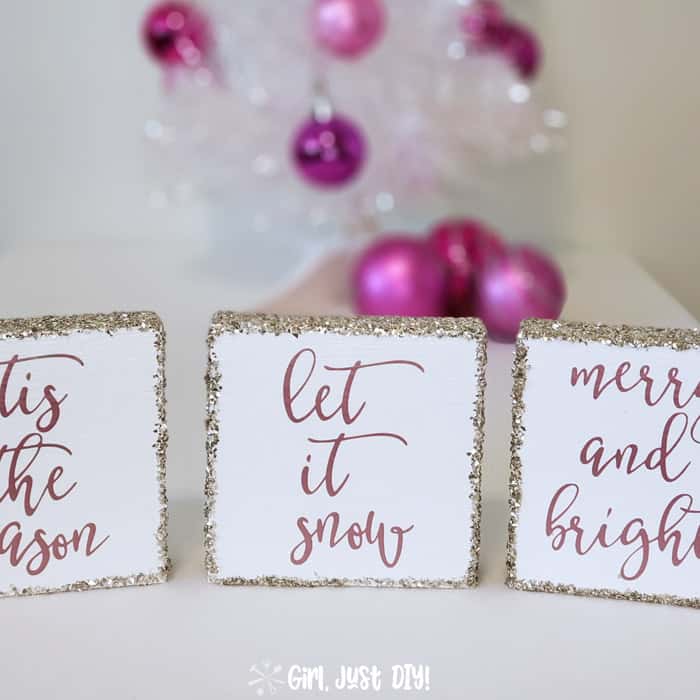
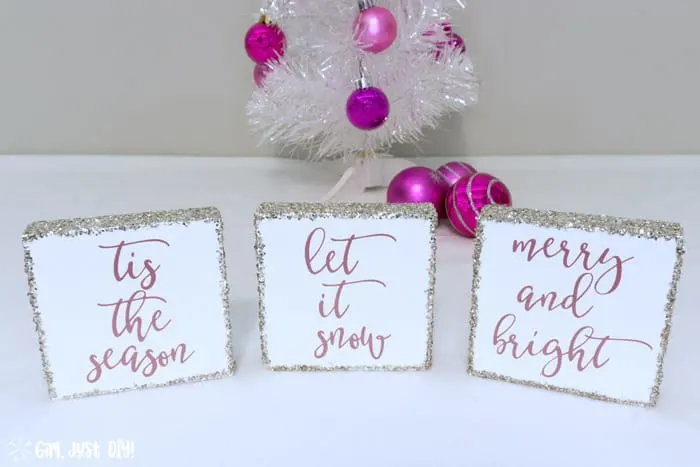
Hey friends, it’s week 2 of Deck the Home and this week the challenge is 2-Hour DIY Holiday Decor. So I whipped up these sparkly Small Christmas Wood Signs.


This is such an easy project and using a Cricut or Silhouette will make quick work of it.
Be sure to check out all the other 2-Hour Decor ideas at the bottom of this post.
And watch for the link to download the SVG files so you can make a set for yourself.
This page contains links to products, if you purchase something after clicking on a link I may earn a small commission (at no cost to you). If you do make a purchase, thank you!
You can read about affiliate links here.
Christmas Wood Signs Supplies
- 3-1/2″ x 3-1/2″ x 3/4″ Wood blocks
- 1×8 board cut using Miter Saw
- or purchase these pre-cut blocks in various sizes
- Cricut Cutting Machine (or Silhouette Cameo)
- Cricut Tool Set (for weeding tool and spatula)
- Rose-gold Vinyl
- Grid Transfer Tape
- Gloss White Craft Paint
- Mod Podge
- Craft Brush – I love this multi-set
- Chunky Silver Glitter
Getting started creating your Christmas Wood Signs
There are only a few steps to creating your own wooden Christmas decorations. There are so many options and sayings you can use when you make your own set.
Step 1: Cut your wood blocks
Using your miter saw cut scrap pieces of 1×6 or 1×8 into 3 pieces that are 3-1/2″ square.
If you don’t have a saw there are lots available for purchase like these pre-cut blocks I found online.
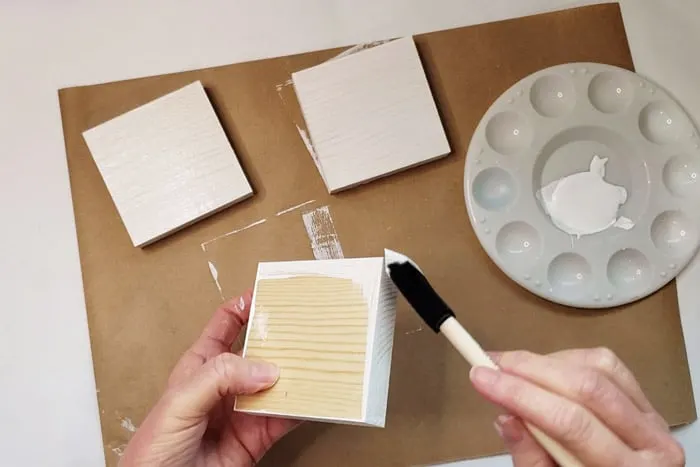
Step 2: Paint the wood blocks
With your craft or foam brush, and glossy craft paint paint your wood blocks. You might need to do 2 or 3 coats. Thankfully craft paint dries quickly.

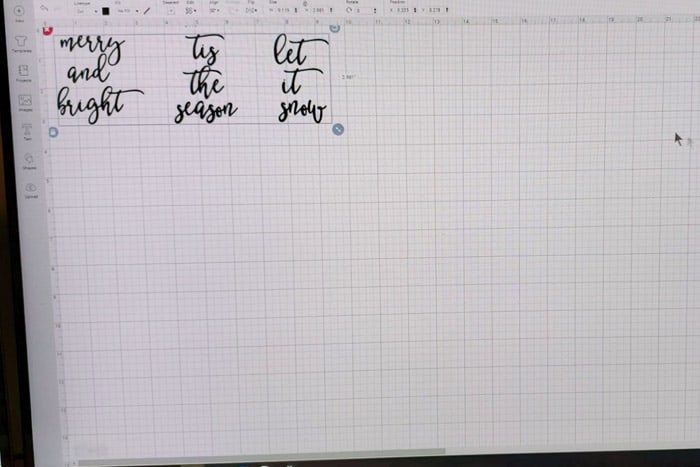
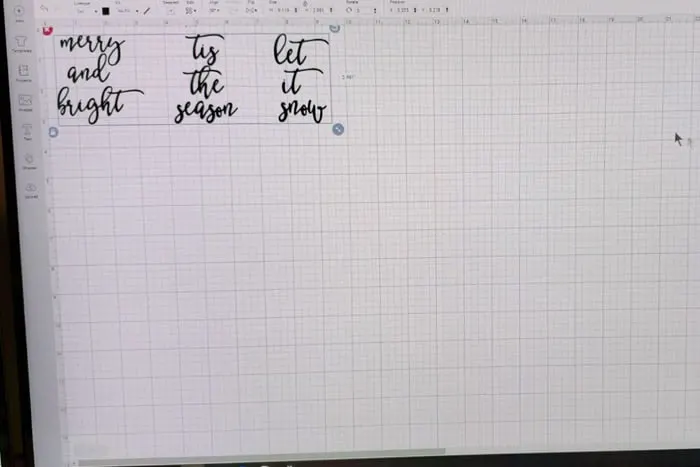
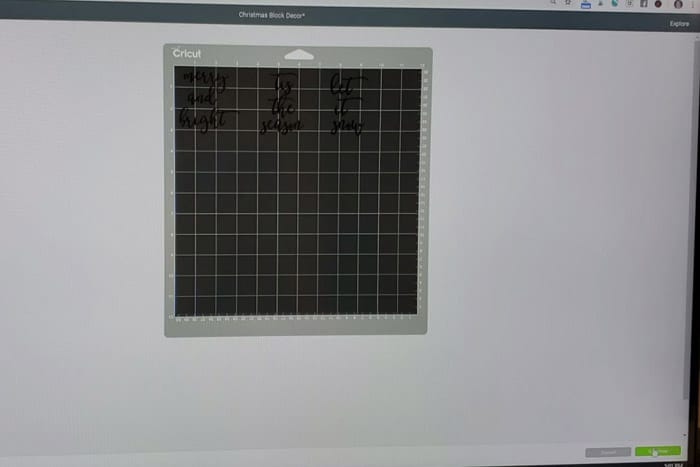
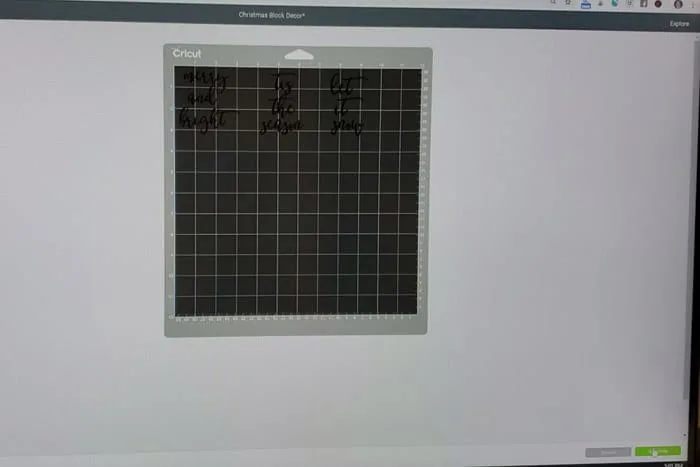
Step 3: Create and cut your design
- On Cricut Design Space create your saying in the font you love best. I actually created mine in Photoshop so I could control the letter spacing. Then uploaded them Design Space.
- To get them to cut exactly as laid out Select them all and then click “weld” in the lower right corner
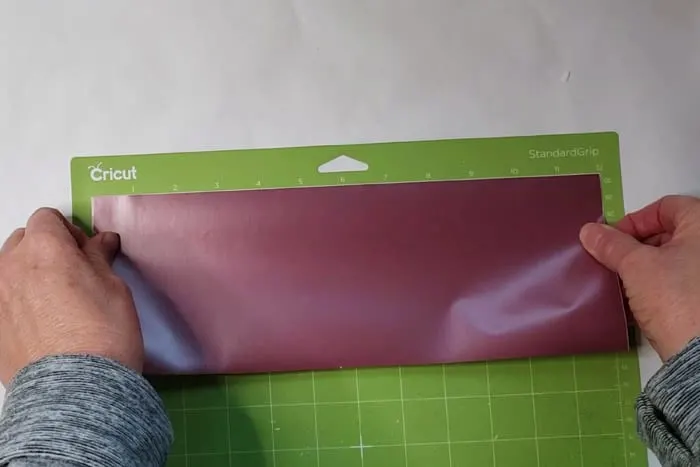
- Cut a piece of rose gold vinyl a little larger than needed and affix it to top of the green cutting mat and load it into the Cricut.

- On the next screen verify your design and click “continue.”
- Follow the commands on the screens to select your material type and send your design to your Explore Air.
Watch as the Cricut Explore Aire cuts your design. Once it’s finished press the double-arrow button to unload it.


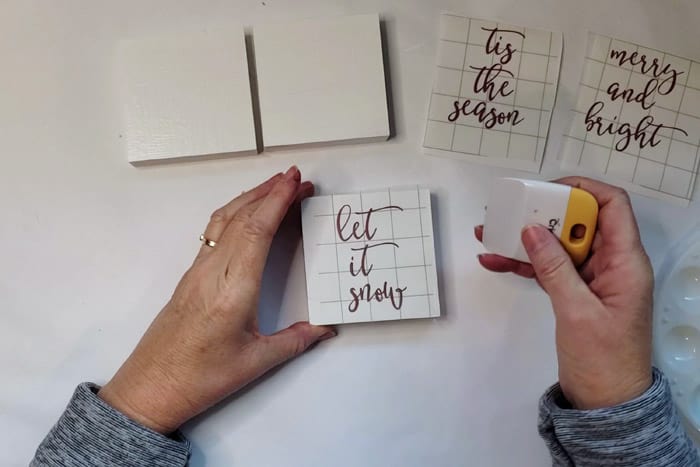
Step 4: Weeding and applying your vinyl design
- Use the weeding tool to remove vinyl from the middle of your cursive letters, such as e, h, l, etc. You’ll have to look close so you don’t miss any.
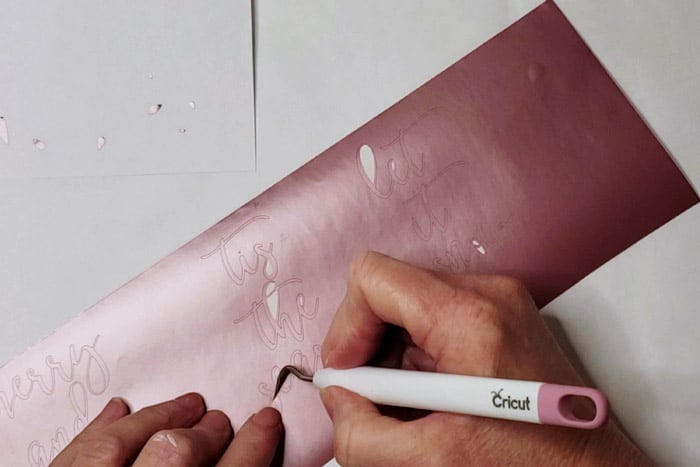
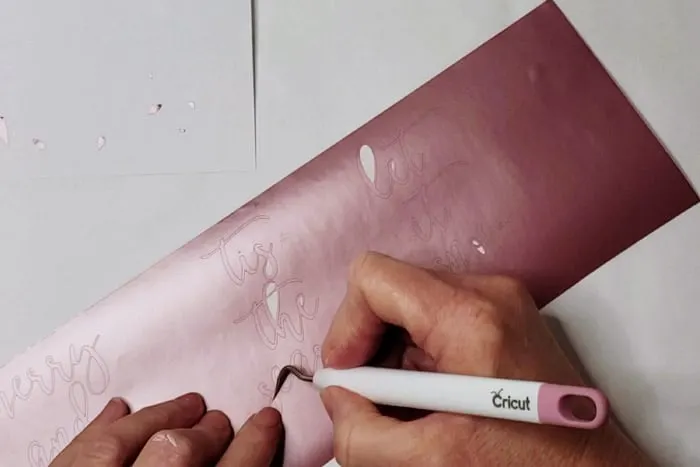
- After the middles are weeded cut apart your designs.
- Start pulling slowly from the corner at a sharp angle. Go slowly and use the weeding tool to gently hold letters down that try to lift.
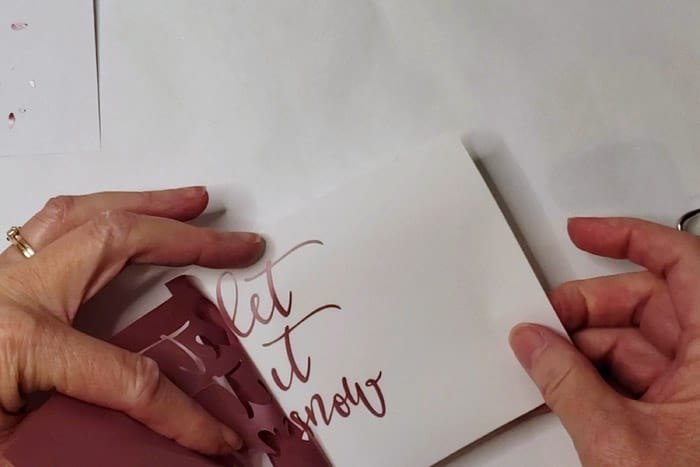
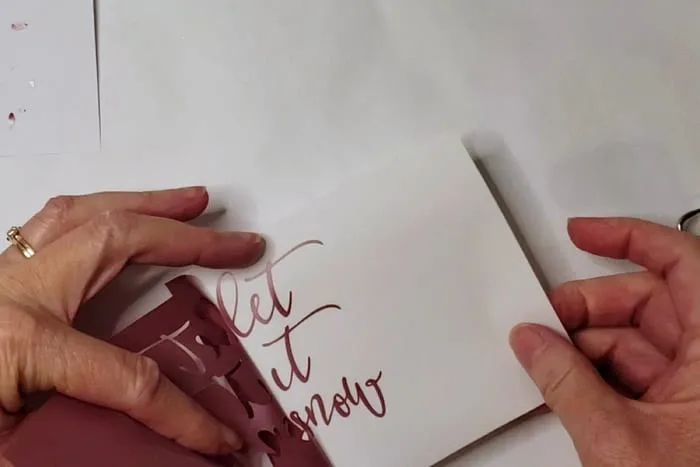
- Cut a section of transfer tape a little larger than the design.
- Lay it on the vinyl so that the grid lines line up with the text.
- Press down with the scraper on top of the vinyl design so it sticks to the tape.
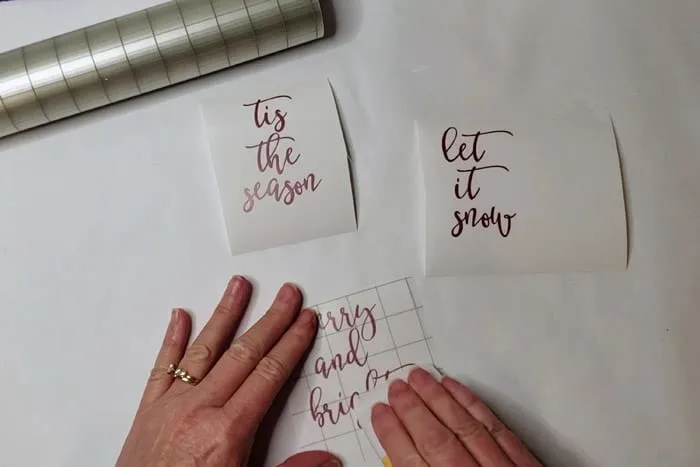
- Set aside and do the same for the others.

Step 5: Tranferring vinyl to the Christmas Wood signs
Now that all the vinyl designs are weeded and covered with transfer tape it’s time to put them onto the wood blocks.
- Start in the corner and pull the transfer tape back from the vinyl backer. Pull at a sharp angle.
- If any pieces want to stick to the backer lift them gently with the weeding tool and stick them to the transfer tape.
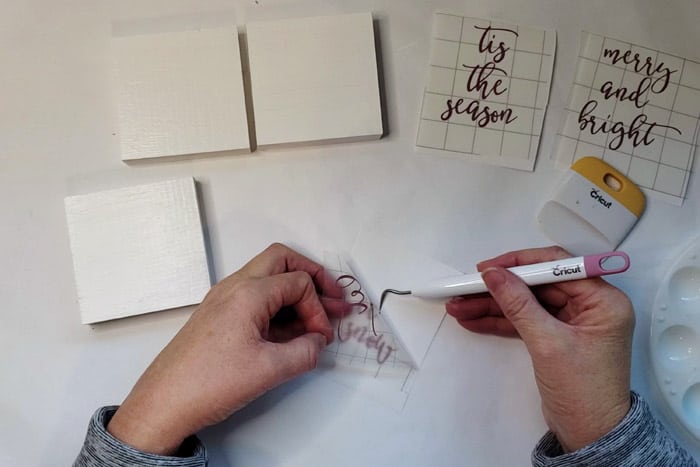

- Line up the design so it’s centered and level on the wood block.
- Use the scraper to press the vinyl onto the wood block.
- Starting from a corner pull back the transfer tape sharply.

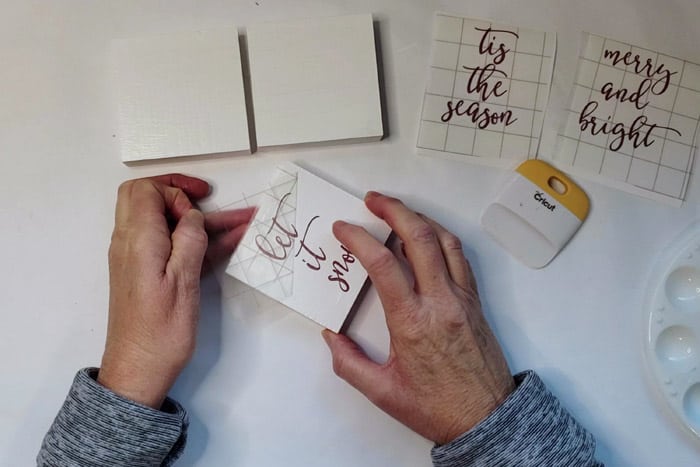

Weeding TIP: If you lose the dots of your i letters when pulling off the vinyl don’t worry. Just take a small piece that you weeded and use it instead. That’s what I had to do on all three wooden Christmas signs because they were either tiny or I missed them.


Finishing touches to make your Wood Signs sparkle.
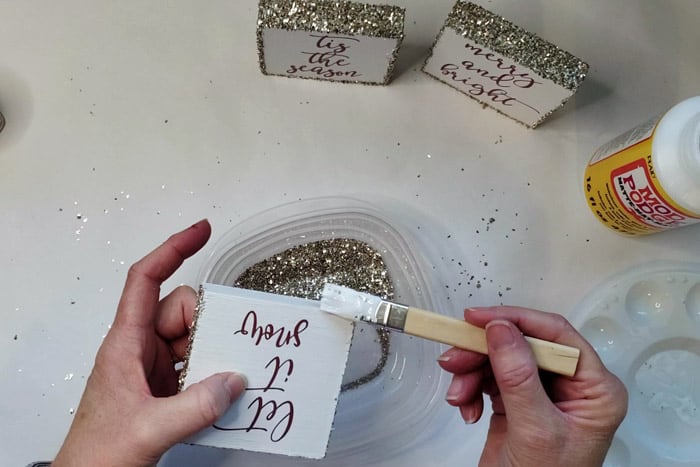
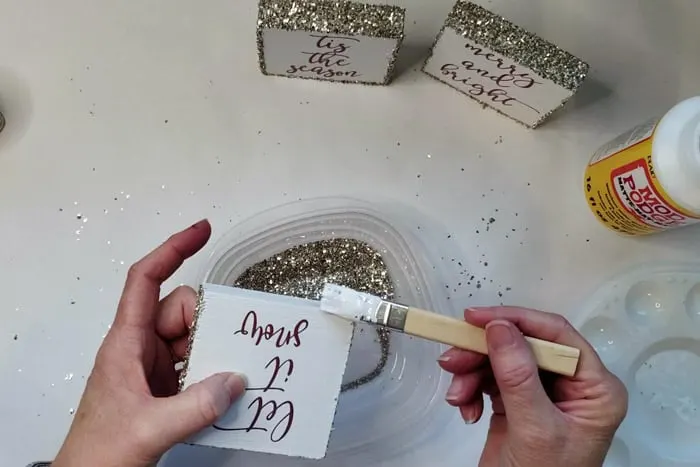
Step 6: Add glitter to your Christmas Wood sign
Now the pretty part that will really make your Christmas Wood Signs sparkle.
- Using a craft brush apply a moderate amount of Mod Podge to the top and two sides of your wood blocks. Put a tiny line of mod podge onto the face of the wood block.
- Apply a thin line of Mod Podge to the face of the botton edge (but not to the bottom)
- Dip the wood block into chunky glitter poured onto a paper plate or plastic bowl.
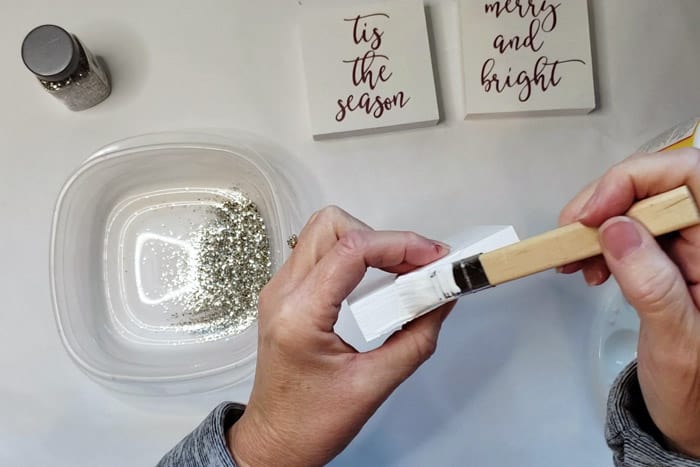
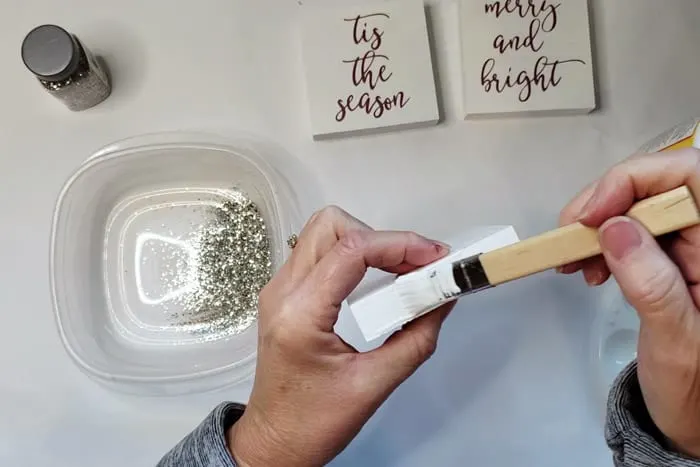
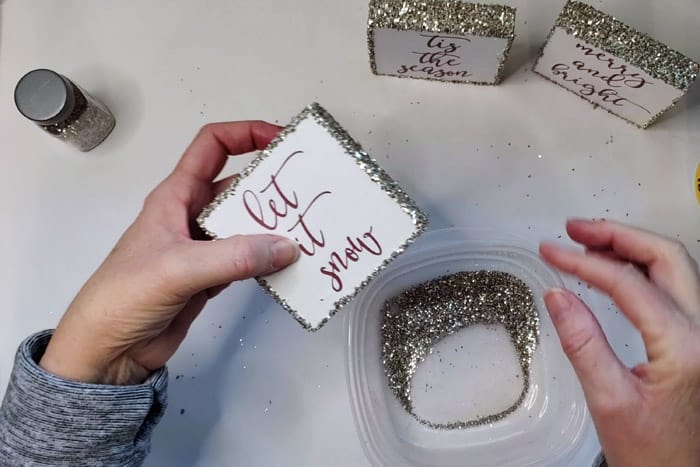

- Set them aside to dry fully.
- Use a dry craft brush to dust loose glitter from the finished Christmas Wood Signs before you add them to your Christmas decor.
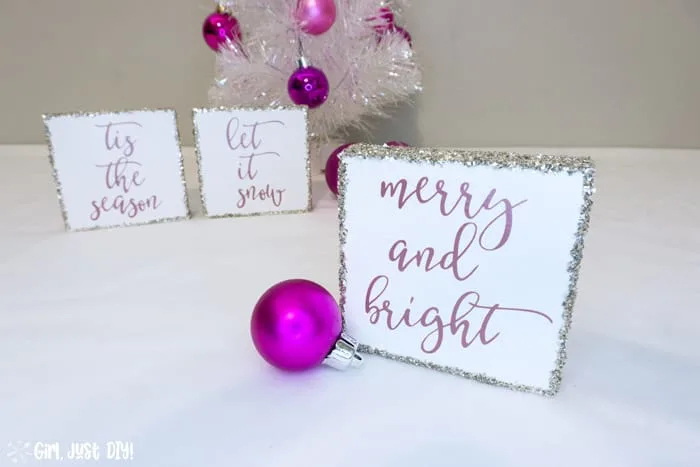
And they’re ready! And they’re a beautiful addition to your Christmas decorating.


Now check out even more 2-Hour Decor ideas.
See More 2-Hour DIY Christmas Decor


Small Christmas Wood Signs to DIY
Let's make these easy DIY Small Christmas Wood Signs. You can make them in under 2-hours. Tis the Season to Let it Snow and be Merry and Bright with your DIY Christmas Decor. Use pre-cut wood blocks to make this project even quicker.
Materials
Tools
- Cricut Cutting Machine, or similar
- Cricut Tool Set, or similar
- Craft Brush
- Miter Saw (optional)
Instructions
- Cut or purchase wood blocks into sizes as listed above.
- Paint your blocks using glossy white craft paint. It might require 2 or 3 coats but they dry fast. Let dry completely before step 6.
- Create your design using Photoshop, Canva, or Cricut Design Space. Make your designs no larger than 3"x 3" so there's a nice margin once applied.
- Place vinyl on cutting mat and send your design to your Cricut to be cut.
- Use the weeding tool to remove excess vinyl from around your design.
- Lift the design off the backing with clear transfer tape and apply to the center of the wood block.
- Paint the top and two side edges with mod podge as well as a tiny line on the face of the block. Paint a thin line along the bottom face only. Press into chunky silver glitter and set aside to dry fully.
Notes
Make these cute Christmas wood signs using any color vinyl and glitter combinations you love best for the holidays!
Danielle L Pientka
Wednesday 13th of November 2019
The sparkles! I LOVE them!
Christine
Tuesday 12th of November 2019
Toni!!! I LOVE those little signs!! I want them!! So pretty!!
Toni | Girl, Just DIY!
Wednesday 13th of November 2019
Aww, thank you so much Christine! :)
STEPHANIE ABBOTT
Monday 11th of November 2019
These are so great, Toni! Adding to my Christmas round up and pinning.
Toni | Girl, Just DIY!
Wednesday 13th of November 2019
Thanks Stephanie, you are so sweet!
Jenny
Monday 11th of November 2019
These are so pretty! Great idea to add the glitter to the sides, the rose gold vinyl is such a pretty color. Those i dots are so tough to not lose.
Toni | Girl, Just DIY!
Wednesday 13th of November 2019
I'm glad I'm not the only one who struggles with those i dots :D