Are you ready for a super fast DIY? Aren’t they the best ones? This Fast Wooden Tray Update using pretty contact paper is as fast a DIY with impact as you can get I think.

My blogging friends and I decided to do a 2-hour DIY Challenge for this month’s At Home DIY Challenge. I planned to do another project but we went away for a few days and that messed up my work schedule a bit.
I think you’re going to love how quick and easy this is. And don’t forget to check out all the other 2-hour DIY projects below.
Tray Update Supply List
- Wooden Tray
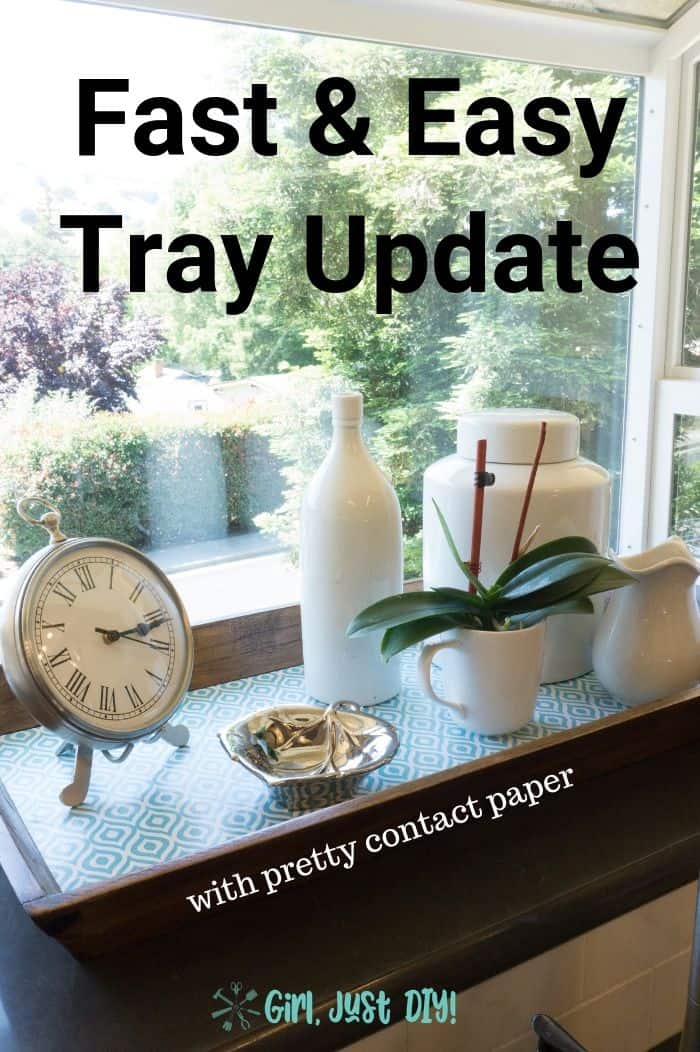
- 1 roll of contact paper in your favorite pattern (I used this brand)
- Scissors
- Straight Edge Ruler
- Sharp Utility Knife
How to cover your wooden tray
I purchased my large wooden tray at the Habitat for Humanity Restore, they had a bunch and were selling them for $10 so I bought two.
The bottom of mine isn’t perfectly smooth but I’m using it for display only so I wasn’t worried if a few bumps here or there showed up.
When we did our kitchen renovation we decided to have the counter-top material put into the new garden window. I like it but it became a sort of dumping ground and was majorly out of control.

I was saving bottles and odds and ends and starting cuttings. The window gets so hot that some plants were almost dying in that window. I was ready to reclaim it.
Let’s get started, you’re going to love how fast this goes.
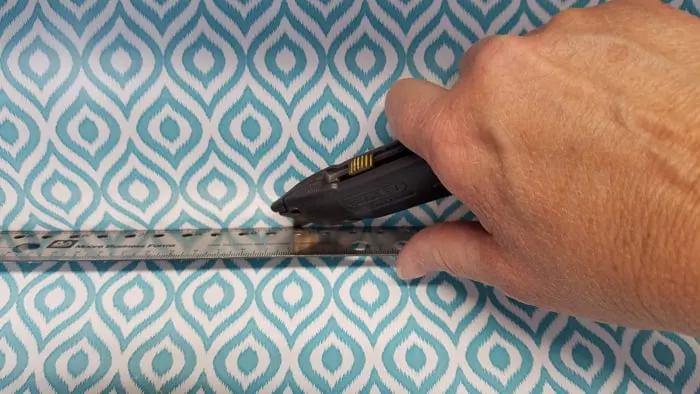
Step 1: Cut a section of contact paper slightly longer than the tray bottom.
- Lay your contact paper with two of the factory edges along a short inside edge and one long edge. Hold it in place.
- Roll out the paper and use your nail or the back of a butter knife to lightly score the paper into the groove along the other short edge.
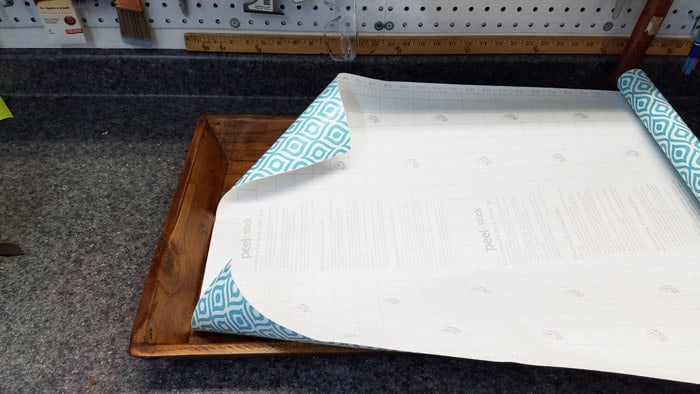

- Turn the paper over and with a straight edge ruler and utility knife cut it 1/2″ longer than the score line. Don’t worry you’ll trim this in a bit.

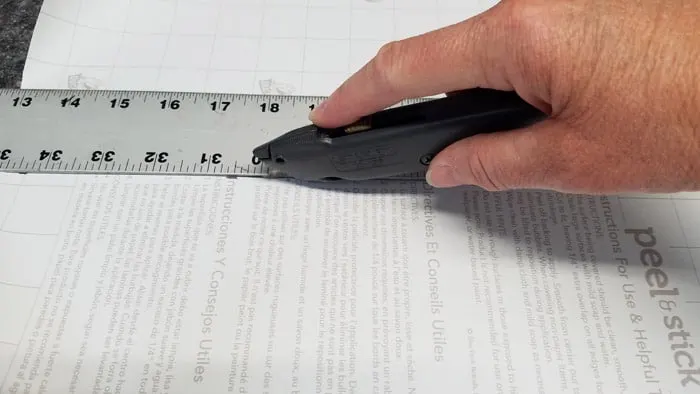
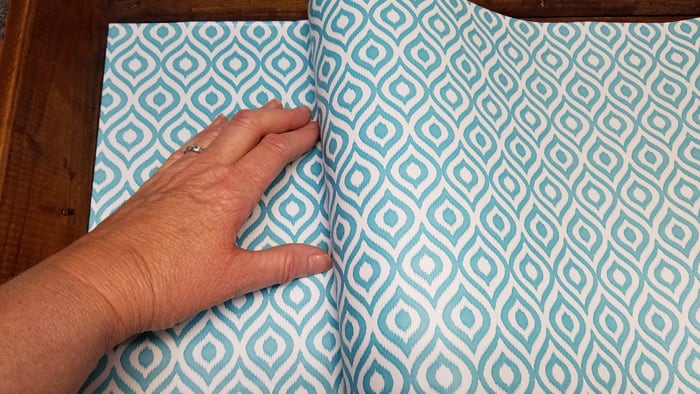
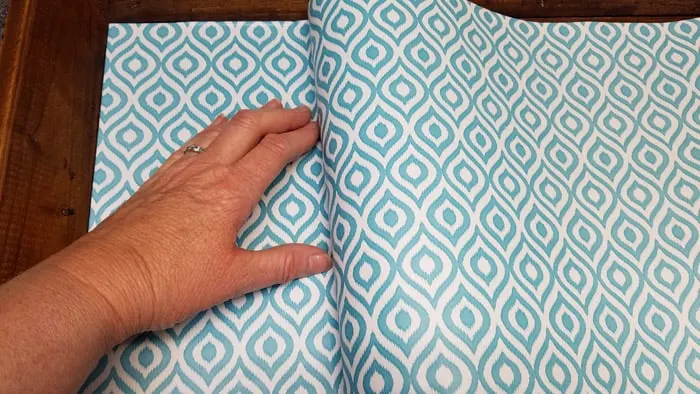
If your paper is much wider than the tray let’s trim some off first.
- Line up the edges of the paper again as you did above and hold it in place.
- Place a straight edge ruler against the other long edge and push it into against the opposite side of the tray.
- Run the utility knife along the ruler to trim the excess contact paper.

Step 2: Adhere contact paper to the wooden tray.
- From the factory edge pull the paper backing down approximately 2″
- Holding both sides carefully line up the contact paper to the short edge of the tray.
- Re-position as necessary until you’re happy with how it’s it’s lined up.
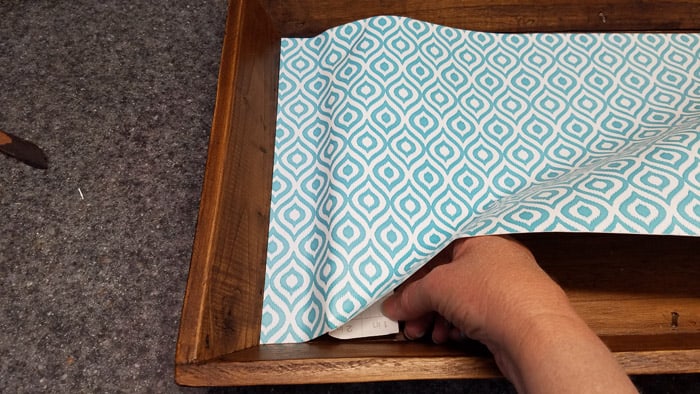

- Using your right hand pull a little backing at a time while at the same time smoothing with your left hand. If you’re doing a big area you can smooth it with a sponge or a gift card.
- Keep doing this until you’ve adhered all of the contact paper to the tray bottom.
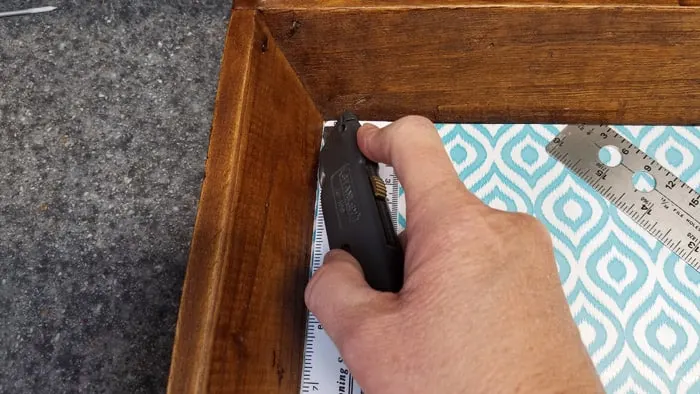
Step 3: Trim off excess contact paper.
- Using the straight edge ruler and utility knife trim off any excess contact paper from all edges.

Wasn’t that easy? That was a fast wooden tray update and now I’ll have a lovely newly refreshed kitchen window.
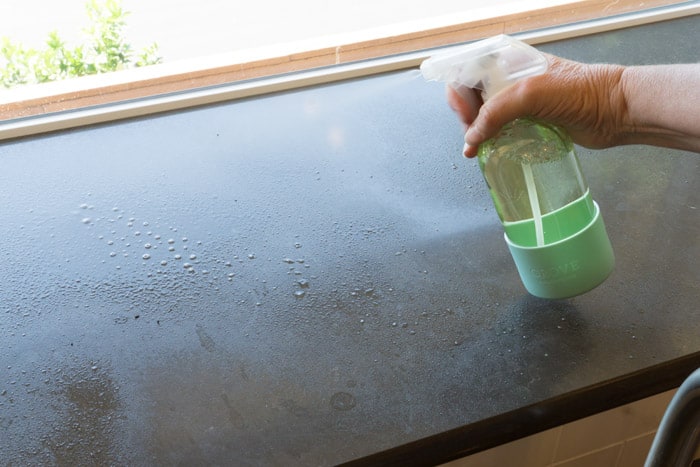
But first I needed to wash off the window sill from all the dusting that hadn’t happened. I started with my new Method Window Cleaner and walnut scrubby sponge. I love all the things that you can get at Grove. The quality glass spray bottle is protected by the silicone sleeve on the bottom. Those and the Bubble Up dish soap dispenser are my new favorites to have in the kitchen.

All done, but as a reminder here’s what the window looked like before….
More Kitchen Projects
DIY Kitchen Art – Coffee Filter Holder
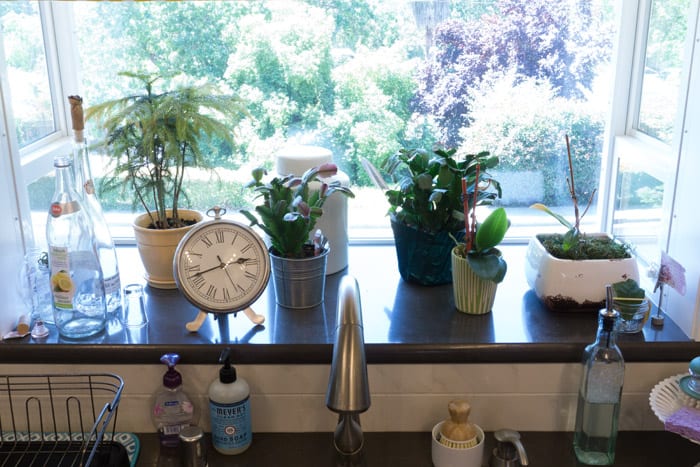
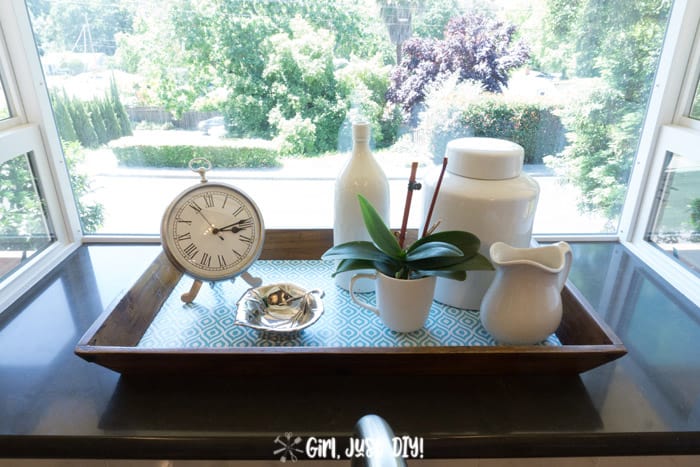
Oh what an improvement!! Thing were put away and some recycled and it looks all organized. I’m determined to keep this window looking pretty and not cluttered. And having everything on the wooden tray makes it easy to lift off for cleaning.

When I chose the Ikat deco adhesive by Duck brand, I didn’t realize it almost matched the dish drying mat I already had. You can just make it out in the before picture. My eye is already drawn to that shade of blue but I guess also to the pattern.
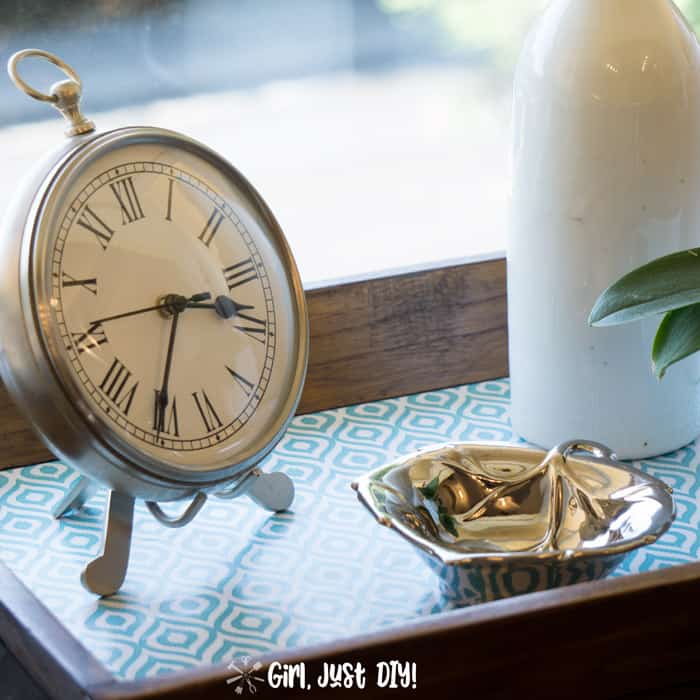

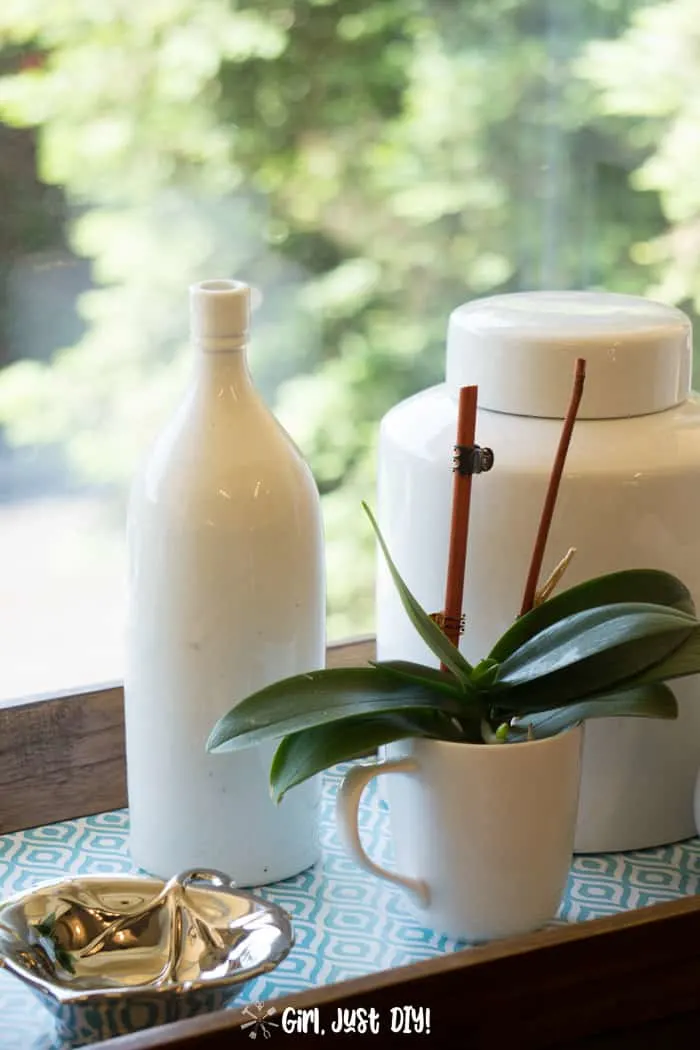
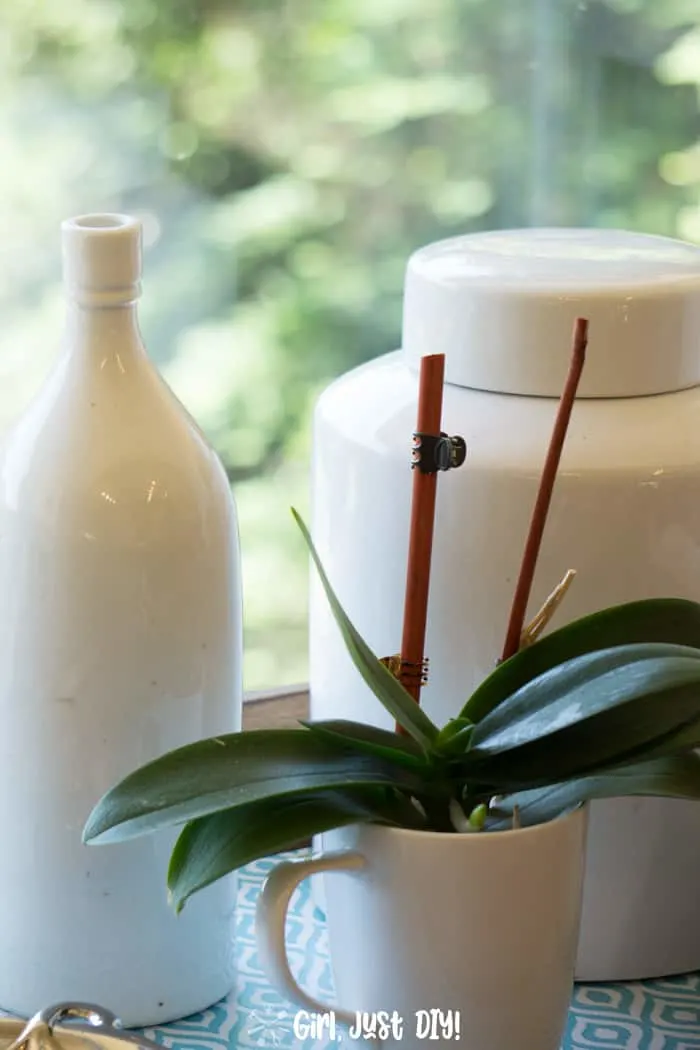
When I started adding things to the updated wooden tray I knew I wanted the ironstone. I love how the white pops look good in the window and against that new contact paper. But Greenery from the orchid and the shine from the metallic tray also add contrast and interest.
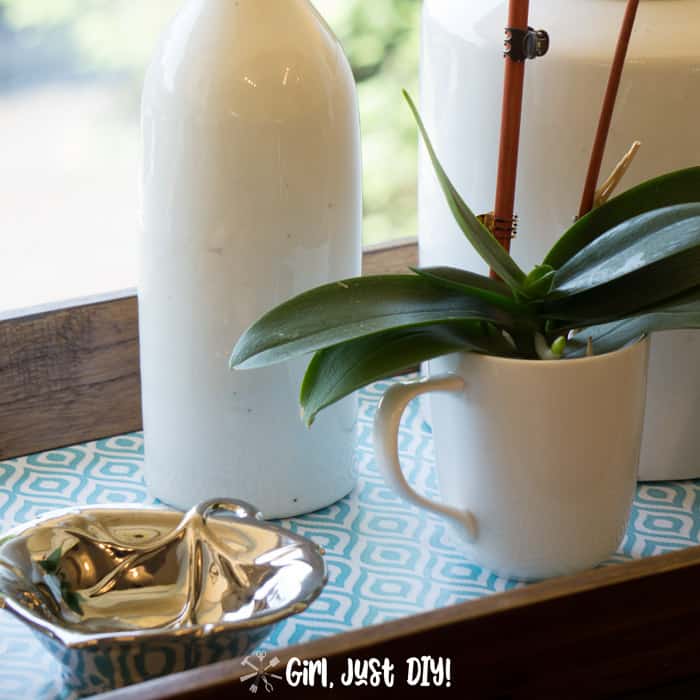
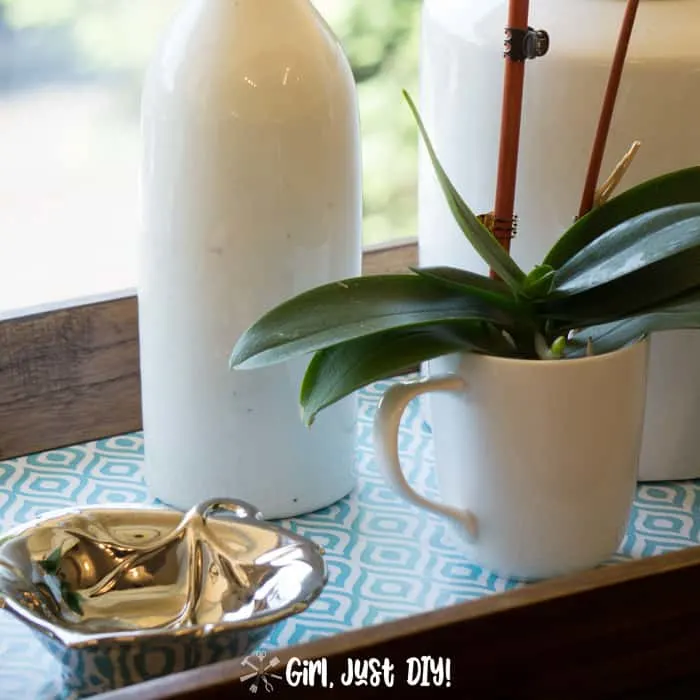
And I was having fun playing around with the settings on my camera getting an artistic blurry background.

LOVE IT!! PIN IT!!
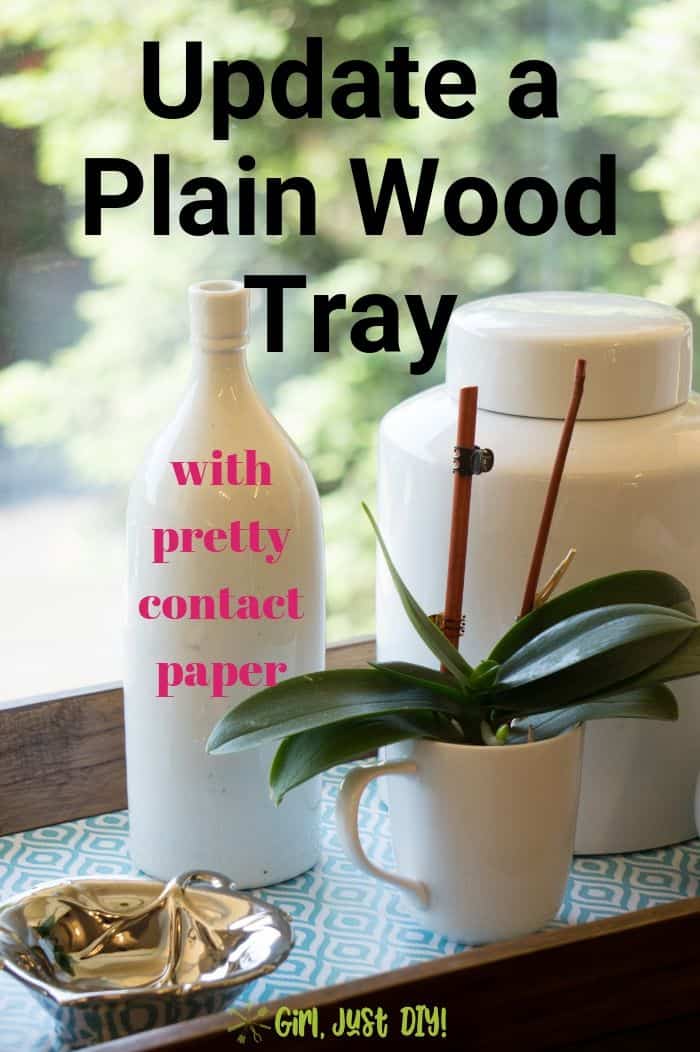


Now that you’ve seen this fast wooden tray update with contact paper what are you ready to cover with contact paper?
Now go be inspired even more and check out all the other great 2-Hour DIY projects by clicking the image below.


Jeanine
Saturday 3rd of August 2019
Great idea - now, if only I had a garden window, haha! But seriously, I plan to make this asap! Also, your backyard view looks to die for!
Toni | Girl, Just DIY!
Monday 19th of August 2019
Thank you, it will look great on a dining table or console. BTW that's not my backyard but the view of the trees across the street from our house. It's a nice view while I'm laboring over dishes LOL
Katarina
Wednesday 31st of July 2019
I love easy to make but gorgeous projects like this one. Your wooden tray is so beautiful! Love that you went with blue paper, it's so bright and instantly improves the mood. Thank you for sharing this simple DIY project, I'll be trying it out tomorrow.
Danielle Pientka
Tuesday 23rd of July 2019
Great update! I have a similar window and everyttthhiing sticks to the paint. Maybe when I repaint the sill, I'll use a tray to hold plants so it won't happen again!
Toni | Girl, Just DIY!
Friday 2nd of August 2019
Ugh that would bug me so much too. Next time you paint the window sill let it cure for at least 21 days before you place anything on it. It's fully cured when you can't see a fingernail indent in the paint. I love having the tray in there, it keeps me from just throwing stuff up there I don't quite know what to do with.
Sarah
Saturday 20th of July 2019
Trays are the best for corralling all kinds of things, love the contact paper on this one.
Toni | Girl, Just DIY!
Tuesday 23rd of July 2019
Thanks, it's such a bright and pretty color.
STEPHANIE ABBOTT
Friday 19th of July 2019
I love this, Toni! It's such an easy update for a custom look. :)
Toni | Girl, Just DIY!
Tuesday 23rd of July 2019
Thanks, there are so many great uses for this paper to change out ordinary items.