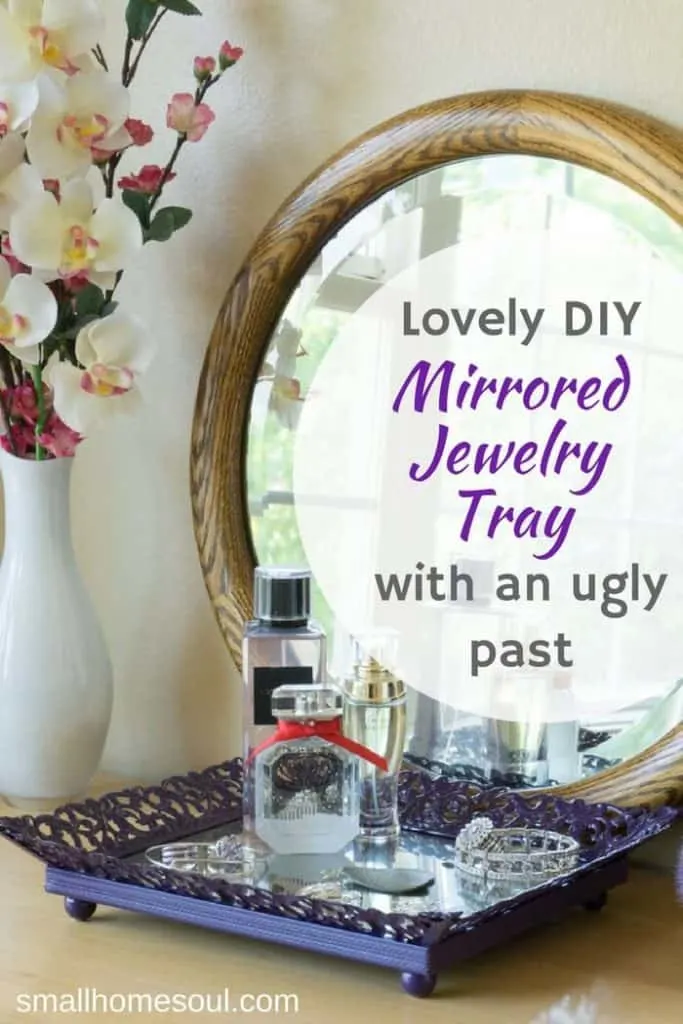
Make your own stylish and unique DIY Mirrored Jewelry Tray from a tired old picture frame. Looking glass paint is amazing for this easy DIY.

What woman doesn’t want a pretty place to display their jewelry or knick knacks?
I’m happy to share this Thrift Store Upcycle with you today. I love bringing you easy ideas and projects (and inexpensive is a major plus) to help you make your home a place that reflects your style.
Purple not your color? You can choose your favorite color and this project will make a beautiful statement piece in your home.
I love DIY projects that can be easily or mostly accomplished with spray paint. Don’t you? Two of my favorites this Summer were the Tin Can Lanterns I made for my backyard and a Hanging Flower Pot that had seen better days.
I’m not sure where I found this picture frame; it has a tag for $2 so it obviously came from some sale somewhere. That’s what happens when you have a stash; sometimes you forget where you get stuff. Please tell me I’m not the only one 🙂
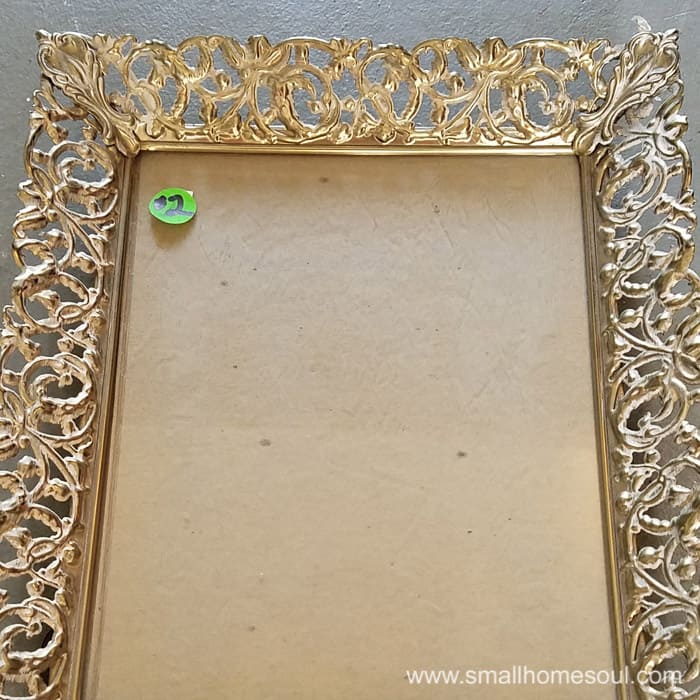
As soon as I saw the curves and scrolls of this frame I knew what I wanted to make. I just wasn’t sure what color I wanted it to be. It wouldn’t take long to transform it, thankfully.
This page contains links to products, if you purchase something after clicking on a link I may earn a small commission (at no cost to you). If you do make a purchase, thank you!
You can read about affiliate links here.
Mirrored Jewelry Tray Supplies
- Old Picture Frame
- Rustoleum Paint in Glossy Purple
- Black Spray Paint
- Mirror Paint – I used this brand
- Wooden Doll Heads
- Screwdriver
- Glue Gun
- Water/Vinegar
- Paper Towels
- Small Spray Shelter
Step 1: Clean the old frame of all dirt.
I gave the frame a good scrubbing and removed the stand and hangers from the back of the frame’s cardboard. It went very smoothly with a flat head screwdriver I was able to pry them up.


Legs would really finish the looks of the jewelry tray. That’s where the doll heads come in. And yes, I don’t remember why I bought these little doll heads or for what project, but I’m sure glad I had them in my stash.
Step 2: Paint the frame and feet.
I propped the doll heads onto finish nails in a scrap piece of 2×4. Seriously, don’t throw all those scraps away. They come in handy for all kinds of things. Then I took everything out front to give them a good painting in the spray shelter.
I forgot to take a picture while giving the frame a few coats of glossy purple paint. Set everything inside your small spray shelter and be sure you paint the underside first and get under those edges where the glass goes so you don’t get any reflection of the old finish.

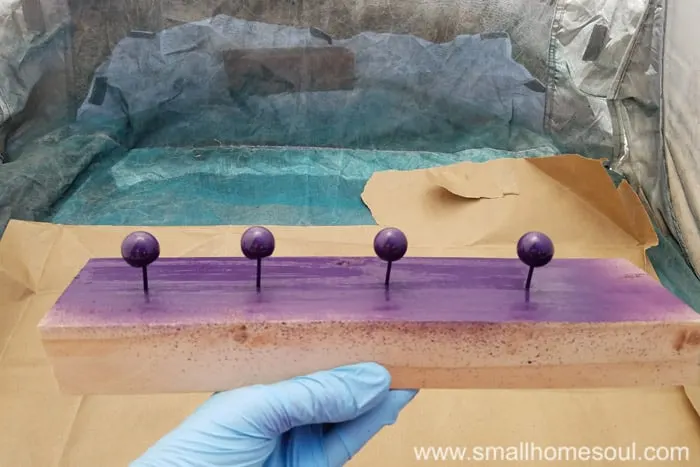
When painting the doll heads gently tilt the 2×4 around and the heads will rotate a little letting you paint all sides.
Step 3: Adding mirroring to the glass.
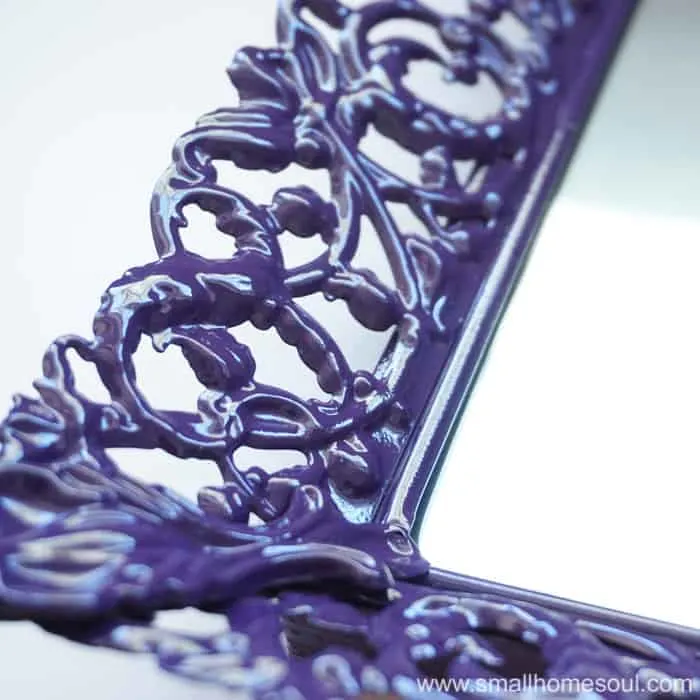
The fun part was painting the glass of the picture frame with mirror paint. It wouldn’t be a mirrored jewelry tray without the mirror, after all. I wasn’t shooting for mercury glass but I did want it to look a little antique to juxtapose the new shiny frame. Here’s how it’s done.
- Clean the glass well.
- For regular mirroring you would just apply 5 coats of Mirror paint 1 minute apart.
- This paint goes on dark and then magically it lightens up. You can see it in the top pic below.
- Since I wanted to add some antiquing I applied 3 coats
- Using my fingers I flicked some 50/50 vinegar/water onto the frame
- I finished up with 2 more coats of looking glass paint
- Lastly I dabbed at the droplets to remove the last few coats in those areas.
- I rubbed a little in some areas for more distressing. Be careful, it won’t be fully dry for at least an hour.
- After it was all dry I gave it a final coat of black spray paint.


Step 4: Assembling the Mirrored Jewelry Tray
After everything is dry it’s time to assemble the jewelry tray.
- Carefully slip the glass back into the frame.
- Apply some hot glue to the backside of the glass in the corners and insert one of the filler cardboards that comes with the frame. I used and glued in two pieces of cardboard.
- Apply some hot glue to the final piece of cardboard
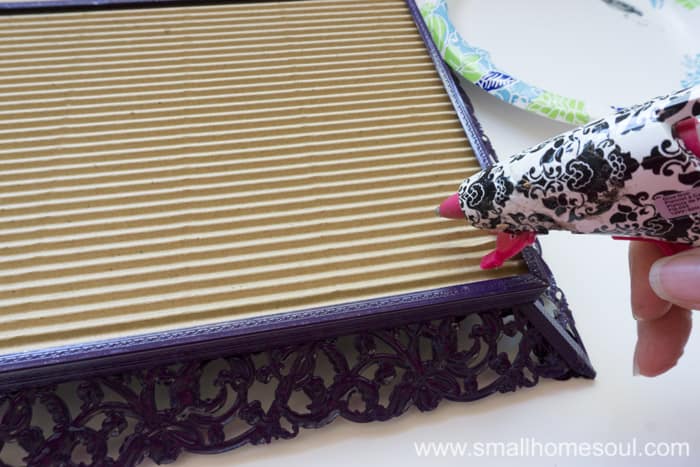

- Slip the backing in over the glue and firmly into the frame. Hold in place until dry.
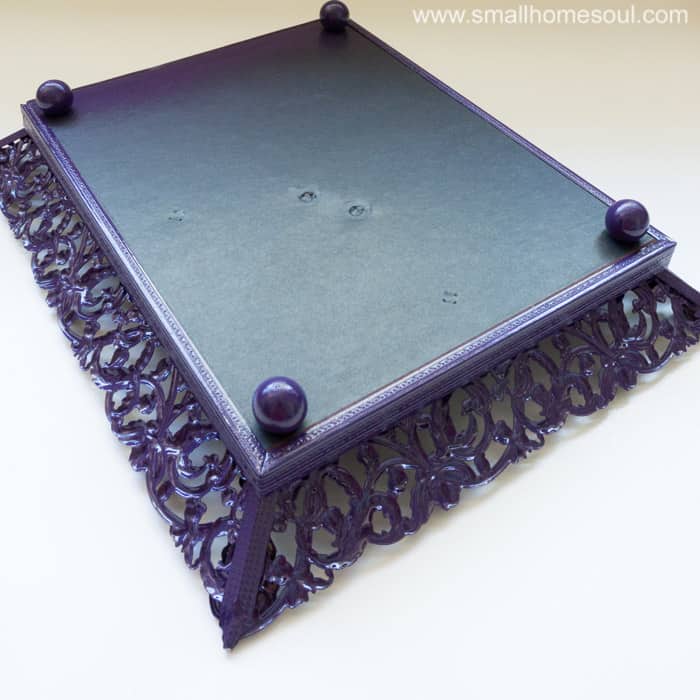
- For a cleaner look I painted the end of the back board purple so the edge would be all one color.
- Installing the back board with the black side out is a cleaner look that the original maroon velvet.
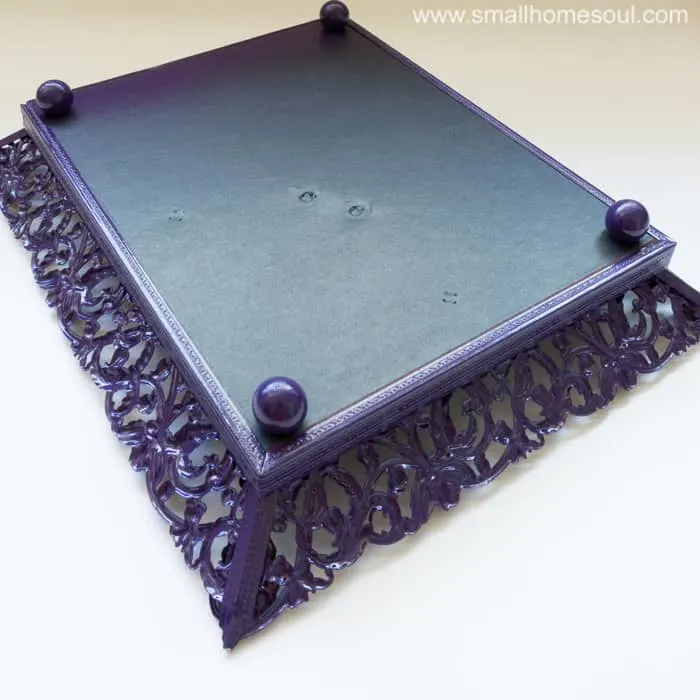
Step 5: Adding the feet.
- Using the Glue Gun glue on the doll head feet inset a bit from the edge of the frame.
- Just eyeball it, they don’t have to be exact.
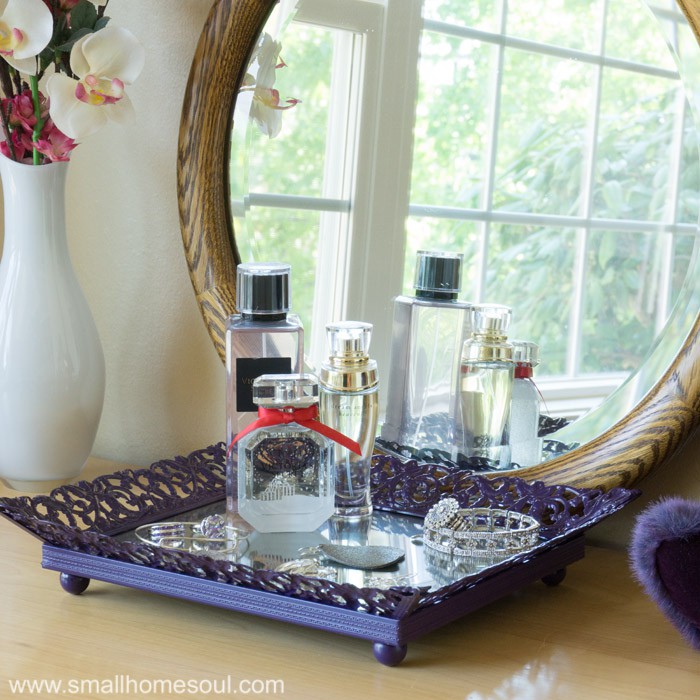
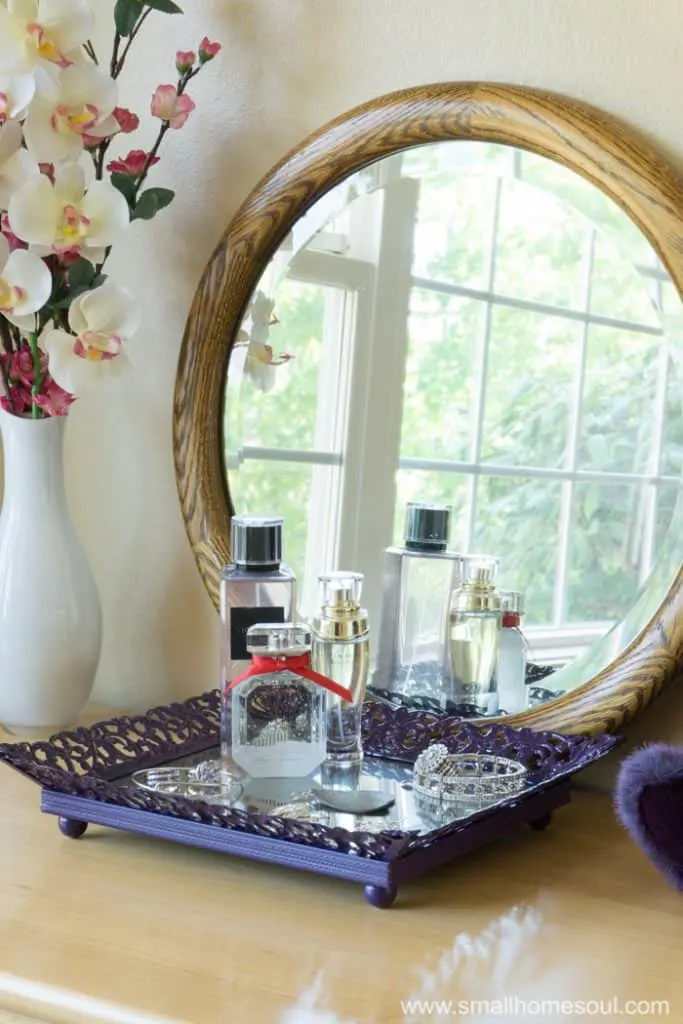
New Mirrored Jewelry Tray
And you’re done. Just look at how beautiful this frame looks now.

Let’s revisit how how ugly it was.
This is so much prettier.

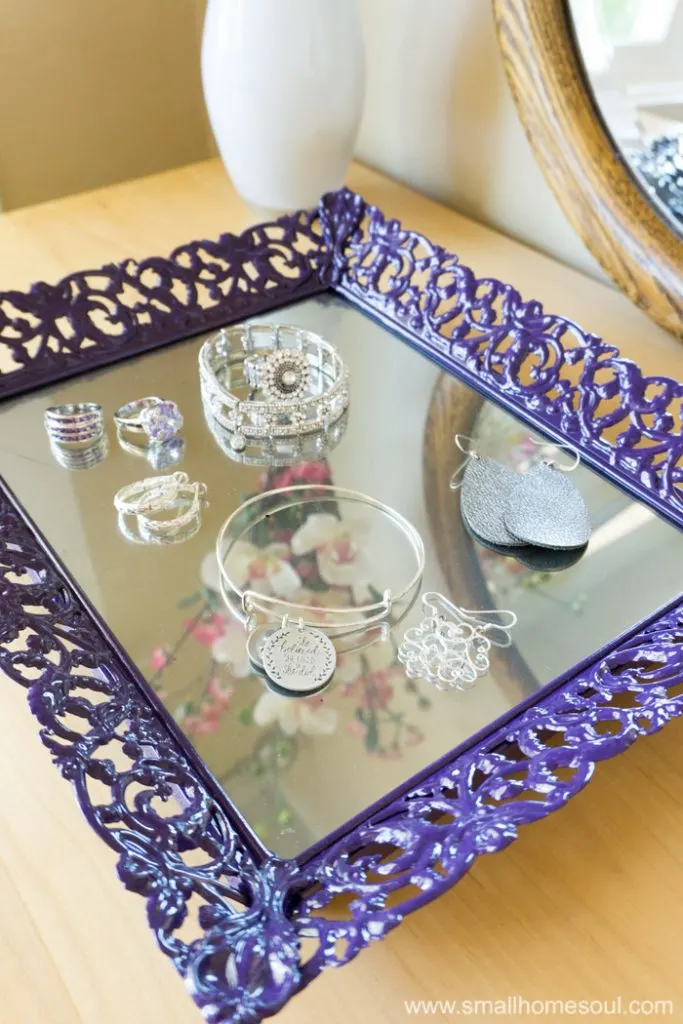
The little feet are perfect, just enough lift to really make a statement.

I love the reflection of the flowers from the vase above in the new mirrored jewelry tray.


You can see the subtle antiquing I obtained with the vinegar trick. Such a pretty contrast to the glossy new paint job.
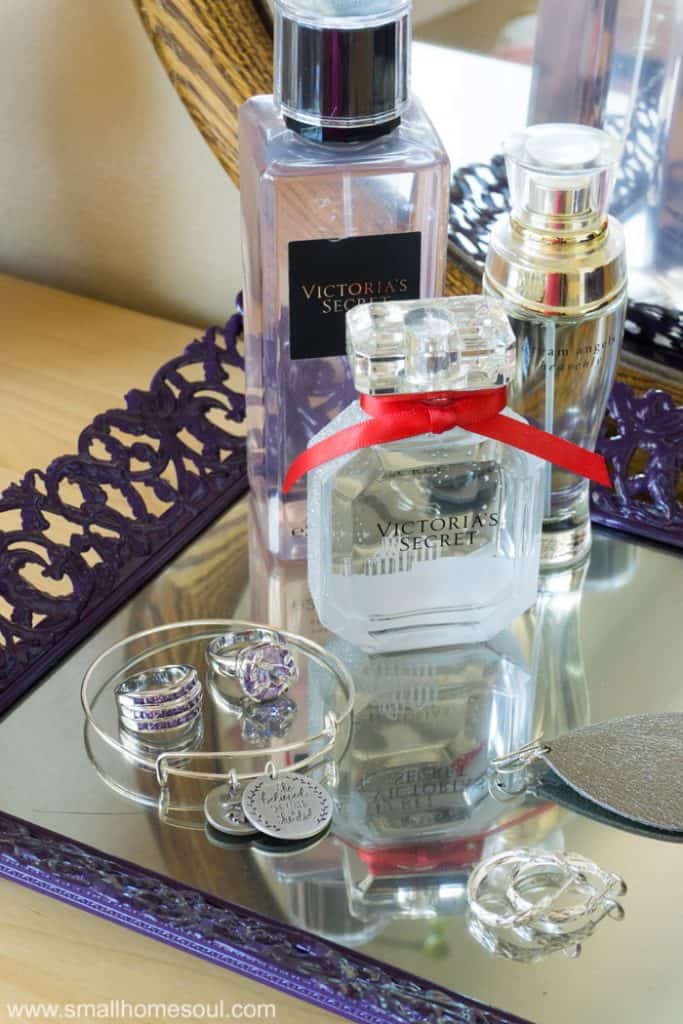

This would look great with watches, perfume, a candle, or even a small houseplant. The reflection will be subtle, but beautiful.

What would you put on your mirrored jewelry tray?
Love it, Pin it!
Julie Briones
Wednesday 25th of April 2018
GREAT idea, Toni! Pinned!
Carolann
Wednesday 24th of January 2018
Wow, Toni, you did a beautiful job with this transformation! I love the color and it's the perfect way to house your jewelry and perfume too!
Christina Makri
Thursday 18th of January 2018
Great idea and this color is gorgeous! So feminine!!! Thank you for sharing at Sweet Inspiration Link Party :)
Michelle
Wednesday 17th of January 2018
Oooooo that's beautiful. Love that purple color Toni. It's so sexy and vibrant and our stash of doll heads better watch out coz they're going to be transformed into feet real soon. Brilliant idea
Julie
Sunday 22nd of October 2017
This is gorgeous, Toni. Love everything about it.