DIY Mason Jar Utensil Caddy - Perfect for BBQs or Parties
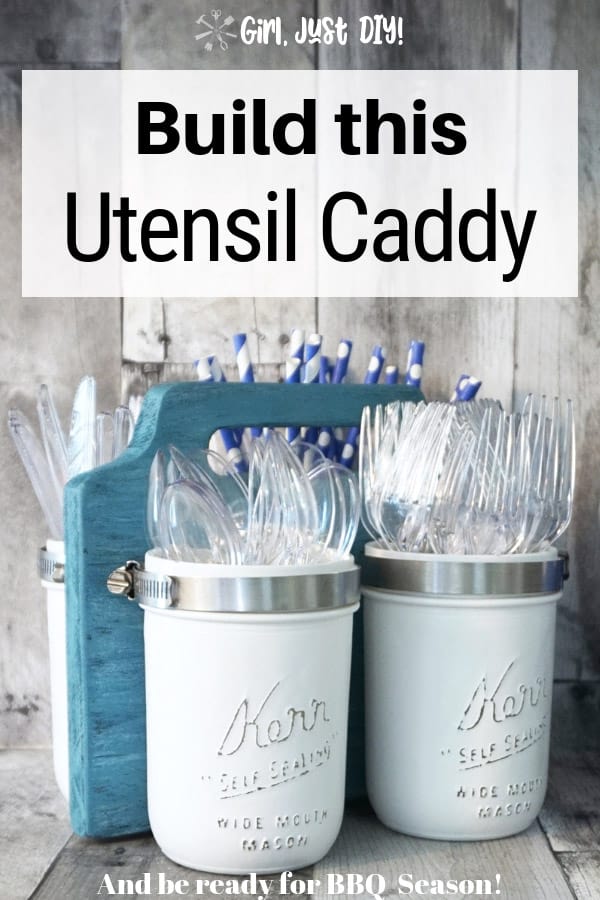
Mason jars are hot and with good reason! I started using mason jars to take my breakfast and lunch to work many many years ago and I love how versatile they are. You can do so much with them; like making this mason jar utensil caddy.
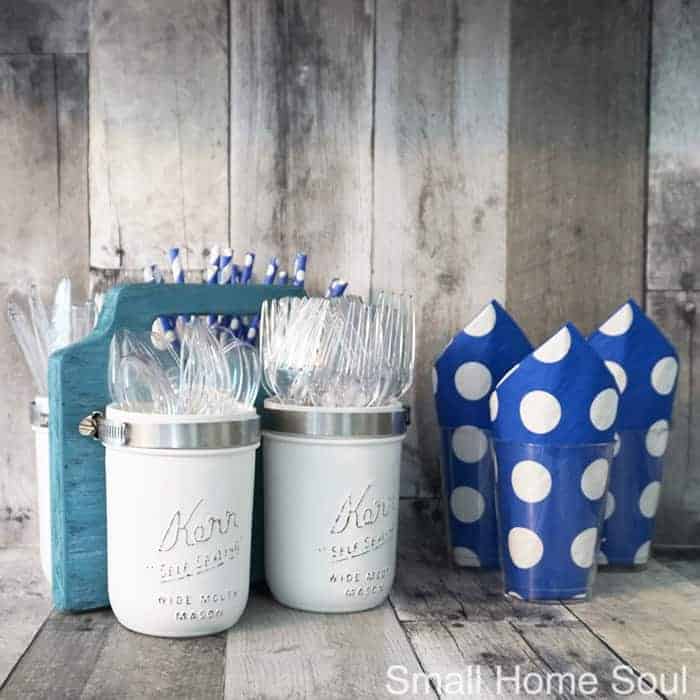
I've seen many variations of utensil caddys on Pinterest but none were clamped to a board like the lovely hanging mason jar vases. Since I couldn't find any I decided to make one and show you how to make your own 🙂
Have you made anything with mason jars yet? They are so versatile and I love seeing all the ways people put them to use. Let's get started!
This post contains affiliate links. If you make a purchase after clicking a link I may earn a small commission, at no extra cost to you.
Mason Jar Utensil Caddy Supply List
- Four 16 oz Mason Jars
- Four 4" Hose Clamps
- Paint
- Spray Polycrylic
- 1" x 10" x 10" board
- Circular Saw
- Jigsaw
- Drill
- Screws
- 60 Grit Sandpaper
- 120 Grit Sandpaper
- Scratch Awl
I didn't have a plan when I started but I knew in my head what I wanted the mason jar caddy to look like when it was done. I wanted it to have a handle so it could be easily carried. It wouldn't be a caddy if you couldn't carry it, right?
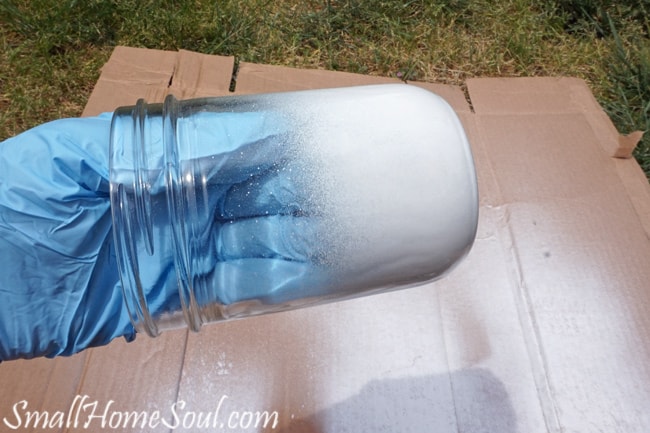
Paint the mason jars with white spray paint. I used what I had on hand but you could use any color. You could also brush on the paint if you want.
Set aside the mason jars until they're fully dry.
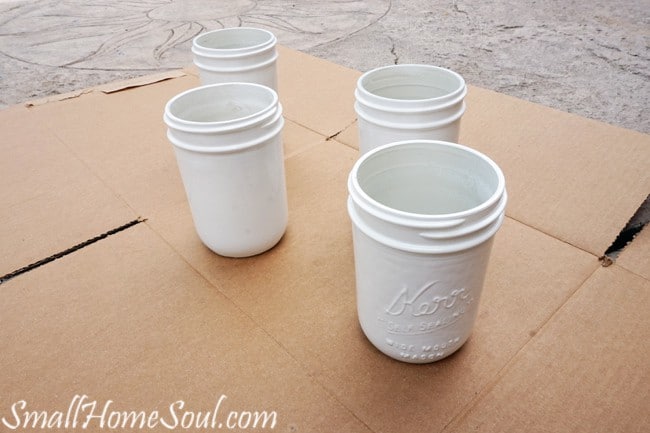
Figure out the spacing you like for the mason jars and the handle then make your template. Here's how I did mine.
I used an old hanging file folder and cut it to 8-¼" wide by 7-½" tall. If you're cutting a hole for the handle fold it in half and cut the hole. While it's still folded draw and then cut scroll detail for the sides. Transfer the design onto your board.
I had saved all the shelves from our old kitchen cabinets when we did our Kitchen Renovation so I didn't have to buy a board.
Cutting the Board
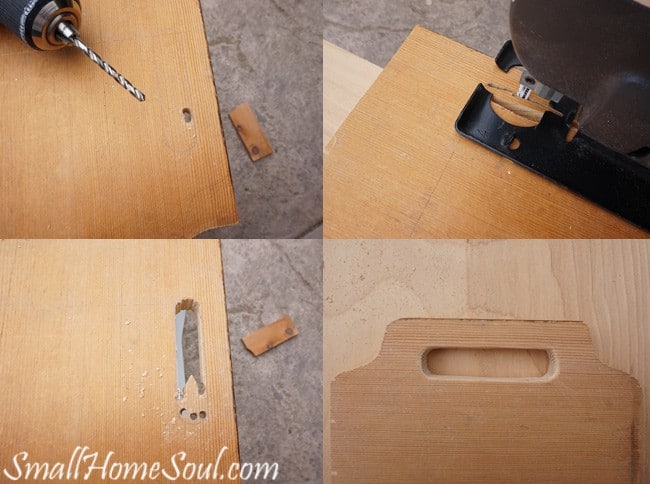
Use a circular saw to cut the board to the right dimensions for the mason jar caddy. Then use a cordless drill to make a few starter holes in the handle to insert the jigsaw blade. This was the first time I used a jigsaw so I've listed some tips at the bottom of the post for you. After you cut the rough hole for the handle you can go back and fine tune it to clean up and even out the cuts. When you're happy with the handle cut the scrolled edges with the jigsaw.

More Jigsaw Projects
DIY Plant Stand - Upcycled Yarn Bowl - Patriotic Star Tray
Sand the handle opening to smooth the edges and make them even. Use 60 grit sandpaper rolled into a tube inside the handle to smoothed out the rough edges. Sand the scrolled edges and all outside edges as well. Then give the whole thing a final sanding with 120 grit sandpaper before painting.
Painting the Board
Originally I wanted the board to be black but the contrast with the white jars was too stark. After getting some input from my friends I went to plan B.
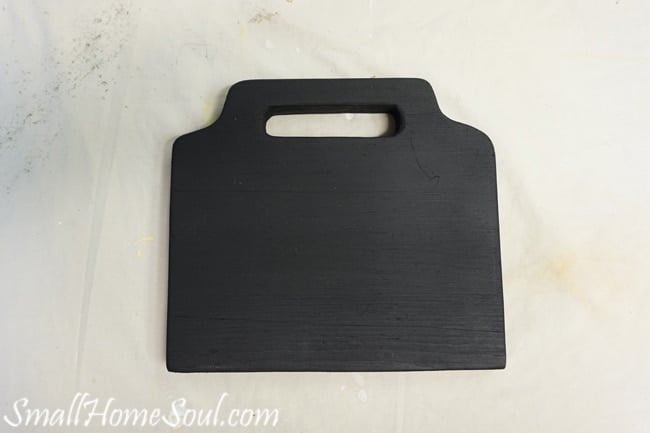
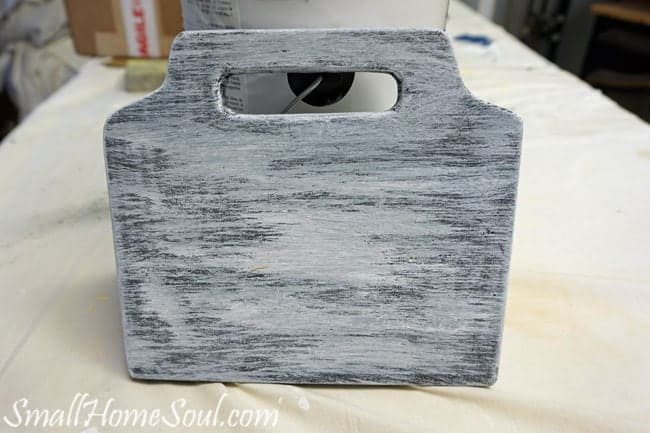
Dry-brush some white paint over the black but don't cover it completely. You want some black showing through for a layered effect.
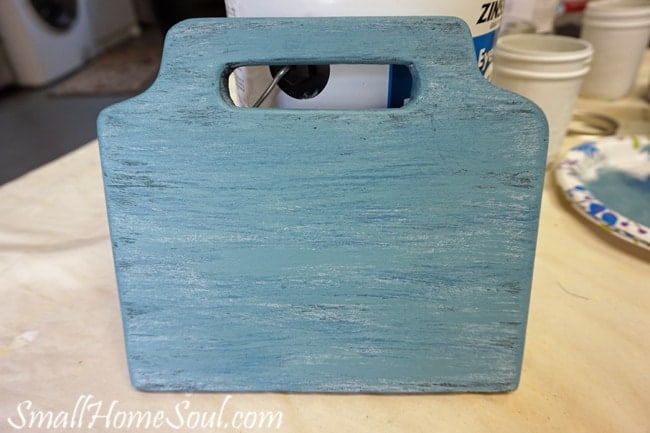
Finally dry-brush two different shades of blue until you're happy with the result. It turned out great for never layering paint before. You can use any color combination you love.
Once the paint's dry stand up the board and use two plain jars to determine the placement of the hose clamps. On mine I measured in 2" from either side and 4-¼" up from the bottom of the board. Mark the spot for the screws with the tip of a scratch awl and make a good indentation. Do this on both sides of the board.
Measure & Attach Hose Clamps
The fastening parts of the hose clamps should be on the outside edge of the board. Close the clamp around the outside of a plain jar and place it next to the board to find the perfect position. Lean the jar forward and mark the metal with a sharpie where the screw will attach the hose clamp to the board.
I hadn't worked with hose clamps before and it went pretty well. The metal is very strong so you'll have to do a little drilling to make room for the screw. The drill bit kept grabbing the bracket and trying to spin it but I wore gloves and held on tight until I had a hole large enough for the screw. Use pliers to flatten any sharp edges.
[UPDATE - when I made the Mason Jar Flower Caddy for my girlfriend I found that using a small flat-head screwdriver worked better than the drill. Just bend the two slats on either side of the sharpie mark you made earlier to create a hole big enough for the screw [You could use tin snips on one of the slats if you needed a bigger hole.]
Fully open the clamp and attach them with the screws to the first side of the board in the divots you made with the scratch awl. Since you'll be attaching screws to either side of the board make sure the screws aren't too long. I found that ⅜" wood screws worked perfectly.
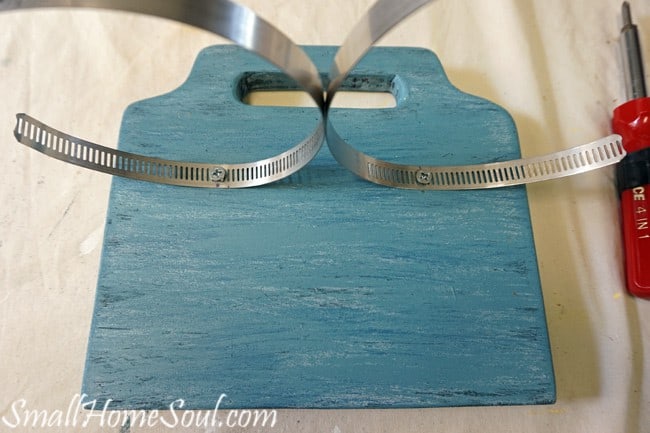
Temporarily attach two plain jars to the clamps on the first side. This will make it easier to attach the clamps to the second side.
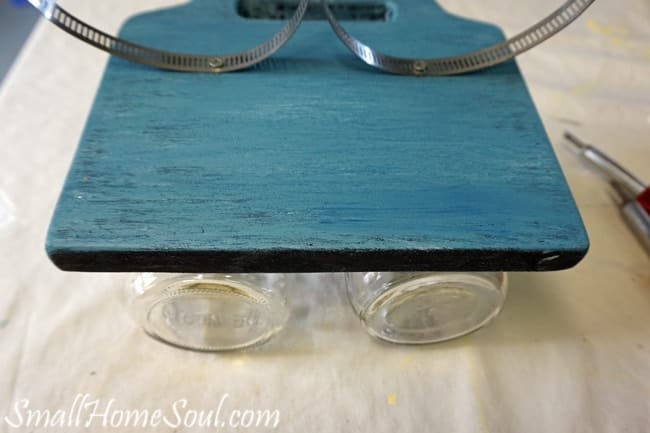
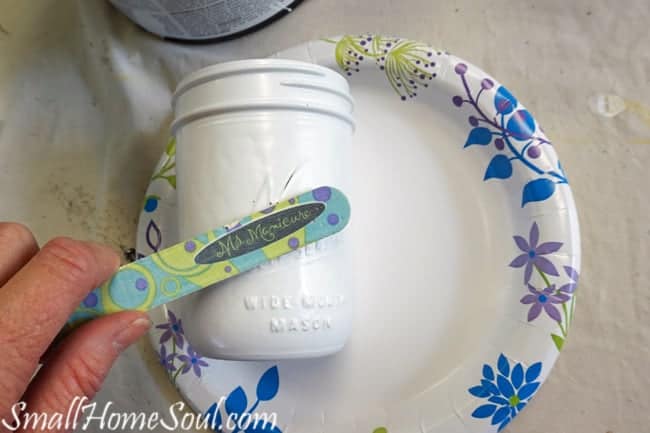
Distress the mason jars with a fingernail file. Don't be too aggressive, sand it down lightly like it's been worn off over time. After you get the mason jars just how you like them you can spray them with a light coat of Polycrylic to ensure they don't get scratched.
Final Assembly for the Utensil Caddy
After the jars are distressed stand them up next to the board and tighten the fastener of the clamp. Before fully tightening the clamps center the jar so the distressed labels face out.
That's it and you're done! I knew you could do it 😀 Now just fill them with plastic utensils and fun straws and you're ready for your first party.
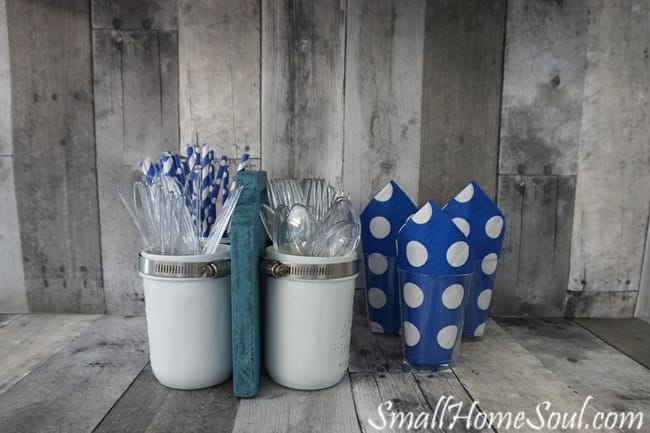
It's a party perfect utensil caddy! I'll admit I'm pretty proud of how great it looks considering I didn't have a real plan when I started. I don't advise this as a general rule but sometimes you just have to wing it.
Here are tips for making a perfect Mason Jar Utensil Caddy:
- Wear safety glasses when working with power tools.
- Drill starter holes on the inside edge of where you want to start cutting with your jigsaw.
- Drill a few extra holes to aid in cutting along tight curves.
- If you have a paddle bit use the proper size on each end of the handle, that makes the rest of the cuts very easy.
- Press the trigger of the jigsaw so the blade moves quickly, but push the jigsaw slowly so you have more control.
- Use the proper blade for tight angle cuts, it will give you a cleaner finish.
- Drill a few extra holes to aid in cutting along tight curves.
- Wide-mouth mason jars hold more forks and spoons than the regular mouth jars.
- Metal silverware makes the utensil caddy pretty heavy so fill it in place.
If you want to see another variation it makes a beautiful Mason Jar Flower Caddy too.
That's all the goodness I have to share today. Thanks for stopping by to check out my new mason jar utensil caddy.
Pin it to your favorite Mason Jar Board or your BBQ Board!
LOVE IT!! PIN IT!!


What a great idea! I love how you use the clamps to put it all together. It makes me ready for spring and summer!
Thank you Jenny, it is one of my favorite, and most popular posts and I'm so happy you love it too!
This is beautiful! I love the pop of color instead of the black on the board too. I need a utensil caddy for all our summer bbqs. Thanks for sharing at the Wednesday Showcase Party! Pinned.
Hi Kati, thanks for stopping by and for pinning! This would be perfect at your summer BBQs!
Thanks for sharing your clever Mason Jar Utensil Caddy with us at the DIY Sunday Showcase Party. It was one of my Top 6 favorites at the party and will be pinned to our DIY Sunday Showcase Talent Board.
Wow, thanks Marie!! I had fun making it and I've been thrilled with the response it's gotten.
Great idea! Thanks for sharing it at Craft Frenzy Friday at Mom Hone Guide!
Hi Lauren, I'm sorry I missed seeing your comment until now. Thanks for the great party!
I think this mason jar utensil caddy is brilliant! Of course I don't need it because I don't entertain, but I pinned it to share it with my friends.
gail
Thanks Gail, I had so much fun making it and even made another one for my friend's birthday because she asked for one. Thanks for pinning and sharing, I appreciate it! 😀
Great idea and clear instructions. From a jar lovers
Thank you Judy, I am a jar lover too. I've been using them for breakfast and lunch stuff for many years, and of course stuff in the garage. I am so happy that so many people love my project and thank you for taking the time to read and leave me a comment 😀
Love this! Directions very clear, and the visuals really help people like me! I'm going to try this! Perfect to have in our trailer! You rock the blog, Toni!
Kim! Thank you for stopping by and reading my blog. You can so make one of these for your trailer. Make sure you send me a picture. Love you girl!!
Hi Toni,
I am in awe of people like yourself who can turn their hand to creating GORGEOUS out of random objects. Love the Mason jars. They look so cute. The very best of beauty and function. Wonderful directions, too!
Maybe there's hope for me yet !
Thanks so much for sharing.
Julie, you work wonders in the kitchen creating such yummy stuff so we all have the areas where we want to improve. You can do stuff like this easy I bet. Thanks for the compliment, I truly appreciate it!! 😀
Good job honey, so happy for you getting to do what you want, and even more proud of you. Love you so much
Thank you sis, that means so much to me. I love you too!!
What a great idea Toni! Love it and so very practical! Well done for all your firsties too!! Awesome job 🙂
Thank you Sam for the nice comments!! I'm sorry for the late response, some reason your comment ended up in the Spam, and you are anything but spam my sweet friend 🙂
LOL!! It's nice to know I'm not spam worthy! LOL!!
Toni....this is absolutely adorable. I am so proud of you and all your "firsts" executed so well with this project. Nice job!
Thank you Denise, it was a fun project. I love playing with power tools and paint 😀
This is such a cool idea Toni! The color possibilities are endless.
Thanks Lisa, I'm so happy with how it turned out. I agree, you could do just about any combination and it would be great. Except black and white, that just wasn't working for me 😉