
DIY Hanging Light from a Wire Basket
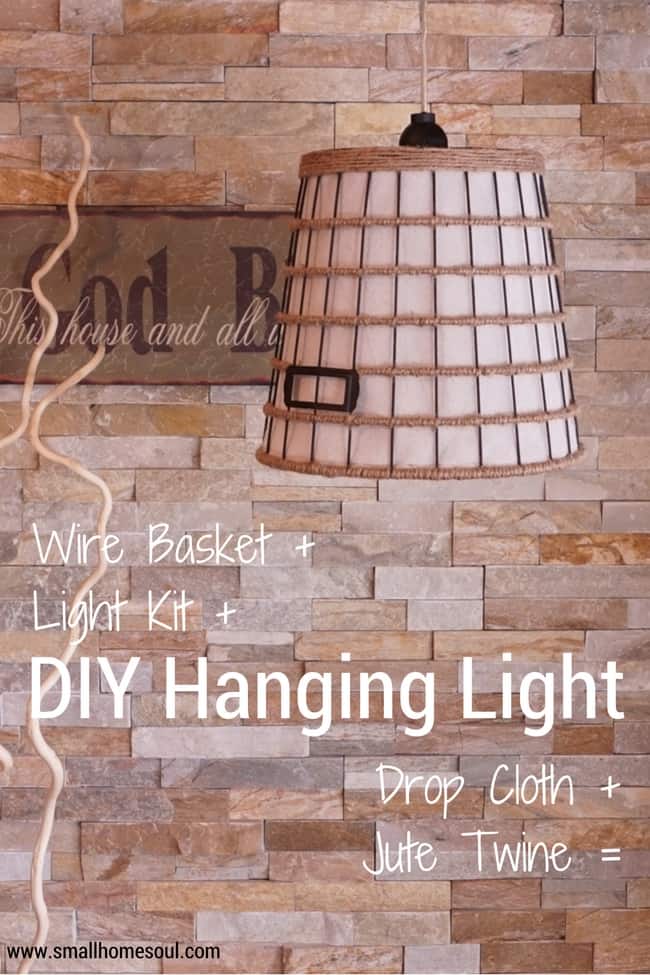
The cost of lighting today is ridiculous! Like me, have you shopped the stores and online only to be discouraged that you can't find a great looking light for under $75? Or you do splurge for that must have light only to want a change before long. Yep, been there, too many times. With a little time and a few supplies I'll teach you how to create the perfect light for your home and save big bucks. Today I'm going to show you how I made a DIY hanging light from a wire basket, and you can too.
Beautiful lighting doesn't have to be expensive and there are plenty of upcycle inspirations online as well. You can also get good deals in the many discount stores. I've even found good as new lights super cheap in the Facebook buy/sell groups. Since I was laid off from my job a year ago I'm all about saving money at every opportunity. Well, I've always been thrifty but now it's even more important.
I got the idea one day at Target when I was at their Dollar Spot and found a waste basket for $3. Target doesn't call it the Dollar Spot anymore but I still like that catchy name the best.
I already had a few light kits at home so this was going to be a very inexpensive light.
This post contains some affiliate links for your convenience. You can read my full disclosure here.
DIY Hanging Light Supply List
- Wire Basket
- Light Kit
- Spray Paint
- Frog Tape
- Jute Twine
- Glue Gun
- Drill & Drill Bits
- Tin Snips
- Metal Rasp
This is the waste basket basket I bought, it measured 10.5" wide and 10.5" to the tops of the handles. I didn't want a gray light but before I painted it I had to make a hole for the light kit.
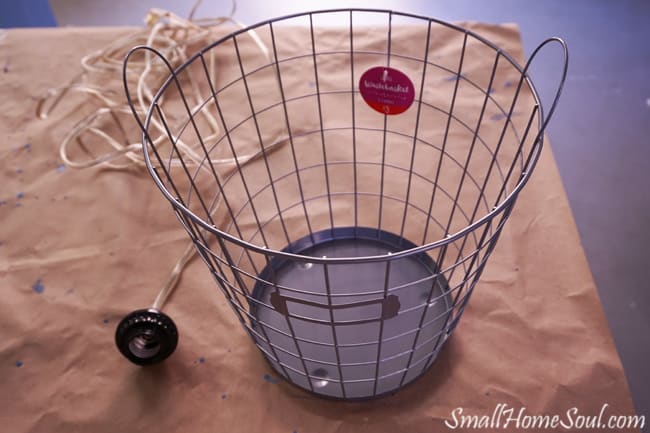
To make the hole it's important to find the center so your diy hanging light hangs straight and is not all cattywampus. I placed the bottom of the basket on a piece of paper and traced the bottom with a pen as close to the side as possible.

Next I cut out the circle and folded it in fourths to find the center and snipped a little hole at the point. Lining up the the circle on the bottom of the basket I used a sharpie to make a dot in the center.
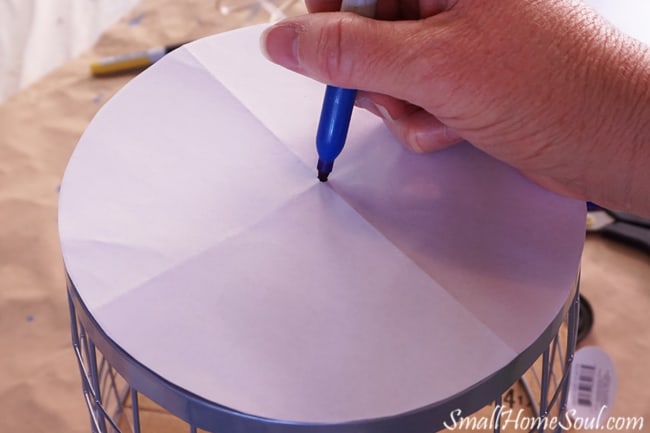
Next, I placed the light kit over the circle and marked the hole to be cut. Be careful here, I almost made my hole too big. You just need the socket portion of the light kit to fit through the hole.
DIY Hanging Light - Let there be light
The smaller circle below is where socket portion will slip in. The larger circle is the outline of the ring that screws on from underneath to hold the light kit to the wire basket. The outer ring screws on from below before you screw in the light bulb.
I used a scratch awl and a hammer to make indentations for the drill bit. Using the cordless drill and a metal drill bit I drilled holes in a circle as close together as possible. I then used tin snips to cut between the holes and clean up the edges with a metal rasp or file.

With the hole for the light kit done it was time to paint my basket. I chose flat black paint for my diy hanging light since I would be adding jute. While I didn't want gloss but that might have been a good choice too.
The handles had to go because I think they would have looked goofy, and after consulting with my two of my blogger friends, they agreed. So I cut off the the handles with tin snips and smoothed the rough edges with the metal rasp.

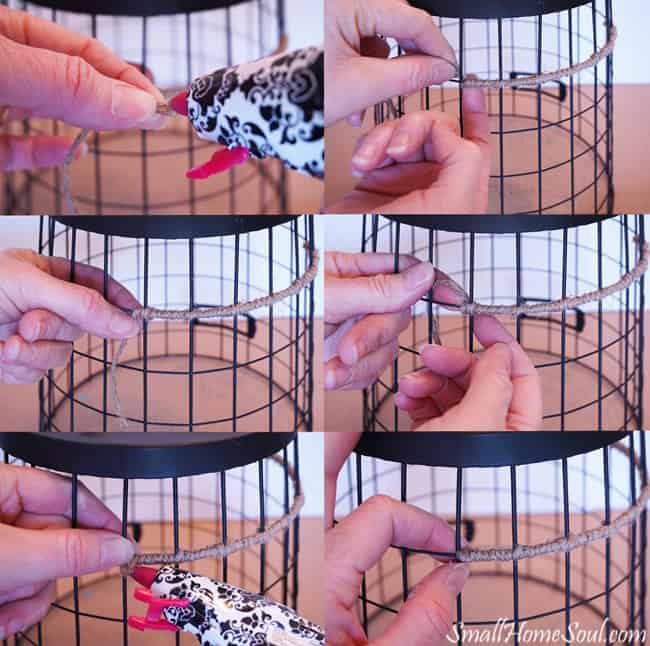
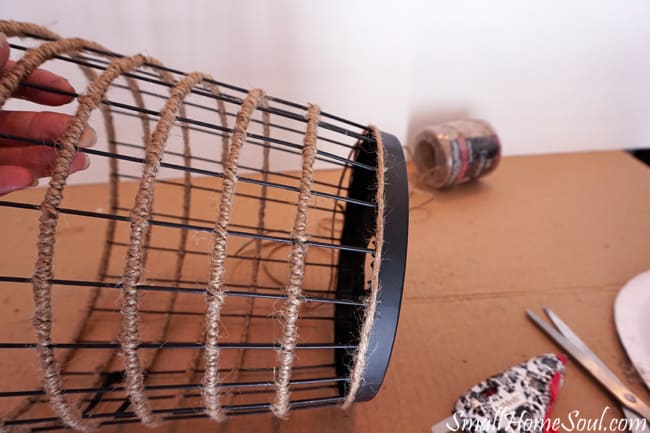
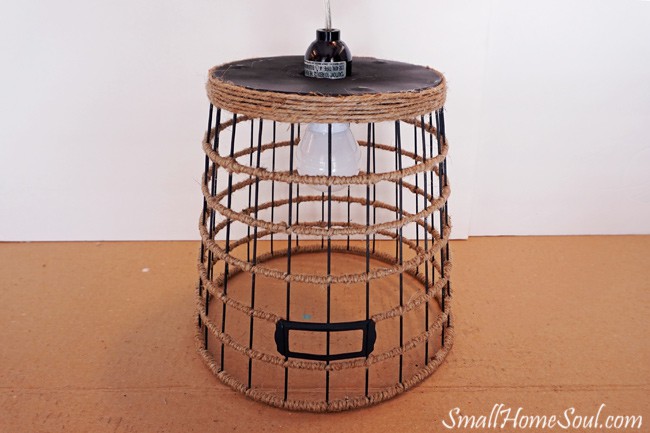
I decided to add a little interest to my diy hanging light and wrapped the horizontal wires with jute twine. Working with 12" strips of jute made it easier to wrap the wire. However, it takes more gluing but it's much easier to wrap with a shorter section of string. You can see left-to-right, top-to-bottom in the photo below how the wrapping went.
- Apply a small bead of hot glue to the end of the jute.
- Press it to the inside edge of the horizontal wire you're wrapping.
- Wrap the jute around and bunch it together as you wrap.
- As you cross over the vertical wires put a bead of hot glue on the wire. This will keep everyting in place. Then keep wrapping.
- When you get to the end place a bead of hot glue onto the underside of the jute
- Moving quickly press it down to the wire.
- Repeat with the next 12" section of jute until you're done with that row.
I must have burned myself 50 times. That's the risk of the glue gun, and it feels really wonderful when you get some hot glue under your fingernail. Um, no, that was serious sarcasm 🙂 It almost blistered but thankfully I got it out in time.
Once all the horizontal lines were wrapped it looked a little off balance with a big band of black at the top of the light. I decided it needed some jute treatment too so I started at the back and glued the jute onto the black band every few inches keeping the rows even as I worked.
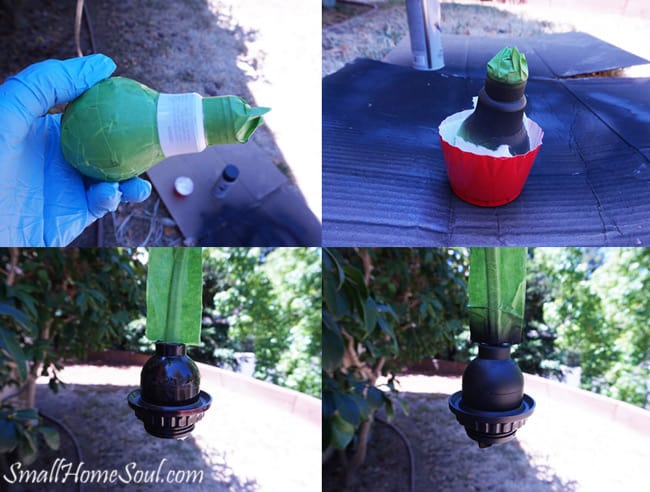
Just when I thought I was done the lightbulb looked funny. I didn't like the big white strip at the top of the LED bulb, or the brown parts of the light. And that ugly sticker had to G - O!
I carefully wrapped the bulb with Frog Tape and left only the collar to be painted. I did the same with the light kit and stuffed the socket with a napkin. They both got a coat of the same flat black paint I used on the wire basket. After I painted the bulb I propped it into a cut off red cup with a napkin to dry. I hung the light kit over a ladder in the garage.
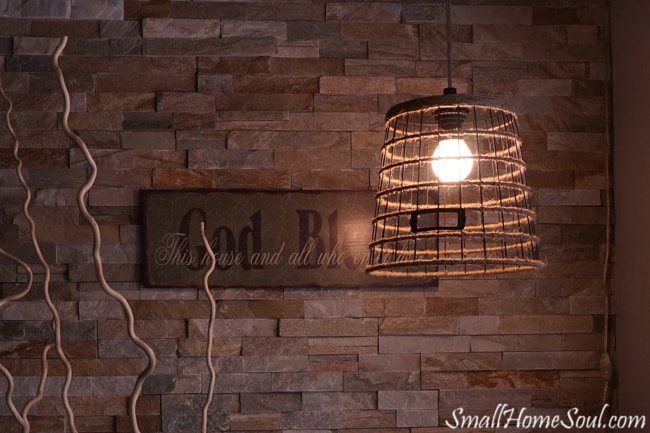
Yay, finally done. It looks great against the quartz wall. I love the horizontal lines of the jute-wrapped wires. Painting the white part of the bulb and the light kit to match the basket was the finishing touch.

WAIT!!.... I really don't like it with the light turned on 🙁 Time for Plan B.
Lining My DIY Hanging Light
The light was too stark, even at night and cast a funny glow in the room. I guess there's a reason someone invented lamp shades 🙂
Originally I thought about lining my DIY hanging light but I thought it would take away from the design. But I'm not going to keep a light if I never want to turn it on, even if it looks cool.
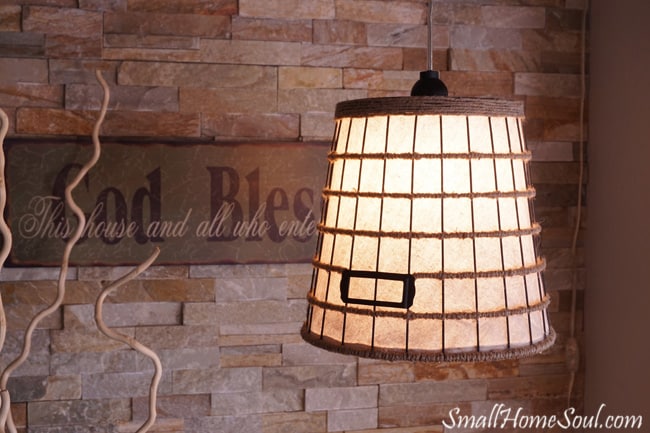
So this morning I whipped up a liner for my DIY Hanging light and it saved the day. Well at least it saved the light 🙂
In the spirit of keeping this post as short as possible I'm going to show you the new and improved light. I haven't written the post for making the liner yet and I used a different process than I did for my Drop Cloth Basket Liner project, with better results.
So much better now!!

Thankfully it even looks good lit up, I can't wait to use it tonight!
Now that my DIY hanging light is saved from the trash don't forget to Pin it and follow my Pinterest Lighting Board to see the other lights I love.
If you haven't seen it already you can watch my 2nd ever Facebook Live I did a few days ago where I gave a sneak peak of my project. It includes a little demo of wrapping the wires. And, if you're not familiar with a light kit I show how those work as well.
I hope this project inspired you to make your own light from a basket. With all the colored twine options out there you can have a light in many different styles. You can also check out my Anika's version of a Basket Light she made for her $100 Room Challenge. It's a beautiful pop of color and I love it.
Until next time,
Toni

It looks even better with the liner, great job- one of the cutest DIY light ideas I have seen. Thanks for sharing this at Totally Terrific Tuesday, and I pinned this to our board!
Thank you so much Nicki! And thanks for hosting your really great party, I'll be back over there for sure 🙂
You were pretty brave to tackle this, but it turned out great!
Thanks Pam, it was pretty simple to do but wrapping the wires took a bit longer than I thought it would. You could totally make one!
Toni This is brilliant - so well done! Pinned.
Thank you so much Kelly, and thanks for pinning!
This light really turned out well. I love the look. Thanks for sharing with us at Creatively Crafty Link Party #CCBG http://tryit-likeit.com/link-party-it
Thanks Janet, and you have a great party 😀
This is a great project and I love the fact that you were able to get that basket for three bucks!! Just beautiful!!
Thank you Kim, and it was a bargain for sure! I love that this light cost so little but looks so beautiful 🙂
LOVE this! You've hit the nail on the head with this one. Pinning and sharing. 🙂
Thanks for sharing Stacey, I'm super happy with how it turned out!
This lamp turned out great. I especially like the way you added the jute to the metal. Nice touch.
Thanks Patti, I love the contrast between the two textures!
This is fabulous and I have a soft spot in my heart for wire baskets!
Growing up on a farm, we used them for all sorts of farm projects.
Sharing too!
Jemma
Thanks for sharing Jemma, wire baskets are so versatile!
Toni I absolutely love this! Industrial farmhouse is my favorite. Thanks for sharing at Vintage charm! xo Kathleen Charm Bracelet Diva {at Home}
Thanks Kathleen, I love mixing industrial into my home. It keeps things relaxed and inviting!
Great project and one that we might be able to make good use of in our new apartment! I am grateful that you've taken us through your thought process as you worked you way to the final project. Thanks for sharing with us at Creatively Crafty #ccbg! 🙂
Thanks Lydia, I love that you could make one any size to fit your space! Good luck in your new home, how fun to be able to decorate from scratch 🙂
Since I just moved and need new fixtures because boob lights, this will be the perfect fix. I even have a light kit handy! It wasn't meant to be Toni! Thank you for the ingenuity!
Haha Amanda, "because boob lights" I love it!! Please share some pictures with me when yours are done, I'd love to see them!
What a great idea. I love the lining in it. Great post!
Thanks Katie, it was a fun project, I'm so happy you like it!
I love this project, Toni! The lamp looks like a Japanese shoji creation with the paper liner. Love the soft light it casts!
Thanks Coco, it does look shoji, doesn't it? That's a good thing because I love that look 🙂
Toni, I saw this post through Sarah @ 1915 House. It turned out beautiful. I need to figure out where I could hang a light fixture like this in my home!
Hi Caris, thanks for stopping over! I have exposed beam ceilings so I had to find a spot I could hang it from a beam, thankfully it fit in that corner perfectly.
Bravo Toni! I have the same wastebasket from the Target Dollar Spot!
Using the drop cloth for a liner was a stroke of genius.
Lisa
Yay Lisa, great minds think alike! And we both still call it the Dollar Spot, I don't think they'll ever be able to shake that name 🙂
This light had all of the elements I love. It looks fabulous. And you say it didn't cost much ? Because it really is so high end looking.
Thank you Debra! Since I had the light kit already and the paint I only paid $3 for the basket. I think light kits run about $8 so you could totally make this light for under $15.
This is just adorable to the moon and back. Looks like you may have another viral on your hands. Fasten your seatbelt. 🙂 Thanks for the shout out.. XOXO Luv ya!
Thank you sweet Susie, you are always such a great encourager! xoxo
I love everything about this light, the twine, the wire, the dropcloth. It looks pretty perfect to me.
Thank you Mary, I think it's pretty perfect too 🙂
I love DIY lighting. This is amazing. I am not sure I would have the patience to wrap the wires but it look beautiful!
Thank you Michelle, it took a little longer than I thought to wrap them all (it would go faster if I wasn't taking pictures, too many pictures LOL). This project would be perfect to do while watching a movie.
Toni this turned out so great!!! What a brilliant idea!! Just sorry that you had to burn yourself 50 times in the making but the jute adds an awesome touch!! Great project!
Thank you Sam! Oh the injury we endure to DIY 🙂